
Managing Websites
Last updated on 20 March, 2023Editing a Website
As with other LogicModules, existing websites can be edited. In this support article, the general steps for initiating website configuration edits are discussed. If you are looking for detailed information on the configurations available for editing, see Adding a Web Check or Adding a Ping Check, depending upon the type of website check you are editing.
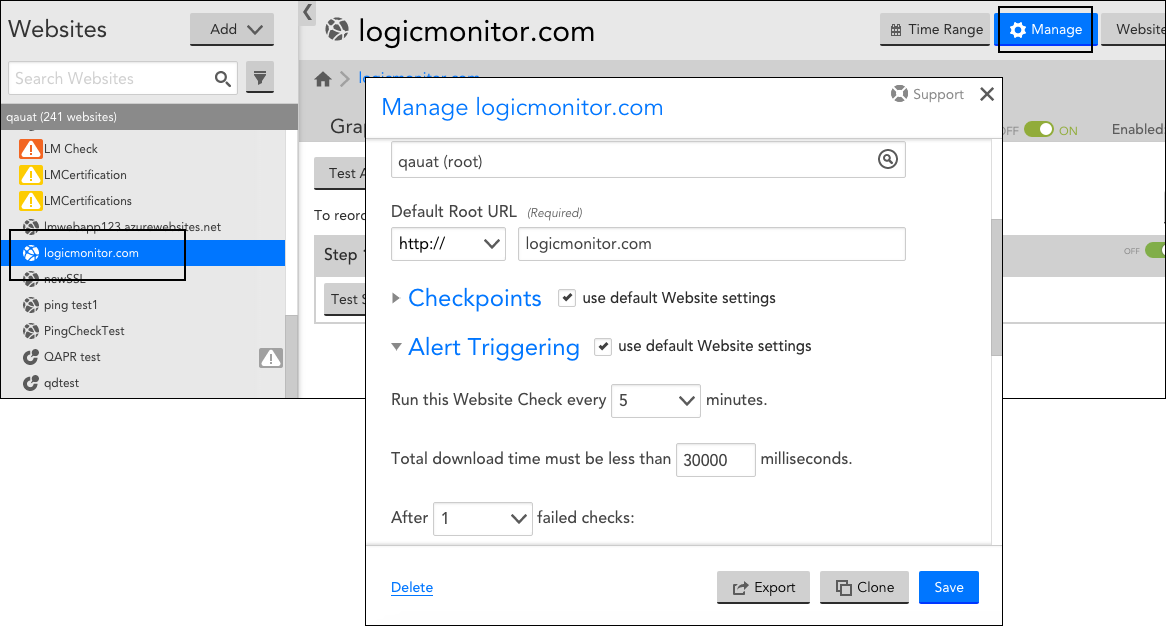
To edit a website:
- Navigate to the website from the Websites tree.
- Click the Manage button in the top right corner of the Websites page.

- From the Manage dialog that appears, make any necessary edits and click Save.
Note: If you are editing a Web Check with multiple steps and would like to edit the settings for a particular step, you must do so from the Steps tab, as discussed in the following section.
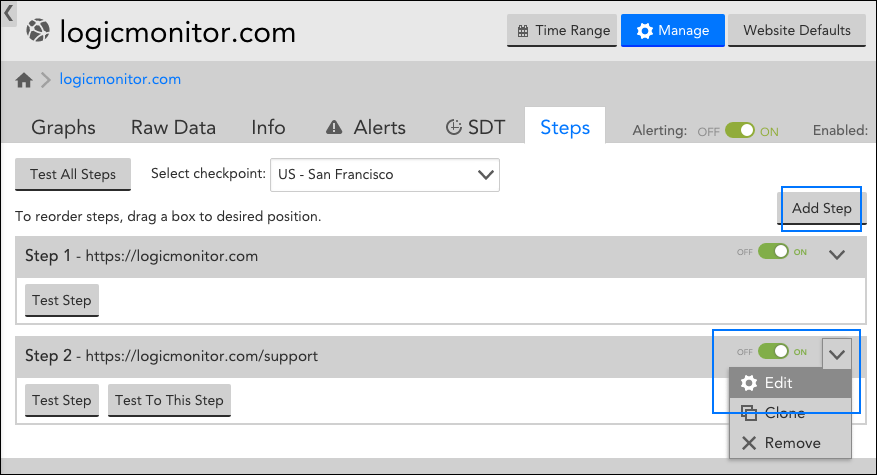
Editing or Adding a Step
To edit the URL or request and response settings for a particular step in your Web Check, you’ll need to open the Steps tab; these settings are not available from the general Manage dialog. From the Steps tab, steps can be edited or added, as highlighted in the following screenshot.
Deleting a Website
To delete a website:
- Navigate to the website from the Websites tree.
- Click the Manage button in the top right corner of the Websites page.
- In the Manage dialog that appears, click Delete in the bottom left corner to delete the website.
Importing/Exporting a Website
You can Import/Export a Website as a JSON file for sharing or versioning purposes.
To export a Website:
- Navigate to the Website from the Websites tree.
- Click the Manage button in the top right corner of the Websites page.
- Select “Export” in the bottom right corner of the dialog.
For Web Checks, upon selecting “Export”, you will see a confirmation dialog that displays all fields that will be exported, excluding scripted fields in scripted Web Checks. We highly encourage users to tokenize sensitive information as a security best practice (see below).
Note: The Password field in Web Check steps will be emptied if it is not tokenized upon export.
In order to tokenize sensitive fields, simply set the field’s value as a property in the Manage dialog (e.g. password=ABCD). Then, in the field you wish to tokenize, set the property’s name as a token (e.g. ##password##). Upon export, all property values will emptied to ensure your sensitive information is not exported.
Note: As with DataSources, any property name that includes “password” or “.pass” will be masked.
To Import a Website:
- Navigate to the Websites Tab.
- Click “Add”
- Select “Add from File” in the dropdown menu. Proceed to select the JSON Website file.