
So you’ve just been tasked with creating a Terraform Provider (or maybe upgrading an existing one). As you do your research to prepare for the project, you slowly begin to realize, “well this looks like I’ll just be developing a Terraform specific wrapper for a client of my API.”
It’s not particularly difficult, but it seems tedious.
Is there a better way to build this? Maybe something that can be modular and automated? A way that’s actually stimulating to implement?
If that speaks to you, then you’re not all too different from my coworkers and me. We wanted something better. Something interesting. Something easy to maintain and quick to extend.
In this article, we:
- Will detail how to build a Terraform Provider using automatically generated code based on an OpenAPI specification file.
- Will not walk you through every line of code.
- Will explain all major components of the code so you understand the moving parts (plus, the code has quite a lot of useful comments).
- Will provide you with a framework to apply this to your own API.
To get the most out of this article, keep the following in mind.
- Do not skimp on the prerequisites. You will get lost quickly if you don’t gain a general understanding of each of the technologies used in this article.
- Read this article with the accompanying repository opened in your IDE of choice in another window. You can find the repository here.
- Play with the code and do the proposed exercises at the end of this article.
- Finally, don’t expect to work through this in a single sitting. There is a lot of material to cover so have patience and allow yourself time to absorb the information.
Now, let’s cover some basics.
What Is Terraform?
Terraform is an open-source Infrastructure as Code tool developed by HashiCorp. It is used to build, change, and version cloud and on-prem resources safely and efficiently using a declarative language. It’s similar in nature to AWS CloudFormation, but isn’t limited to just AWS.
You can learn more from this introduction to Terraform. Then, try one of the Getting Started Projects (it defaults to AWS, but you can select other options like Docker on the left column of the page.
What Is a Terraform Provider?
Not sure what a Provider is? Well, you better figure it out before you go building one!
To put it simply, Providers are Terraform’s version of plugins. You can learn more about them from HashiCorp.
What Are Resources and Data Sources?
Resources and Data Sources are fundamental components of Terraform and are very important to understand before building a provider. Learn about resources here. Learn about data sources here.
How Do You Write a Provider? Are There Any Important Design Principles to Be Aware Of?
You can learn all this and more on HashiCorp’s Plugin Development page.
What Is an OpenAPI Specification?
Formerly known as a Swagger Specification (you may see us reference it as such), an OpenAPI Specification is a formal way to describe a REST API. You can learn more from the Swagger team here. If you’re so inclined, you can also sneak a peek at the Specification itself here. Finally, you can check out LogicMonitor’s API Specification right here.
What Is Go-Swagger?
Go-Swagger is an awesome Golang package that provides the Go community with a Swagger 2.0 implementation. It does this mainly using the Go Template package. This package does a whole lot, but we’re primarily interested in its ability to generate API Clients and its support of custom code generation (again, through Go Templates!). The repository can be found here.
What Are Go Templates?
The template package in Go allows for the data-driven generation of textual output (in our case, code). It can be very difficult trying to digest a Go Template if you don’t understand the notation, so we highly recommend checking out the documentation here. If you want to get your hands dirty, gopheracademy.com has a great introduction to Go Templates here.
Do I Need a LogicMonitor Portal?
That depends on your goals and whether or not you trust us 🙂 If you want to fully test out the provider we’re building in this article, then you’ll need an LM portal. The provider will need to communicate with a specific portal to carry out the processes we’re implementing. Luckily, LogicMonitor provides a free trial!
Once you have your new portal set up (or if you already have one), you’ll need to generate some API tokens. You can learn how to do that here.
Now, if you don’t necessarily have to test this provider (maybe you just want to understand the process so you can apply it to your own API), then you won’t need a LogicMonitor portal. You’ll still be able to learn a lot while going through this article, the provider build process, and the code in the accompanying GitHub repository.
Technologies to Install
In order to start working on this project, you’ll need to have a few tools installed and set up:
- Terraform 0.14.x
- Go 1.16 (to build the provider plugin)
- Go-Swagger v0.27.0+ (to generate the code)
- Your code editor of choice (we recommend VS Code with the Go extension, plus the Go Template Support and HashiCorp Terraform extensions for convenience)
Why Do Things This Way?

Ah yes, one of the biggest questions of all.
Why?
When we were tasked with putting together a Terraform Provider for the LogicMonitor API, we initially considered a more standard approach: manual implementation. It was during our due diligence that we discovered Go-Swagger.
We knew we wouldn’t want to manually develop an SDK/client for the LogicMonitor API, so Go-Swagger was the perfect solution.
As we continued our research, something rather obvious became apparent to us: a Provider is essentially just a Terraform-specific wrapper for an API client written in Go.
So that begged the question: If we can automate the creation of that API client, why not automate the creation of the Terraform wrapper as well? Since Go-Swagger supports custom code generation, we decided to take the leap.
Benefits
The primary benefit of this approach is automation.
Going into this project, we knew we would want to start small and incrementally add functionality to our provider. Additionally, after looking over existing provider implementations, we recognized that there tends to be a lot of boilerplate code in them (mostly mapping fields from one object to another).
As you’ll see later, this approach allows us to extend our provider very easily by leveraging our API’s OpenAPI specification. We can break down this (rather large) specification into individual features/components. Then, whenever we need to add functionality, we simply add the corresponding component to Go-Swagger’s input specification. Don’t worry if this doesn’t make complete sense yet, it will become clear as we move forward.
Costs
As you may have already gathered from the prerequisites section, this approach is complicated! There are a significant number of technologies to become familiar with and, on top of that, working with generated code isn’t a walk in the park.
Not to sound dismissive, but we didn’t see this as much of a negative. In fact, it was quite positive in our minds. We had been looking for a new challenge and an opportunity to learn something new, and this approach was the perfect solution.
Understanding the Repository

Below you will find summaries of the various directories and files that make up the project. This is just to give you a high-level understanding of the roles and responsibilities of each of these components. You can find more detailed information in the files themselves; we’ve added helpful comments to the code in an effort to explain parts of it that are either complex or whose purpose may be difficult to intuit.
| /Makefile | Makefile is used primarily for generating the code and then building and installing the provider. It also contains some alternate targets that are useful during the development process. Primarily, you’ll want to run either the default target to fully build the entire project or the nogen target for testing changes without actually generating code via Go-swagger. |
| /config.yml | This config file is used to tell Go-Swagger how and what it should run. Explaining it is outside the scope of this article, but you can reference the Go-Swagger documentation to learn more. |
| /templates/ | This is where all the templates related to custom code generation reside. Go-Swagger, using the config.yml file, will read each of these templates and generate code accordingly. |
| /templates/client/facade.gotmpl* | The facade template generates the main entry for the REST API client code. It defines functions for configurations, authentication, and authorization of the client. In our example, we define a function LMv1Auth that facilitates client authentication with the LogicMonitor REST API.The output of the template is found at client/logic_monitor_r_e_s_t_api_client.go. |
| /templates/client/client.gotmpl* | The client template generates client code entry points for each swagger group (groups are equivalent to tags in the specification file). It defines specific functionality associated with each group. Generally speaking, it will create CRUD operations for the group. |
| /templates/datadump.gtpl | This template provides nothing for the final implementation, but we’ve included it because it can help debug the data that’s being passed to the templates. Development using Go Templates can lead to difficulty understanding exactly what you have to work with. This template is a simple way to find out. The output files aren’t particularly pretty to look at but can definitely be useful in a pinch! After you run Go-Swagger, you’ll see the output of this template in the data_profile/ directory. |
| /templates/main.gtpl | Every provider needs a Main file from which Terraform can gain access to it. This is the template that creates that file. There isn’t anything special going on here since it’s (mostly) static code, so we could technically replace it with a raw Golang file. But it’s more fun this way. |
| /templates/provider.gtpl | Every provider needs to be defined somewhere and that’s usually in a Provider function. This template focuses on generating that function, defining the schema of the returned provider, and determining how the provider is configured. Our provider requires an API ID, API Key, and a company name (to determine which portal to route requests to). Your provider will likely use different credentials and/or configurations. |
| /templates/resources.gtpl | As you know by now after reading the Terraform Provider Design Principles (check the “How do you build a Provider?” section above if you haven’t!), every provider resource should represent a single API object. While this example will only use the LogicMonitor Device API object as a starting point, our design lends itself to incrementally adding new Resources simply by adding API objects to our input OpenAPI specification. As explained in our “Why?” section, this was one of the major reasons we decided to move forward with this design. This template lays out how each of these resource structs are generated. It defines the create, read, update, and delete methods for each Resource defined in a Terraform configuration as well as the read method for the corresponding Data Sources. |
| /templates/schemata.gtpl | This template is responsible for generating Schema objects (Go-Swagger already has a concept of schema so, for lack of a better term, we used schemata in order to differentiate the two). Each Terraform resource is represented by a configurable Schema, allowing resource data manipulation for create, update, and read operations. A Schema object is a mapping where the keys are the configuration keys and the values describe the schema of the configuration value. So the schemata can be thought of as an interface to read and write data to the LogicMonitor API. First, the resource data defined in the Terraform configuration file is translated into a Schema model struct with the configured values, which is then sent to the LogicMonitor API to create or update a resource. If the request is successful or if an existing resource is merely being retrieved, the response data will be translated back to the same model struct sent to the LogicMonitor API above, whose values will be used to create or modify the underlying resource data defined in the Terraform configuration. |
| /templates/tf_responses.gotmpl* | The tf_response template defines the response structure expected from the specific endpoint. It also contains various helper functions to help with the response. |
| /templates/utils.gtpl | Maybe it’s a code smell, maybe it isn’t. Either way, most repositories have some sort of utilities file (or many!). Our Utils template is pretty much just hard-coded helper functions that are called in different areas of the provider. |
| /spec_files/ | The spec_files directory contains everything relating to the LogicMonitor OpenAPI specification files. Go-Swagger will read the specs from this directory when generating the code. |
| /spec_files/components/ | This subdirectory houses the specifications for individual components. You’ll see that this directory contains two files: device.json and dashboard.json. These are files that we needed to create ourselves by pulling the relevant info from the overall LogicMonitor OpenAPI specification. They contain the relevant spec data (definitions, paths, and tags) for each of these LogicMonitor API Objects (devices and dashboards). Ultimately, breaking our specification into components helped simplify the development process. If we had included the LogicMonitor specification in its entirety, Go-Swagger would’ve generated supporting code for every API object and endpoint in the LogicMonitor ecosystem. Since we wouldn’t use most of that, we were able to cut out a lot of noise and bulk by slimming the specification file in this way. It also lent itself well to our goal of incrementally adding functionality to the provider in the future. When we want to add a new component, we’ll simply extract the relevant specs and add them to a new component file. Later, we’ll go over how we can make a new specification file from these components. |
| /spec_files/ref/ | Here is where we house reference specification materials. In this case, it just contains the lm-openapi-spec.json file. This spec file is the entire OpenAPI specification for LogicMonitor. You can confirm that by comparing its contents to the output of the LogicMonitor API specification URL mentioned in the “What is an OpenAPI Specification?” above. Now that you know what this file is, you can compare it to those files in the Components subdirectory and see how they were constructed. It’s a pretty straightforward cut and paste operation, but it’s a worthwhile endeavor to explore how the data is structured. |
| /spec_files/current.json | This is the json representation of the current spec file we’re using to generate the provider, thus the filename. How original! If you compare it to the device.json file in the Components directory, you’ll notice that these two files are nearly identical. The only differences are some boilerplate specifications like “externalDocs”, “info”, and “securityDefinitions”. We’ll cover where those come from in the next section! |
| /spec_files/createSpecFile.py | This is the file that pulls it all together. This script generates a valid specification file from an arbitrary number of components files in your components/ directory. It will create a baseline specification JSON with boilerplate specifications (like those mentioned above in the current.json section) and then iteratively add entries from each component, making sure to not create duplicate entries. You can try running it yourself now, but be careful! If you run it without arguments, it’ll add the dashboard component information to the current.json file. Then, when you try building the project, you may run into errors (you can fix them by adjusting the templates, see the Proposed Exercises section at the end of this article for more info). Try opening and reading the file to see how you can exclude the dashboard component when running this script. Please note that you need Python3 to run this file. |
| /logicmonitor/ | The LogicMonitor directory contains generated code for the provider. It’s split up into resources/, schemata/, utils/, and the provider.go file, which we have already covered. |
| /client/ | This is (almost) what the Go-Swagger output would be if we were to do NO custom code generation at all. So that makes it our LogicMonitor Client/SDK! Because this is pretty much just standard Go-Swagger output, there’s not much for you to see here. |
| /models/ | This directory contains the models that are generated by the Go-swagger process. These models are representations of the definitions listed in the input specification file (current.json). |
| /test/ | In here we have a test Terraform configuration file that you can use for testing, plus a Makefile to use as a convenience during testing. |
Bold files/directories = items found at the root level of the repo
Gray background rows = child items of those directories
* = templates that correspond to base Go-Swagger templates. These have been slightly altered to better fit our API. If you apply this framework to your own API, you’ll want to alter config.yml to point to the original templates instead of ours, at least to start.
Building the Provider
You can find this same information in the project repository’s README, but we’ve included the following for convenience. If it doesn’t work, check the repository in case it has been updated since this article was published.
- Clone the repository (here, using SSH):
$ git clone [email protected]:logicmonitor/automated-terraform-provider.git- Change to the repo’s directory and build the provider:
$ cd automated-terraform-provider/
$ make- The makefile will then generate the code, build the binary, and copy it to the Terraform plugin directory
Assuming you didn’t run into any build errors, you’re all set to start testing!
Testing the Provider

After running the Makefile, your provider should be installed. That means we just need to write up a Terraform configuration file using our provider, initialize the provider, and run it.
To help, we’ve already included a test/ directory that contains a test.tf Terraform configuration file you can use for testing. Be sure to edit the test.tf file by entering values for api_id, api_key, and company within the LogicMonitor provider definition. See the Prerequisites section for more information about generating the API Key and ID.
To actually run the tests, we’ve included a Makefile to provide convenience commands that we thought were helpful during the development process.
Make Clean
You must initialize any new provider after you’ve installed it in your Terraform plugin directory. You can do that by running terraform init. However, Terraform locks the version of a provider after it is initialized. This prevents you from making changes. For example, if you initialize the provider and make changes to it without changing the version, Terraform prevents you from initializing the changed version and displays an error.
During development, we often need to make incremental changes without actually changing the version number so this sort of behavior can become a problem. To fix this, we added the clean target. It deletes the lock file and re-initializes the provider using the most recent build in your repo.
Example Output
$ make clean

rm .terraform.lock.hcl
terraform init

Initializing the backend...

Initializing provider plugins...
- Finding logicmonitor.com/com/logicmonitor versions matching "0.1.0"...
- Installing logicmonitor.com/com/logicmonitor v0.1.0...
- Installed logicmonitor.com/com/logicmonitor v0.1.0 (unauthenticated)

Terraform has created a lock file .terraform.lock.hcl to record the provider
selections it made above. Include this file in your version control repository
so that Terraform can guarantee to make the same selections by default when
you run "terraform init" in the future.

Terraform has been successfully initialized!

You may now begin working with Terraform. Try running "terraform plan" to see
any changes that are required for your infrastructure. All Terraform commands
should now work.

If you ever set or change modules or backend configuration for Terraform,
rerun this command to reinitialize your working directory. If you forget, other
commands will detect it and remind you to do so if necessary.Make Plan and Make Apply
These two targets don’t need much introduction. They run the terraform plan and terraform apply steps respectively while using a file, lm.tfstate, to save the plan for reference if need be.
Example Output: Plan
$ make plan
terraform plan -out=lm.tfstate
An execution plan has been generated and is shown below.
Resource actions are indicated with the following symbols:
+ create
<= read (data resources)
Terraform will perform the following actions:
# data.logicmonitor_device.my_devices will be read during apply
# (config refers to values not yet known)
<= data "logicmonitor_device" "my_devices" {
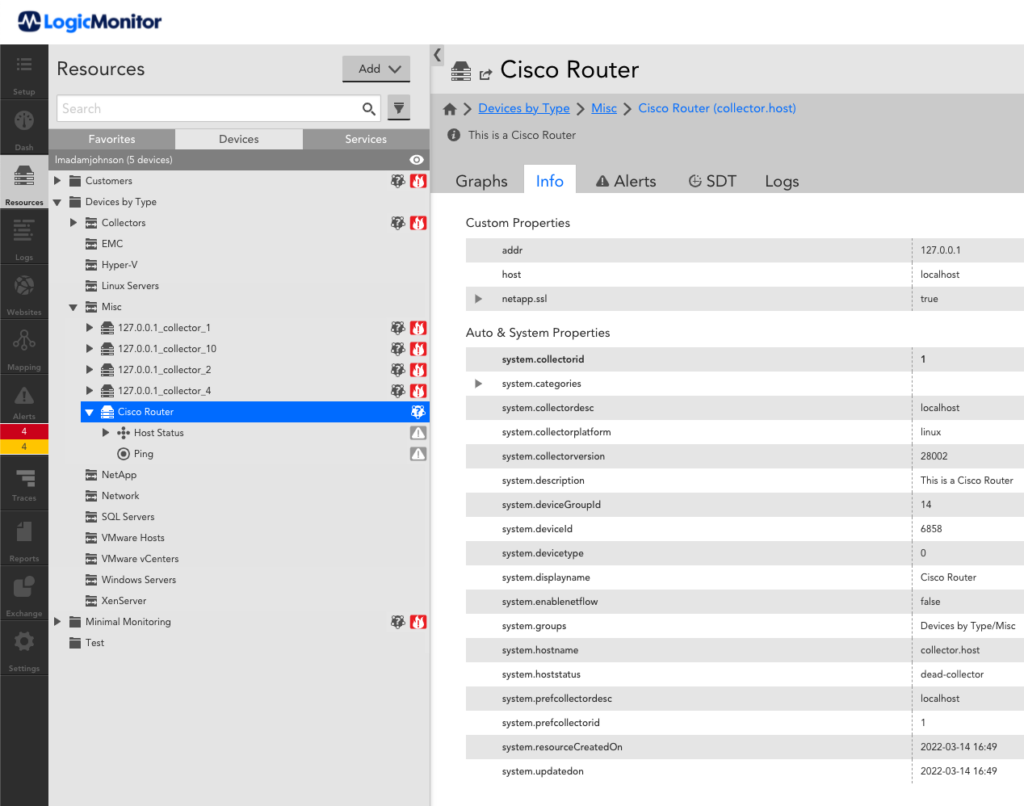
+ filter = "displayName~\"Cisco Router\""
+ id = (known after apply)
}
# logicmonitor_device.my_device will be created
+ resource "logicmonitor_device" "my_device" {
+ auto_properties = (known after apply)
...
}
Plan: 1 to add, 0 to change, 0 to destroy.
Changes to Outputs:
+ devices = {
+ auto_balanced_collector_group_id = null
...
}
------------------------------------------------------------------------
This plan was saved to: lm.tfstate
To perform exactly these actions, run the following command to apply:
terraform apply "lm.tfstate"Example Output: Apply
$ make apply

terraform apply lm.tfstate
logicmonitor_device.my_device: Creating...
logicmonitor_device.my_device: Creation complete after 1s [id=6858]
data.logicmonitor_device.my_devices: Reading...
data.logicmonitor_device.my_devices: Read complete after 0s [id=6858]

Apply complete! Resources: 1 added, 0 changed, 0 destroyed.

The state of your infrastructure has been saved to the path
below. This state is required to modify and destroy your
infrastructure, so keep it safe. To inspect the complete state
use the `terraform show` command.

State path: terraform.tfstate

Outputs:

devices = {
  "auto_balanced_collector_group_id" = 0
  ...
}Default
By default, the Makefile will run clean, plan, and then apply.
Results
After you run the tests, you should see the new device in your LogicMonitor portal.
You can now edit the test.tf file to make changes to your new device. Alternatively, you can remove the device by running the terraform destroy command.
Developing the Provider
Now that you have 1. Examined and understood the templates used to generate the provider 2. Generated the provider code and 3. Tested the provider, you can confidently work towards making your own changes (more on that in the next section!).
Before you do that, we have a tip that helped us immensely during the development of the LogicMonitor Provider.
We recommend first making changes to the generated source code directly, instead of trying to tweak the templates straight away. Get things working and test them (here is where the make nogen target of the root directory Makefile is very useful) and THEN alter the templates to replicate the manual changes you’ve made. Better yet, you can make manual changes and then commit them to the Git branch you’re working on. This will keep the changes you made to the generated code safe to reference later.
After your changes are tested, working, and saved to your Git branch, you should now modify the template files. Since you committed your changes to the generated code, making changes to the template files and building the code (using the make build target of the root directory Makefile) is much safer. Make your template file changes, generate the code, and run a diff command like git diff. You can now precisely identify the changes your new template files are producing.
Adding Functionality
Whew! That’s a lot of information! Let’s take a step back and review the high-level process of adding functionality to the provider.
- Identify the component you want to add.
- Manually build the component json OpenAPI spec file from the original spec file.
- Run createSpecFile.py to update current.json with your new component.
- Run make to generate the code, build the provider, and install it.
- You may run into generation errors, in which case you must make changes to the templates to at least get all the code to output.
- You may also run into build errors, in which case you should use the process we previously outlined by manually altering the generated code to get it working, then mimicking those changes within the appropriate templates.
- Test it to make sure it’s working.
Proposed Exercises

Now that you’ve got a handle on all of this, let’s really push your understanding and show you what the development cycle looks like through some additional exercises!
Add the Import Feature
Importing is an important feature for any halfway serious Terraform Provider. We’ve left it unimplemented so that you can add it yourself. Learn more about developing the import feature here: https://www.terraform.io/plugin/sdkv2/resources/import
Expand the Provider: Dashboards
We’ve included a ready-made dashboards component spec file in the GitHub repository, but its values weren’t included in the current.json file. Try adding it by running the createSpecFile.py file in the spec_files directory and then rebuild the provider.
Does it build successfully? When you test the addition of dashboards, are you able to create, edit, and delete dashboards using the dashboard resource? Is the dashboard data source functioning properly?
If you’re having trouble, we have a branch in the automated-terraform-provider repo called “adding-dashboards” that will show you how we got it to work.
Expanding the Provider: Your Choice!
Like we’ve mentioned, one of the major advantages to our approach is that it’s easy to add new components to the provider as needed. We covered an easy example with the dashboards exercise above, but now it’s your choice!
Look through the various definitions in the reference LM OpenAPI spec file and see if there’s one that interests you. Some options: Admin (LM’s user object), AlertAck, Alert Rule, Chain, Collector, Device Group, Dashboard Group, Role, SDT, and WebCheck.
The overall process for creating a component spec file is to identify the object that will be your resource (i.e. Device), copy all definitions related to that object (i.e. Device, DevicePaginationResponse, ErrorResponse, and NameAndValue), copy all the paths you’ll need (CRUD and getList paths – i.e. GET/POST /device/devices and GET/DELETE/PUT /device/devices/{id}), and finally copy the appropriate tag. You can see all of these items in the device.json and dashboard.json files in the spec_files directory.
One final note: you will need to add a field to the definition of the object that will map to your Terraform resource of choice. The field to add is “example” and the value should be “isResource” and it should only be added to the definition of the object that represents the resource you want to add.
You can look at the existing component spec files for examples (i.e. the device definition as opposed to the DevicePaginationResponse definition). Objects that are resources need to be treated differently than the standard data objects. Search through the repository for “isResource” to see how things differ between the two.
Documentation
When Terraform adds a provider, they expect that provider to come with documentation to help users maximize their utilization of it. This process can be “automated” as well. Within our framework, this typically means adding the documentation to the spec file in the appropriate fields and then accessing them within a new template (or two). To summarize, this exercise requires changes to the spec files (adding your documentation), adding new templates for the documentation, and updating the config.yml file to include these new templates.
You can learn more about what documentation Terraform expects here: https://www.terraform.io/registry/providers/docs
Apply It to Your Own API!
Now that you have a great understanding of the end-to-end process, try applying it to your own product’s API. All you need to do is construct a new current.json that uses your API’s OpenAPI specification, switch to the original Go-Swagger client templates, and generate the code! Add in some tweaks to the templates to better handle your own objects and you’ll be well on your way to having a full fledged, custom built Terraform provider.
Surely, once you’ve completed each of these exercises you will be a master of automating the generation of a Terraform provider for your particular API.

This blog was written by Adam Johnson with contributions from Carlos Alvarenga and Ned Imming.