Overview
Once configured and saved, widgets can be shared externally to the LogicMonitor platform via embedded URLs. Embedded widget URLs launch from any LogicMonitor-supported browser version and display read-only versions of the shared widgets. Unlike shared dashboards, which only support a snapshot in time, shared widgets always reflect current conditions. As discussed in Roles, your user account must have the appropriate dashboard permissions assigned in order to generate and manage embedded widget URLs.
Note: No unauthorized external access to the portal is provided through embedded widget URLs. However, if the viewer of the embedded widget URL is logged into the portal from which the URL originated (and has the appropriate permissions), actions such as following links to devices or topology maps, for example, can be taken.
Generating Embedded Widget URLs
You can generate an embedded widget URL for any saved widget. To generate an embedded URL for a widget:
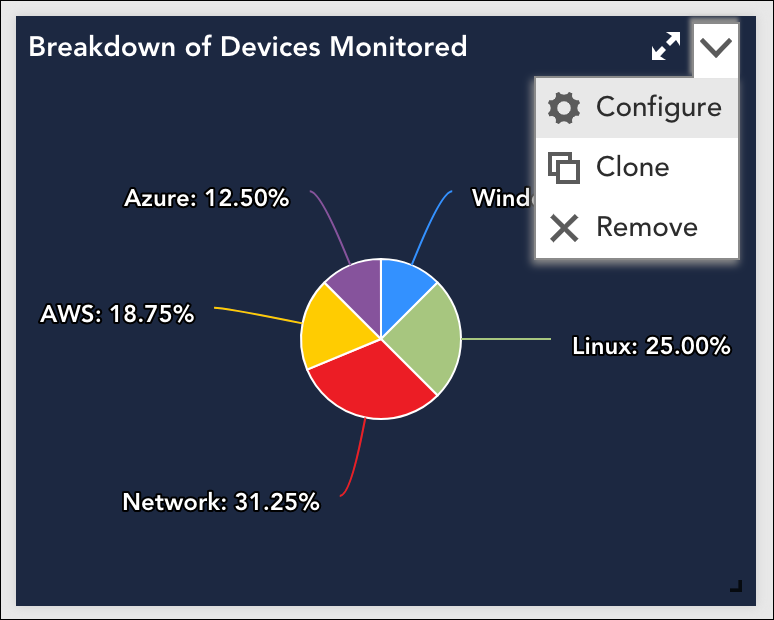
- Locate the widget on a dashboard, select its upper right dropdown arrow, and select Configure.
- Select the Generate button located to the right of the Widget Embedded URL field. Note: The Generate button is not available if you’ve previously generated an embedded URL; LogicMonitor only supports one embedded URL per widget per user.
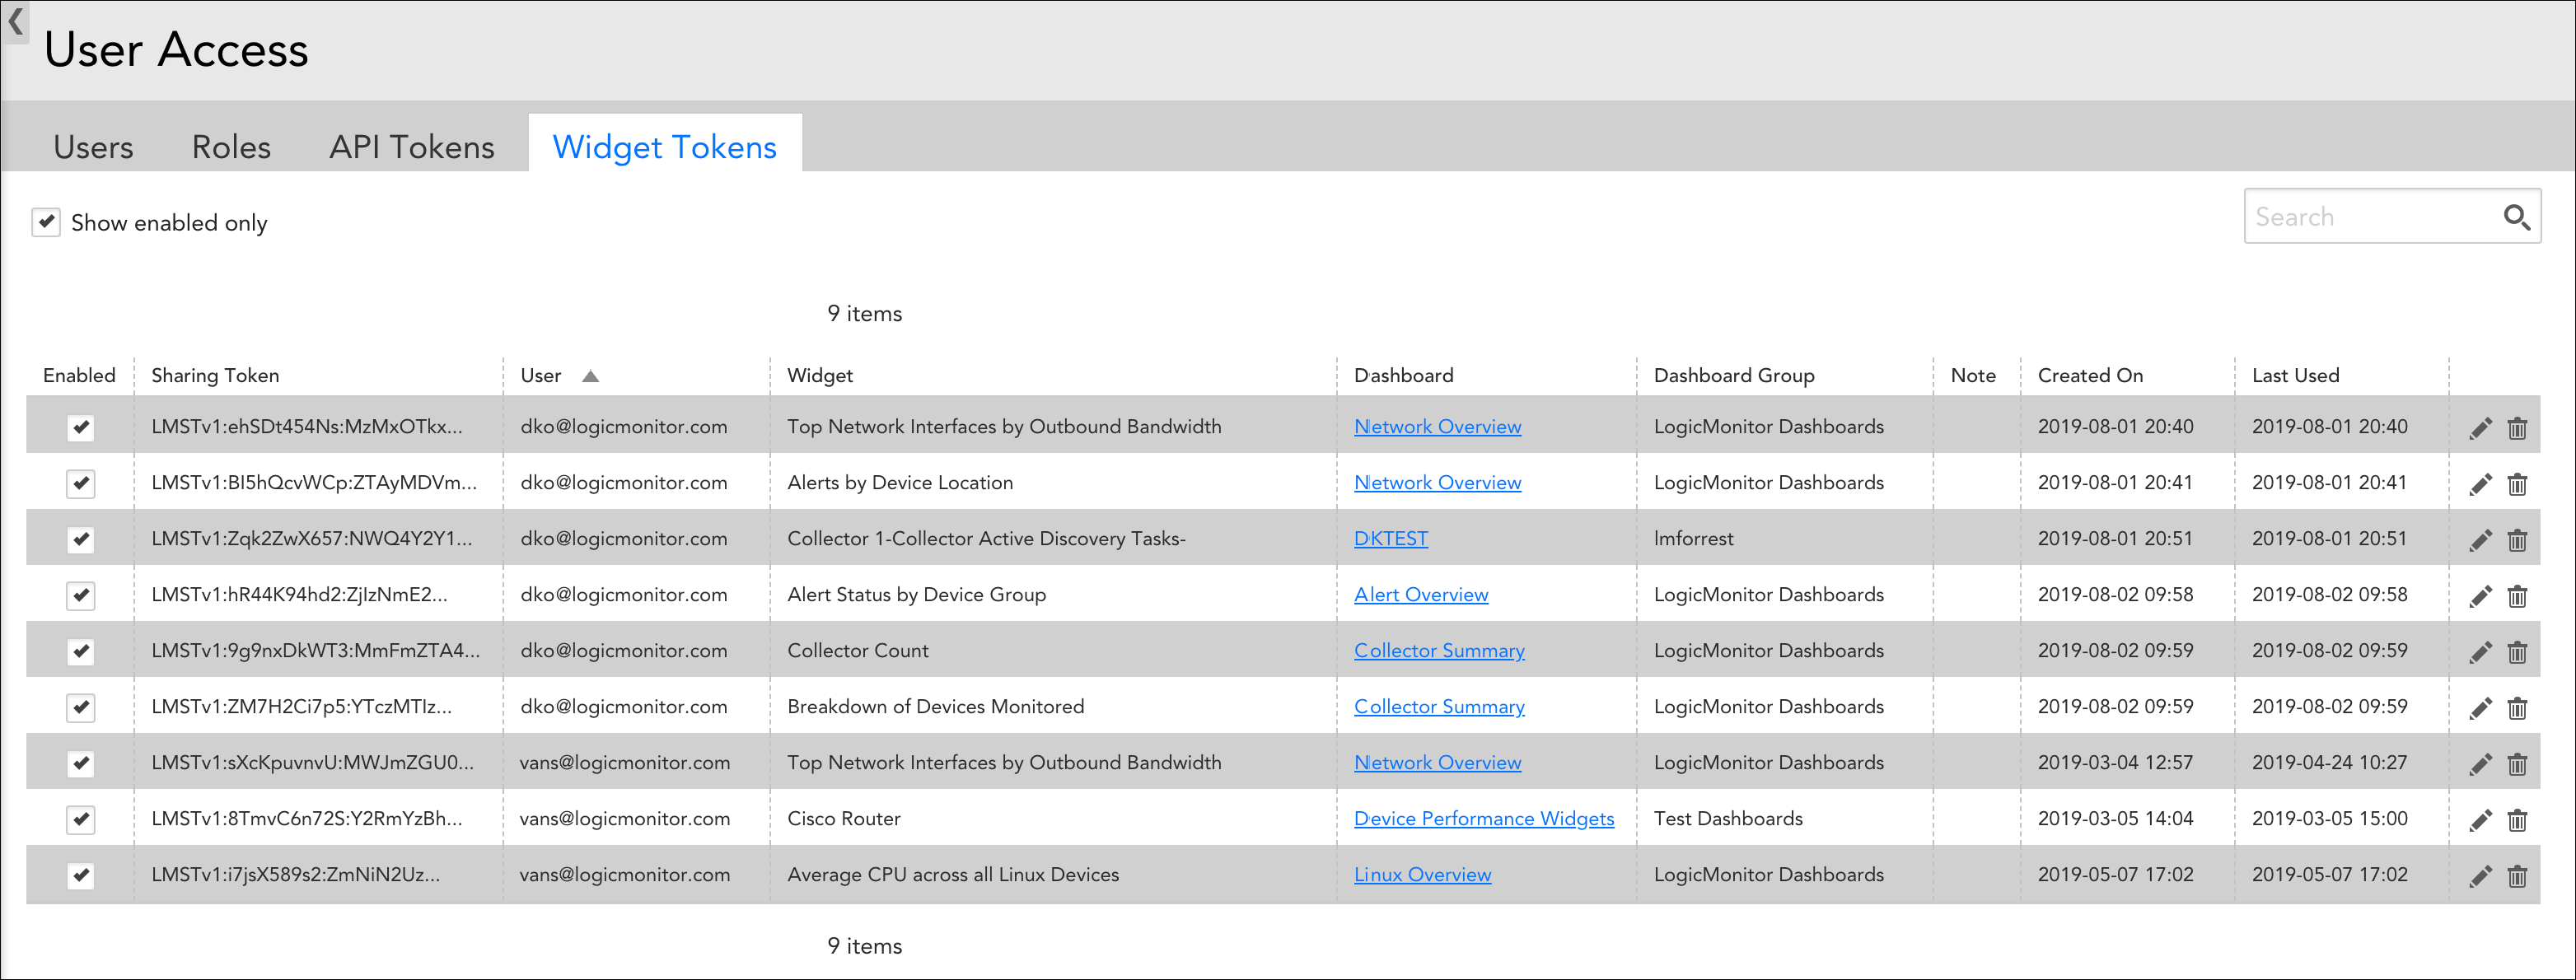
- The new URL appears in a table under the Widget Tokens heading. You can use the pencil icon to open its settings in edit mode and optionally add notes that describe the intended use of the embedded URL.
- Select the Copy button to copy the URL to your clipboard.
Note: For Alert Widgets, if you are sharing the embedded widget URL, the data in the Custom column type is not displayed. You must log in to the LogicMonitor portal to view Custom column type data in the dashboard widget.
Managing Embedded Widget URLs
Embedded URLs can be disabled or deleted from a widget’s configurations, in the same dialog as originally generated. Additionally, LogicMonitor offers an interface from which you can view all generated embedded widget URLs, across all shared widgets. Available by navigating to Settings > User Access > Users & Roles > Widget Tokens, the Widget Tokens management interface allows you to view details, sort, search, disable/enable, delete, and update the notes for any previously generated embedded widget URL.
Deleting or disabling an embedded widget URL will break any embedded links elsewhere.
Adding Widgets
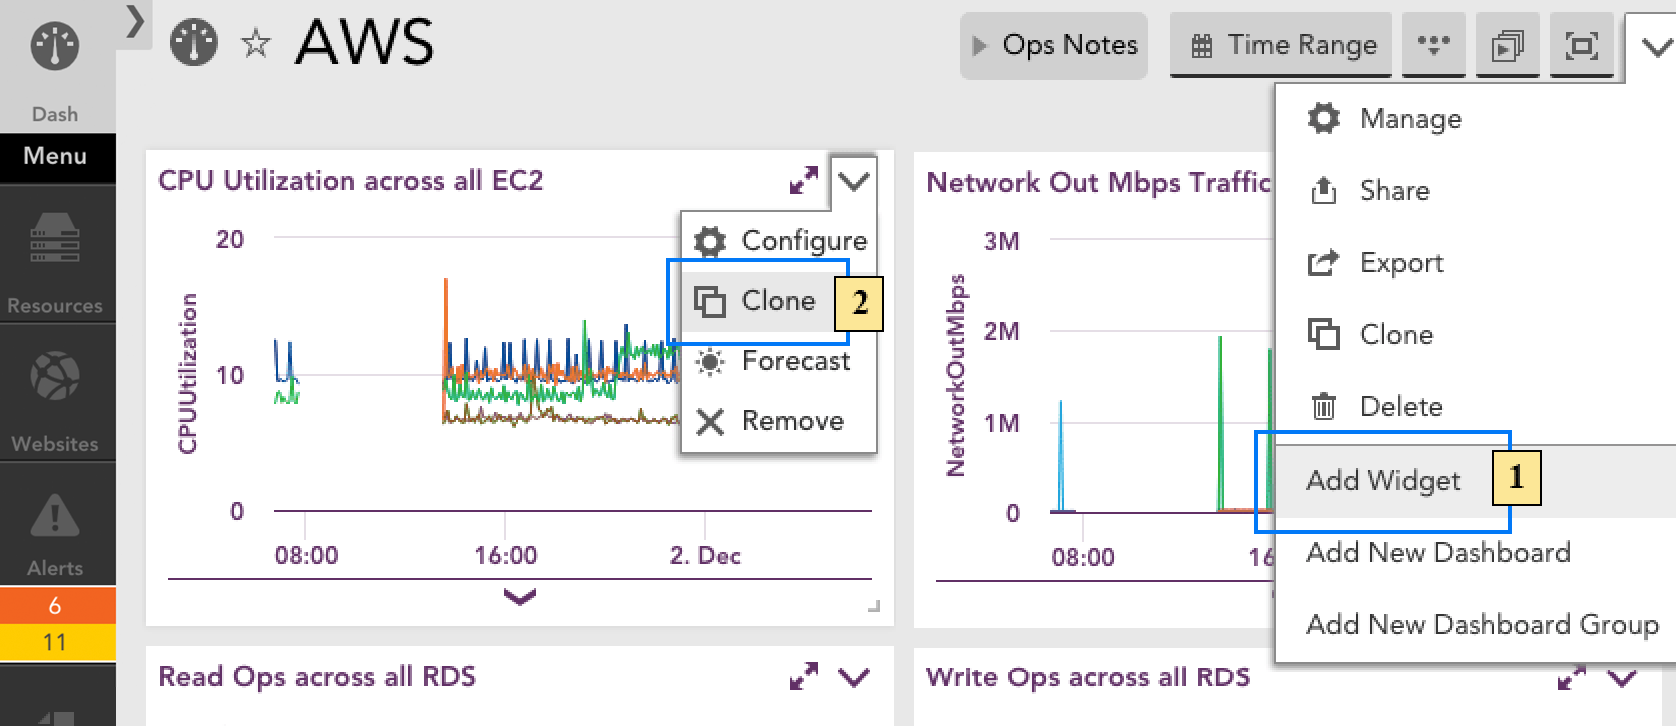
New content can be added to a dashboard in one of three ways:
- By clicking the Add Widget command available from the header of the dashboard that you would like to update with the new widget.
- By clicking the Clone command available from the header of an existing widget.
- By adding an instance graph. (For more information on adding instance graphs to dashboards, see Graphs Tab).
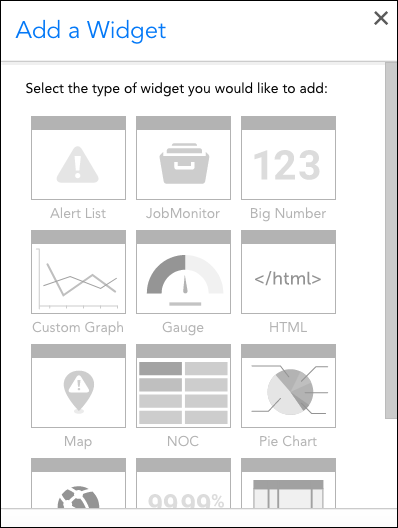
If you’re adding the widget from scratch (vs. cloning an existing widget), select the type of widget you would like to add. (For guidance on which widget type is best suited for your intended purpose, see Widget Overview)
Configuring Universal Widget Settings
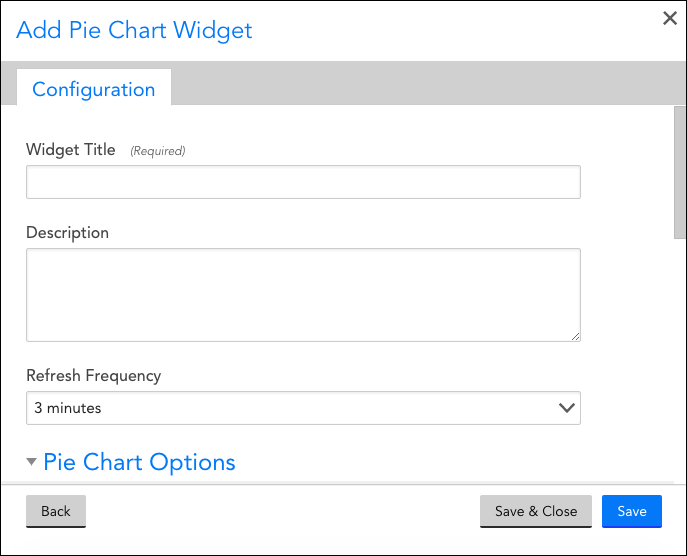
Upon selecting a widget type or cloning an existing widget, you are presented with the various configuration settings for that widget.
While many of the available widget types look very different from one another, there is a considerable amount of shared functionality among them. This section provides instructions for configuring settings that are common across most or all widget types.
Note: Don’t see the setting you’re looking for? It’s likely specific to a particular widget type. For information on configuring settings that are specific to a particular widget type, see the dedicated support article for that widget type.
Widget Title
The title entered here displays at the top of the widget. There are a few naming convention restrictions to be aware of:
- Widget titles cannot include the operators and comparison functions available in LogicMonitor’s datapoint expression syntax, as discussed in Complex Datapoints.
- Widget titles cannot contain commas (,), semicolons (;), or asterisks (*).
Description
The text entered here does not display with the widget, but is helpful for making notes.
Dashboard
The Dashboard setting only displays after a widget has been saved. This field defaults to the current open dashboard, but can be changed to move an existing or cloned widget to another dashboard.
Refresh Frequency
Select the frequency in which data displayed by this widget will be updated.
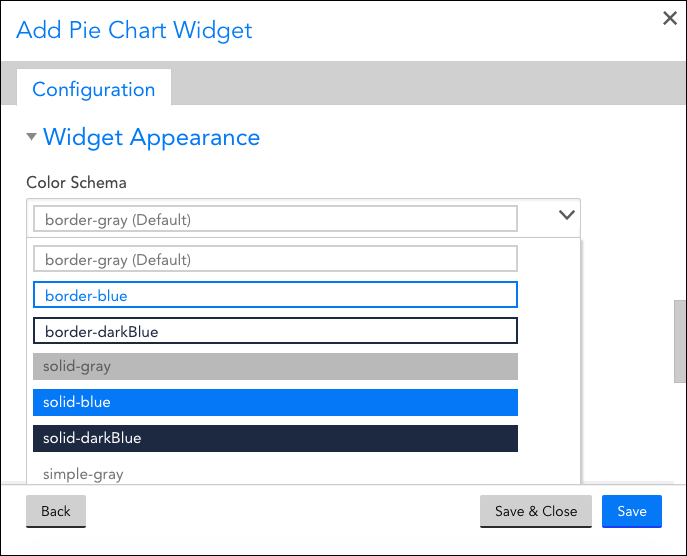
Color Schema
The schema options available from this setting’s drop-down preview the colors that will be applied to the widget’s border, text, and background. It is recommended that the “solid” schemas be used selectively to draw attention to critical data.
Configuring Datapoints
While not universal across all widget types, many widget types utilize datapoints. Widgets that display metric information, as opposed to widgets that display status, require datapoints to be configured.
Groups and Devices
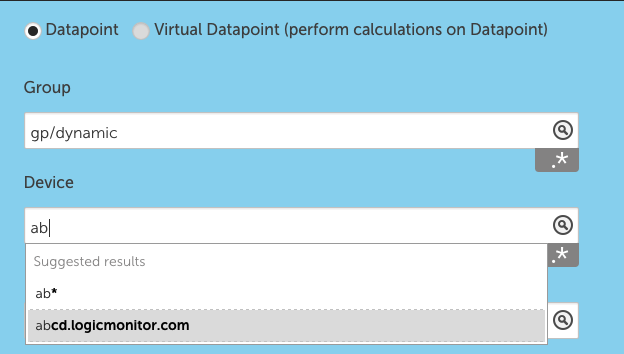
When adding a datapoint to a widget, you will be prompted to select Groups and Devices.
If you do not select any specific Groups or Devices, it will default to all. There are exceptions when a specific instance is required for the widget to display correctly.
Glob expressions can be used in the Group and Device fields. This works for include and exclude. To include only subgroups, enter GroupName/*. To exclude a group or device, use !DeviceorGroupName.
Datasources and Instances
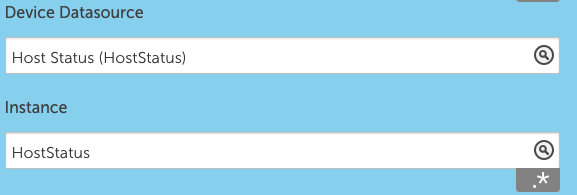
Once your Groups and Devices have been configured, you will have the option to select Datasources and Instances. Datasources are available as ‘DisplayName (DataSource Name)’, such as CPU (WinCPU).
Only datasources that are enabled on the selected Group and Device are available. Similarly, only active instances of the datasource can be added.
Glob expressions are also available for Datasources and Instances. To include all matches, append *. To exclude, prepend !, such as !InstanceA.
Datapoint
While Groups, Devices, DataSources and Instances can all be specific, configured as a glob match, or set to all, a datapoint must be selected.
The configuration of Group, Device, Datasource and Instance determines which occurrences of a datapoint will be utilized in the widget, whether it is a datapoint specific to a singular instance, many instances on the same device, or a datapoint on many instances across devices.
Configuring Virtual Datapoints
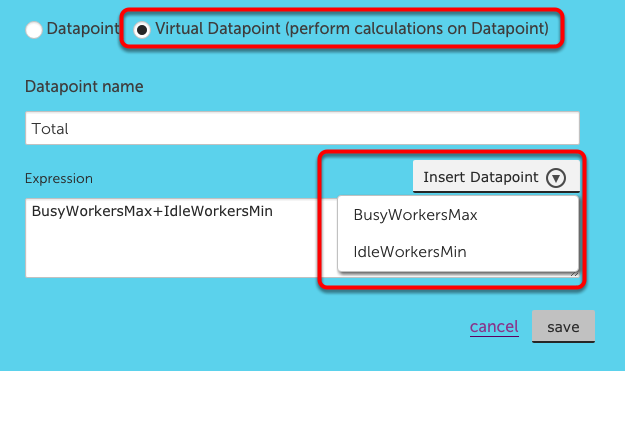
Virtual datapoints are calculations based on the datapoints that have already been added to the widget.
To add a virtual datapoint, select the toggle in the top of the Add Datapoint configuration. You will need to enter a name, to be utilized in the remainder of the widget configuration. From there you can apply any datapoint expression to the existing datapoints.
Note: If the set of datapoints referred to by an expression are wildcard datapoints, with glob expressions used, be aware that the virtual datapoint will only operate on datapoints that share the same host and instance. For example, given a datapoint InTraffic which is defined as the top 10 InOctets counter on all hosts, all interfaces for the SNMP 64 datasource, you can combine that with another datapoint OutTraffic which is defined as the top 10 OutOctets counter on all hosts, all interfaces for the SNMP 64 datasource. You could not have a virtual datapoint combine the InTraffic datapoint with a TopCPU datapoint, which is defined as the top 10 CPU load of all hosts – they would not have an instance in common and so could not be combined.
Insert Datapoint enables you to add your existing datapoints directly into the datapoint expression.
Once widgets have been created, there are a few functions that can help you get the most out of the widgets and associated dashboards.
Resizing a widget
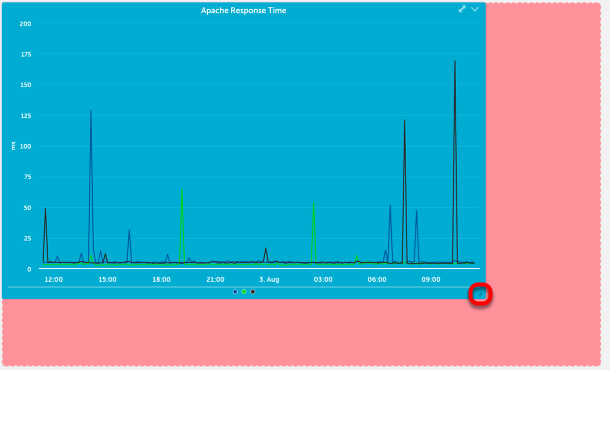
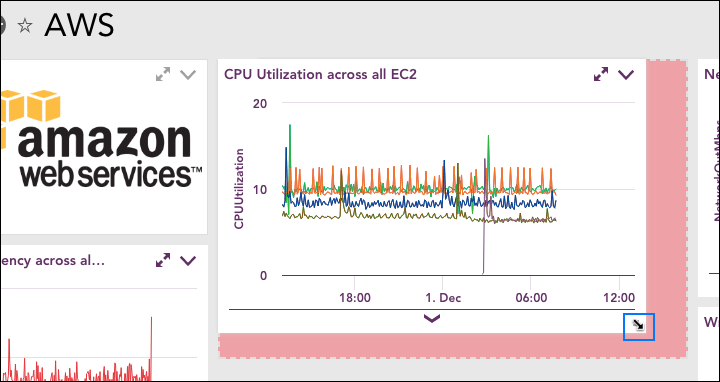
To resize a widget, hover over the bottom right corner. When a one sided arrow appears, click and drag to resize. A pink shadow will appear to indicate the new widget size.
Change time range
To change the time range displayed on a graph widget, you can click and drag to select the area to want to zoom in on. When you release the area selected will become the new time range.
For all other widgets and globally for dashboards, you can use the Date Range button in the upper right on the tool bar.
Clone a widget
To clone a widget, click the drop down arrow on the widget and select Configure, or expand the widget and select the Configure tab. On the bottom left there is an option for clone. Selecting clone will default the widget name to (current name)_clone, and will default the dashboard to the active view. Both items can be changed.
Delete a widget
To delete a widget, select the drop down on the widget and select Remove. Alternatively, you can click configure from the drop down menu and then select delete from the bottom left hand corner of the widget configuration dialog.
Once a widget has been configured and added to a dashboard, it can be resized and rearranged as a means of drawing attention to content that you consider most critical.
Resizing Widgets
Dashboards are built on an underlying grid that consists of evenly spaced columns and rows. As a widget’s size is increased or decreased, it snaps to the lines of this grid.
To resize a widget, hover over its bottom right corner to change your cursor into a streamlined arrow. Then, click and drag. You can drag horizontally to increase or decrease just the width; vertically to increase or decrease just the height; or diagonally to increase or decrease both simultaneously while preserving the existing aspect ratio. As you drag, a pink box appears to indicate the grid lines the widget will snap to upon letting go.
Rearranging Widgets
To rearrange a widget, hover over its header to change your cursor into a move cursor. Then, click and drag the widget to the desired location. As with resizing, a pink box appears to indicate where the widget will be positioned upon letting go.


