LogicMonitor’s LM Container is an excellent choice for users who wish to effectively monitor Kubernetes environments running mission-critical business applications. We have now introduced a new cost optimization feature called dynamic property filtering, which offers added flexibility and customization to users. In this blog post, we will guide you through this exciting new feature with a step-by-step example of selectively monitoring a persistent volume based on its state.
Dynamic vs. Static Property Filtering
LM Container discovers and monitors all Kubernetes resources by default. However, users can apply filters to limit the scope of monitoring to specific resources. The LM Container guide on filtering Kubernetes resources provides detailed instructions on how to apply filters to Kubernetes resources.
Previously, LM Container had limited filtering options for monitoring Kubernetes resources, only allowing users to filter based on static properties like object labels. For instance, users could remove all services with the label “environment” and value “development” by using the filter expression: ‘type in (“service”) && env == “development”‘. This feature helped improve efficiency and reduce monitoring overhead by allowing users to monitor only the resources they needed. However, with the addition of dynamic property filtering, LM Container now permits users to filter resources based on their current state, allowing for more precise monitoring. This means that resources can now be monitored only when they are in use, providing even more targeted monitoring capabilities.
Benefits of Dynamic Property Filtering
Dynamic property filtering in LM Container improves the efficiency and customization of Kubernetes monitoring and offers significant financial benefits. By allowing customers to monitor only the necessary resources, they can optimize their monitoring costs and get the most value from their investment. Dynamic property filtering can help customers save on monitoring costs in various ways:
- Pay for what you monitor: With dynamic property filtering, you can focus your monitoring efforts on the resources actively used and relevant to your business operations. This means you can save on monitoring resources that aren’t essential to your operations.
- Greater customization: Dynamic property filtering allows you to tailor your monitoring setup to your specific needs, ensuring visibility into the most critical aspects of your Kubernetes environment.
- Streamline troubleshooting and support: By monitoring only the resources that matter, your IT teams can quickly identify and address issues. This reduces downtime and lowers the costs associated with troubleshooting and support efforts.
- Efficient scaling: As your Kubernetes environment grows, dynamic property filtering allows you to scale your monitoring setup while keeping costs in check easily. By monitoring only the resources actively in use, you can maintain an efficient and cost-effective monitoring system even as your infrastructure expands.
- Maximize return on investment (ROI): By optimizing your monitoring setup with dynamic property filtering, you can ensure you’re getting the most value from your investment in Kubernetes monitoring. This can lead to higher ROI and overall better performance for your organization.
Example: On-demand Monitoring of a Persistent Volume with Dynamic Property Filtering
To help you understand the benefits of dynamic property filtering, let’s dive into a step-by-step example of monitoring a Persistent Volume (PV) only when it is in Bound phase. A Persistent Volume (PV) stays in the Bound phase when it is actively being used by a Persistent Volume Claim (PVC). Monitoring a PV only when it is in the Bound phase will allow you to monitor it only when it is actively being used, saving you monitoring costs when it is not in use.
I will use MiniKube for this exercise. However, you can use any Kubernetes cluster of your choice. MiniKube is a lightweight Kubernetes implementation that is ideal for testing and development purposes. To learn more about MiniKube, check out the official documentation. To begin, install the latest version of LM Container on your Kubernetes cluster using the instructions in the LM Container installation guide. Before you run the installation command to deploy LM Container, make sure to add the following filter expression to the generated values file:
argus:

  # ADD the following filter condition to the existing argus configuration

  filters:

    - type == "persistentvolume" && jsonGet(object, "status.phase") != "Bound"
The above filter expression will ensure that only the PVs in the Bound phase are monitored by LM Container. Once you have deployed LM Container to your Kubernetes cluster, execute the following command to create an NGINX Pod with a PVC and a PV:
cat <<EOF | kubectl create -f -

kind: Pod

apiVersion: v1

metadata:

  name: task-pv-pod

  labels:

    app: demo

spec:

  volumes:

    - name: task-pv-storage

      persistentVolumeClaim:

        claimName: task-pv-claim

  containers:

    - name: task-pv-container

      image: nginx

      ports:

        - containerPort: 80

          name: "http-server"

      resources:

        limits:

          cpu: "1"

          memory: "512Mi"

      volumeMounts:

        - mountPath: "/usr/share/nginx/html"

          name: task-pv-storage

---

kind: PersistentVolume

apiVersion: v1

metadata:

  name: task-pv-volume

  labels:

    type: local

    app: demo

spec:

  storageClassName: manual

  persistentVolumeReclaimPolicy: Recycle

  capacity:

    storage: 10Gi

  accessModes:

    - ReadWriteOnce

  hostPath:

    path: "/mnt/data"

---

kind: PersistentVolumeClaim

apiVersion: v1

metadata:

  name: task-pv-claim

  labels:

    app: demo

spec:

  storageClassName: manual

  accessModes:

    - ReadWriteOnce

  resources:

    requests:

      storage: 3Gi

EOF
You can verify that the NGINX Pod, PVC, and PV have been created successfully by running the following command:
kubectl get pods,pvc,pv -l app=demoThe following screenshot shows the output of the command:

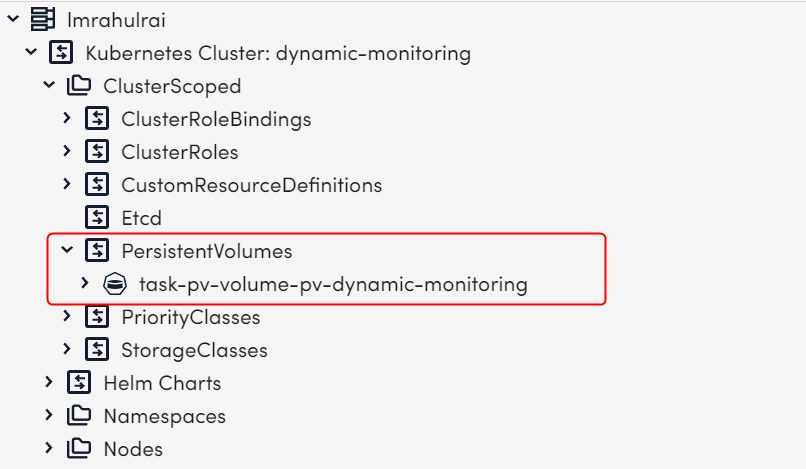
The screenshot above shows that the NGINX Pod, PVC, and PV have been created successfully. The PVC is in the Bound phase, which means that the PV is actively being used. Now, let’s verify that the PV is being monitored by LM Container. To do this, navigate to the LogicMonitor portal and check the monitored resources. You should see that the PV is being monitored by LM Container, as shown in the following screenshot:
You can now delete the NGINX Pod and PVC by running the following command, which will leave the PV in the Available phase:
kubectl delete pod task-pv-pod

kubectl delete pvc task-pv-claim
The following screenshot shows the status of the PV after deleting the NGINX Pod and PVC:

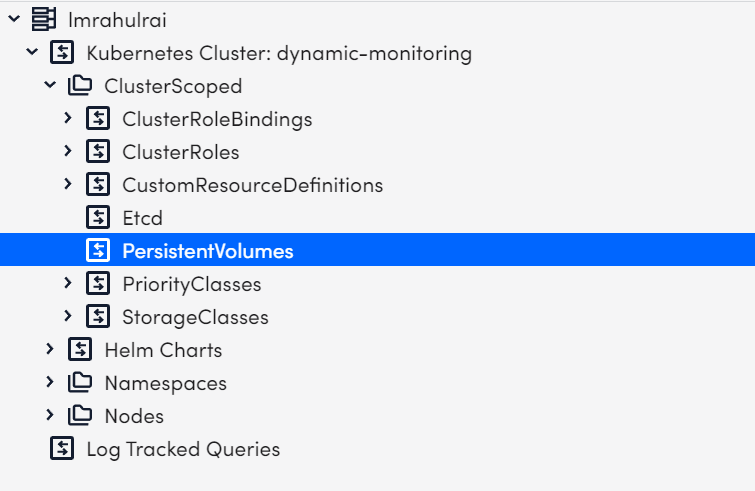
You can now verify that the PV is no longer being monitored by LM Container. To do this, navigate to the LogicMonitor portal and check the monitored resources. You should see that the PV is no longer present in the resource list, as shown in the following screenshot:
This is just one example of how dynamic property filtering can help you optimize your monitoring costs. You can apply dynamic property filtering to any Kubernetes resource to monitor it only when it is in use, allowing you to save on monitoring costs.
Conclusion
Dynamic property filtering in LM Container provides significant financial benefits, enabling customers to optimize their monitoring costs and pay only for what they need. By implementing this feature in your Kubernetes environment, you can enhance your monitoring efficiency while keeping monitoring costs under control. As the world of containerization and Kubernetes orchestration continues to grow, LogicMonitor remains committed to delivering innovative solutions to help you stay ahead of the curve.