
LogSource Configuration
Last updated on 25 September, 2023Disclaimer: The LogSource LM LogicModule is currently in open Beta.
LogSource is an LM LogicModule that provides templates to enable logs and configure the sending of log data for ingestion by LM Logs. LogSource helps you configure details about what logs to get, where to get them, and which fields should be considered for parsing.
Note: The following describes general steps to add and configure a LogSource. For information about configuration parameters for a specific type of LogSource, see configuration information for each type. For more information about the LogSource concept, see LogSource Overview.
Requirements
When using the LM Collector with a LogSource, the LM Collectors installed in your infrastructure must be version EA 31.200 or later. For information on how to upgrade a collector, see Managing Collectors.
Step 1. Adding the LogSource
Do the following to add a new LogSource:
- In the LogicMonitor navigation menu, select Modules.
- From My Module Toolbox, select Add
 .
. - In the Add window, select LogSource. The Add New LogSource window displays.
- Continue by configuring the LogSource as described in the following steps.
Note: Depending on the type of LogSource selected in the next step, you will see different sections for entering information. For example Exclude filters, Include Filters, Log Fields, and so on. The tabs at the top provide quick access to the different sections.
Step 2. Configuring the LogSource
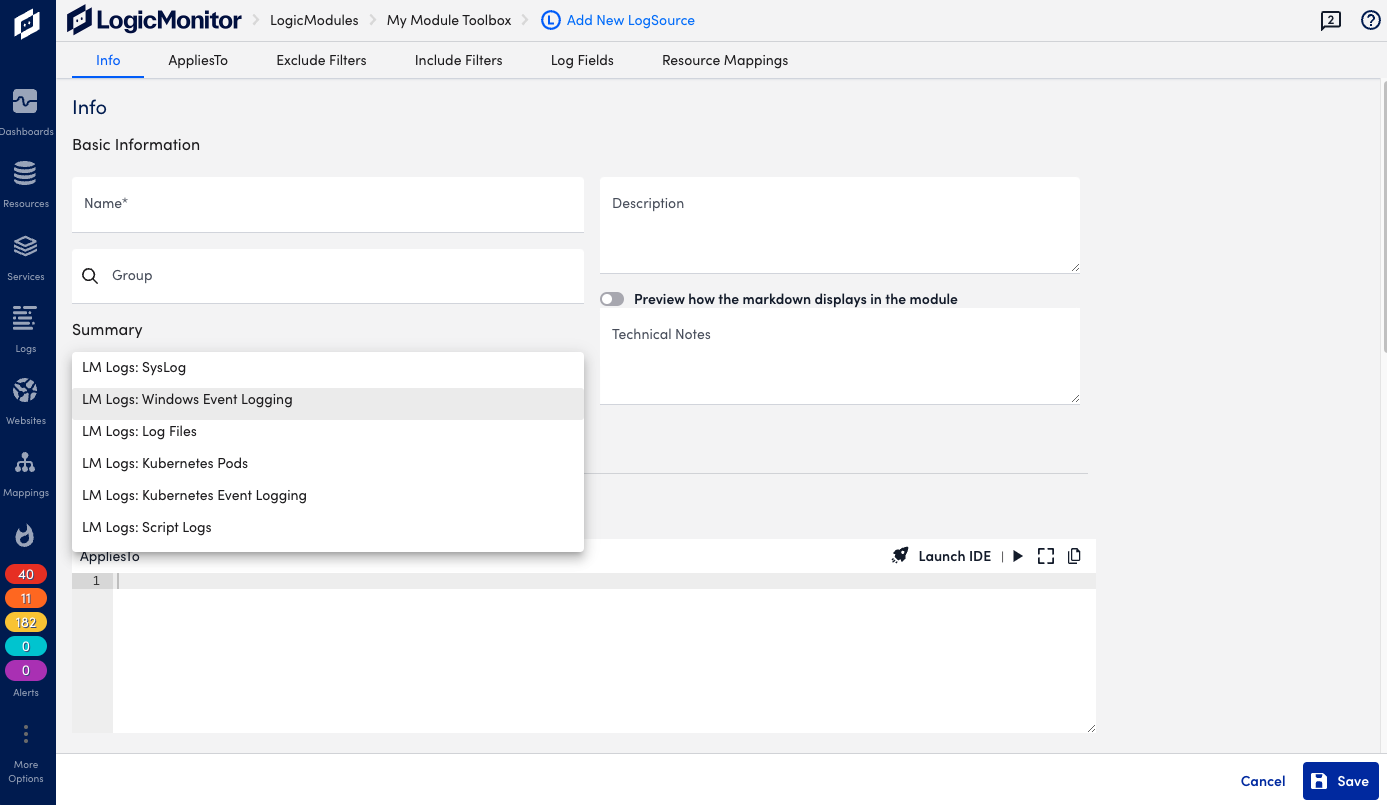
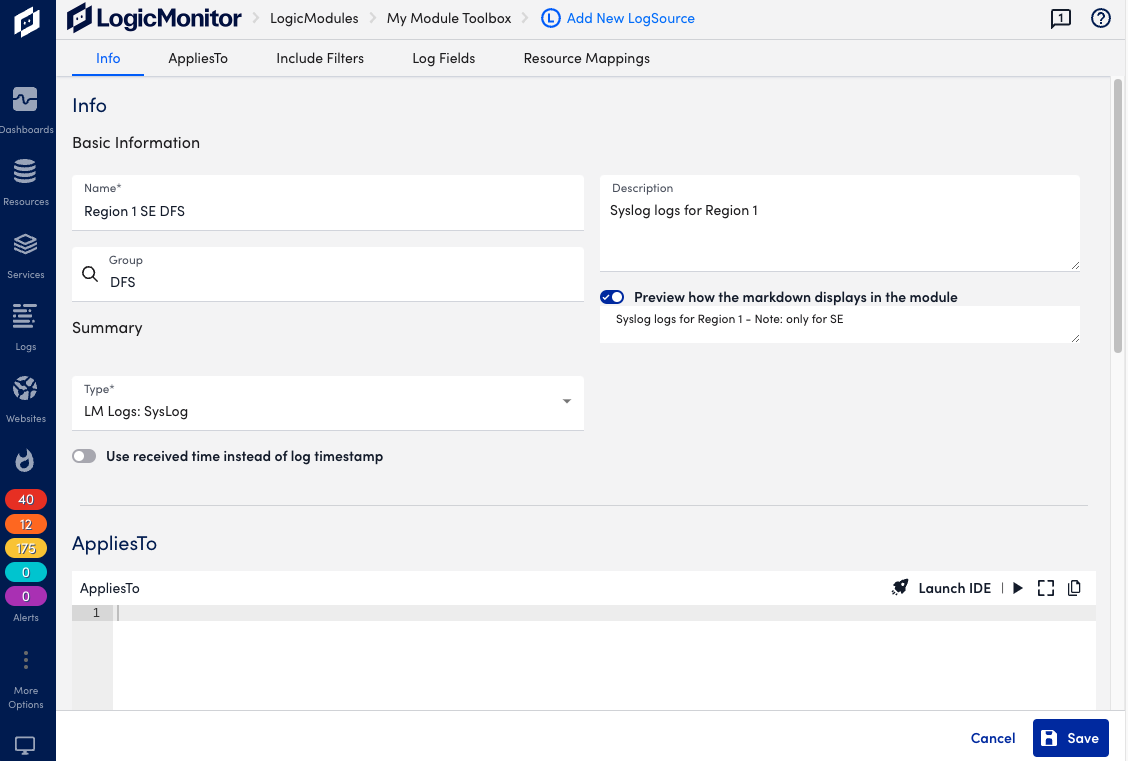
Basic Information
Provide general information about the LogSource, and select a type for it depending on the origin of the log data.
In the Info section, do the following:
- Name (required)—Add a descriptive name, this will be displayed in the list of logsources.
- Description and Technical Notes—Optional information about the LogSource.
- Group—The group under which the LogSource should be present. Select a LogSource group or create a new one. If no group is specified, the LogSource will be placed in “@ungrouped”.
- Preview how the markdown displays in the module—Toggle this to see how the information in technical notes will appear.
- Type (required)— Select the type of resource that the LogSource is applied to and continue the configuration of the rest of the applicable sections as described in the following.
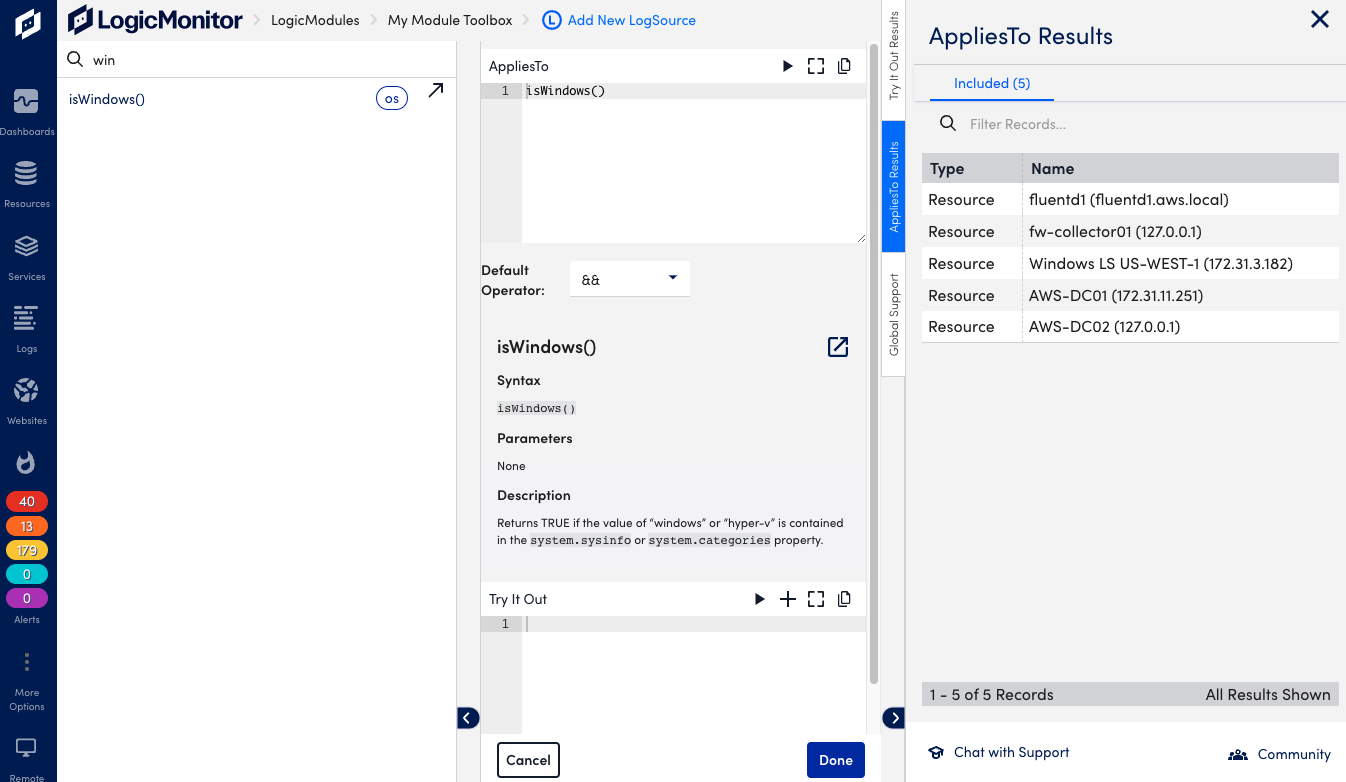
AppliesTo
Configure the resources that will use the LogSource.
In the AppliesTo section, do the following:
- Enter the resources to which the LogSource is applied.
- Optionally, select Launch IDE for guidance through the resource selection. Select Done to save the configuration.
- Optionally, select the Test AppliesTo icon to test the resource selection, and refine the criteria as needed.
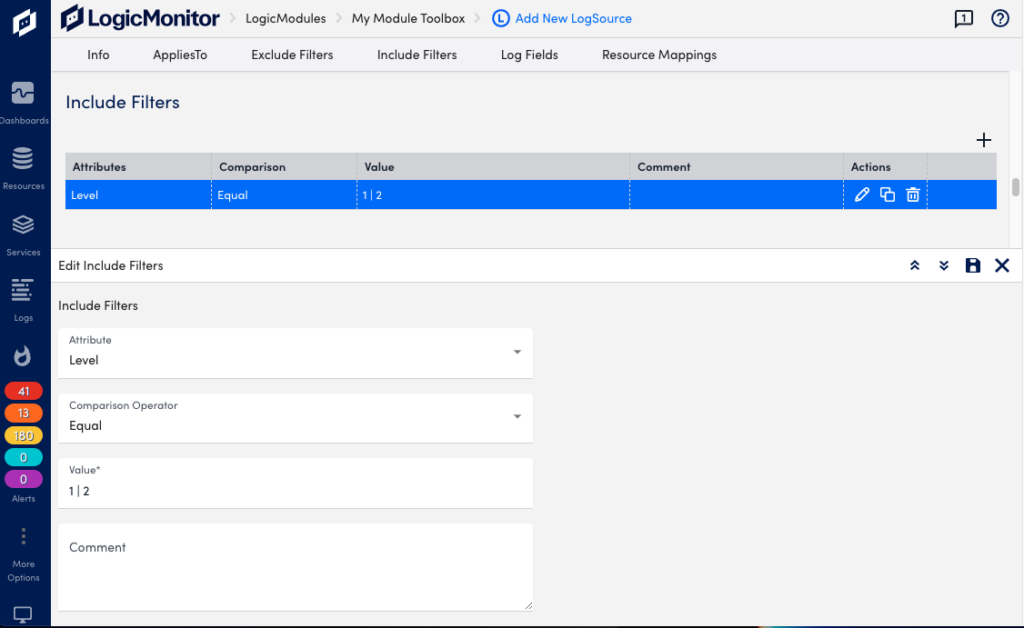
Exclude and Include Filters
Optionally, you can add filters to exclude or include events. If you add filters, events must meet the filter criteria in order to be detected and alerted on. Available filtering options depend on the selected LogSource type. If no filter is provided all log events will be included by default. If you add multiple filters they will be added (AND condition).
In the Exclude and Include Filters sections, do the following:
- Select Add Exlude Filter, or Add Include Filter.
- For Attribute, add the type of item to filter on, options depend on type of LogSource. Example: “Level” for a Windows Event Logging type of LogSource.
- Select a Comparison Operator, for example “Equal” or “RegexMatch”, depending on type of attribute.
- Add a Value, depends on attribute and comparison operator, for example “Warning”.
- Add an optional Comment.
- Select the Save icon to add the filter.
When defining the severity level to be included for incoming log messages, you can include multiple levels specified with a pipe separator. You can also use level numbers such as 1 for error, 2 for warning, and 3 for information.
Example: If you want to only include log messages for errors and warnings, you can set the filter with the attribute “Level”, comparison operator “In”, and value “1 | 2”.
As you’re defining filters, you can select Test AppliesTo to perform test runs to ensure events are filtered and captured as you intended. You can also use the testing capability before any filters are defined in order to return all messages from a device, and use this information to refine parameter values.
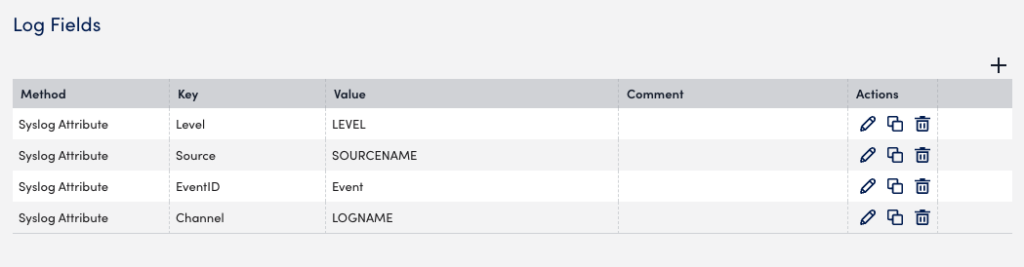
Log Fields
Optionally, you can configure Log Fields (tags) to include additional metadata to be sent with the logs. You can also add LogicMonitor resource properties as log metadata.
In the Log Fields section, do the following:
- Select Add Log Fields.
- For Method, add the method for collecting the metadata, options depend on type of LogSource. Example: “Windows Event Attribute” for a Windows Event Logging type of LogSource.
- Enter a Key, for example “Source”.
- Add a Value, for example “Source Name”.
- Add an optional Comment.
- Select the Save icon to add the log field.
Example: Log Fields configured for metadata.
Resource Mappings
This is required for some LogSource types and provides information about which resource the logs should map to. The settings define the resource properties to use for the collector device mapping. For more information see agent.conf Collector Settings.
In the Resource Mappings section, do the following:
- Select Add Resource Mappings.
- For Method, add the mapping method, for example “IP”.
- Add a mapping Key, for example “system.hostname”.
- Add a Value, depending on selected method.
- Add an optional Comment.
- Select the Save icon to add the resource mapping.
Example: Resource mapping in the following is equivalent of this collector configuration:
lmlogs.syslog.hostname.format=IPlmlogs.syslog.property.name=system.hostname

Note: With Portal version 187 and later, LogSource supports only RE2 compatible regex patterns which are stored in Filter/LogFieldTag/ResourceMapping section. Same validation is applied while updating an existing LogSource.
EA Collector 34.100 and later versions support processing of LogSources using RE2J. Collector supports backward compatibility for existing LogSources that have Java compatible valid regex pattern but which are not compatible with RE2.
Enabling the LogSource
When done adding information in the different sections, select Save to enable the LogSource (or update an existing one).
Step 3. Enabling Preferred Collectors
Note: This step is only needed if logs are sent to a different collector than the one monitoring the resource. If logs are sent to the same monitoring, you don’t need to configure a preferred logs collector.
The following describes how to define a Logs Collector Group and Preferred Logs Collector for each resource or resource group.
Warning: LogSource configurations supercedes collector configurations. For example, say you are sending logs to a Collector A resource using the traditional log collection method. Then you configure a new LogSource that applies to that resource. In this case the LogSource configuration is applied, which could cause potential resource mapping conflicts.
Enabling on a Resource
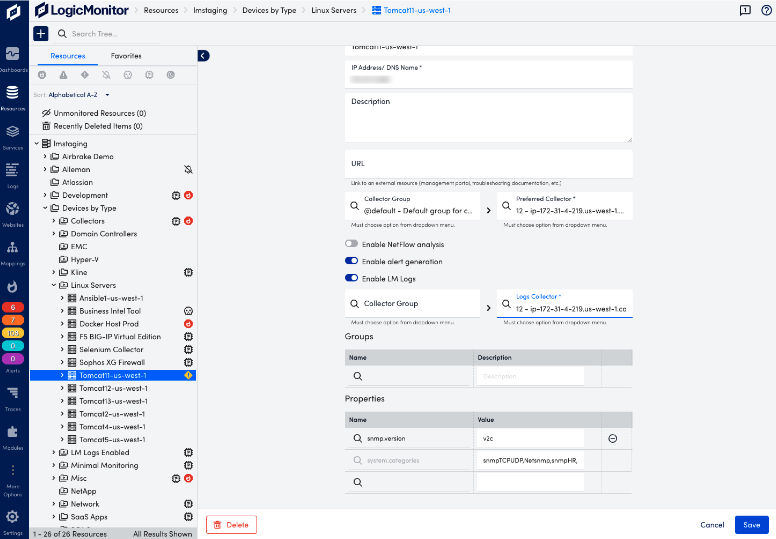
- Navigate to Resources and select the desired resource.
- For each resource, select the Manage Properties icon to open the Manage Resource view.
- Toggle Enable LM Logs to on.
- Select the desired Collector Group (optional) and the preferred Log Collector (required) from the drop-down, type in field to see available options.
- Select Save.
- Repeat the procedure for each resource you for which want to enable logs collection.
Enabling on a Resource Group
Note: Preferred logs collector configurations are not saved at Resource Group level. This means that if new resources are added to the group after the initial configuration, you must reapply the preferred collector to the resource group, or manually configure this for the new resource itself.
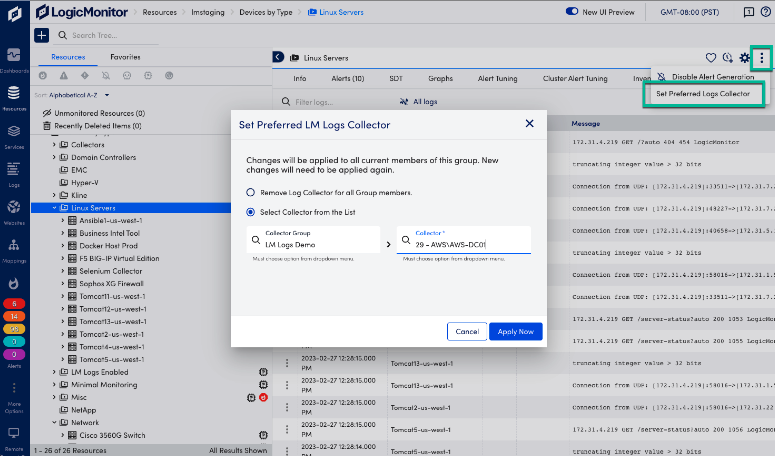
- Navigate to Resources and select the desired resource group.
- Select Set Preferred Logs Collector from the options menu in the upper right corner.
- Select the desired Collector Group (optional) and the preferred Log Collector (required) from the drop-down, type in field to see available options.
- Select Apply Now to update the configuration.
Type-specific Configuration Parameters
For information about configuration parameters for a specific type of LogSource, see the following: