
Configuring the Azure Active Directory SSO Integration
Last updated – 24 September, 2025
Overview
Before you can use the Microsoft Azure Active Directory (AD) IdP for Single Sign On (SSO), you must add the LogicMonitor app to Azure AD and configure the SSO integration.
Adding the LogicMonitor App to Azure AD
- Sign in to the Azure portal and navigate to Azure Active Directory.
- On the left navigation pane, select Enterprise applications and then select All applications.
- Select New application.
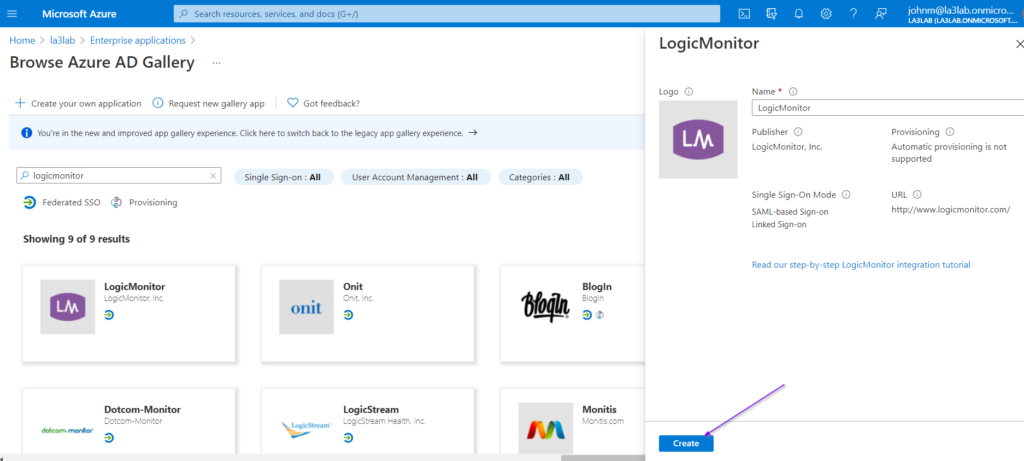
- From the Browse Azure AD Gallery page, enter “LogicMonitor” in the Search application field.
- Select LogicMonitor from the results and then click Create.
The app is added to your tenant.
Configuring Azure AD SSO for LogicMonitor
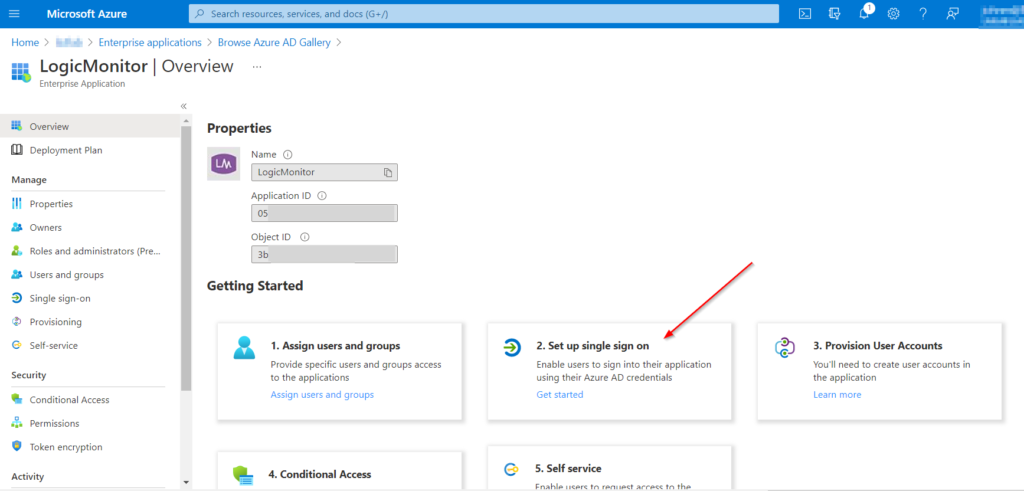
- In the Azure portal, navigate to the LogicMonitor app you just added.
- Click Set up single sign on.
- From the Users and groups page, add the users or user groups that will use SSO to log in to your LogicMonitor portal.
- Select SAML as the single sign on method.
- From the Basic SAML Configuration pane, click Edit.
- Enter the following information:
- Identifier (Entity ID)—The URL of your LogicMonitor portal
- Reply URL (Assertion Consumer Service URL)—The following URL, replacing “yourportalname” with the correct name of your LogicMonitor portal: https://yourportalname.logicmonitor.com/santaba/saml/SSO/
- Sign on URL— For more information, see the Entering the Sign on URL section.
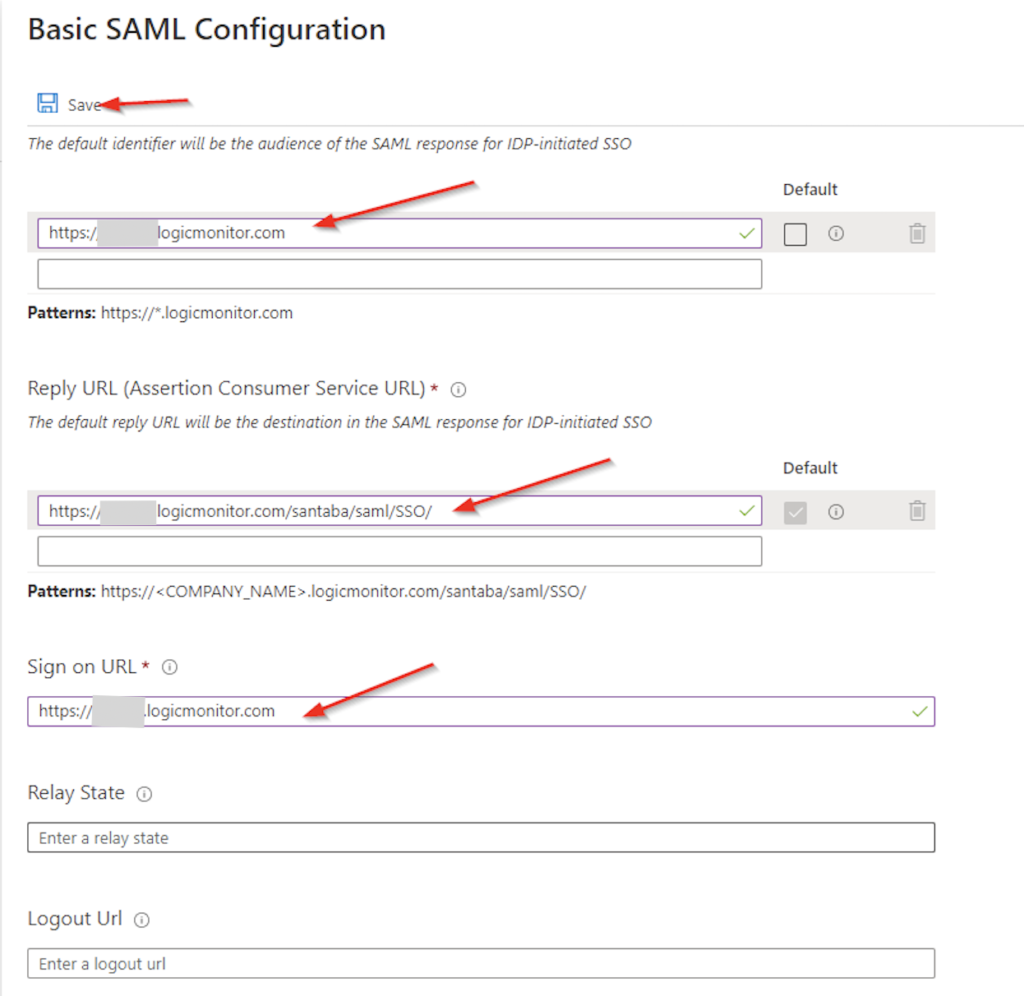
- Click Save.
- Select the User Attribute & Claims.
- Select Add a group claim.
- Select the group options. For information on group options, see Add group claims to tokens for SAML applications using SSO configuration.
- You can configure group claim to include the group display name for the cloud-only groups. For more information, see Emit cloud-only group display name in token.
- Click Save.
- Download the Federation Metadata XML file.
For information on how to configure SSO if you are using Microsoft Azure Active Directory (AD) IdP, see Single Sign On.
Entering the Sign-On URL
Use case 1: Disabled Multi Idp Support
If you have disabled the Multi Idp support option, enter one of the following URLs in the Sign-on URL field:
https://COMPANYNAME.logicmonitor.com/santaba/saml/login?userDomain=&url=
or
https://COMPANYNAME.logicmonitor.com/santaba/saml/login
or
https://COMPANYNAME.logicmonitor.com/santaba/saml/login?userDomain=USERDOMAIN&url=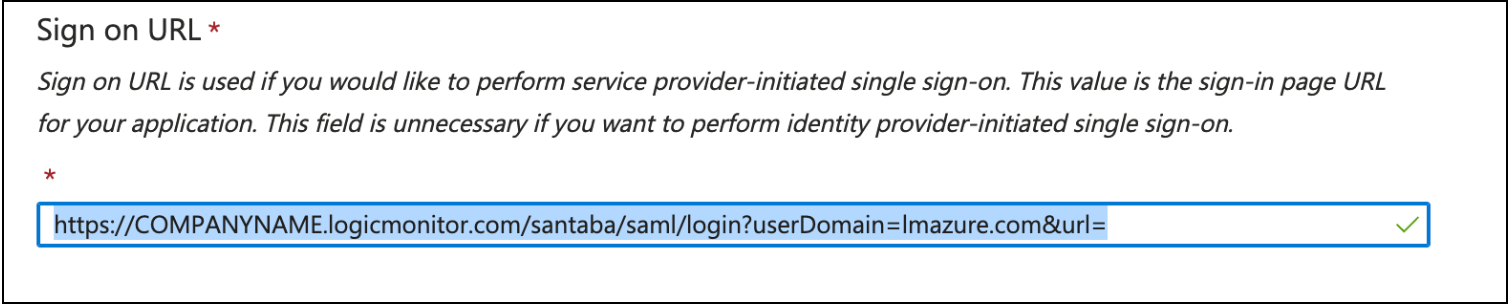
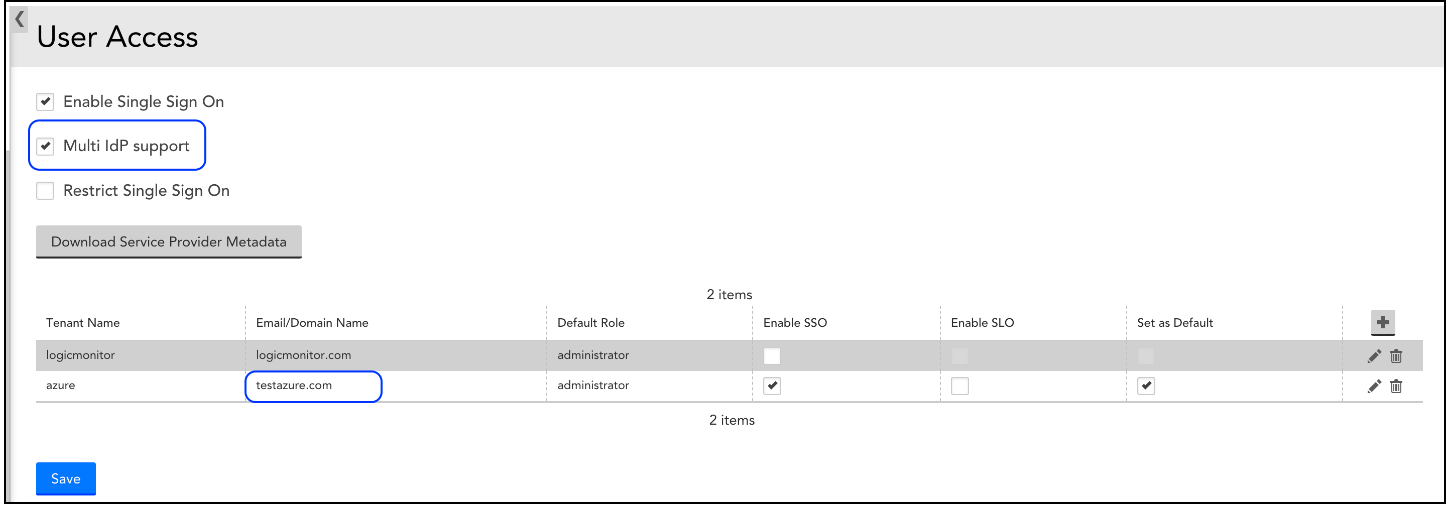
Use case 2: Enabled Multi Idp Support
If you have enabled the Multi Idp support in Settings > User Access > Single Sign On. Enter the following URL in the Sign-on URL field:
https://COMPANYNAME.logicmonitor.com/santaba/saml/login?userDomain=USERDOMAIN&url=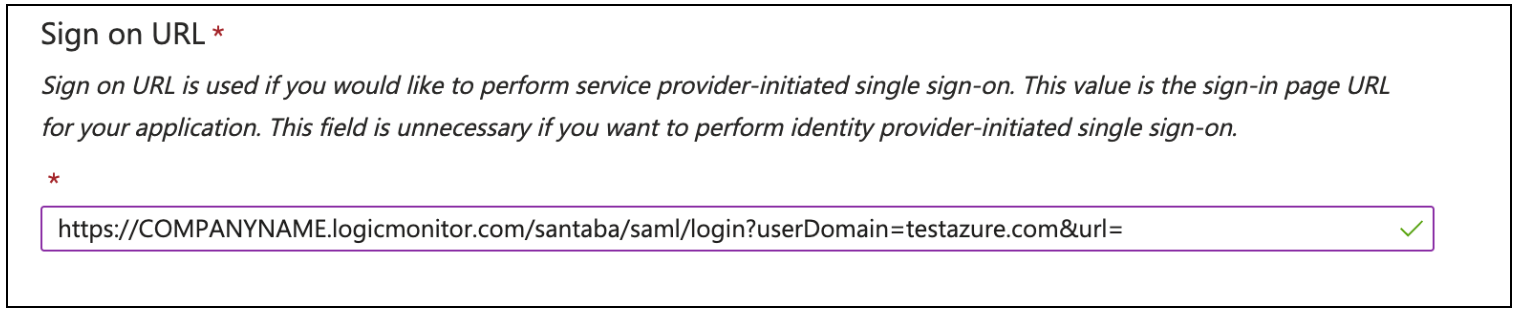
Note: The <userDomain> must match with the domain name mentioned in the LogicMonitor SSO configuration.
Configuring LogicMonitor SSO for Azure AD
- In the LogicMonitor portal, navigate to Single Sign On from the Settings menu.
- Select the Enable Single Sign On checkbox.
- Select a role from the Default Role Assignment dropdown menu.
- From the Identity Provide Metadata, click Upload and select the XML file you downloaded in the previous section.
- (Optional) To force users to authenticate using SSO, select the Restrict Single Sign On checkbox.
- (Optional) Select a number of days to allow users to remain signed in for.
- (Optional) Enable Single Logout (SLO).
- Click Save.
Testing the Integration
- In the Azure portal, select Single sign on from the left navigation pane.
- From the Test single sign on with LogicMonitor panel, click Test.
- Select Sign in as someone else.
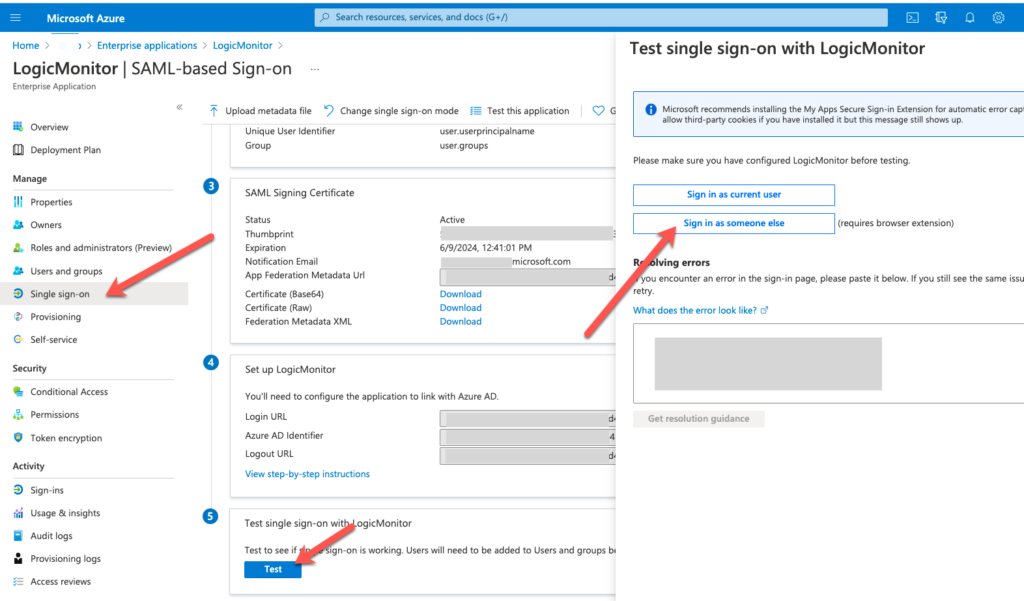
- When prompted, log in as a user who was assigned the LogicMonitor app in Azure AD.
If the integration was configured correctly, the user is logged in to the LogicMonitor portal and a new user is created in LogicMonitor with the default role you selected in the previous section.
