
Managing a Role
Last updated - 09 July, 2026
To manage an existing user, do the following:
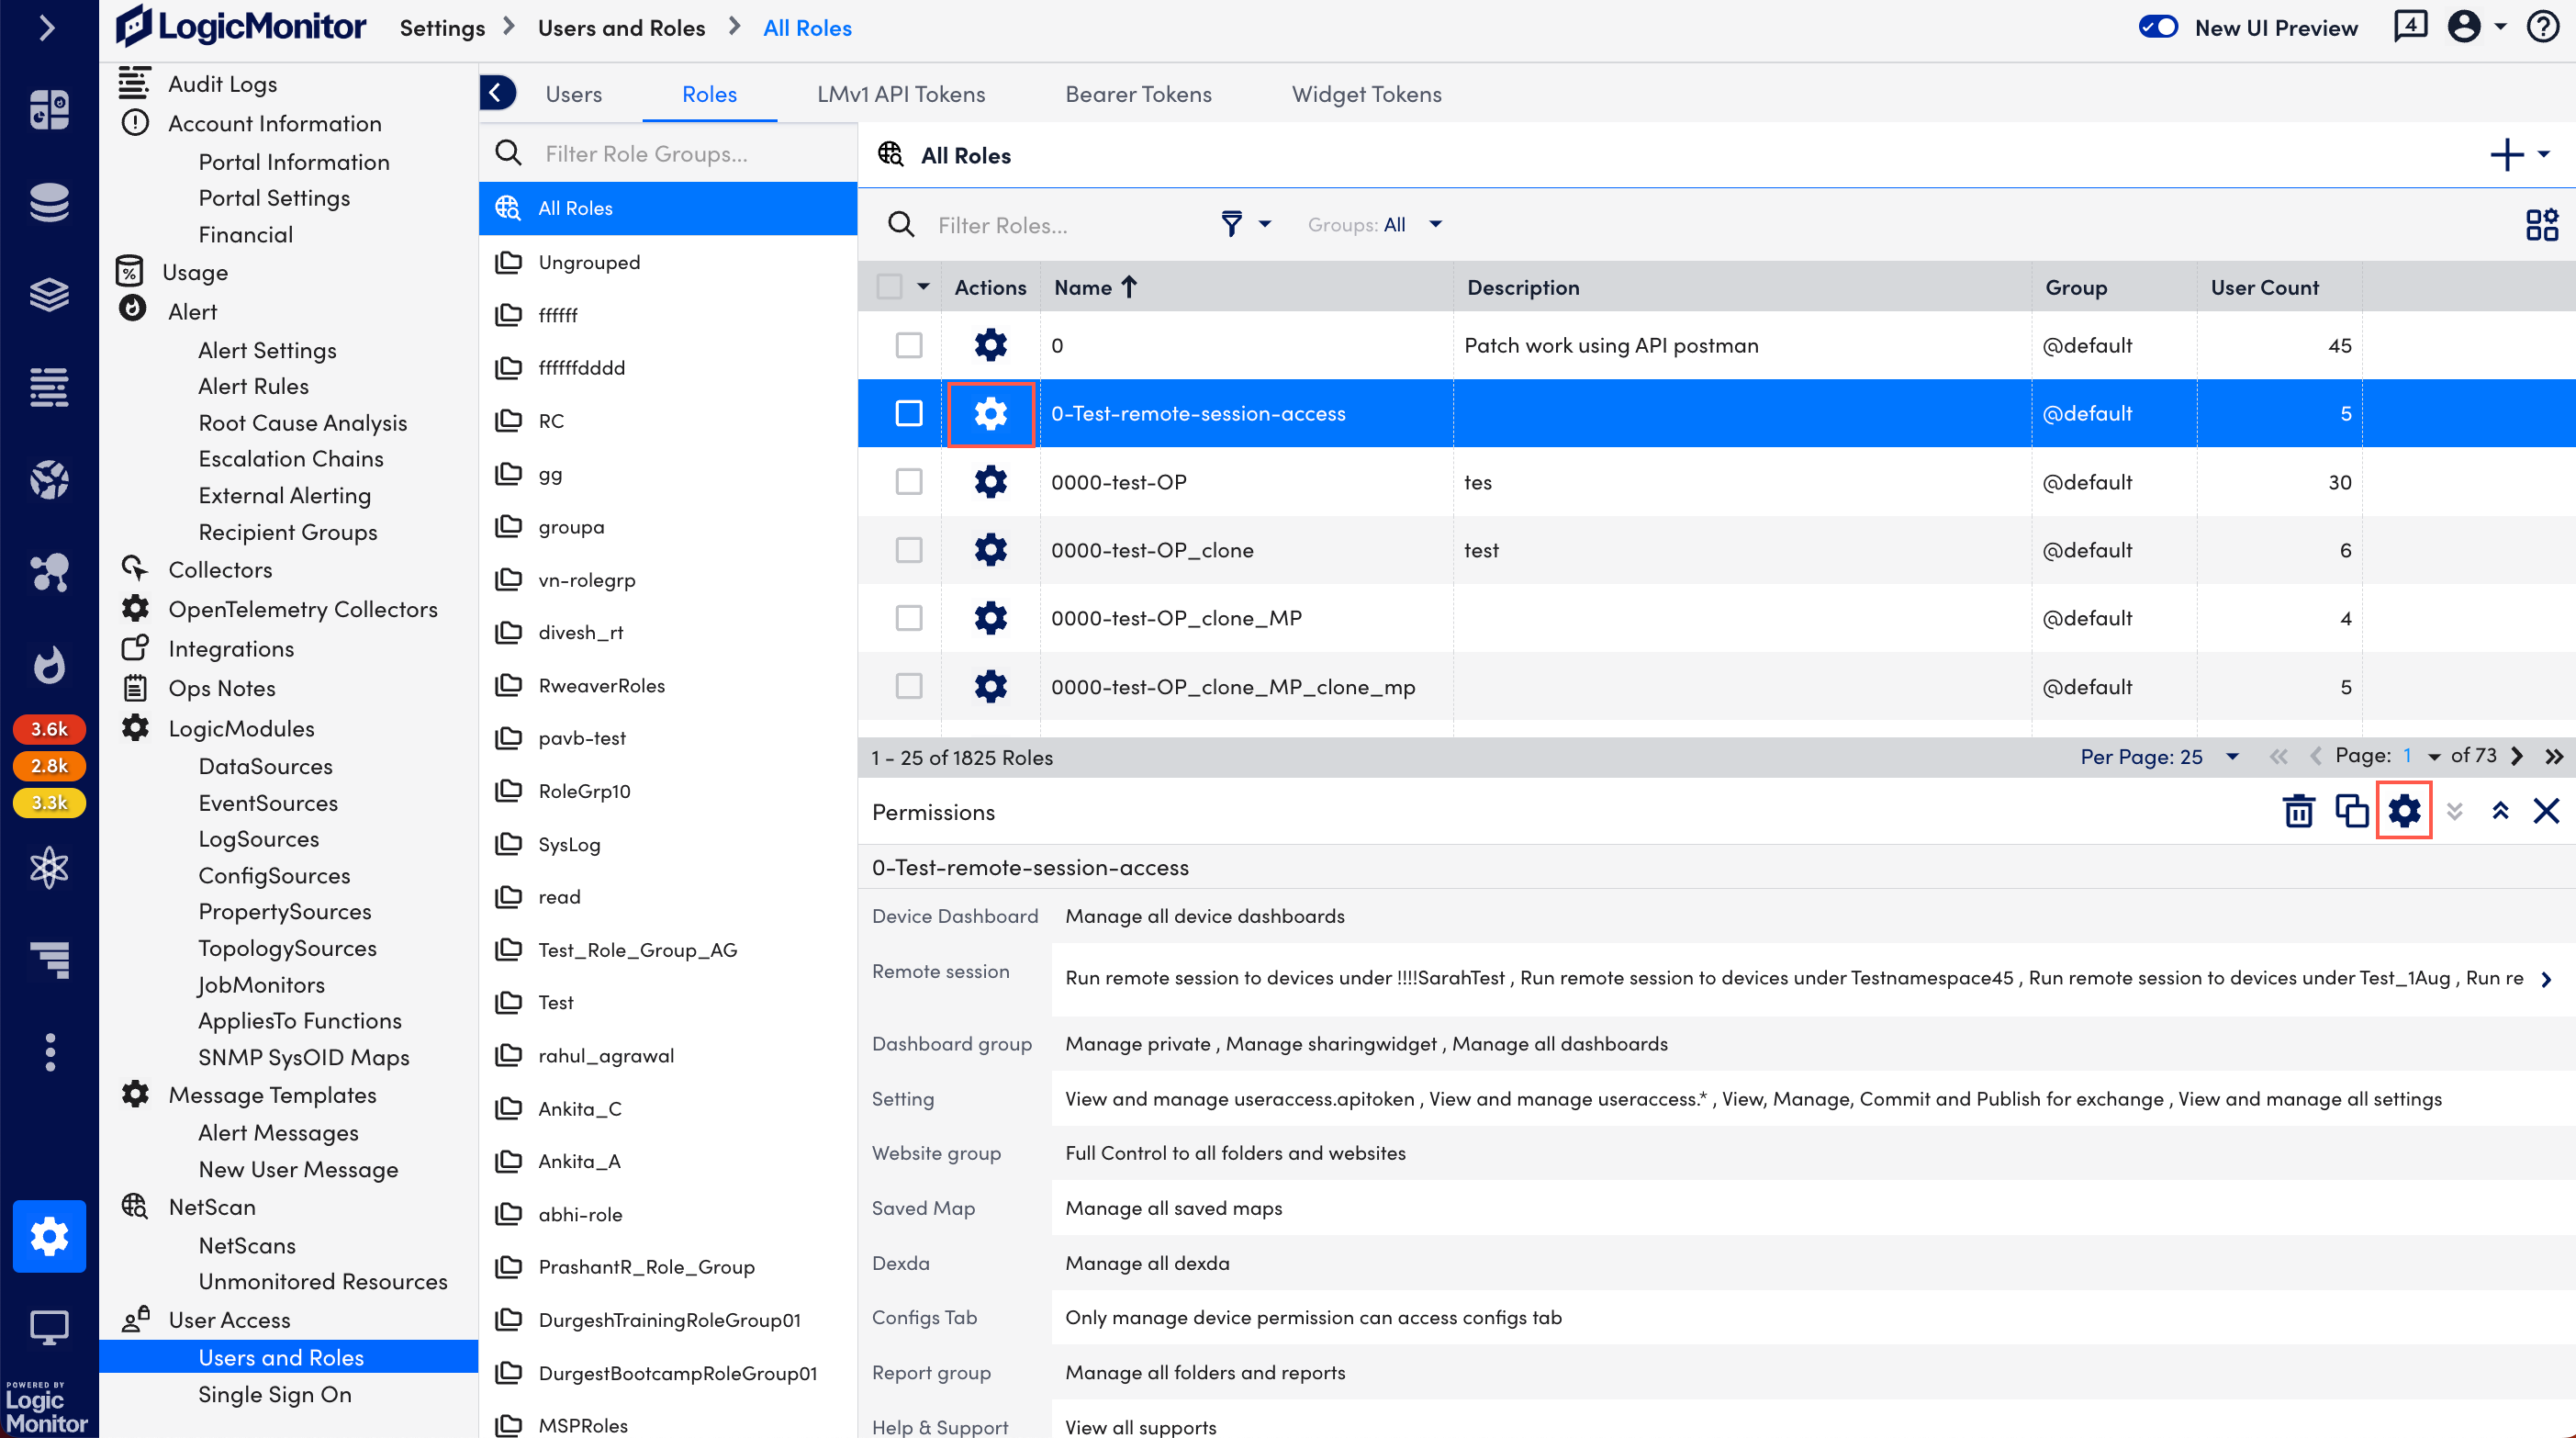
- Navigate to Settings > Users and Roles > Roles. All users are nested in group(s) and listed in table form.
- From the Actions column, select the Manage icon corresponding to the role you want to manage. The role details appears.
- Edit the details you want and select Save.
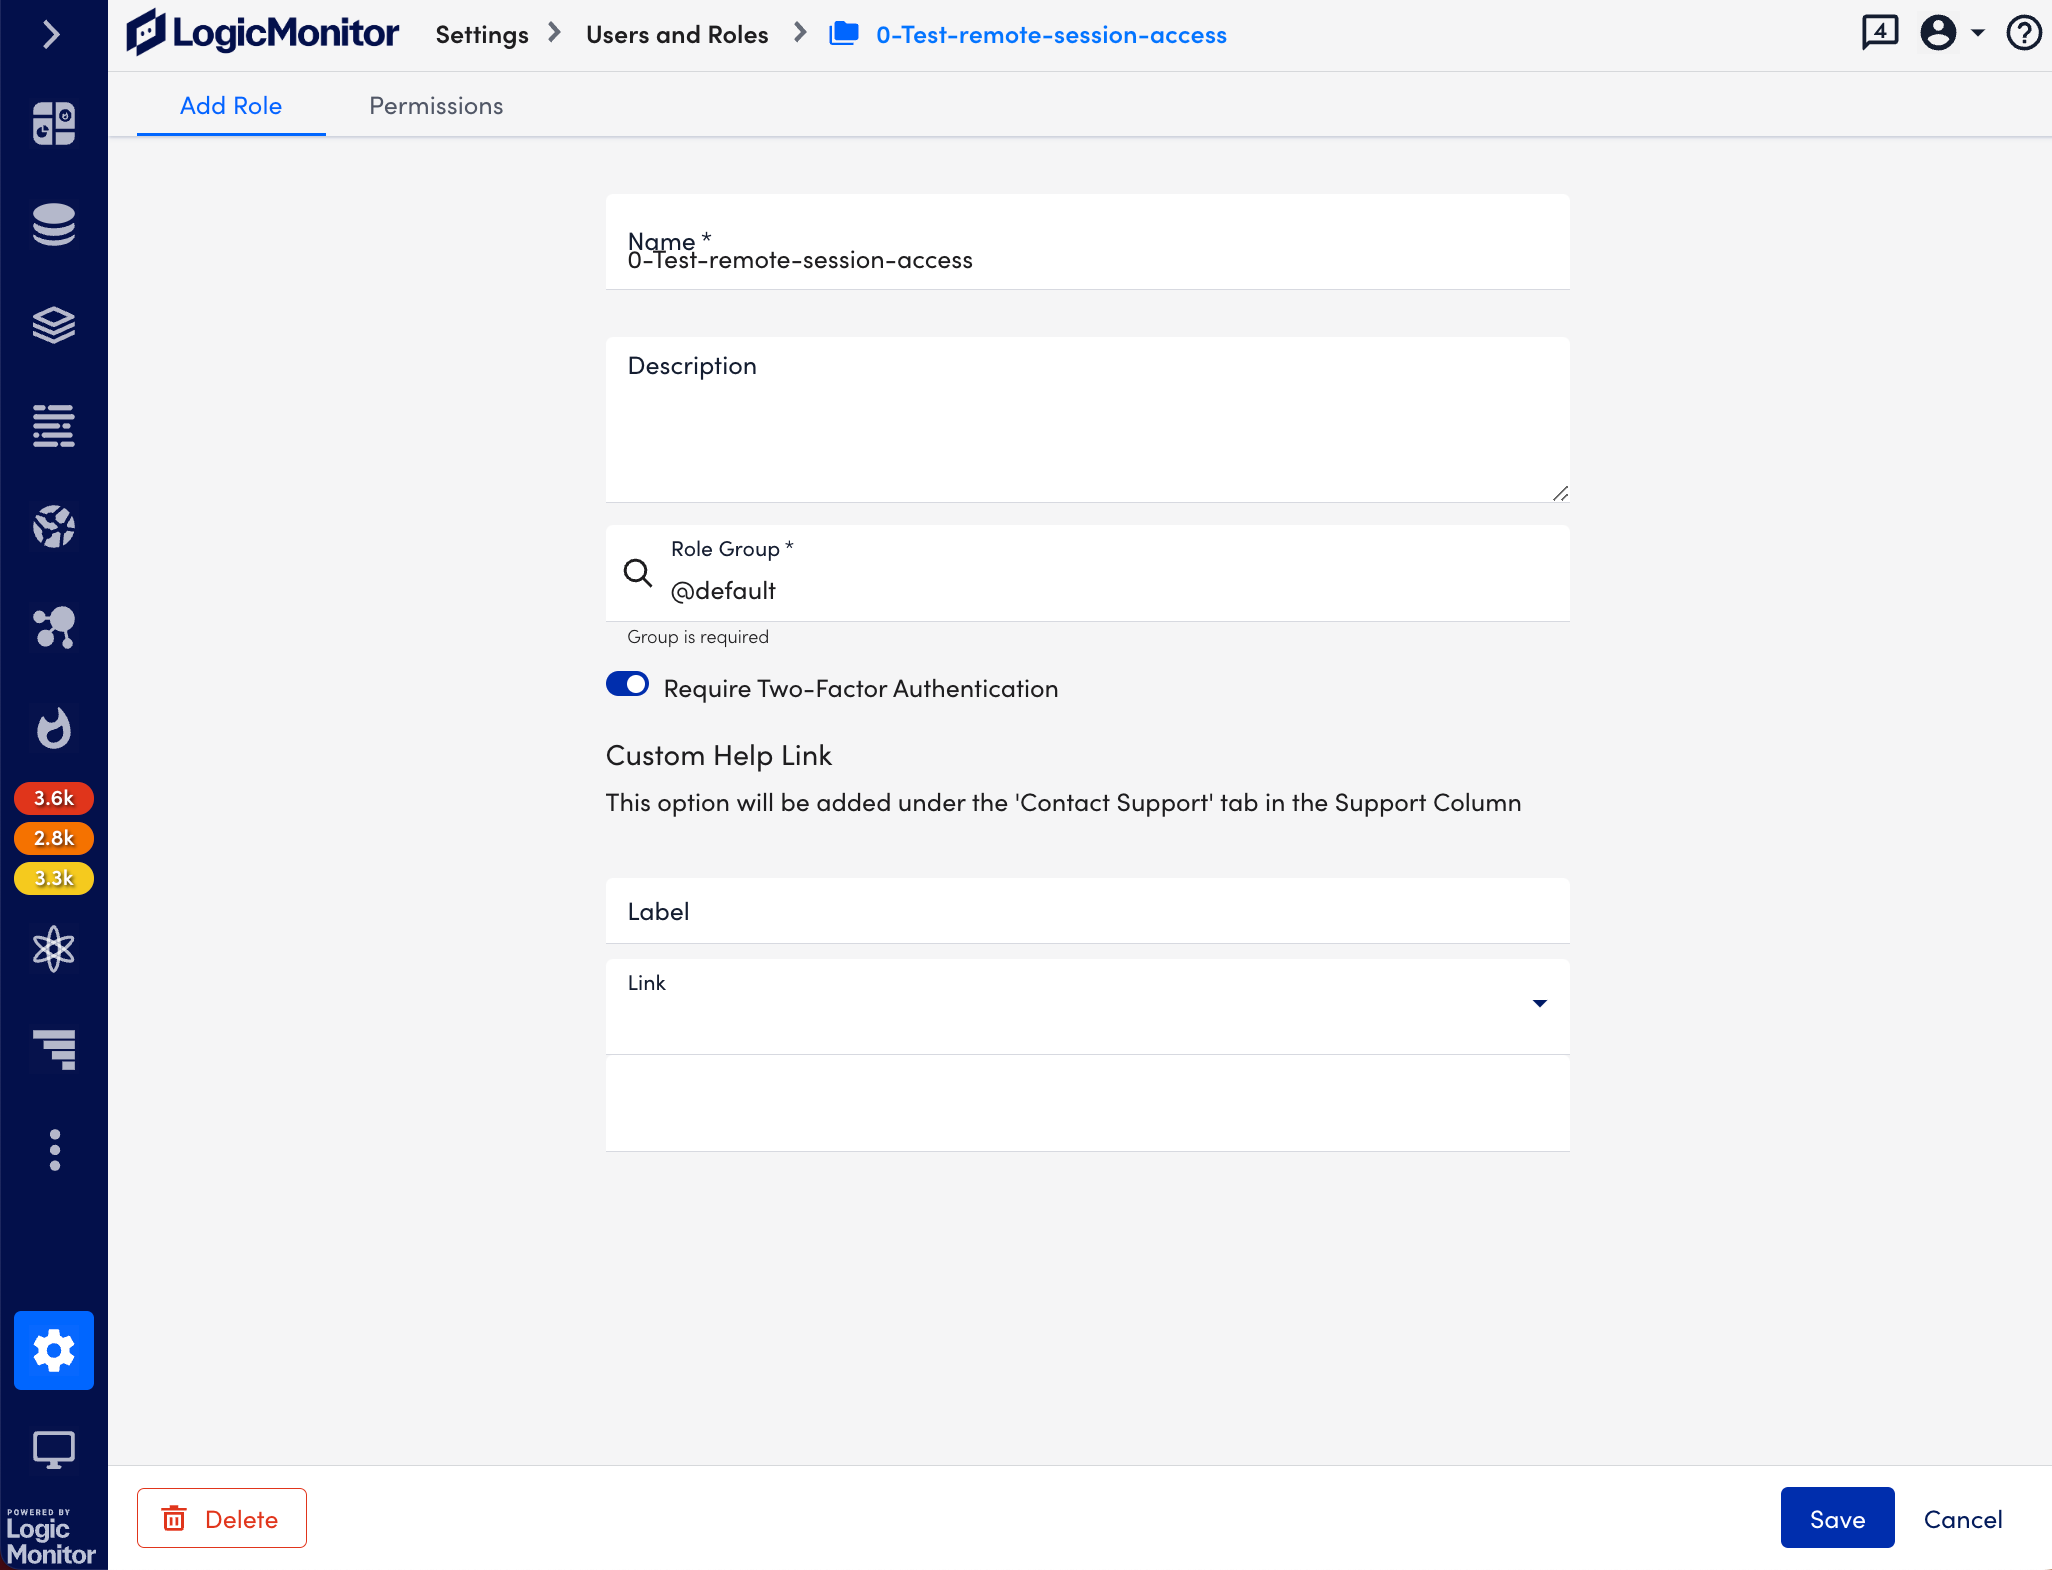
- If you want to delete the role, select Delete.
Note: The out-of-the-box Administrator role is protected for newly created LogicMonitor portals and cannot be modified or deleted. Existing LogicMonitor portals are not affected and can continue to modify or delete this role.
Options available on Roles Page
From the roles page, you can:
- Filter roles. Restrict table display to one or more role groups using the “Groups” filter.
- Search roles. Search for roles using role name, group name, or role description.
- Log off users. Place a checkmark in the leftmost column of one or more roles and select the Logoff Users button to log off all users to which a role is assigned.
- Expand role details. Select the arrow to the left of a role to expand listing to include all permissions assigned to the role.
- View user count. The far right column displays the number of users the role is assigned to. You can get additional details on users assigned to a particular role by generating the Role Report.
- Edit, clone, or delete a role. Select the gear icon to open the Manage Role dialog. From this dialog, you can update the permissions assigned to a role, clone a role, or delete a role. If you update role permissions assigned to a user that is currently active in the platform, they will experience those updates as soon as they move to a new area of the product (i.e. a refresh takes place). You cannot delete a role that is currently assigned to one or more users.
- Manage role groups. Select the drop-down arrow to the right of a role group name to edit or delete the group.
