
Websites Default Settings
Last updated - 30 October, 2023
You can set default checkpoint and alert triggering settings for your websites using ![]() (Websites Defaults) located at the upper right corner of the Websites page. The checkpoint and alert triggering options are already filled in the Website Default Settings modal so that you can quickly apply them to any new Web Checks or Ping Checks.
(Websites Defaults) located at the upper right corner of the Websites page. The checkpoint and alert triggering options are already filled in the Website Default Settings modal so that you can quickly apply them to any new Web Checks or Ping Checks.
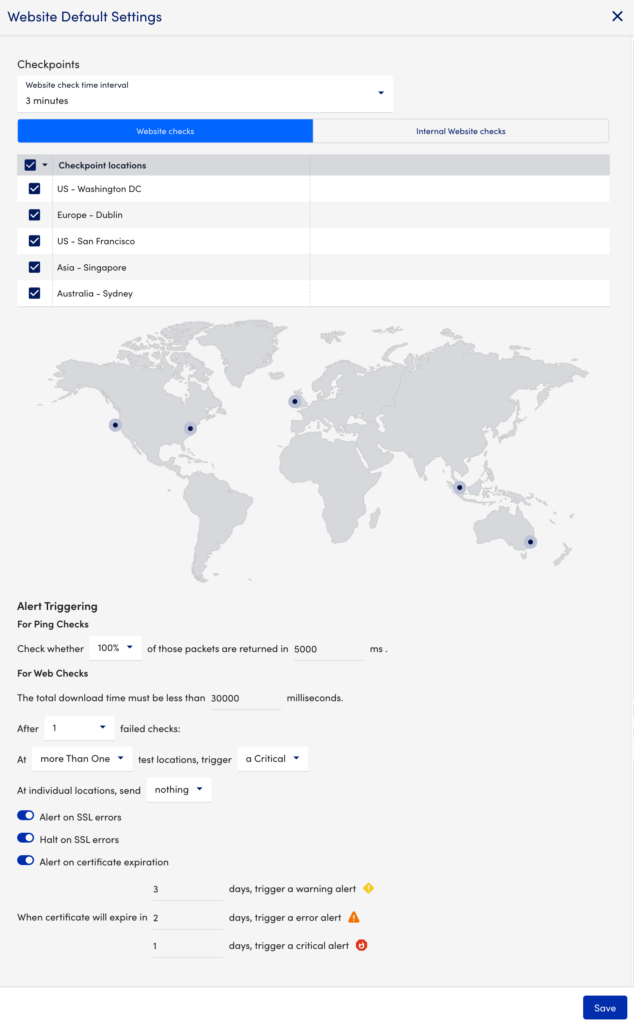
The following image displays the Website Default Settings modal.
Requirements for using Website Default Settings
You must have manage permission for all website groups to update Website Default Settings. For more information, see Roles.
Checkpoint Defaults
Checkpoint defaults can be set for both external LogicMonitor checkpoint locations and internal Collectors. For more information, see Adding a Web Check and Adding a Ping Check.
Note: The process of establishing website external checkpoint defaults is independent of the process of Disabling External Website Testing Locations Across your Account.
Alert Triggering Defaults
Defaults can also be established for settings that specify the conditions that must be met in order for a website alert to be triggered, as well as the severity of the resulting alerts. For more information, see Adding a Web Check and Adding a Ping Check.
