
LM Uptime Settings
Last updated - 17 July, 2026
You can configure default checkpoint and alert settings for your websites using settings directly in your LogicMonitor portal. These settings are pre-populated by default and can be modified to meet your requirements. Because they are centrally located, you can update and apply them to your Web or Ping checks. For example, you create two web checks named Website A and Website B. You can apply the default Uptime settings configured here to both the web checks.
Requirements for Adding Default Uptime Settings
To add default uptime settings, you need a LogicMonitor user with the “Manage” permission set for Uptime. For more information, see LogicMonitor Roles.
Adding Default Uptime Settings
- In LogicMonitor, navigate to Settings > Uptime.
- In the Checkpoints section, do the following:
- In the Uptime check time interval dropdown menu, select how often the designated checkpoints should check the website.
- Based on your requirements, select the Website Checks or Internal Website Checks tab, and select the required options.
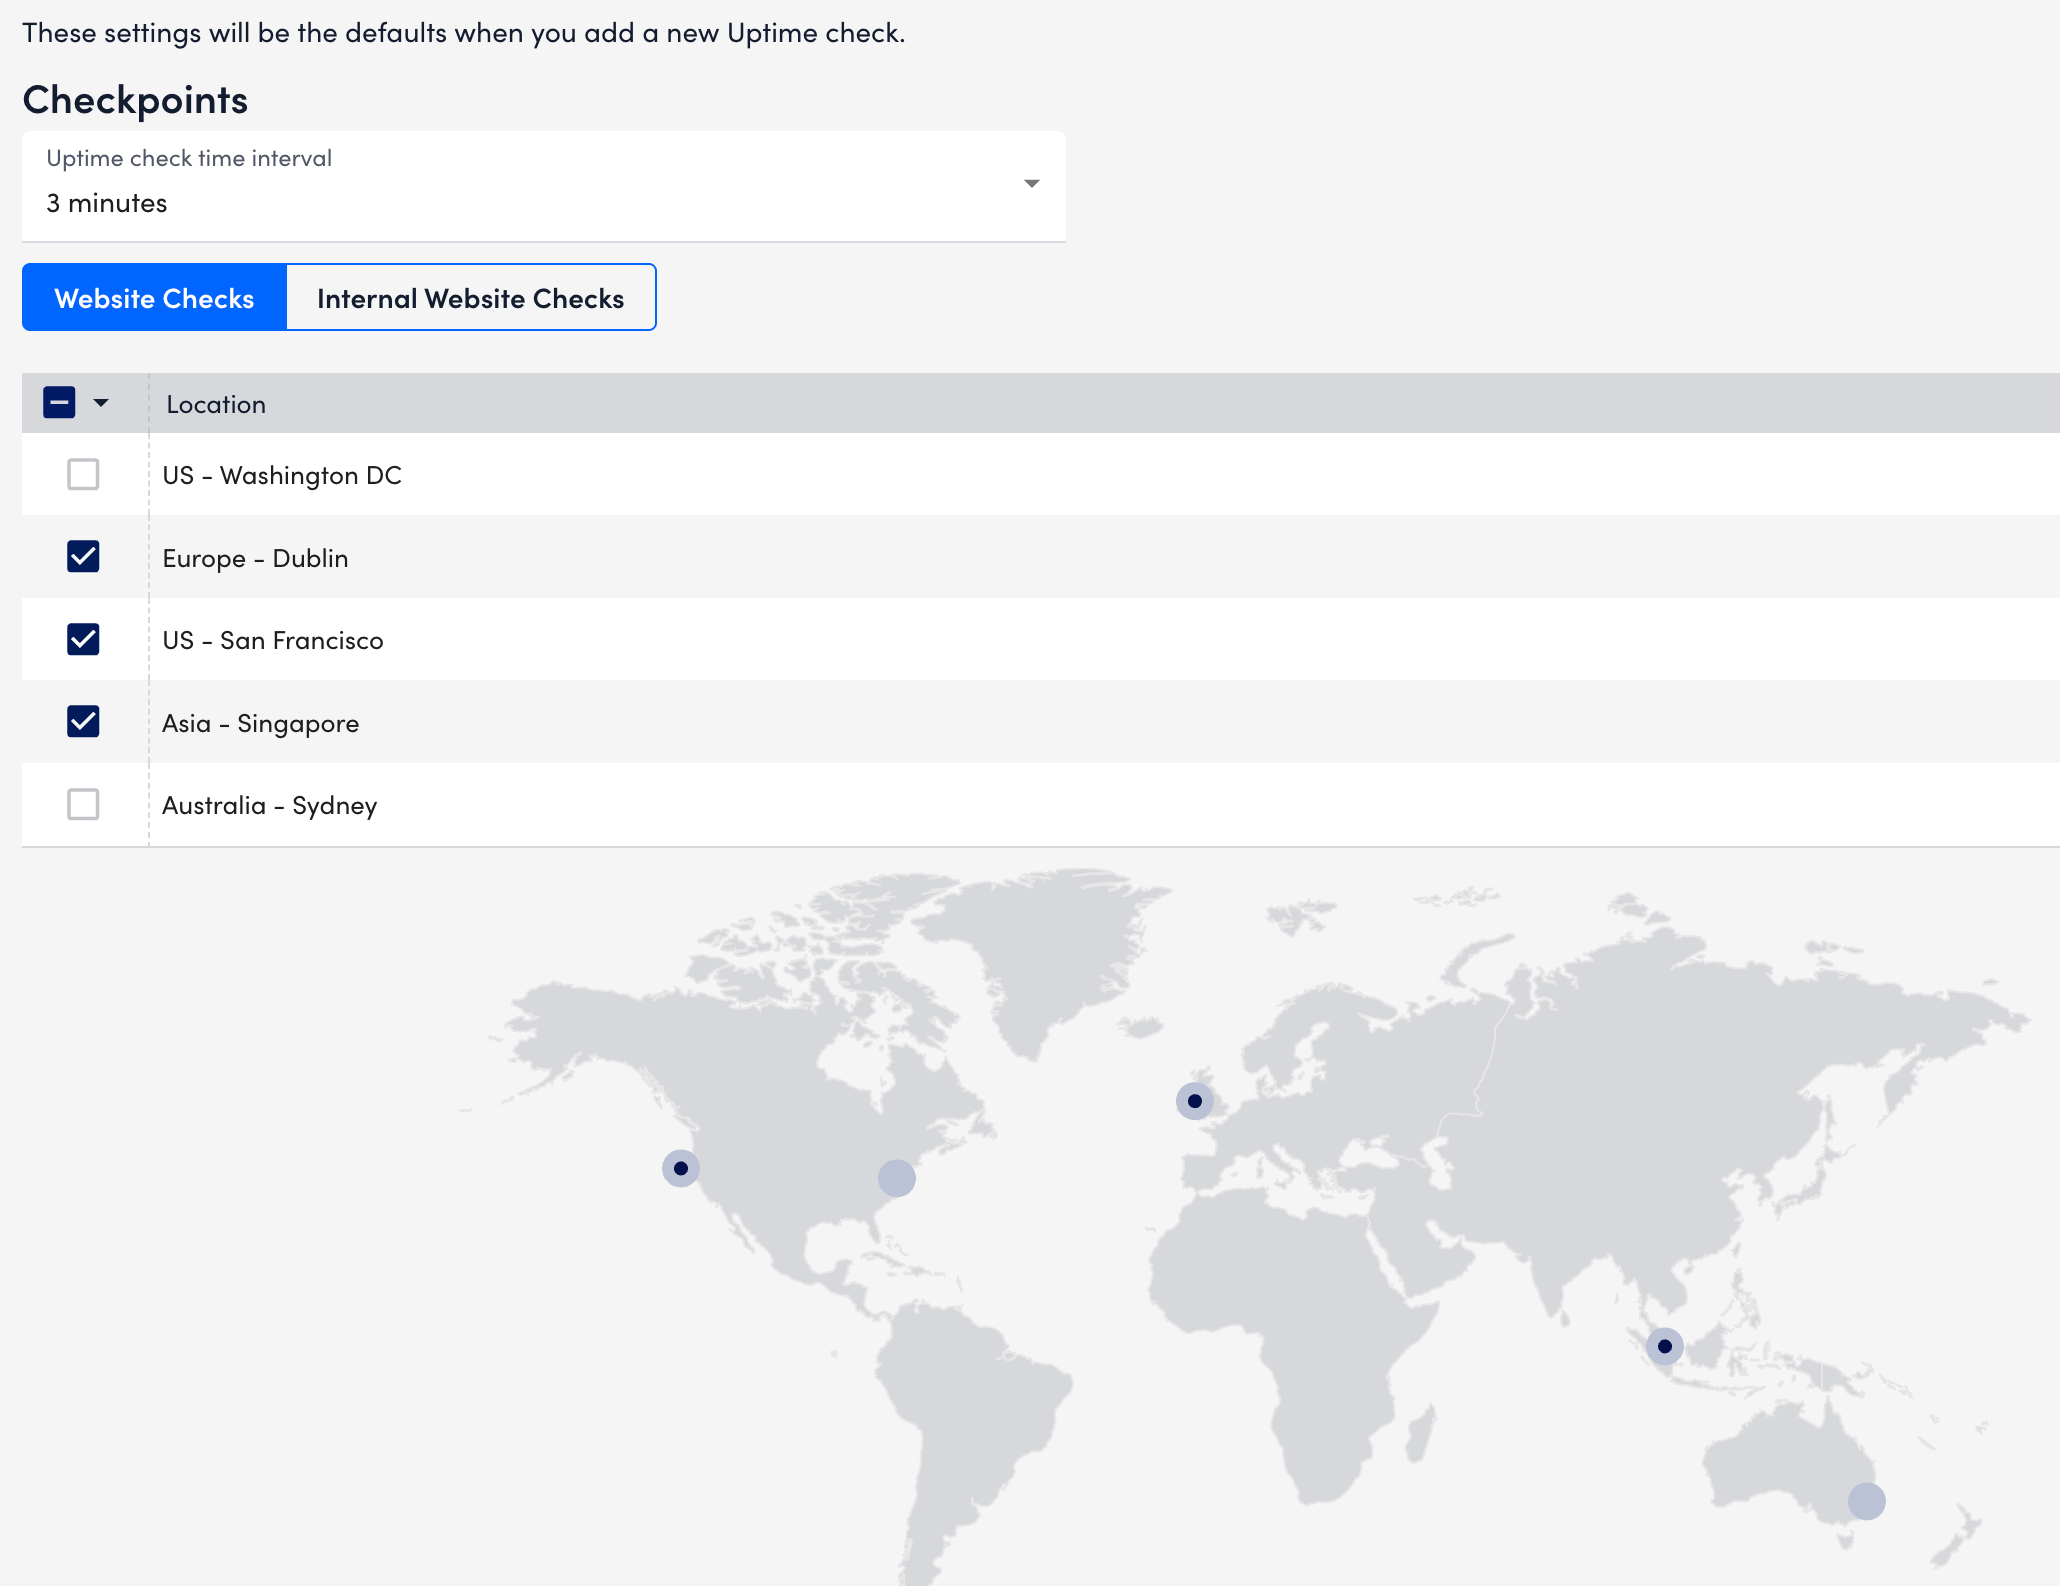
Note: LogicMonitor hosts five geographically dispersed checkpoints for Website Checks, from which the check can be sent. All the checkpoint locations are selected by default.
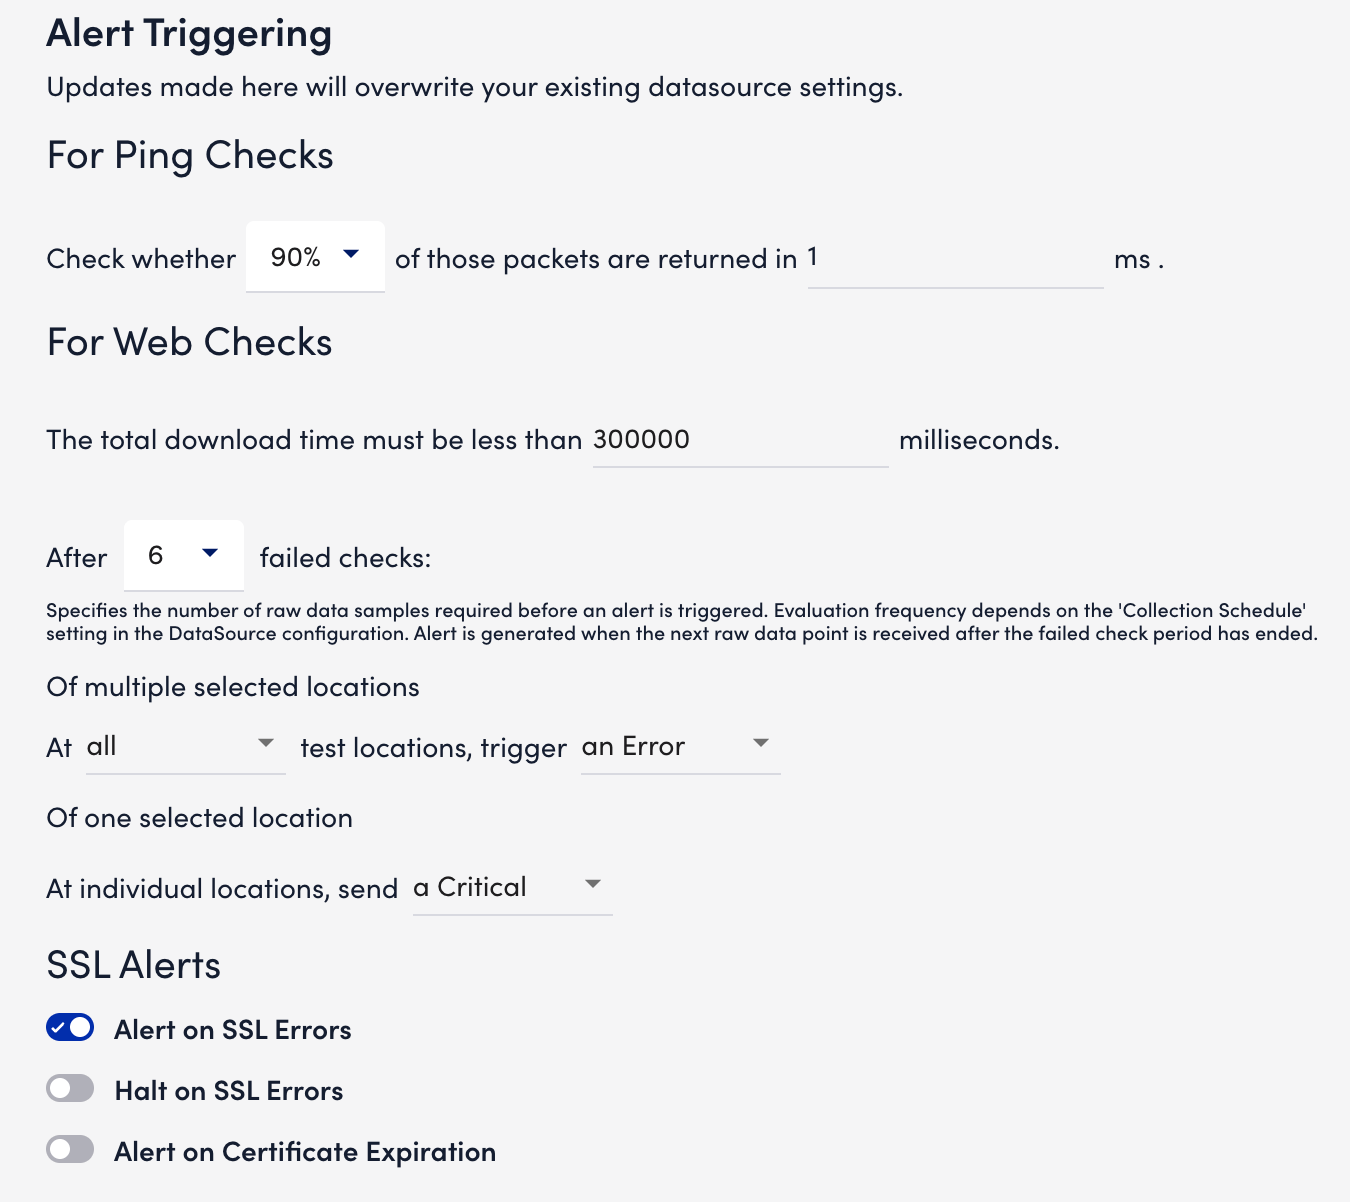
- In the Alert Triggering section, for Ping Checks, select the percentage of packets that must be returned and the designated time period (milliseconds) for the check to be deemed successful in Check whether (X)% of those packets are returned in (X) ms field.
Packets are sent one by one, with a delay of 250 milliseconds between each packet. For example, if you leave the default of five packets in the Number of Packets to Send field, it takes 1000 milliseconds (1 second) to deliver all five packets.
Note: The Check whether (X)% of those packets are returned in (X) ms and Number of Packets to Send fields operate independently of each other. If either criterion is not met, the check is considered a failed check. For example, any returned packet takes longer than the minimum allowed return time or the number of packets returned is less than the minimum percentage threshold.
- In the Alert Triggering section, for Web Checks, do the following:
- In the The total download time must be less than X milliseconds field, specify the number of milliseconds in which the website must load.
- Select the number of consecutive checks that must fail for an alert to be triggered from the After X failed checks dropdown menu. You can select the location and severity of multiple or one selected alert.
- In the SSL Alerts section, do the following:
- Toggle on the Alerts on SSL Errors switch to trigger alerts if a certificate experiences issues like unsupported algorithms, an untrusted or incomplete certificate chain, CName and HostName mismatch, or an expired certificate.
- (Optional) Toggle on the Halt on SSL Errors switch to stop the Web Check and send an alert accordingly if any issues are encountered.
This switch displays only when you enable the Alert on SSL Errors switch. - Toggle on the Alert on Certificate Expiration switch and enter the number of days in advance of expiration for which you would like to receive a corresponding alert for each severity level.
- Select Save.
The default LM Uptime settings are saved and can be applied when you create a new web or ping checks.
