
Text Widget
Last updated - 24 October, 2025
You can display text or images on your dashboard using the Text widget. You can create to-do lists for your team, post project or company updates, and display logos or other images on your dashboard you may find useful.
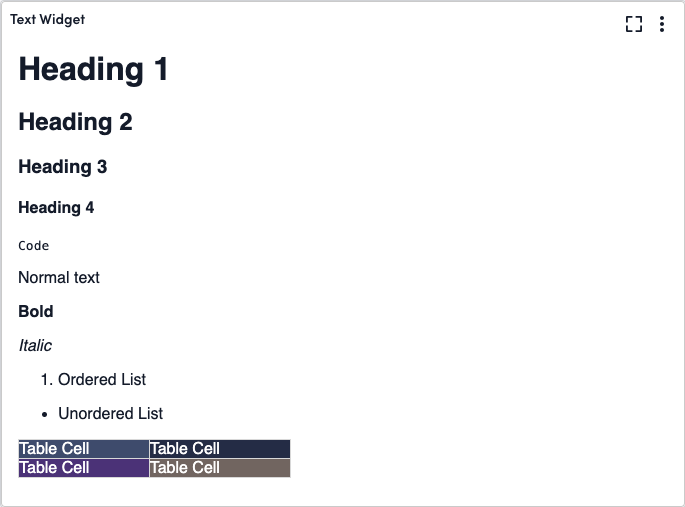
When you configure a Text widget, you use a text editor to enter plain text and leverage the formatting settings to apply paragraph styling such as heading levels or font styling (for example, bold). You can also add lists (numbered and bulleted), tables, and images. In addition, the text editor enables you to modify the text in HTML format.
Requirements for Configuring a Text Widget
To add an image to a Text Widget, the image must be in https and have a LogicMonitor endpoint.
To modify the text in HTML format, the HTML needs to be valid for the widget to render the content, including a string.
Configuring a Text Widget
- In LogicMonitor, navigate to Dashboards, select a current Dashboard or create new, and then add a Text widget.
For more information, see Dashboard Creation.
For more information, see Widget Creation. - Configure the Basic Information settings.
For more information, see Configuring Standard Widget Settings.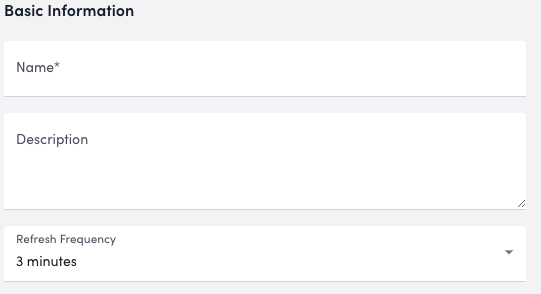
- In the Text Options settings, enter the content as needed, using the toolbar to format the content.
Alternatively, you can modify the content in HTML format by selecting Code View in the editor.
If you add a table, you can resize the cells in the table by dragging the rows and columns to the size you need.
If you add an image, additional settings are available for the image, such as alignment and alternative text. Select the image after you add it to access the additional settings.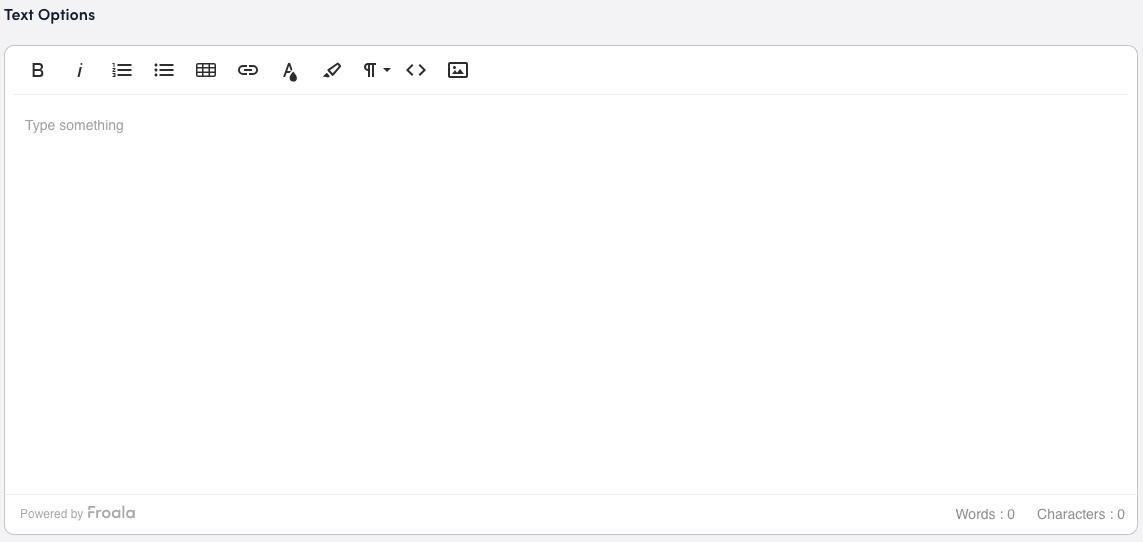
Note: A maximum of 65,535 characters are allowed in the Text Options field. If the HTML is broken, LogicMonitor displays an error in the content of the widget.
- Configure the Widget Color Schema settings.
For more information, see Configuring Standard Widget Settings. - Select Save.
The Text widget displays on your dashboard.
