Navigating the Integration Page
Last updated - 09 January, 2026
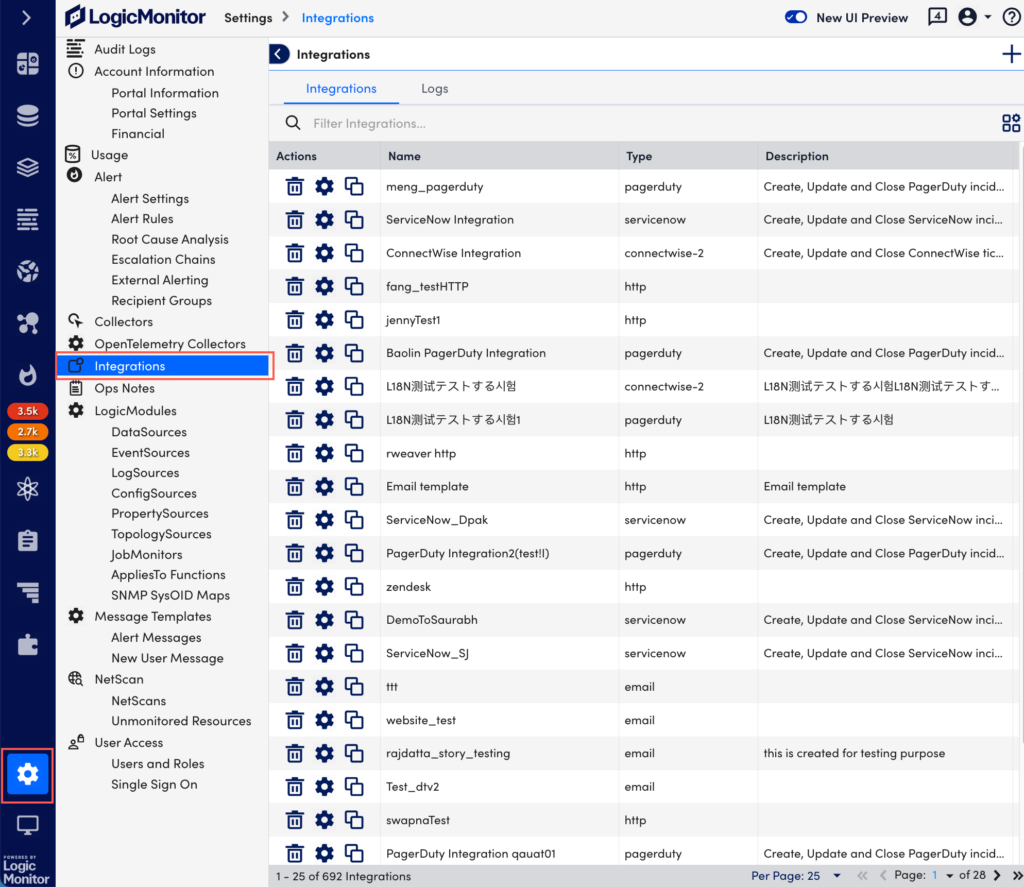
You can configure a new integration and also can manage the existing integrations using the Integrations page. On the Integrations page, the Integrations tab displays the list of existing integrations with the options to manage integrations and the Logs tab displays the list of logs available for the integrations.
To view the Integrations page, in LogicMonitor, navigate to Settings > Integrations. The integration page appears.
You can do the following on the Integrations page:
- Adding an integration
- Managing an integration
- Searching an integration
- Sorting integrations using column headings
- Show or hide columns
- Use pagination options
Adding an Integration
To add an integration, do the following:
- On the Integrations page, select + Add Integration.

- From the Add Integration pane, select the integration you want to add.
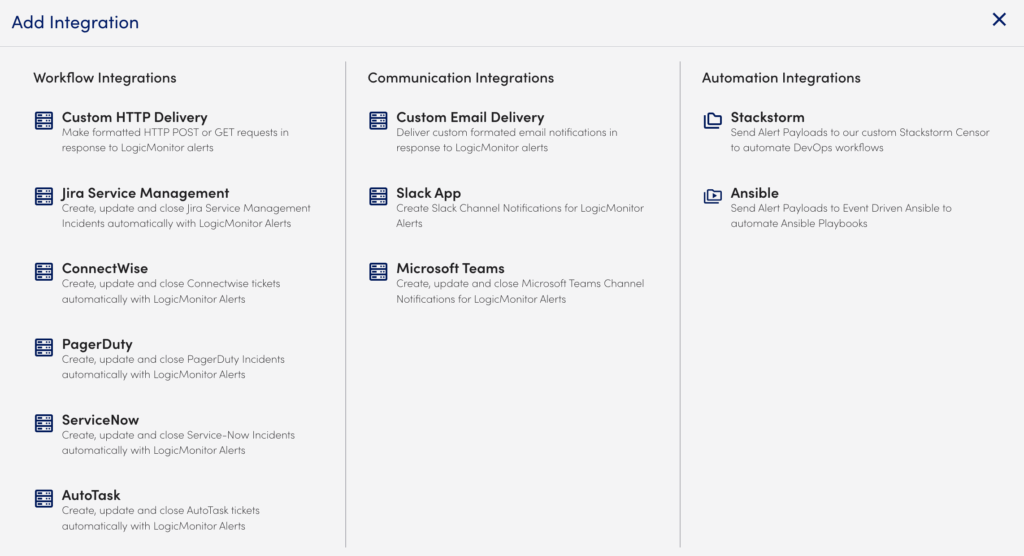
- Provide the required information and select Save.
For more information on adding a specific integration you want, see Integrations topics in product documentation.
Managing an Integration
You can use Delete, Manage, and Clone icons from the Actions column to manage your existing integrations.
To delete an integration, do the following:
- On the Integrations page, from the Actions column, select Delete corresponding to the integration you want to delete.
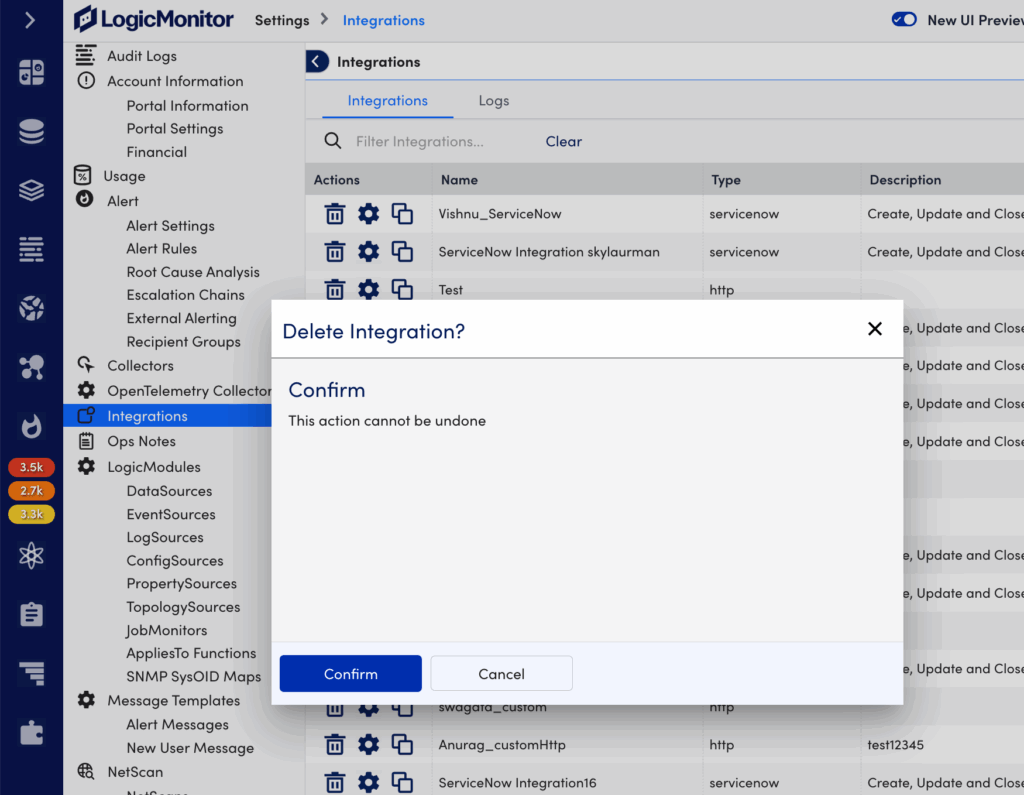
- Select Confirm to delete the integration.
Alternatively, you can delete the integration from the manage integration page too.
To manage an integration, do the following:
- On the Integrations page, from the Actions column, select Manage corresponding to the integration you want to manage.
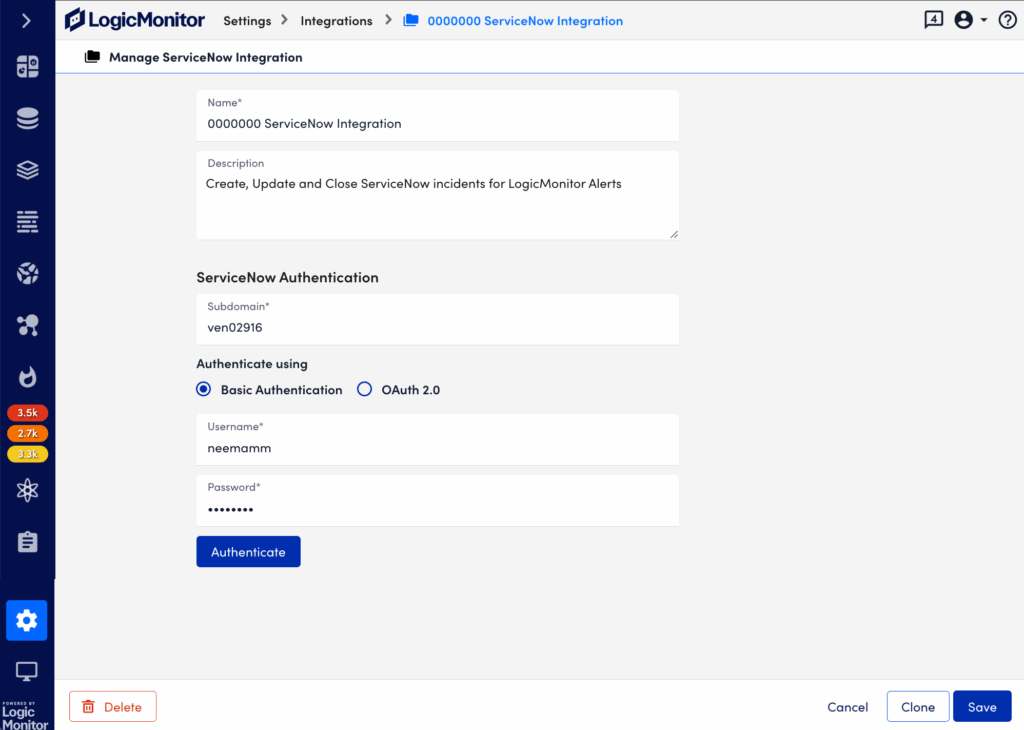
- To manage the integration, do any of the followings:
- Edit the details you want and then select Save.
- To create a clone of the integration, select Clone.
- To delete the integration, select Delete.
- To cancel and go back to the Integration page, select Cancel.
To clone an integration, do the following:
- On the Integrations page, from the Actions column, select Clone corresponding to the integration you want to manage.
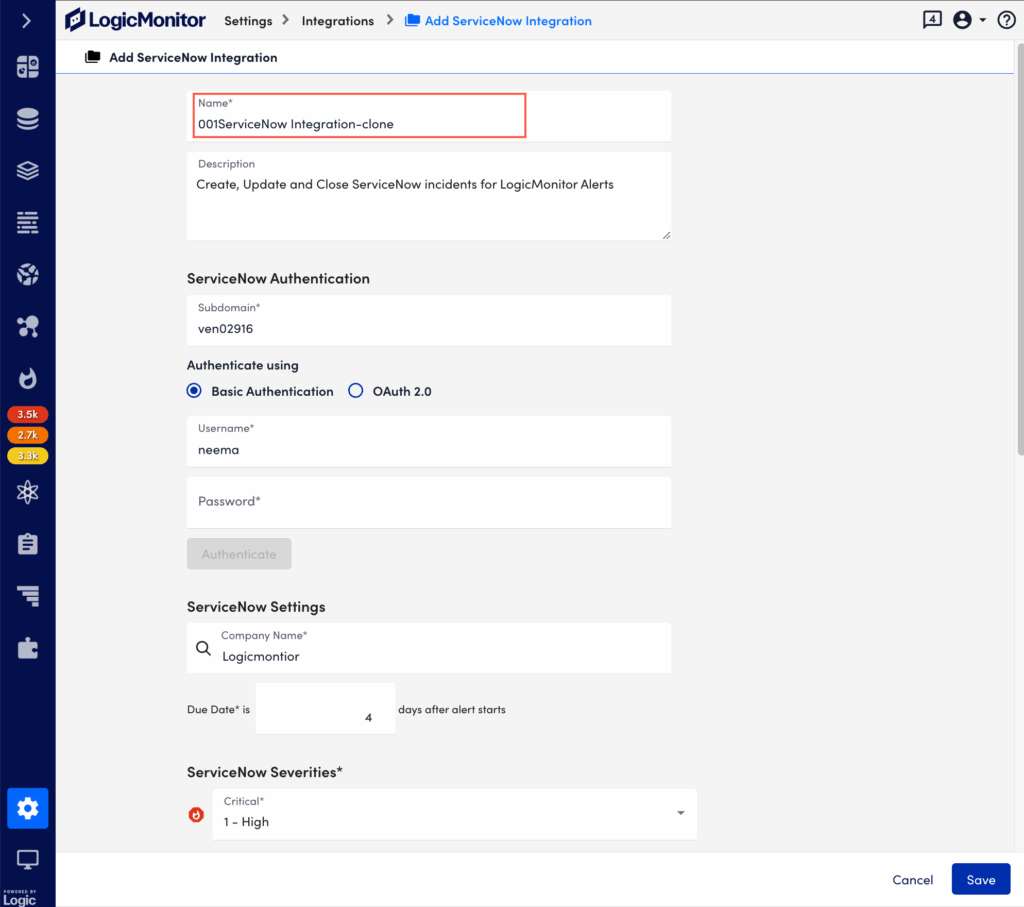
- Edit the details you want and then select Save.
Note: When you clone an integration, in the Name field, the name of the integration is appended with a (-) hyphen and the word clone. You can edit this name if you want.
Searching an Integration
To search an integration, do the following:
- On the Integrations page, type the search term in the Filter Integrations field. As you type the search term in the field, the matching integration names appears in the search results.
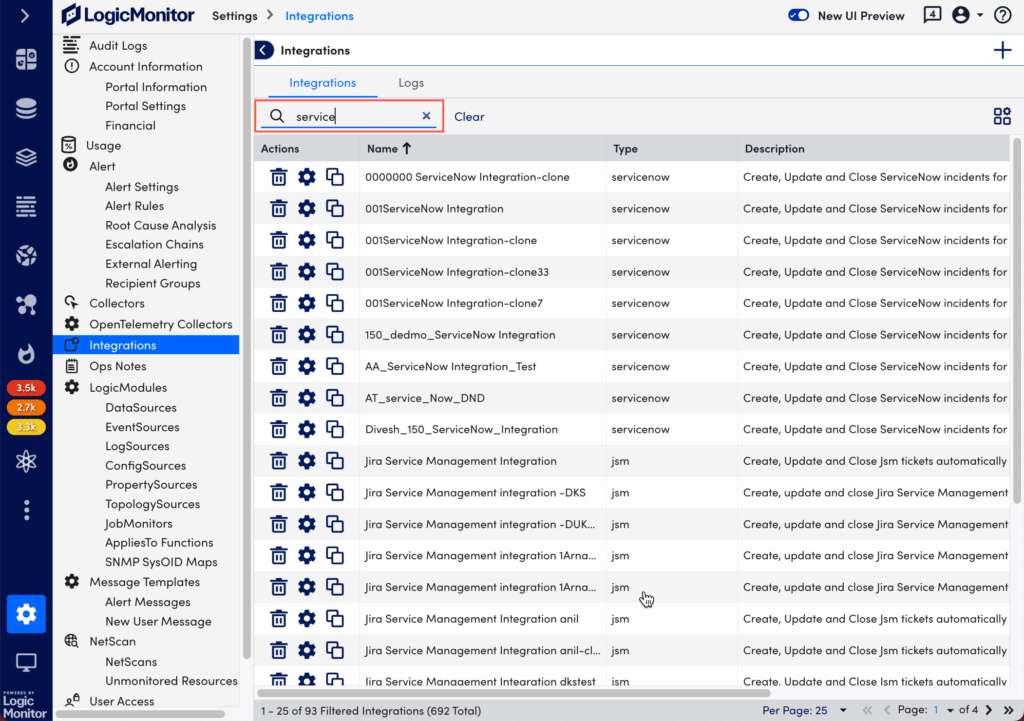
- To clear the search, select Clear next to the Filter Integrations field.
Note: The integrations are searched based on the integration names only.
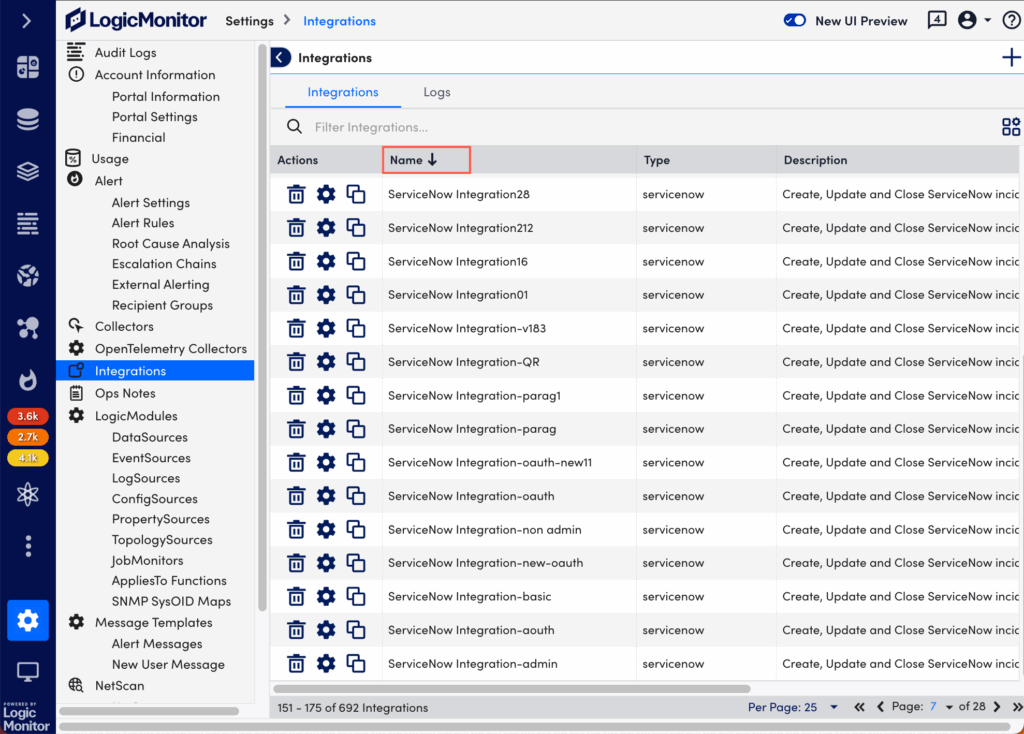
Sorting Integrations using Column Headings
On the Integrations page, to sort integrations based on column heading, select the column heading you want. The integrations are sorted in alphabetical order based on the content of that column.
The column heading with an up arrow indicates it is sorted in alphabetical order.
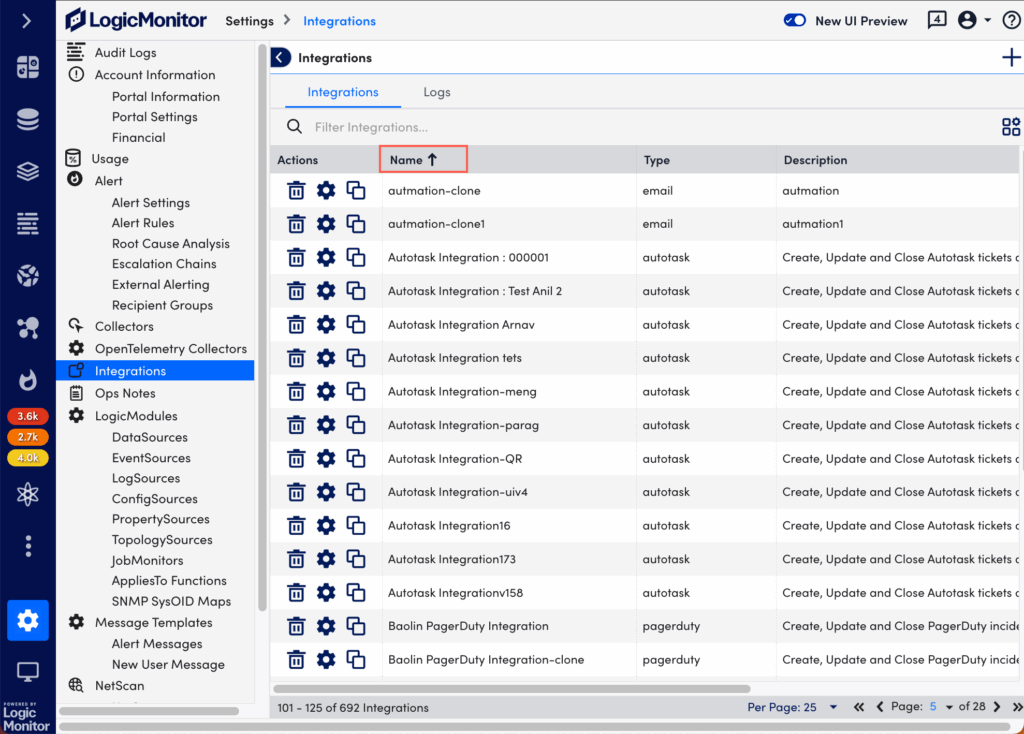
The column heading with a down arrow indicates it is sorted in reverse-alphabetical order.
Note:
- By default, the integrations are sorted in alphabetical order.
- The sorting option is available for Name, Type, and Description columns only.
Show or Hide Columns
To hide or show the column:
- On the Integrations page, select the Hide Table Settings icon. The Column Settings pane appears.
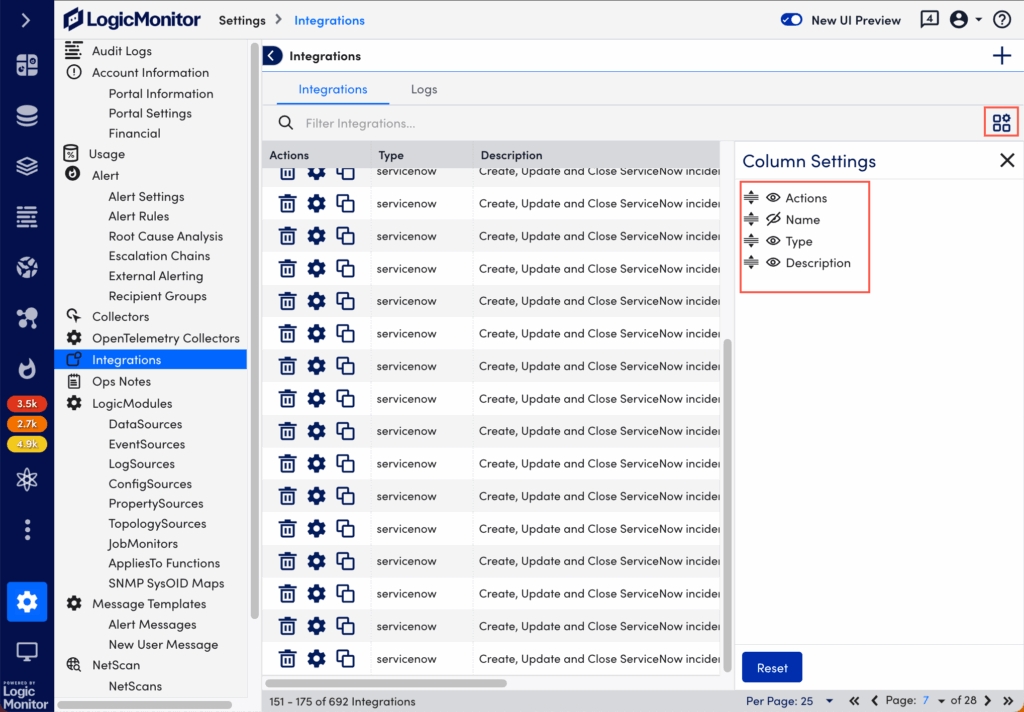
- Select the
 icon corresponding to the column you want to hide.
 - To show the hidden column, select the
 icon.
icon.
Note: You can drag the column name using the drag icon to rearrange the order of the columns.
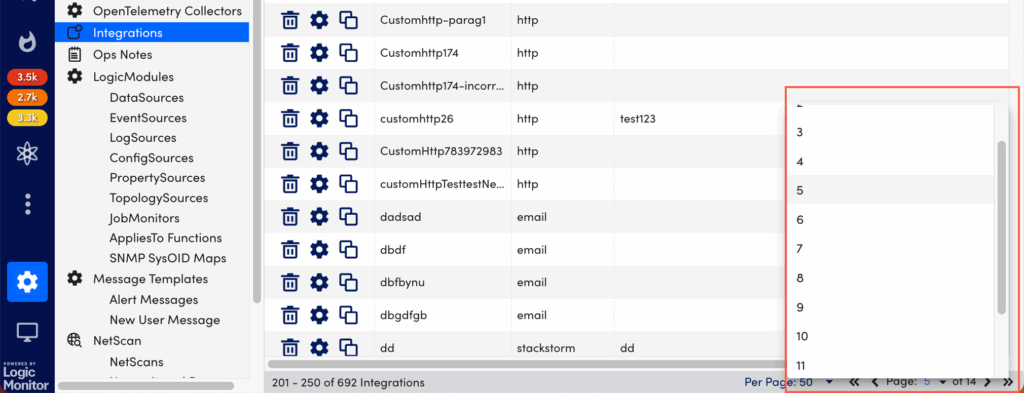
Use Pagination Options
The pagination options are available at the bottom of the Integrations page.
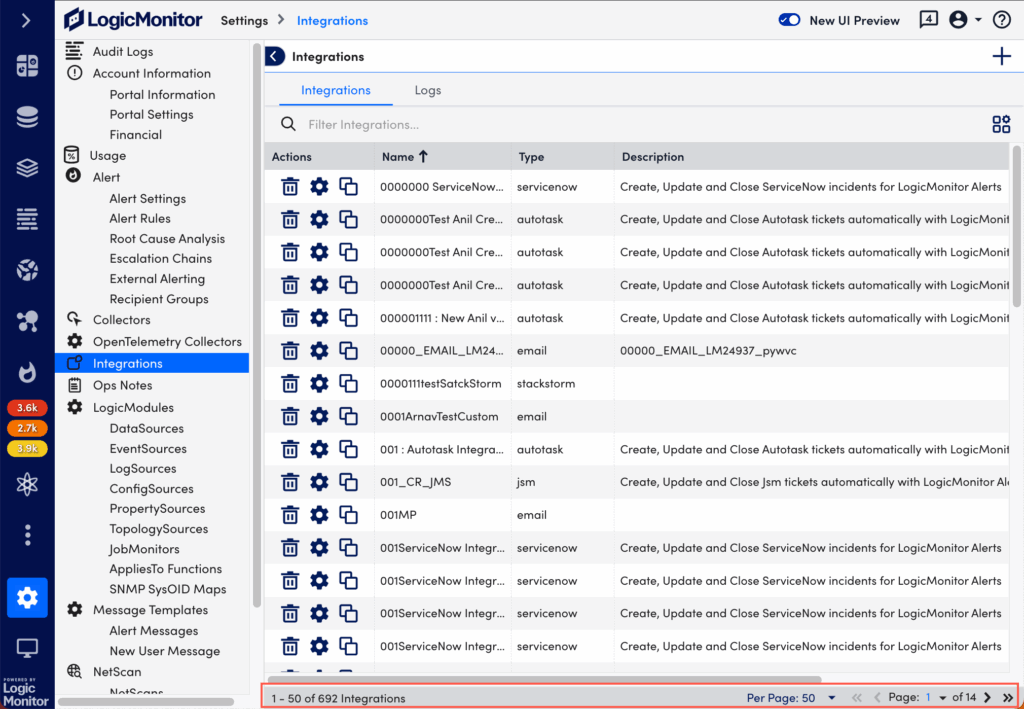
The following option shows the total number of integrations and also shows the range of integration numbers that are being displayed per page.

Select the Per Page option and select the number of integrations you want to display per page. By default, 25 integrations are displayed per page.

Select the paging arrows to move through integrations pages or select a page number from the list.