
Traffic Alert Rule
Last updated - 01 September, 2022
You can set traffic alert rules for the NetFlow resources to receive notifications when traffic for a NetFlow resource exceeds the set limit, or if there is no traffic for a defined time, and so on. In addition, you can apply traffic alert rules on multiple NetFlow resources.
Viewing Traffic Alert Rule at Group Level
- Navigate to Resources > Resources > select the required Netflow resource group > Traffic tab.
- On the Traffic tab, select Alert Rules
in the upper-left corner.
- From the Traffic Alert panel, select This Group Only, to view the alerts set on that NetFlow resource.
The Traffic Alerts panel is displayed.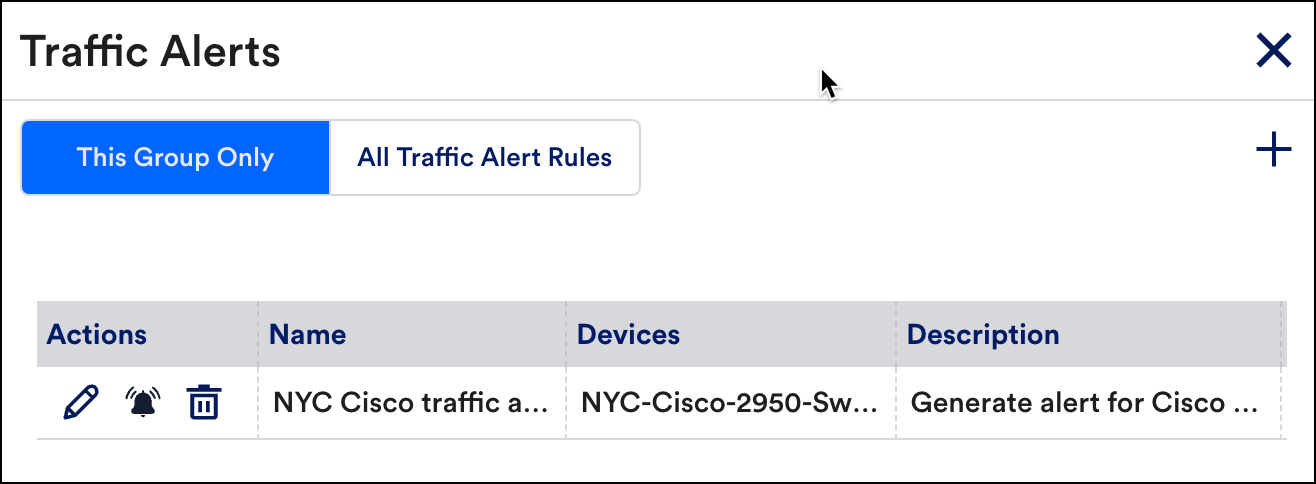
- From the Traffic Alert Rules panel, select one of the following:
- This Group Only – To view the alerts set on the selected NetFlow resources added in the selected NetFlow resource group.
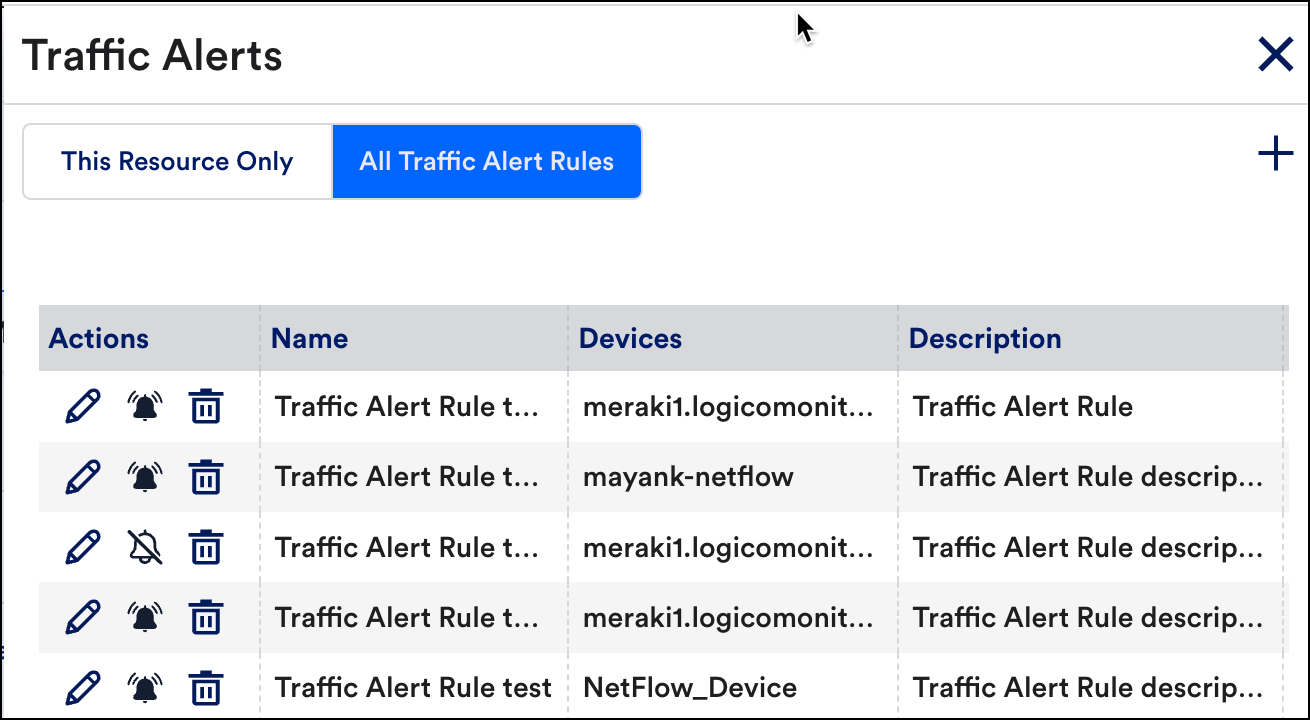
- All Traffic Alert Rules – To view or edit all the traffic rules added to the resources in the selected resource group.
- This Group Only – To view the alerts set on the selected NetFlow resources added in the selected NetFlow resource group.
Viewing Traffic Alert Rule at Resource Level
- Navigate to Resources > Resources > select the resource > Traffic tab.
- On the Traffic tab, select Alert Rules
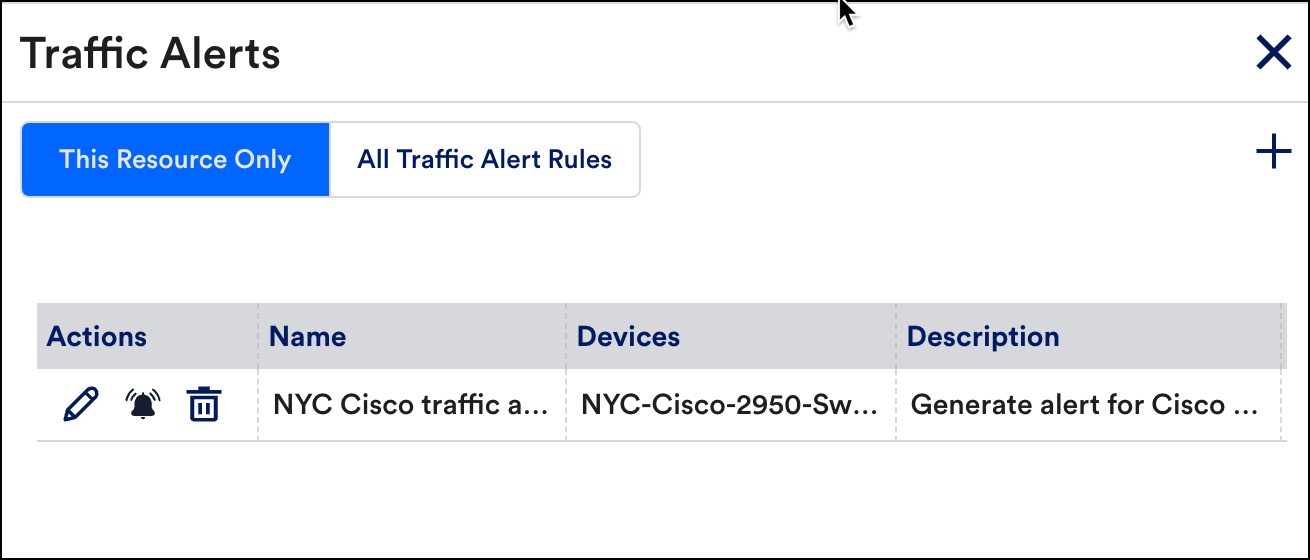
- From the Traffic Alert panel, select This Resource Only, to view the alerts set on that NetFlow resource.
Adding Traffic Alert Rule
- Navigate to Resources > NetFlow Group or NetFlow Resources > select the required NetFlow resource group or NetFlow resource.
- On the Traffic tab, select Alert Rules
- Select Add Traffic Alert Rule to add traffic rules.
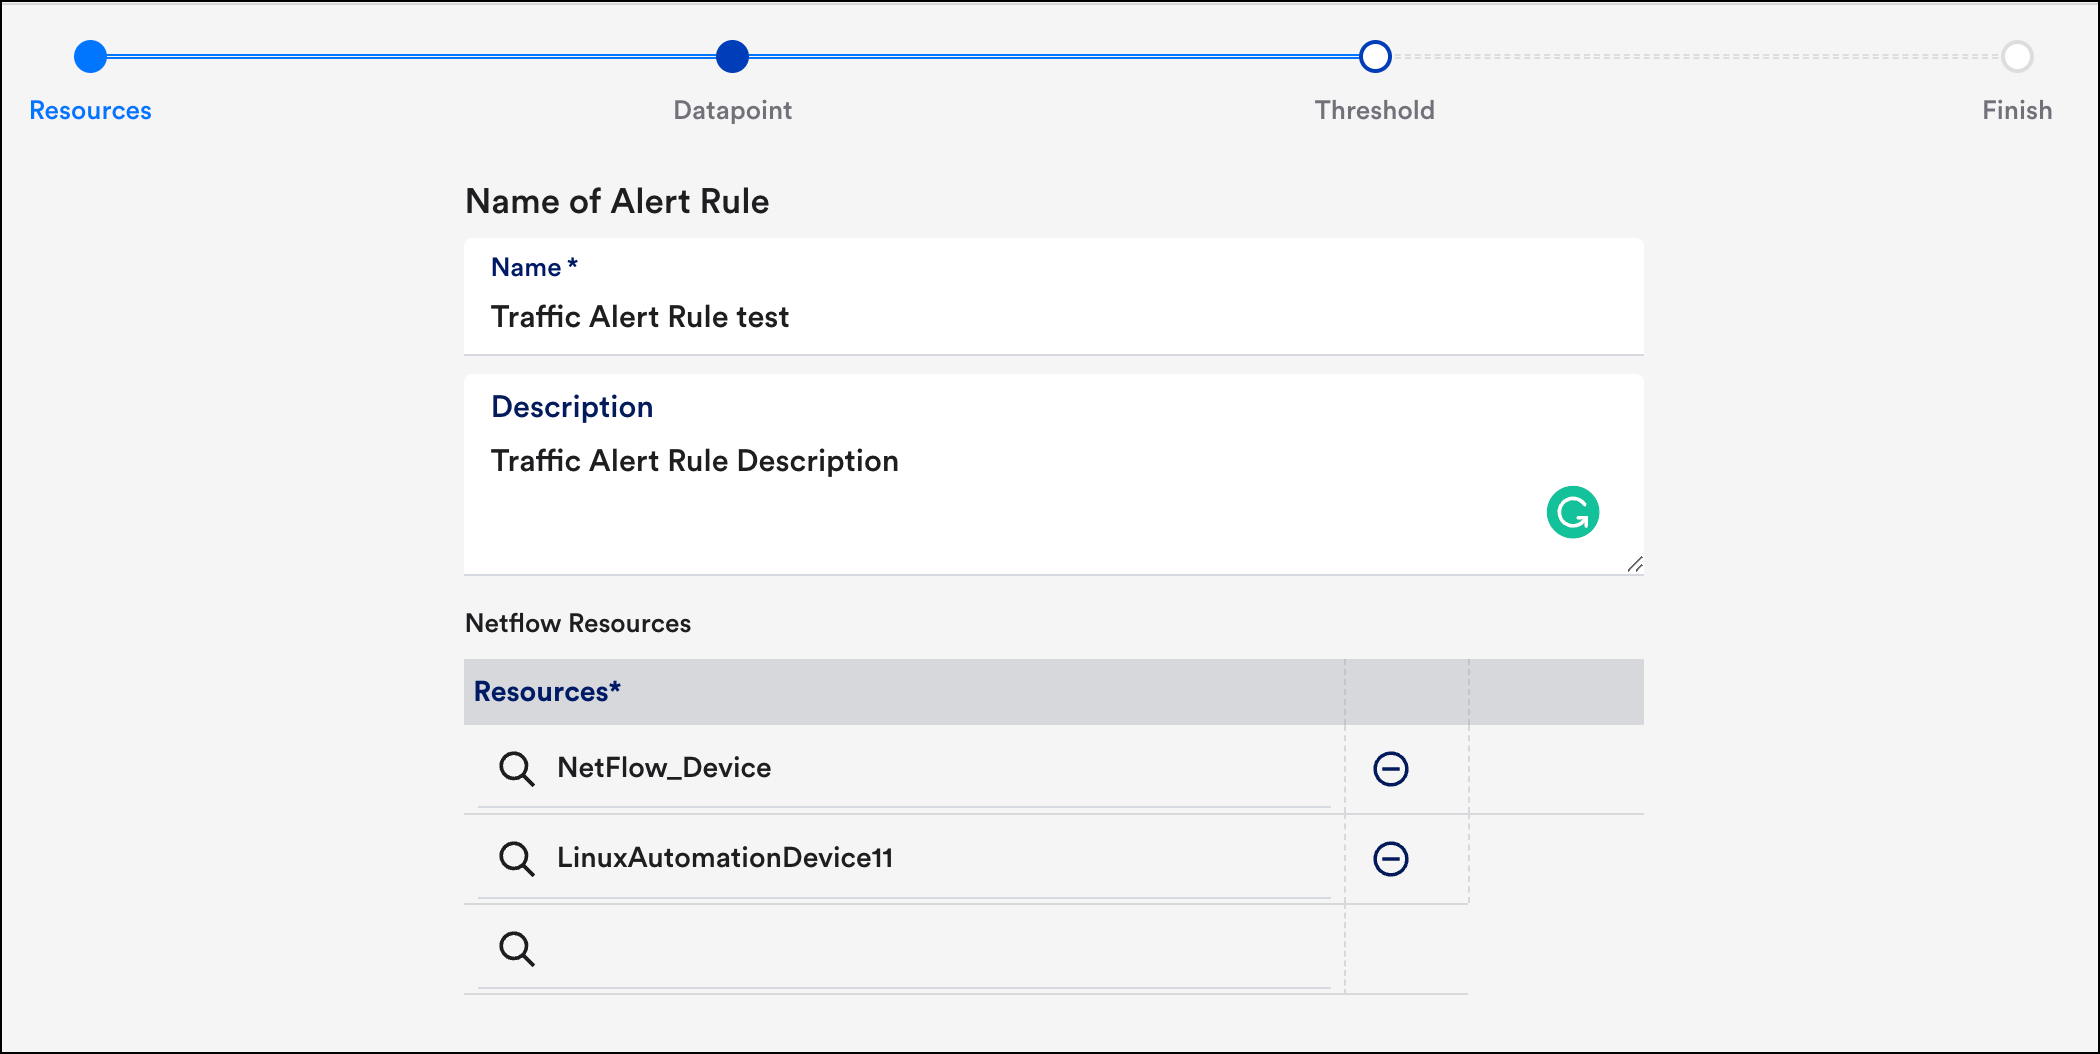
- On the Create Traffic Alert Rule page, add the following information in the Resources section:
- Name of Alert Rule – (Required) Enter a name for the traffic alert rule.
- Description – Provide a description of the traffic alert rule.
- NetFlow Resources – (Required) Enter the NetFlow resources on which you want to add the traffic alert rule.
- Name of Alert Rule – (Required) Enter a name for the traffic alert rule.
Note: You will only see NetFlow-enabled resources in the list.
- Select Next: Datapoint, to add Datapoint details.
- On the Datapoint page, you can set the following filters for the Datapoints:
- Saved Views – You can set the filters based on saved views.
- Add Filters – You can add filters like Direction, IP version, Protocols, and so on.
- Clear – You can select Clear to clear the selection.
- Clear After – You can clear the alert after the required consecutive polls by setting the required time.
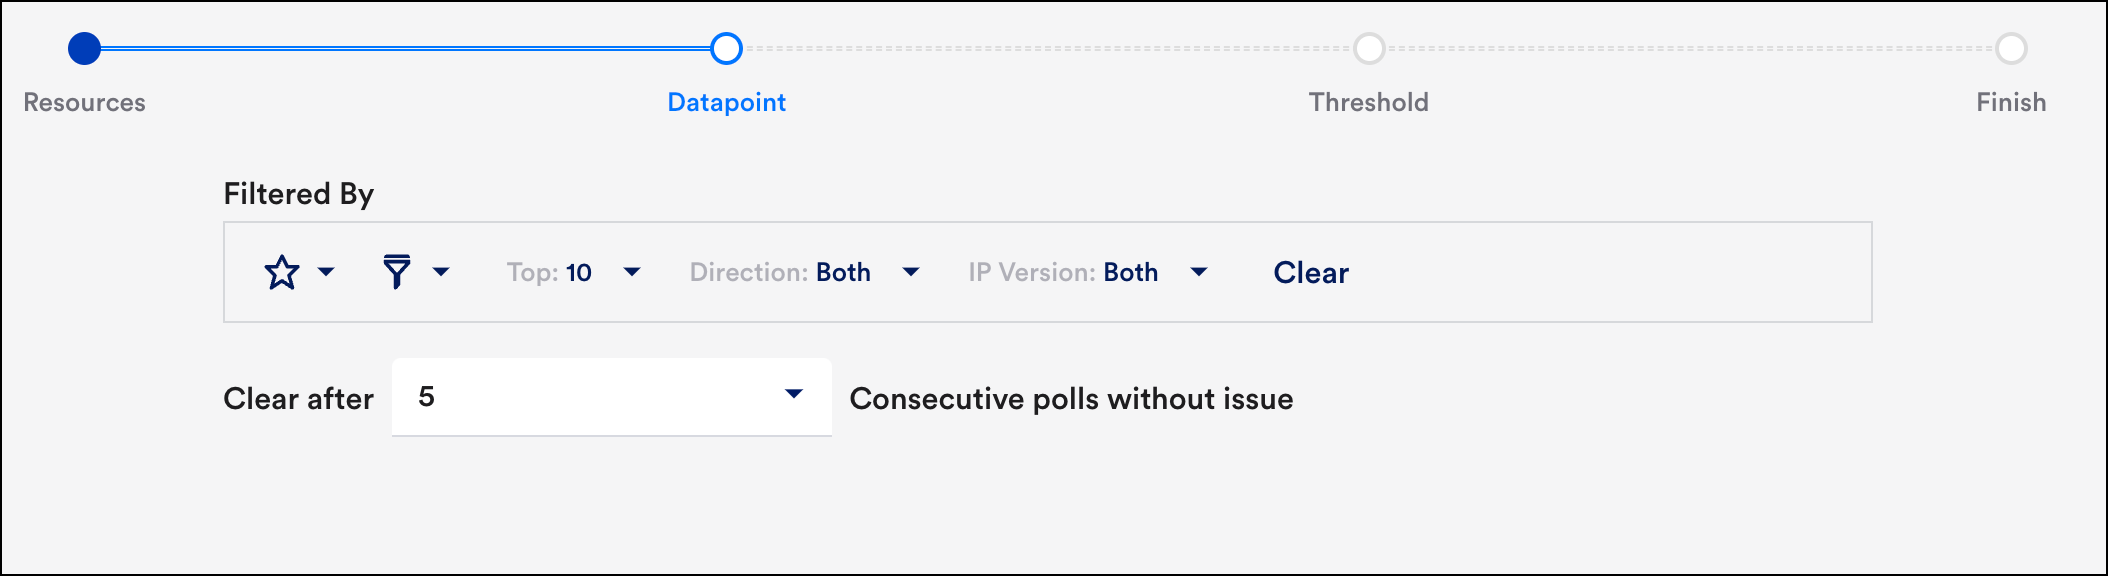
For more information, see Filtering Alerts.
- Saved Views – You can set the filters based on saved views.
- Select Next: Threshold.
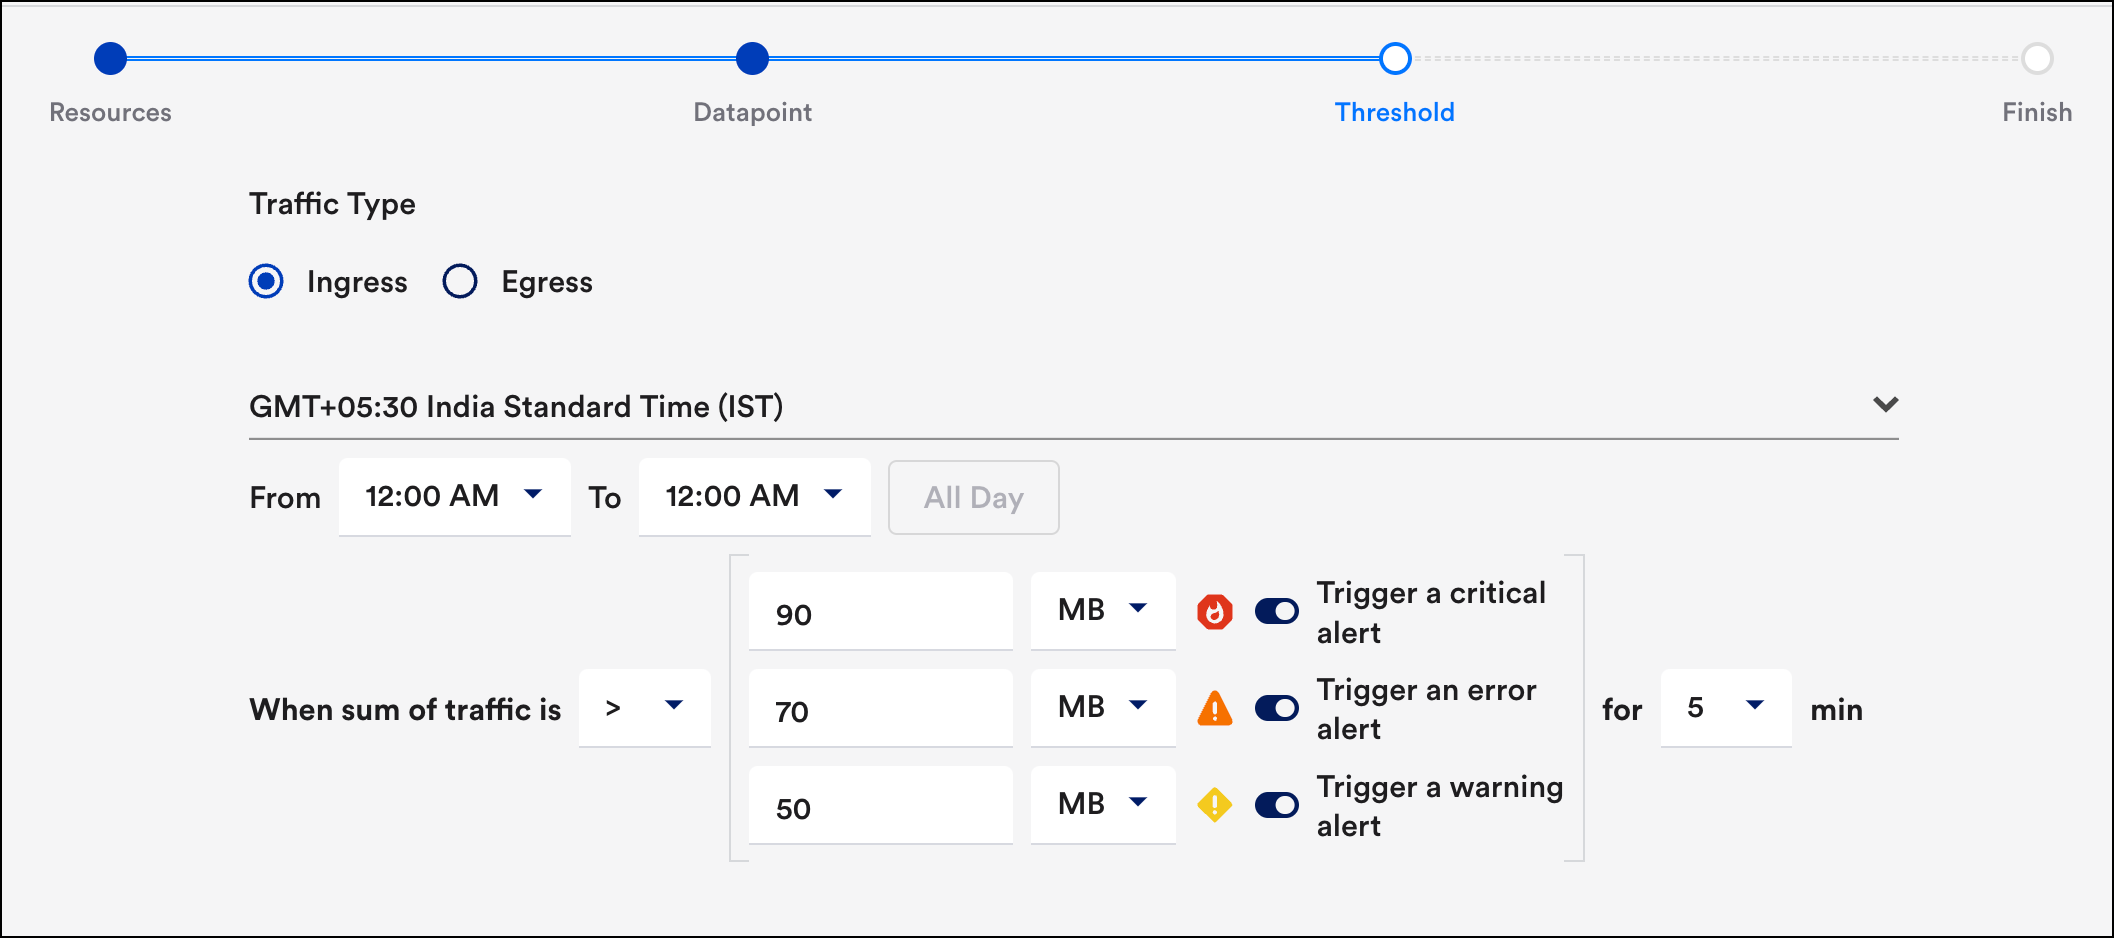
- On the Threshold page, you can select the following options:
- Traffic Type:
- Ingress – To monitor the incoming traffic flow.
- Egress – To monitor the outgoing traffic flow.
- Schedule time – You can select the time for monitoring the traffic.
Note: Select All day, to monitor the traffic throughout the day. - In the When sum of traffic is option, you can set different threshold levels based on your requirements by entering the required details.
- Traffic Type:
- Select Next: Finish.
- Review the details on the Finish page and select Save Rule.
Note: You can configure a maximum of 25 alerts.
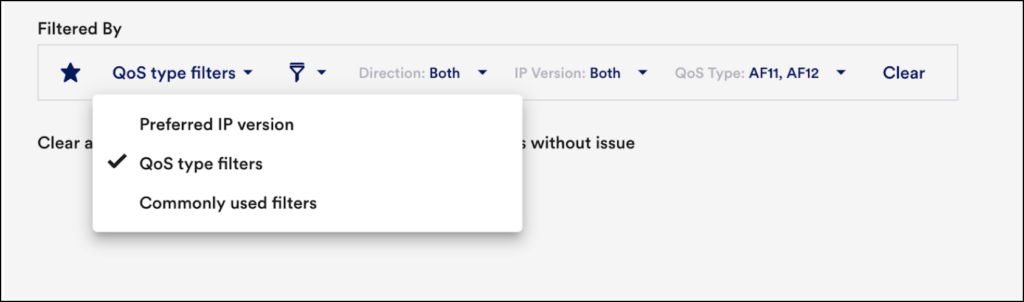
Filtering Alerts
You can use the filtered NetFlow data for alert evaluation. Predefined filters are available, along with the ability to save sets of commonly used filter criteria for convenient future access.

Saving and Clearing Filter Views
Saving a Filter View
You can select Saved Views to select the saved filter. Saved filter views are associated with individual user accounts and NetFlow resources. In addition, saved filters are not available globally.
Clearing a Filter View
You can select Clear to clear the filter section.
Note: Each poll is for 5 minutes.

