AWS Organizational Unit Monitoring Setup
Last updated – 14 May, 2026
An AWS Organizational Unit (OU) is a group of individual accounts that are managed as a single entity. If you use AWS Organizations, the AWS Organizational Unit wizard can help you to efficiently add and group your new or existing accounts.
The OU wizard lists the information to identify the OU within LogicMonitor. Changes are made within the wizard to all AWS accounts to be monitored within the OU, then adds role information back into LM.
Once complete LogicMonitor can discover the OU and child accounts. You can then choose from a list of services that apply to those accounts added to LogicMonitor. The wizard then tests permissions and adds those accounts for monitoring.
Monitoring AWS Organizational Units
- Navigate to Resources > Add > Cloud and SaaS.
- Select AWS Organizational Unit > Add.
The Add AWS Organizational Unit wizard is displayed.
- On the Name page of the wizard, enter a Description to add basic information about your resource.
- Enter or select Properties (key-value pairs) that you want to associate with this resource.
- Select Next: Permissions.
- Add a new role and policy to all accounts that you want to add to LogicMonitor in this process.
- Use the value from the Account ID field provided by LogicMonitor to create an IAM role in your AWS Management Console, as well as the External ID. If this is your first time adding accounts to LogicMonitor, copy the External ID from your AWS console.
- If you are adding additional accounts, select Re-Use External ID then select an existing AWS account whose External ID you wish to re-use.
- Use the Creating a role to delegate permissions to an IAM user process to create your IAM role in the AWS Management Console. Copy the JSON from Create a new Policy and use it to create your IAM policy in AWS. Adding the provided Account ID and External ID to your IAM role requires that LogicMonitor uses the IAM role you create.
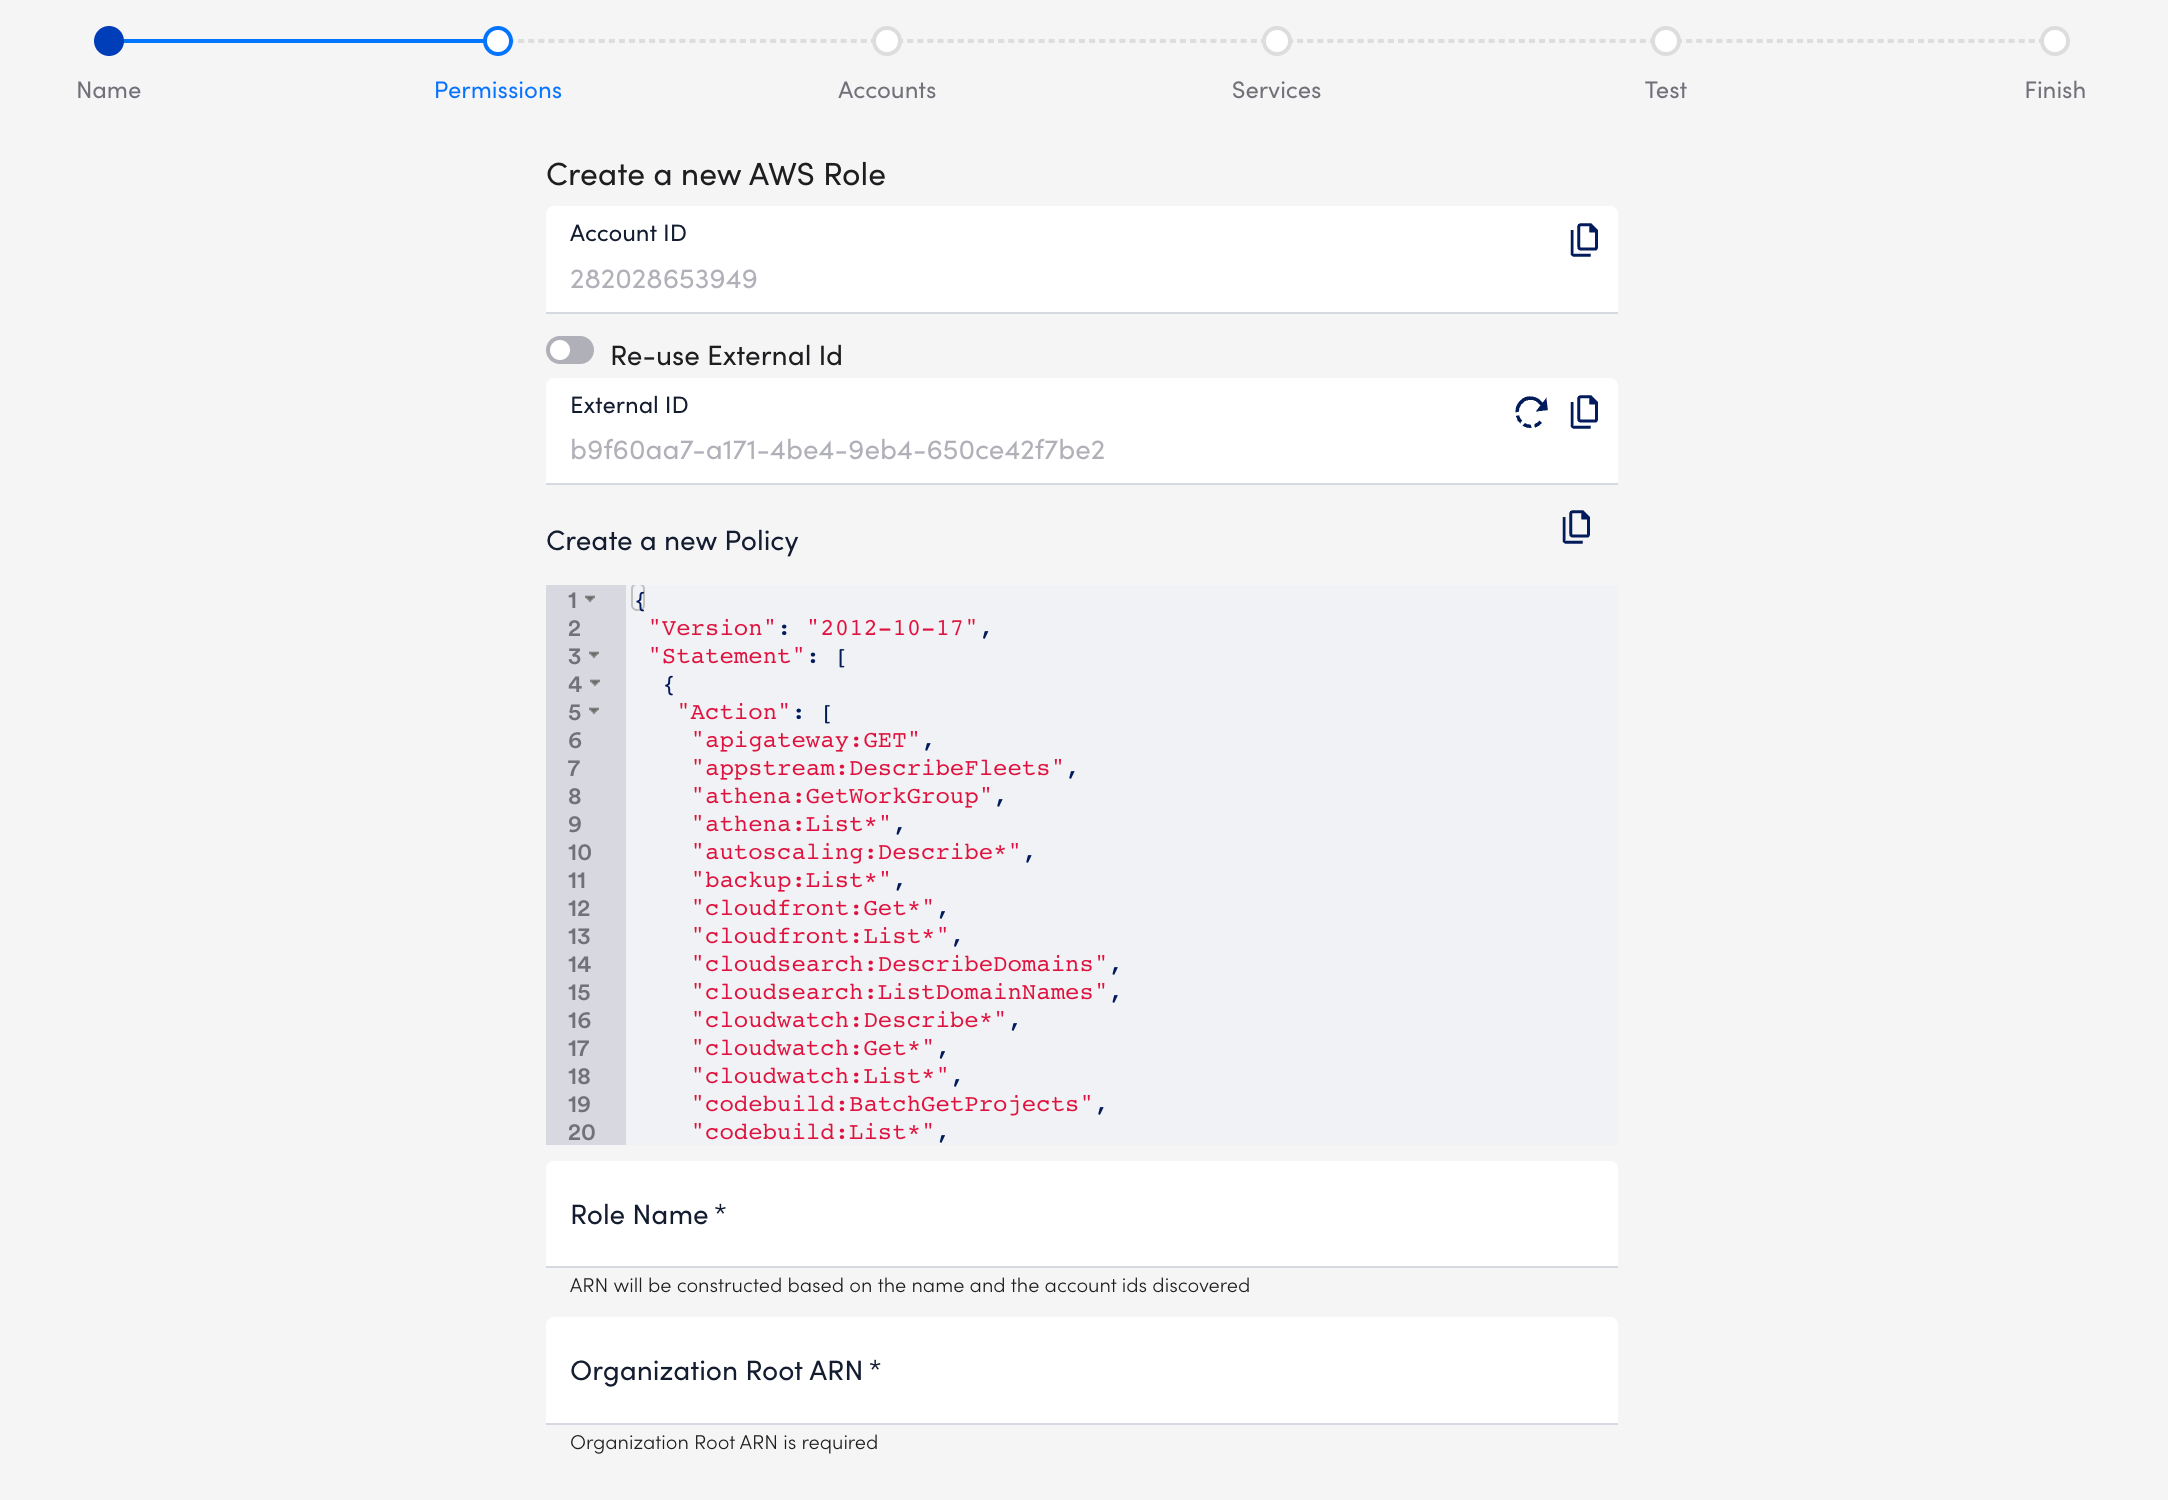
- Once these are created attach the policy created from the JSON to the created Role. See Creating IAM policies in AWS documentation for details.
- The JSON includes the minimum permissions necessary for LogicMonitor to collect data for your AWS resources. Omit permissions for services you do not monitor with LogicMonitor. Alternatively, you can attach the default AWS ‘ReadOnlyAccess’ to your LogicMonitor role and add permissions for certain AWS resources as necessary.
- You need the ‘AWSSupportAccess’ role for service limit monitoring via Trusted Advisor and ‘CostExplorer’ read access to monitor reserved instances. For more information about ReadOnlyAccess, see AWS’s Managed policies and inline policies documentation.
- The s3:GetObjects permission is needed for billing monitoring. To reduce permissions, you can modify the permission to include the s3 bucket you saved your AWS cost and usage report to.
- Once the role is created in AWS, enter the Role Name and Organizational Root ARN on the Permissions page.
- Select Next: Accounts.
- On the Accounts page, select the accounts that you want to add to monitoring.
- Accounts that are already monitored do not need to be added again. They cannot be selected in this wizard.
- Services you select to be monitored will apply to all the selected AWS accounts.
- Add a maximum of 100 accounts per use of this wizard.
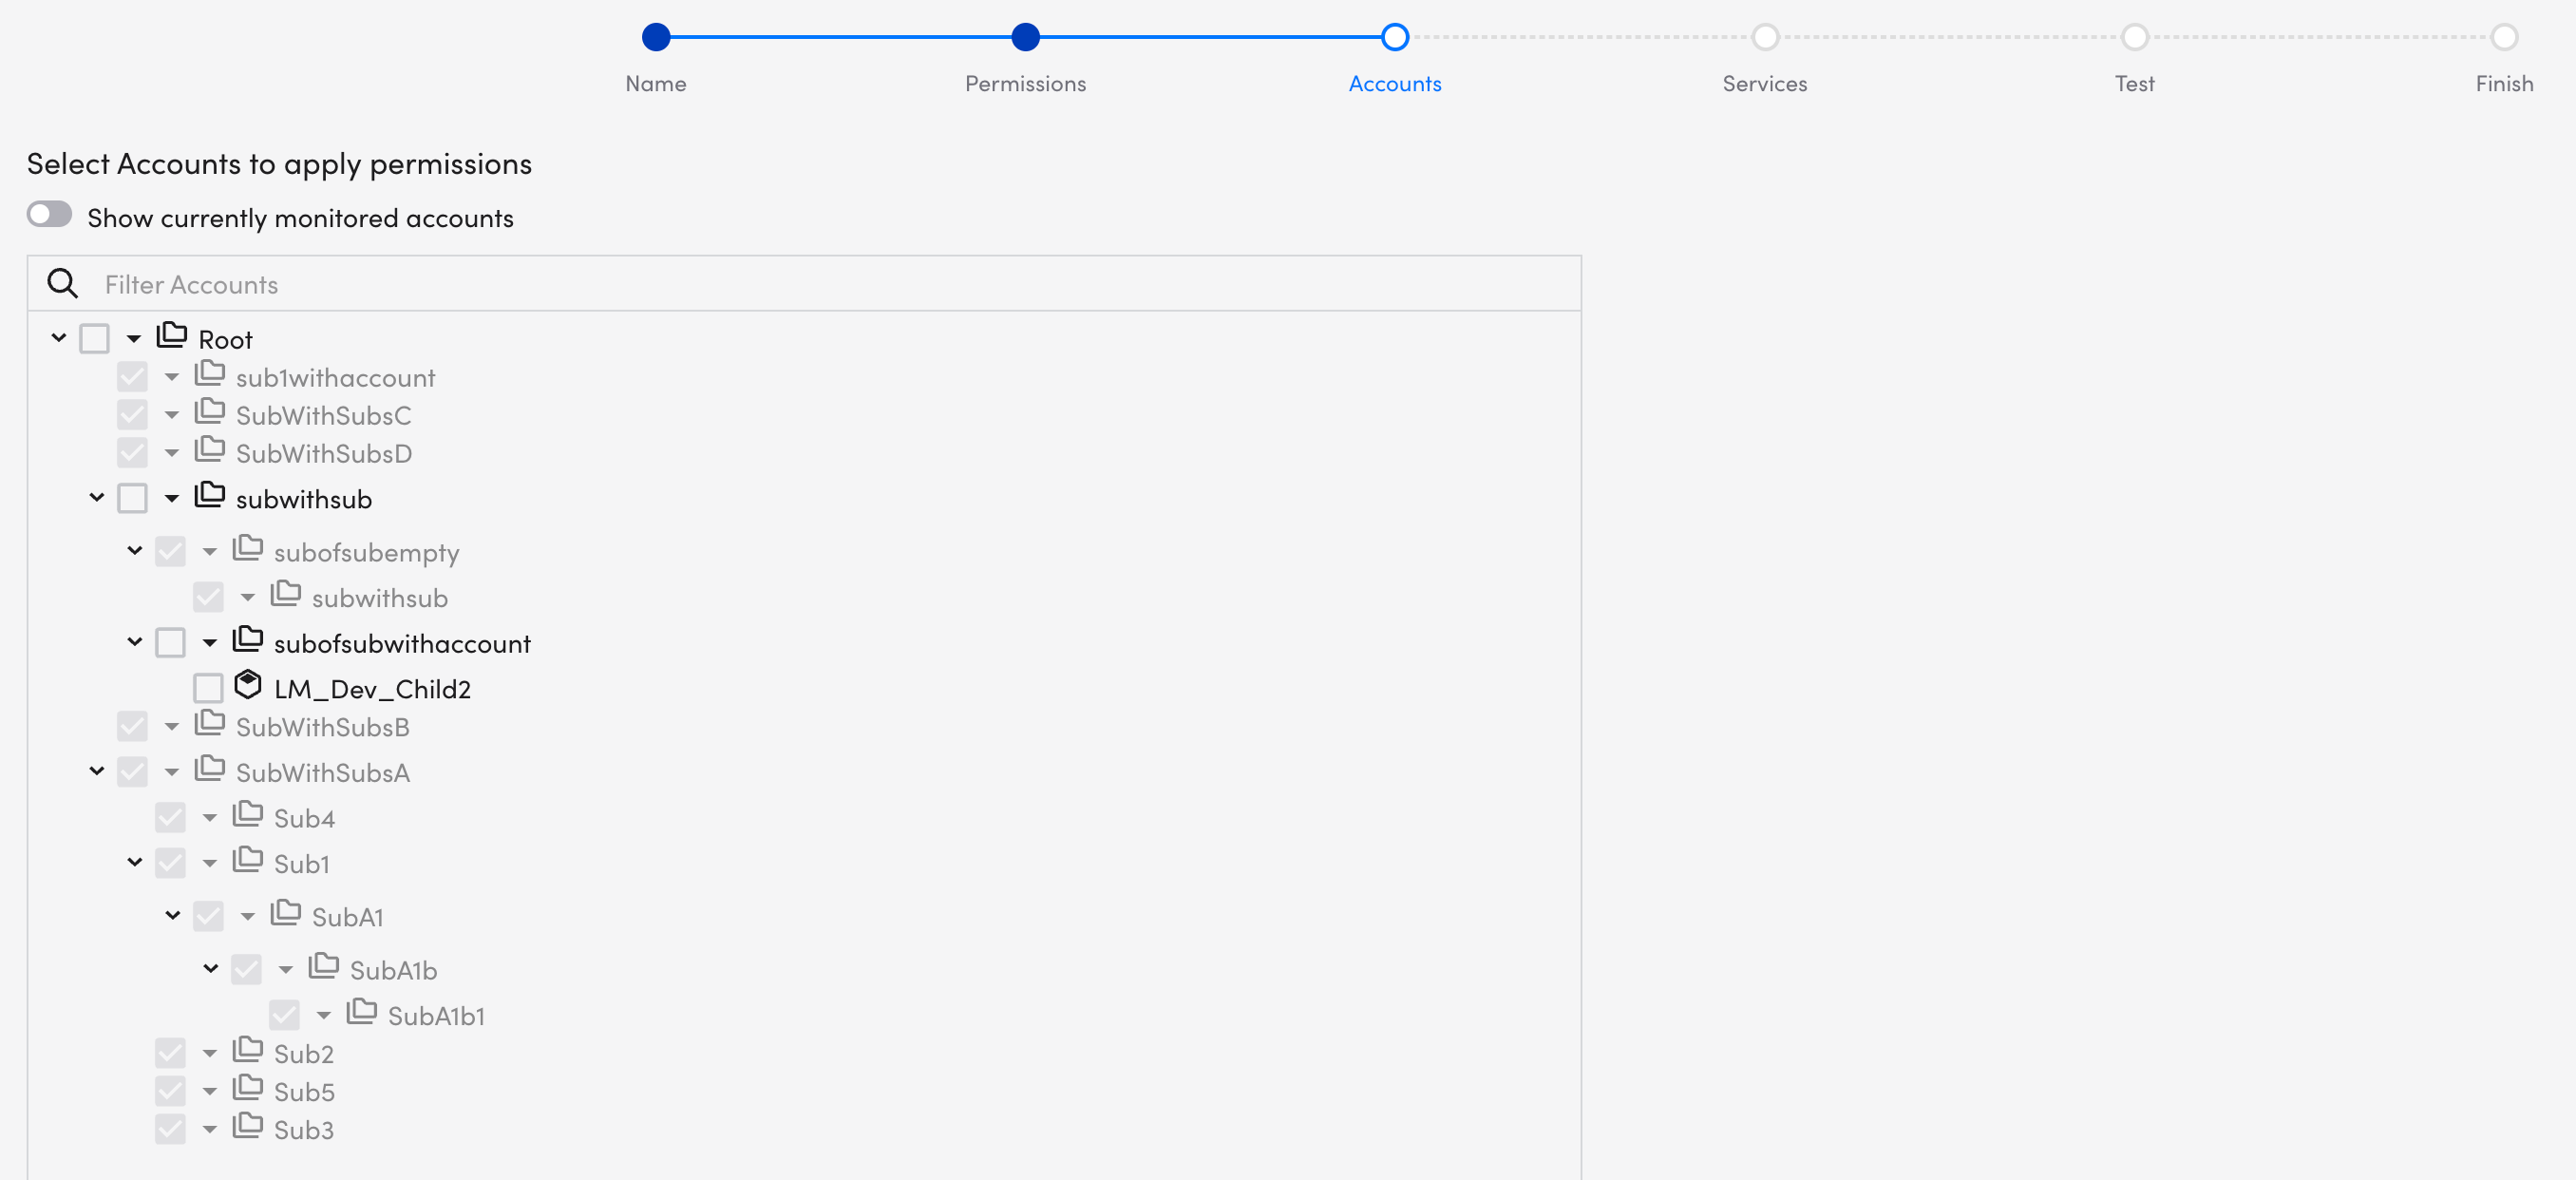
Note: The Show currently monitored accounts toggle is inactive. It becomes active once the initial setup and monitoring is complete.
- Select Next: Services.
- On the Services page, select or deselect any of the services that you want to monitor.
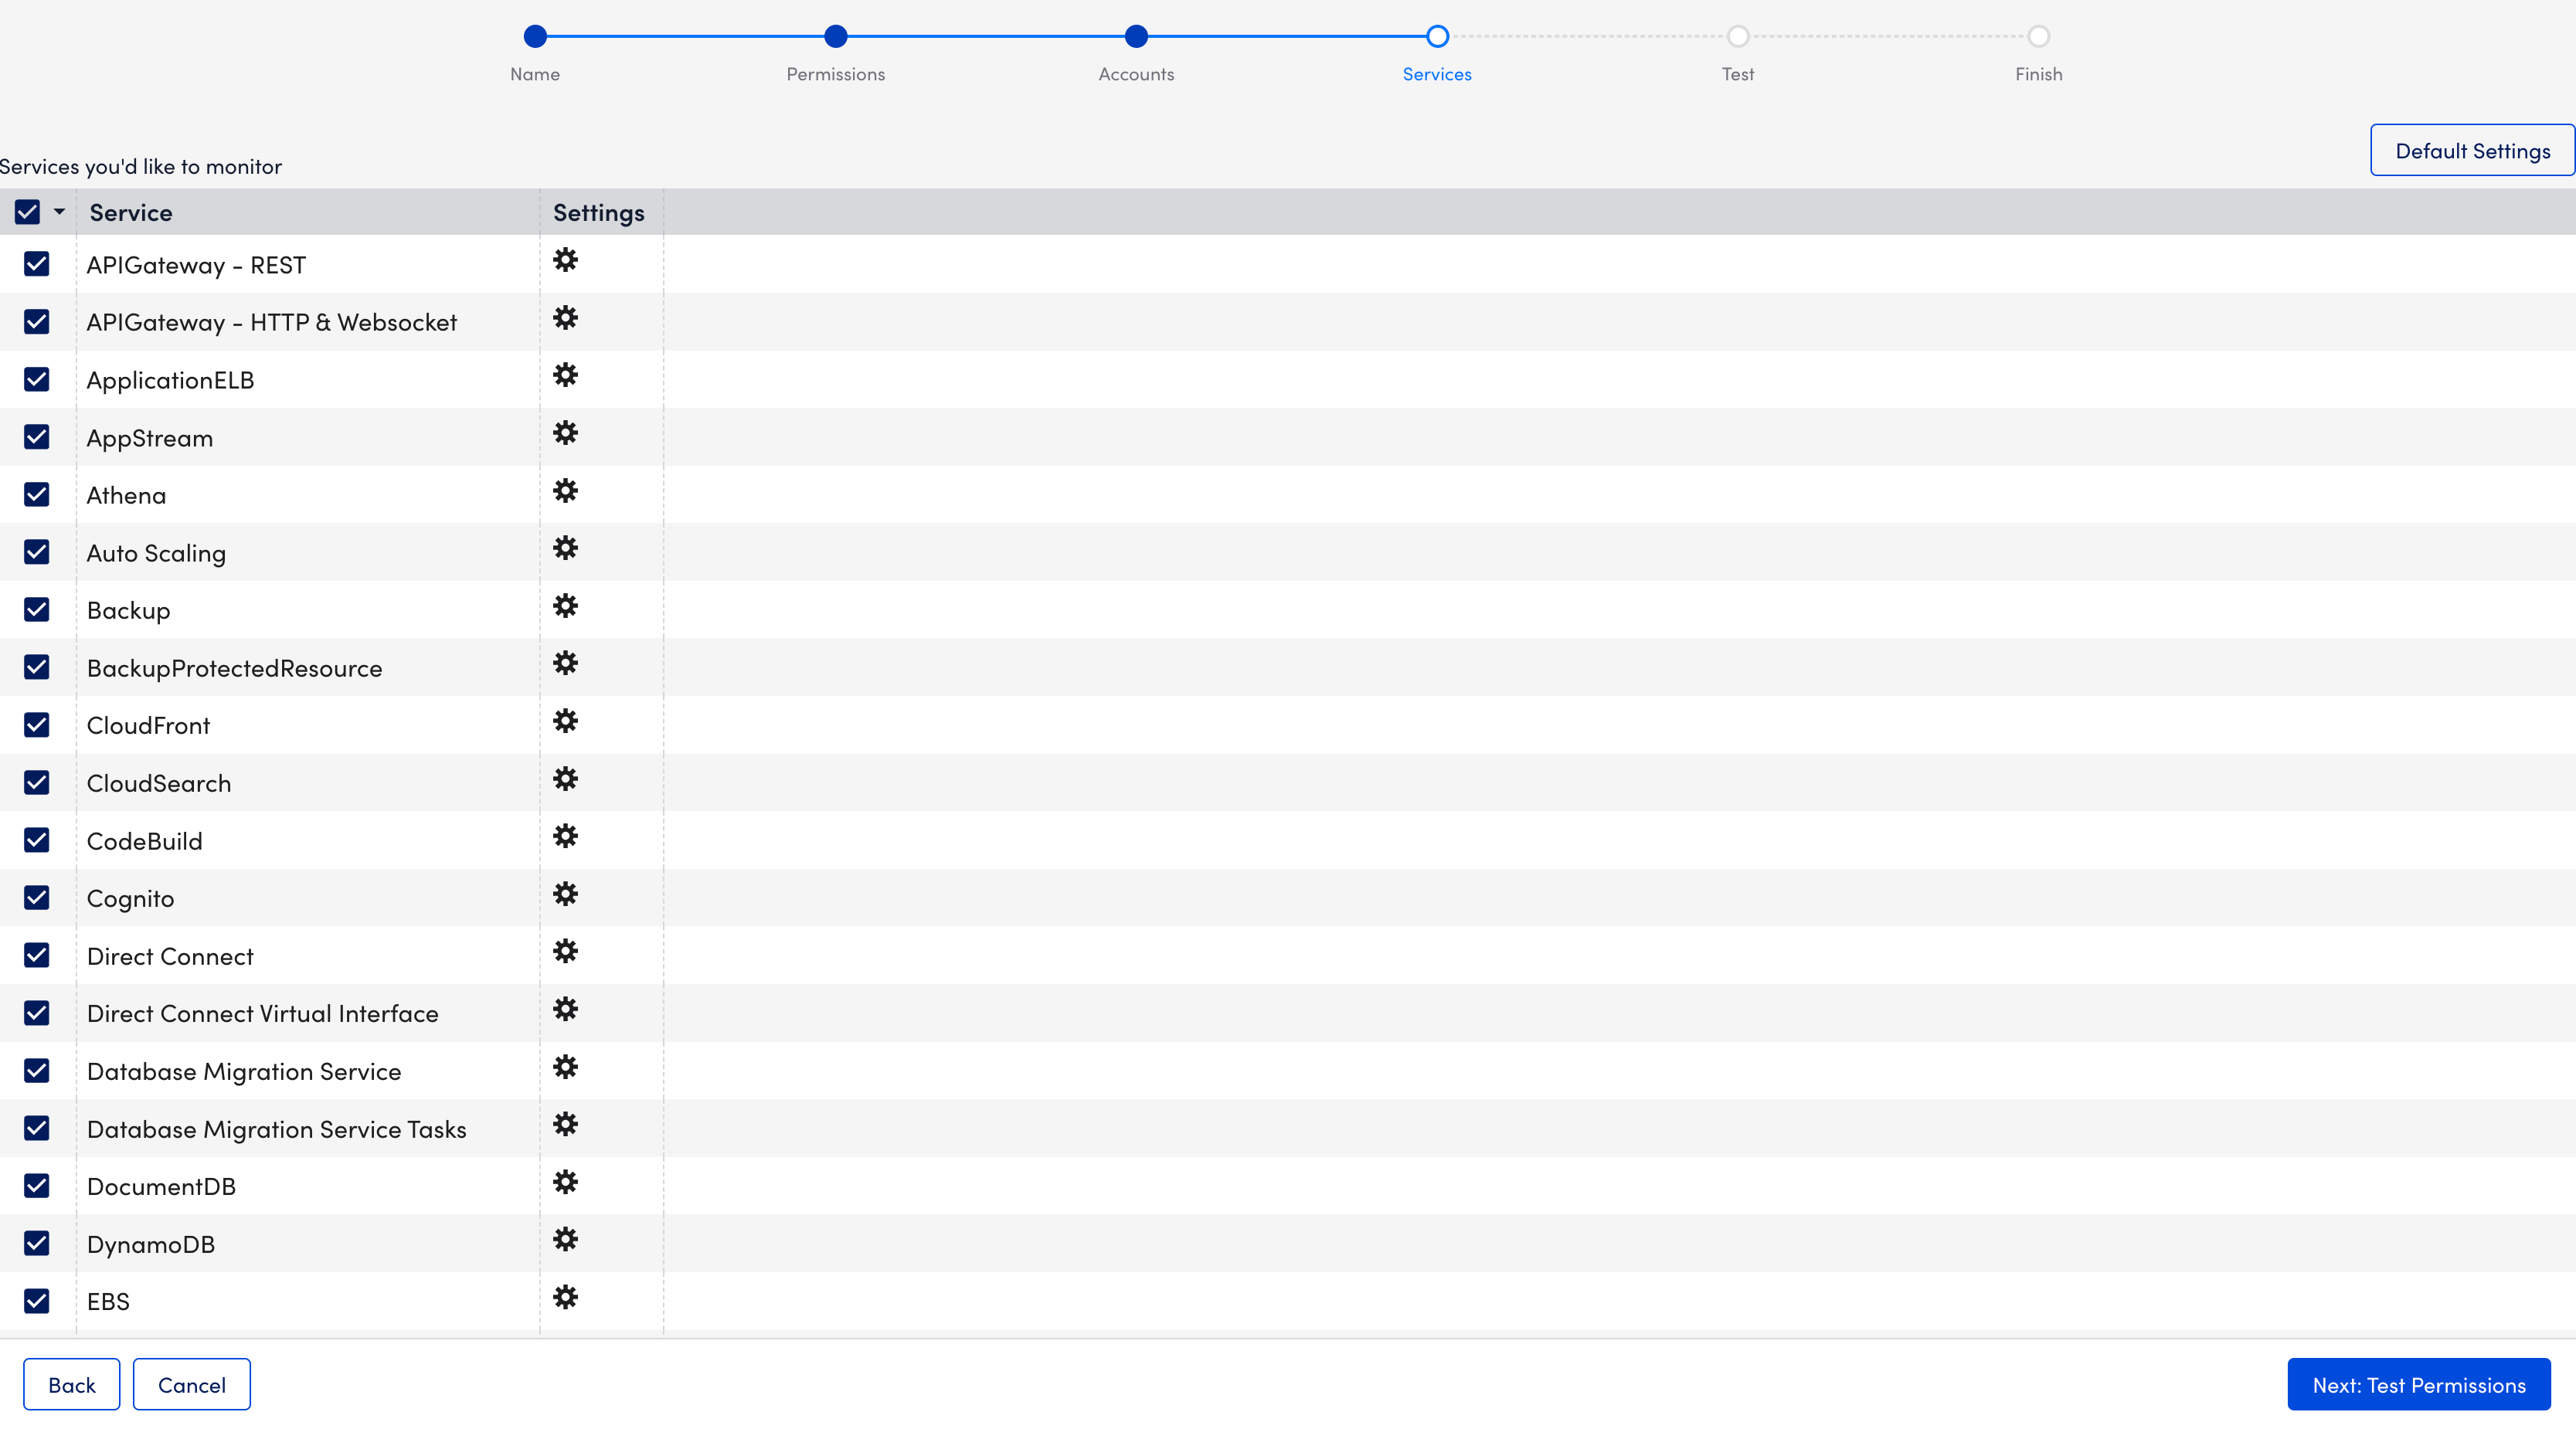
- Select Next: Test Permissions.
- On the Test page, select (blue highlighting) or deselect (no highlighting) the services for permissions testing.
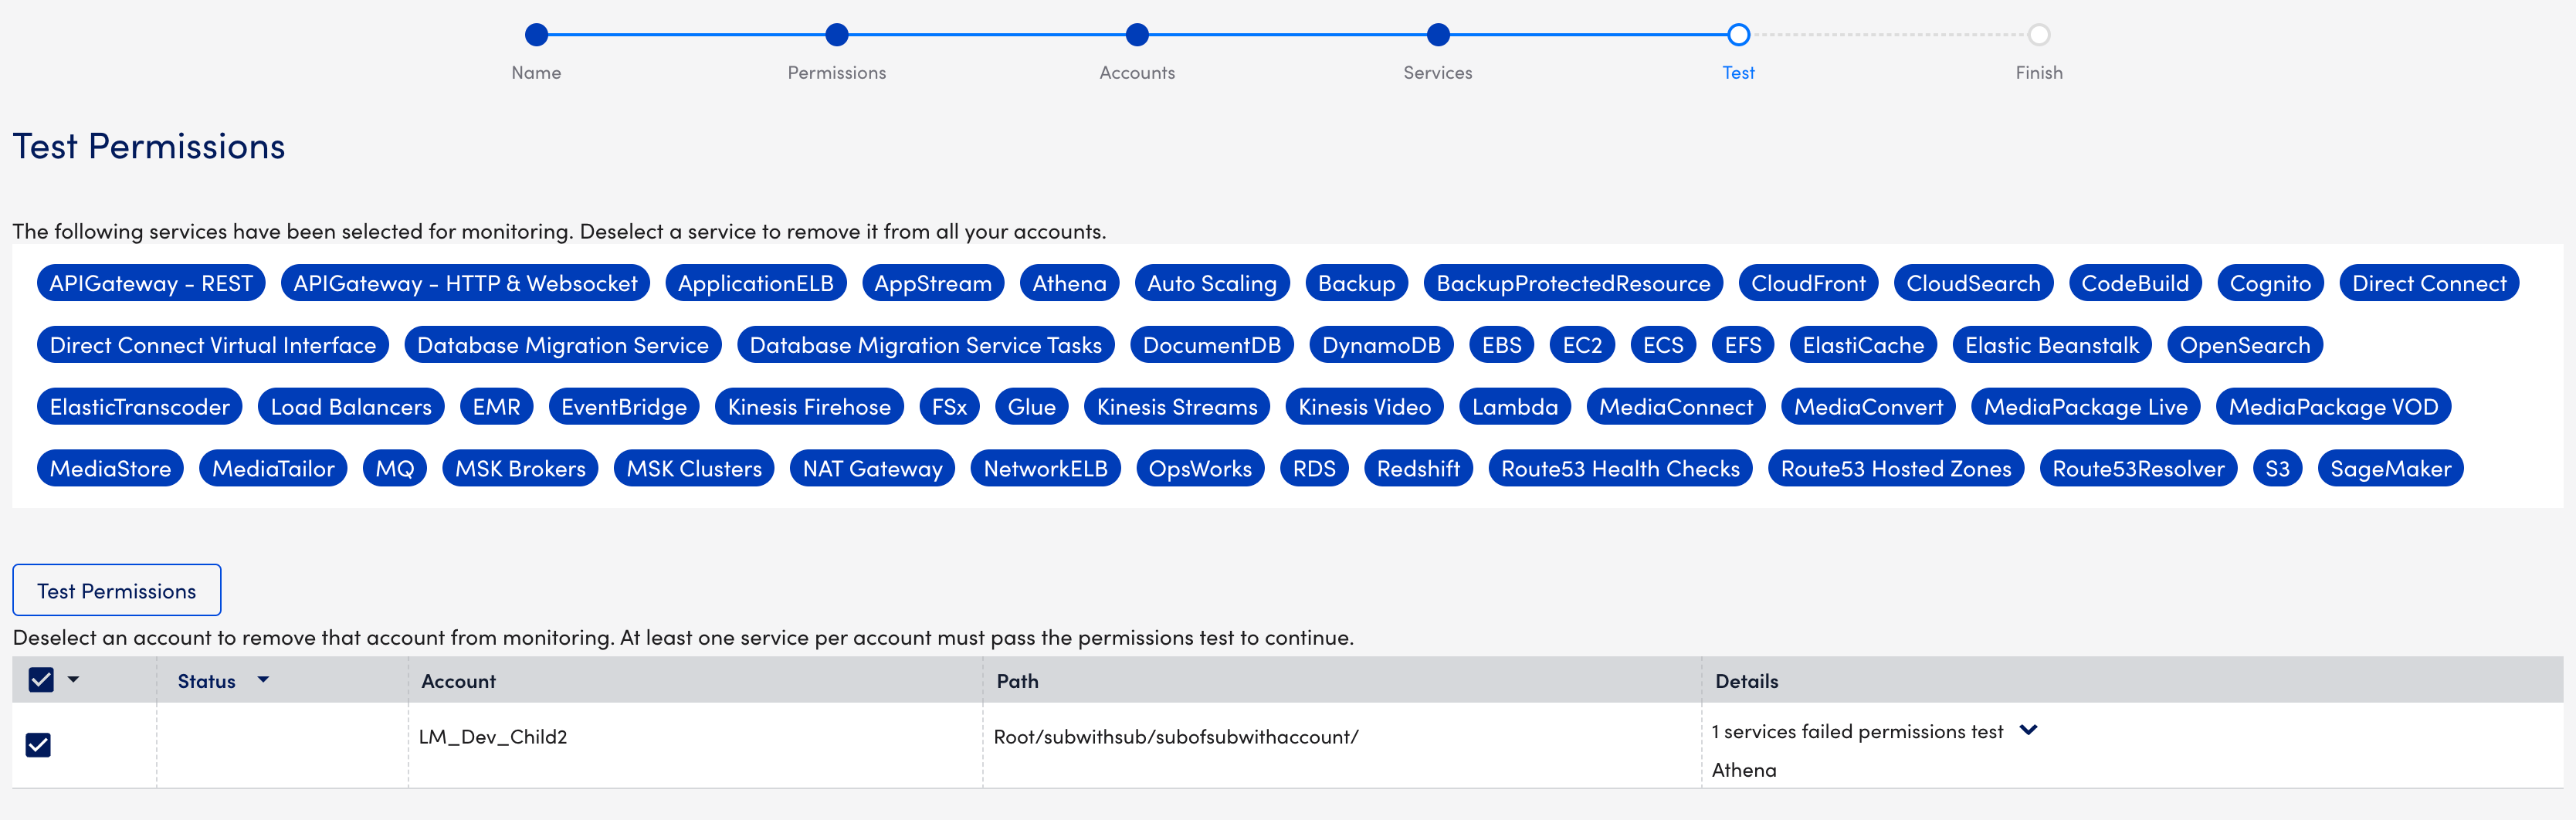
Note: When you deselect a service, it is deselected for all accounts. Your selections are automatically updated on the Services page. This is a scrollable pane, so you may need to scroll down to view all services.
- In the accounts table, select or deselect the accounts (OUs) that you want to add to monitoring.
- Select Test Permissions to run the test. There are three potential outcomes or statuses:
 Pass- All services passed the permissions test.
 Warning- Some services passed the permissions test.
 Fail- All services failed the permissions test.
- Select Next: Finish.
- On the Finish page, select View AWS Resource.
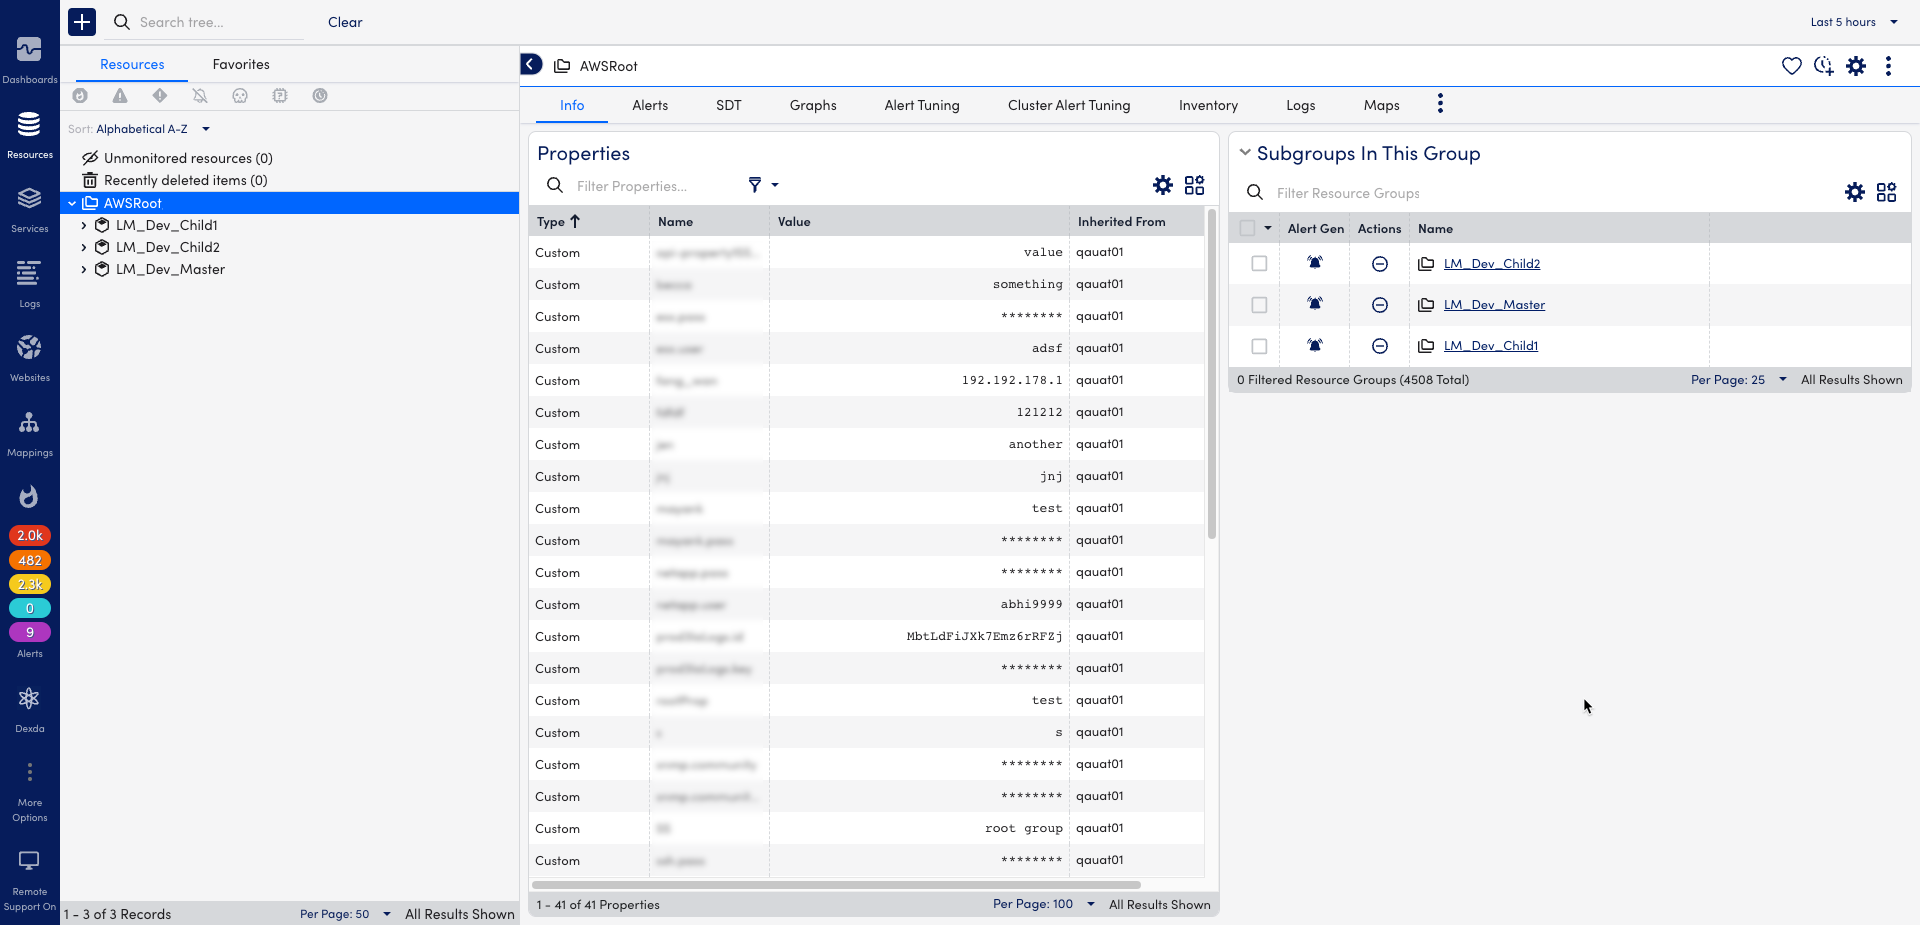
The Organizational Units are displayed on the Resources page.