
Adding Kubernetes Cluster into Monitoring as Non-Admin User
Last updated - 28 September, 2021
Disclaimer: Argus and Collectorset-Controller Helm Charts are being phased out. For more information to switching to the new LM Container Helm Chart for a simpler install and upgrade experiencere, see Migrating Existing Kubernetes Clusters Using LM Container Helm Chart.
When you add your Kubernetes cluster into monitoring, dynamic groups are used to group the cluster resources. For more information on adding a Kubernetes cluster into monitoring, see Adding Kubernetes Cluster into Monitoring.
Earlier, for adding dynamic groups, you required ‘manage all resources’ permission. However, now you can use API keys that have access to at least one resource group to add clusters for monitoring. The dynamic groups are linked to the resource groups that have the API keys with view permissions.
Administrator: Steps to Assign Permission to a Non-Admin User
- Create different device groups for non-admin users. For more information, see Adding Device Groups.
- Navigate to Settings> User Access> User and Roles> Roles tab.
- Select the required user group and click the Gear icon.
- On the Manage Role dialog box, provide access to the respective static groups.
Note: You can create multiple users with specific roles from the Manage Role dialog box.
Once the required permissions are provided, the non-admin users can add and monitor the Kubernetes clusters within the static groups respectively.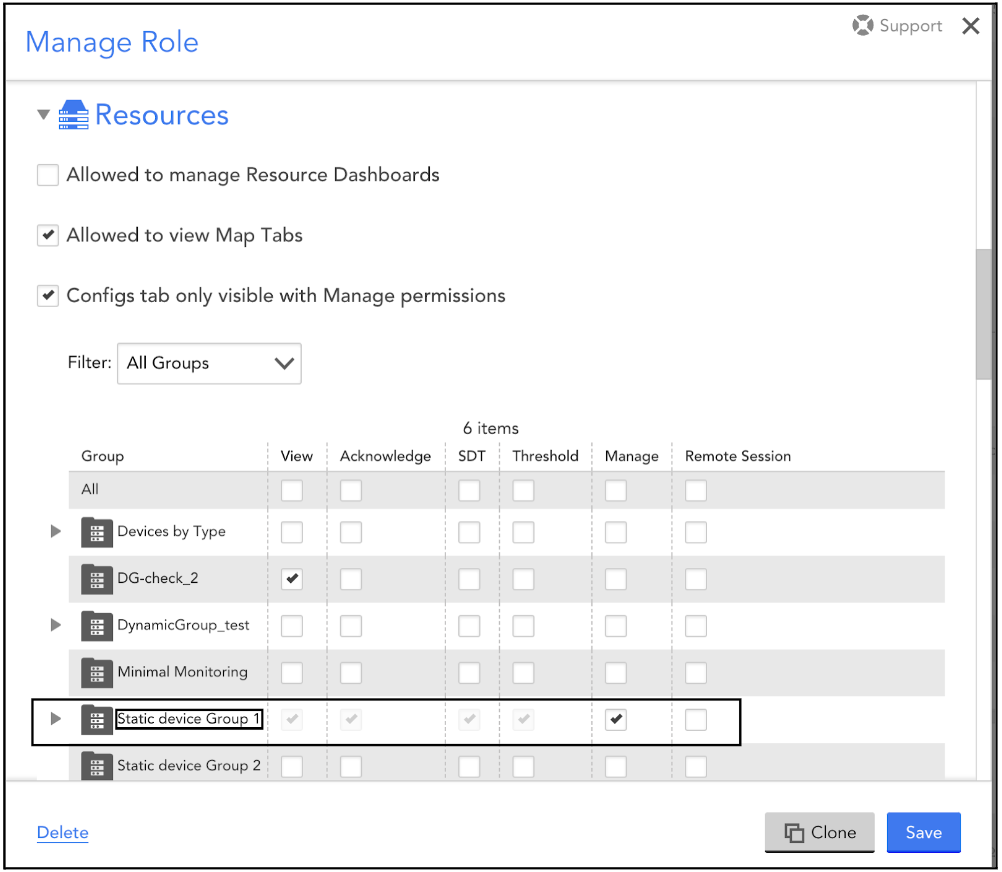
- Create different Collector groups and Dashboard groups for the non-admin users and provide access to the users for their respective groups.
- Select the User Profile setting and grant access to the non-admin users to create the API tokens and manage their profiles.
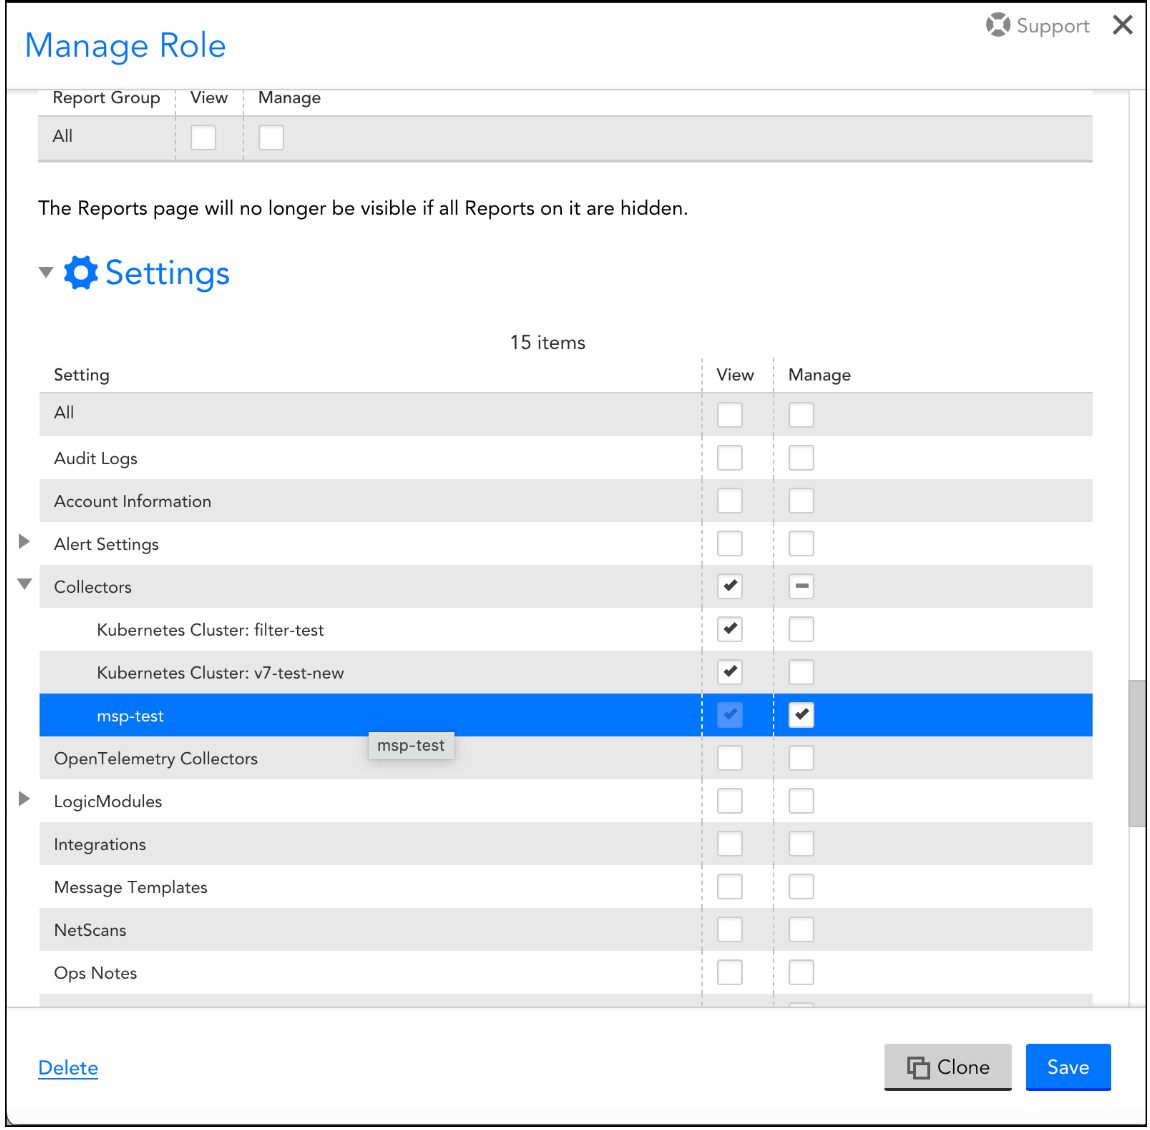
Note: Ensure to select the View checkbox for Collectors.
Non-admin user: Adding a Kubernetes Cluster
Once the administrator has completed all the prerequisites and allocated a resource group, then you can complete the following steps to add the Kubernetes cluster:
Note: You must have access to at least one collector before adding a Kubernetes cluster.
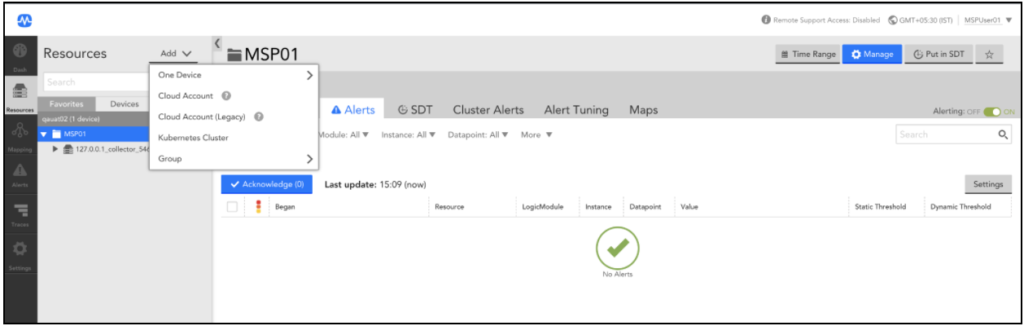
1. Navigate to Resources > Devices > select the allocated resource group for adding the cluster.
2. From the Add drop-down list, select Kubernetes Cluster.
3. On the Add Kubernetes Cluster page, add the following information:
a. In the Cluster Name field, enter the cluster name.
b.In the API token field, select the API token for the allocated resource group and click Save.
The other API Token fields information will get populated automatically.
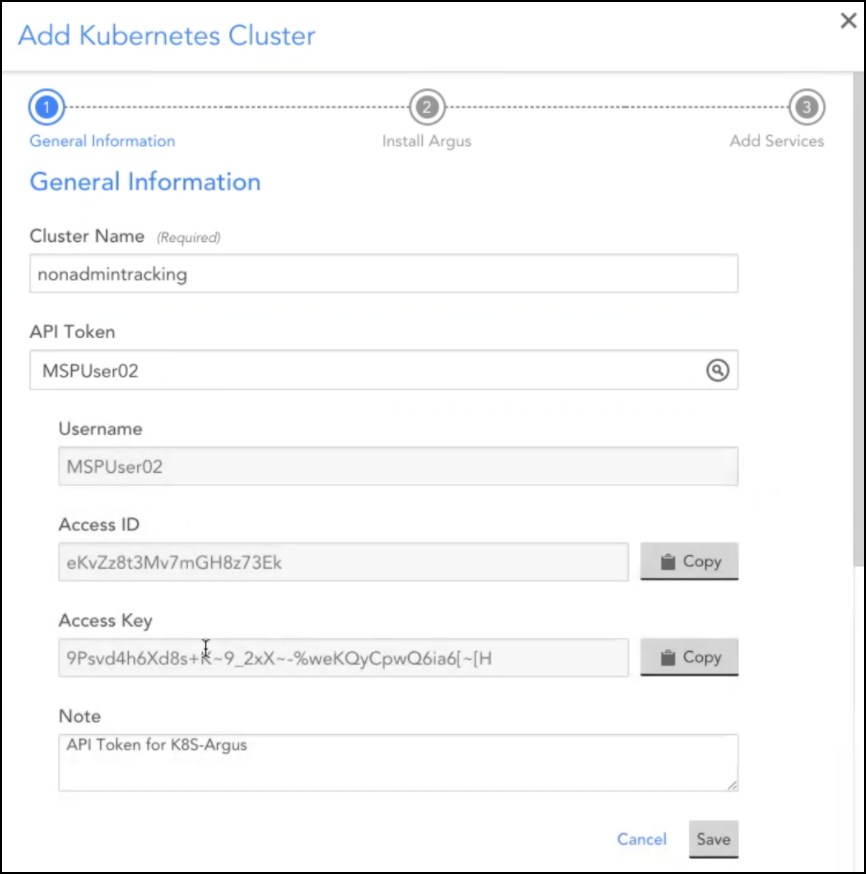
c. In the Resource Group field, select the allocated resource group name.
Note: If you select the root group in the Resource Group field, an error message “Insufficient permissions” will occur.
d. In the Collector Group and Dashboard Group fields, select the allocated Resource Group.
4. Click Next.
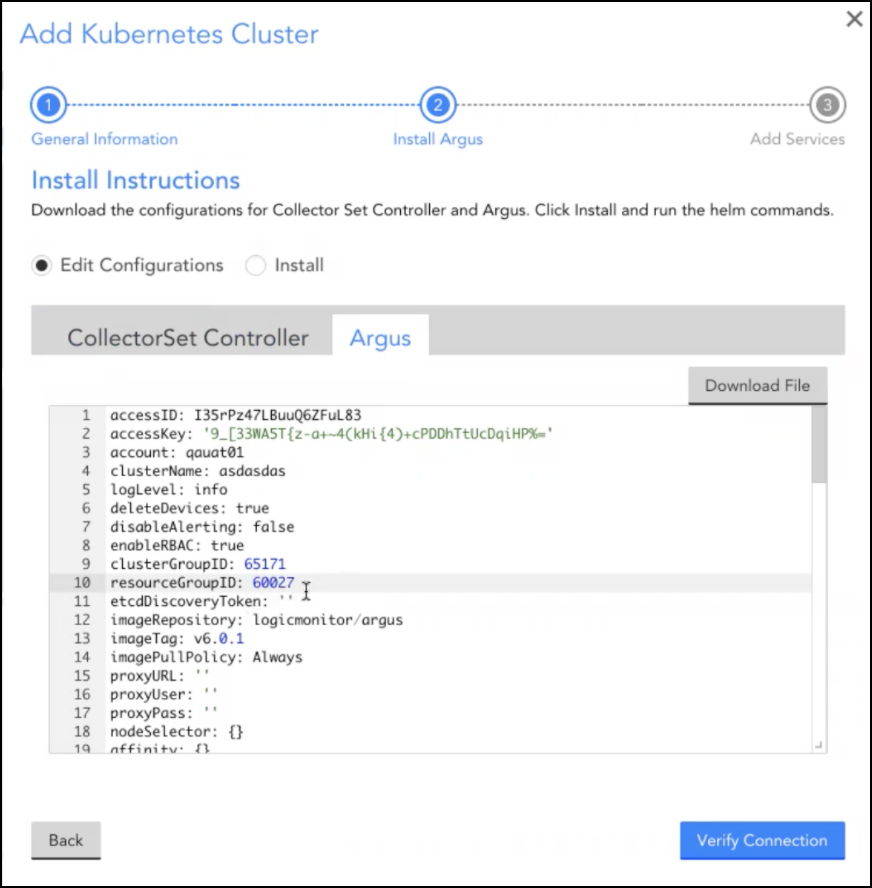
5. In the Install Instruction section, select the Argus tab.
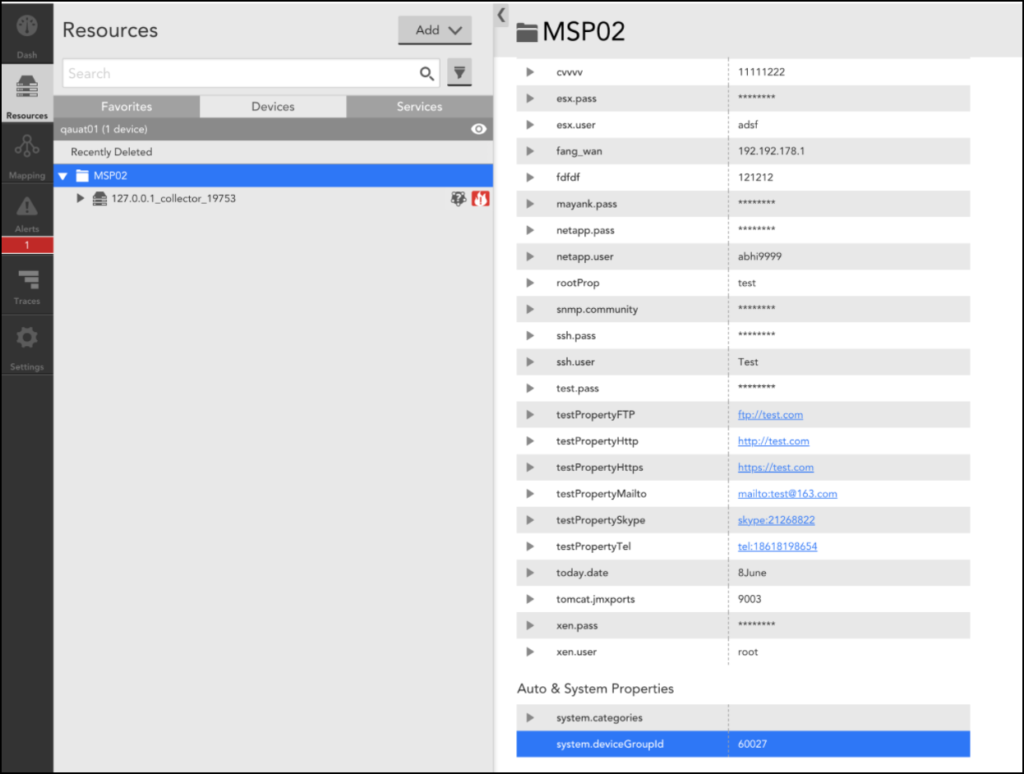
6. Select the resourceGroupID parameter and replace the default value with the system.deviceGroupId property value of the allocated resource group.
Note: To view the system.deviceGroupId value, navigate to Resources > Devices > select the allocated resource group, and click the Info tab.
7. Click Verify Connection. Once the connection is successful, your cluster is added.
Note: Currently, you cannot add services to the Kubernetes cluster. You must contact the administrator to add the required services.
