
Selenium Monitoring Setup
Last updated - 03 October, 2025
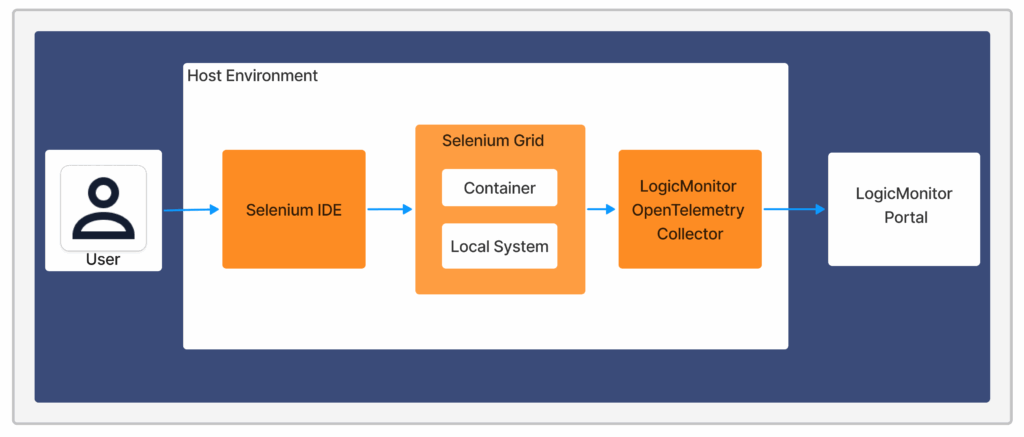
You can monitor your websites by setting up Selenium on your LogicMonitor setup by installing a reachable Selenium Grid and configuring your Collector. This enables seamless integration of Selenium Webchecks and synthetic performance insights directly in your LogicMonitor portal.
Setting up Selenium monitoring involves the following:
- Installing the Selenium Grid
- Updating the LogicMonitor Collector for Synthetics
General Requirements for Setting up Selenium
To set up Selenium Synthetics with LogicMonitor, you need the following:
- Selenium Grid 4
For information, see Selenium Grid 4 from Selenium documentation. - LogicMonitor Collector 34.100 or later
Note: You must install the Collector in an environment with network access to the Selenium Grid. For more information, see Adding Collectors.
Note: Set the Shared memory (/dev/shm) value to a minimum 2GB to ensure the browser-based test runs successfully.
Installing the Selenium Grid
You can install the Selenium Grid in the following two ways:
- Installation of Selenium Grid in a Container
For more information, see Installing the Selenium Grid in a Container. - Installing the Selenium Grid Locally
For more information, see Installing the Selenium Grid Locally.
Updating the LogicMonitor Collector for Synthetics
- In LogicMonitor, navigate to Settings > Collectors > select the Collector that has access to the Selenium Grid
- Select the
 against the collector and then select Collector Configuration.
 - In the Agent Config tab, enter the Selenium Grid URL to the
synthetics.selenium.environment.grid.urlproperty.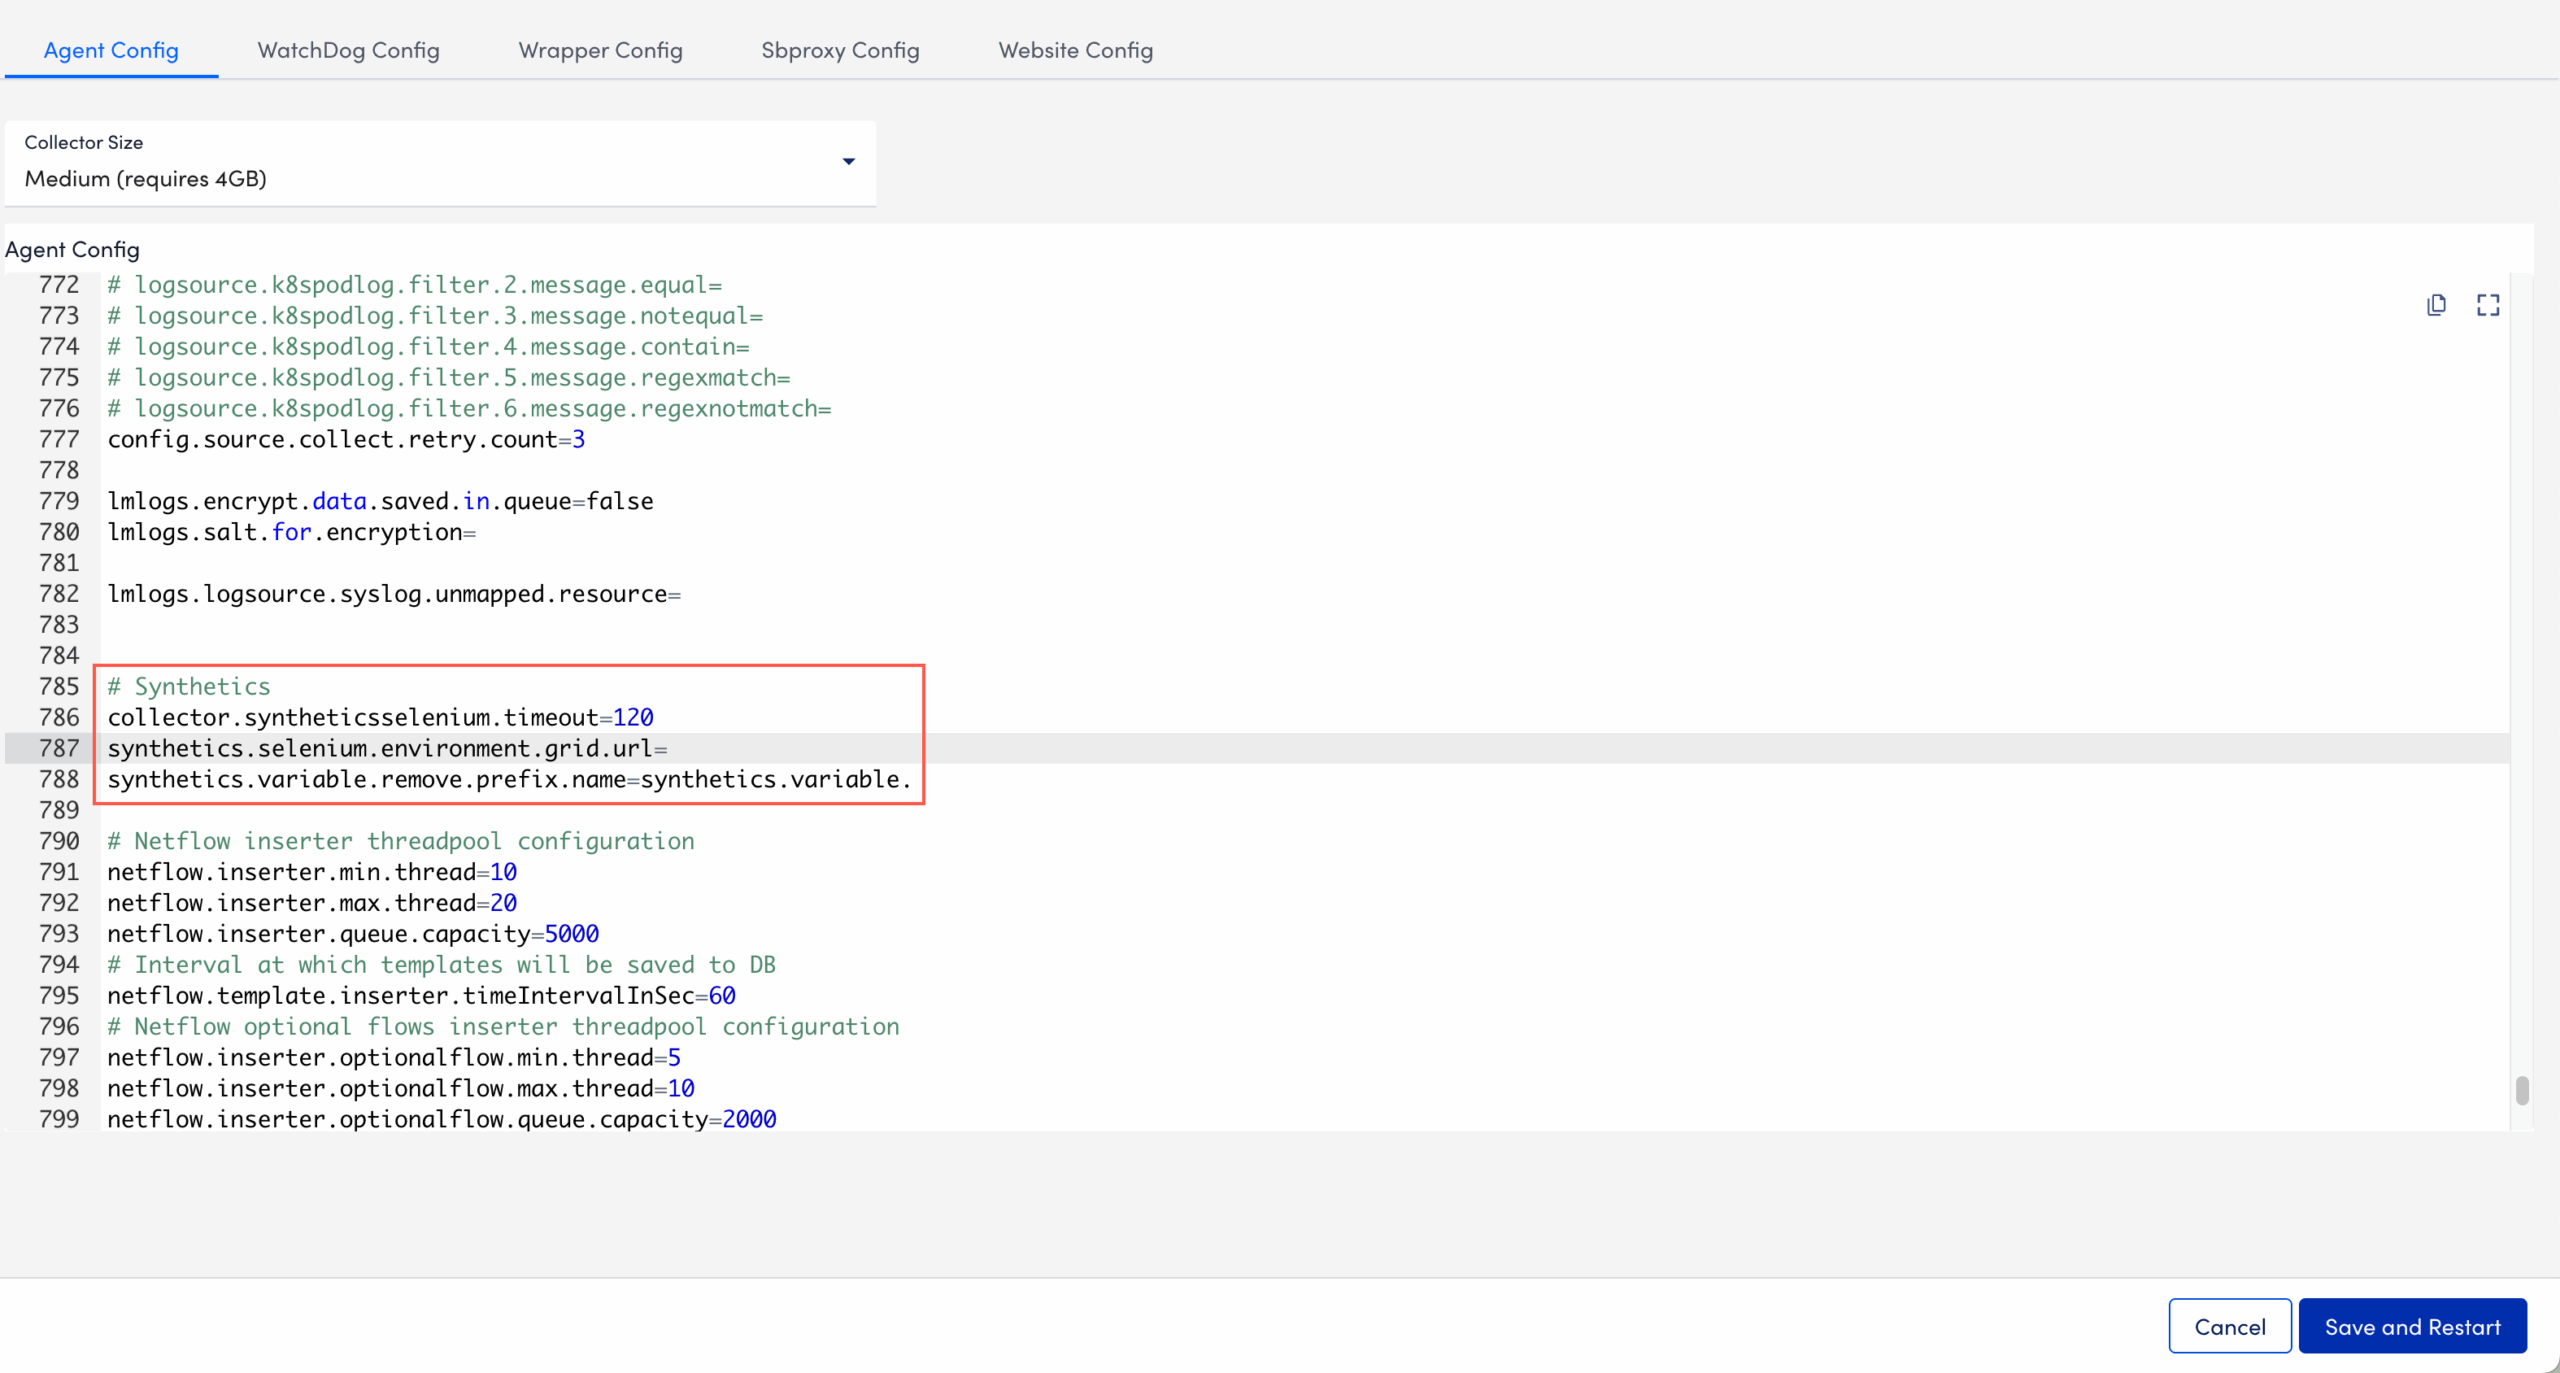
- Select Save and Restart.
The Collector restarts with the Selenium Webcheck assigned to it.
