
Adding Website Groups
Last updated - 24 July, 2025
As with other areas of LogicMonitor, websites can be organized into logical groupings. Groups can make website management significantly easier and save time when configuring dashboards, reports, user roles, website properties, and alert routing.
Strategies for Organizing Website Groups
There is no right or wrong way to group your websites. But there are a couple of common approaches we recommend that have been proven to be efficient depending upon your objectives:
- Grouping with alerting in mind—Consider grouping websites based on criticality. Critical websites with slow performance metrics are likely to be of more interest to you than QA websites. Grouping websites of similar importance allows you to route alerts by group so that you can efficiently prioritize alerts on critical websites.
- Grouping with user permissions in mind—Consider grouping websites based on the structure of your organization. Having a website group structure that mirrors your organizational structure can help teams quickly find the websites relevant to their roles. It also allows LogicMonitor administrators to easily set up roles for each group such that each team can only make changes to the websites they are responsible for. Grouping based on organizational structure may mean grouping by function, location, customer, or business application.
Adding a Website Group
Note: Website groups can also be added using LogicMonitor’s API. For more information, see Using LogicMonitor’s REST API.
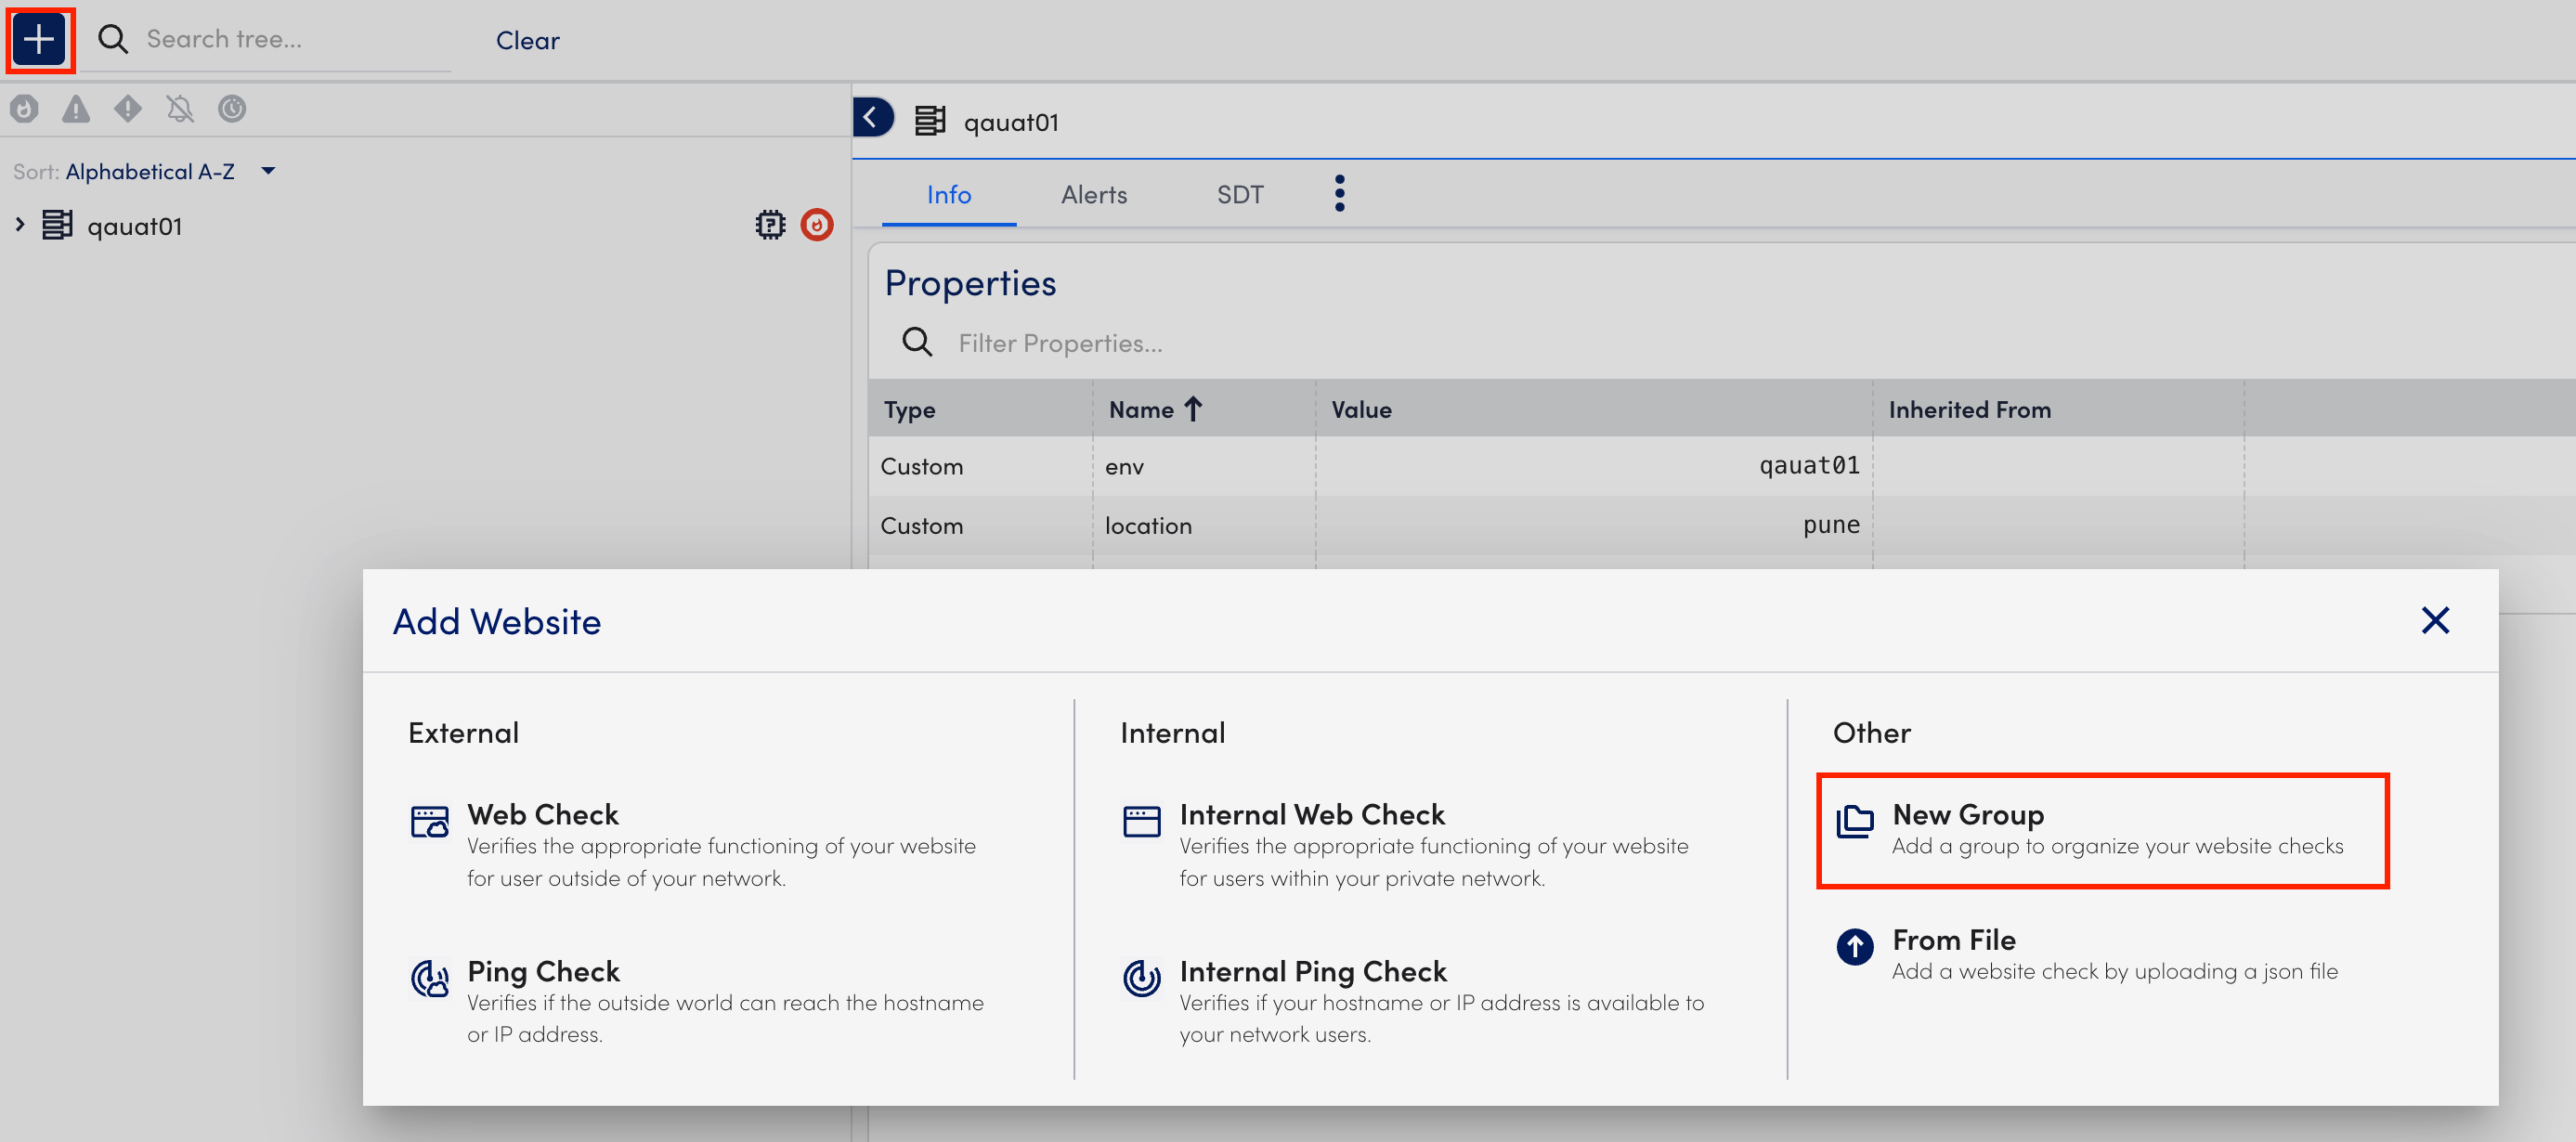
- In LogicMonitor, navigate to Websites > + (Add) > New Group (under Other section).
- In the Name field, enter a descriptive name for the website group. Website group names cannot include the operators and comparison functions. For more information, see Complex Datapoints.
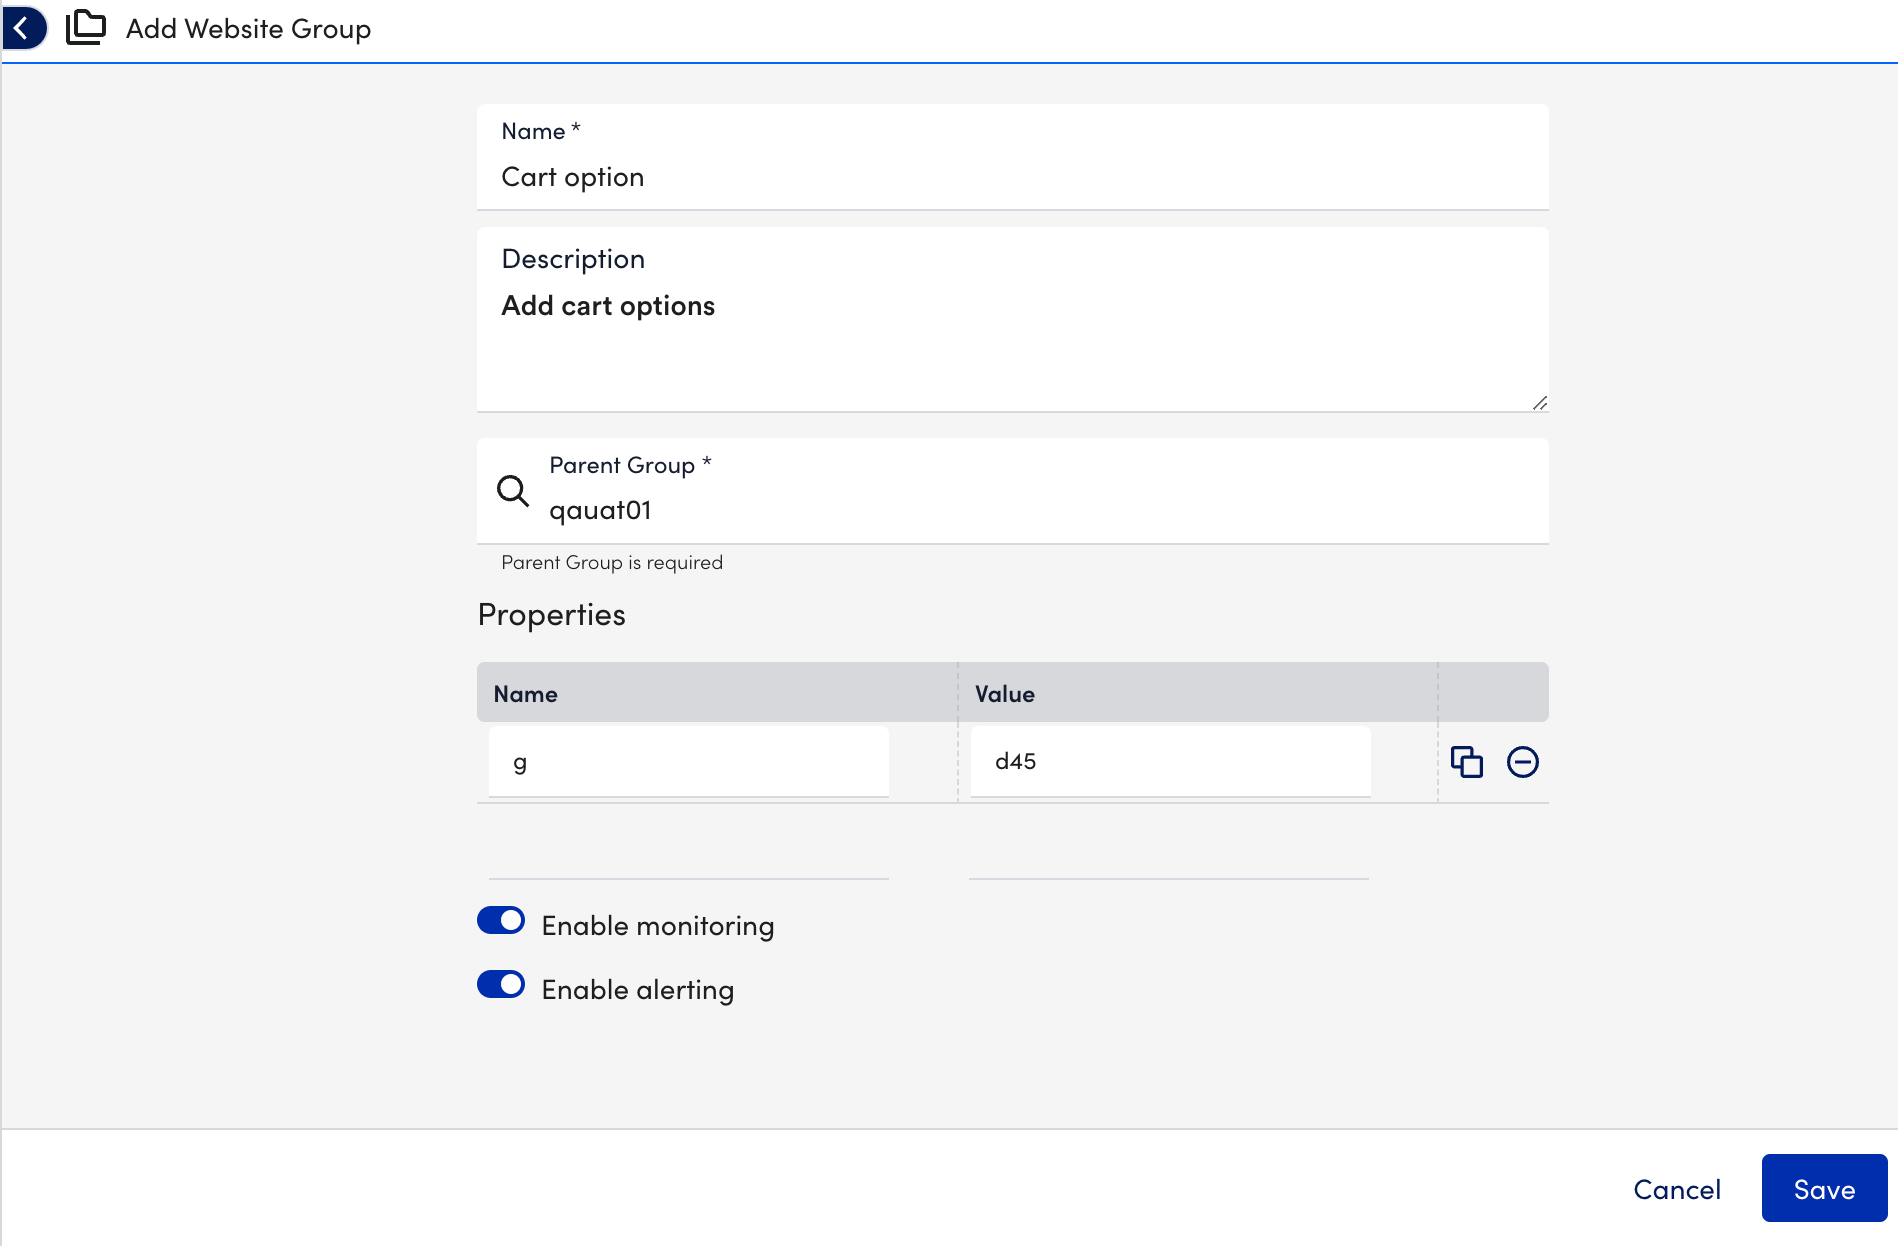
- In the Description field, briefly describe the scope and purpose of your new website group.
- From the Parent Group dropdown menu, select the group that the website group should belong to from the list of existing groups. By default, the new website group are created under the root website group (account name). You can create as many subgroups as you need and the above strategies can apply to them as well.
- In the Properties table, add the relevant properties.
Properties can be added to your website groups to facilitate organization, customize alert message templates, and so on. The properties you set here are inherited by all member websites and subgroups. - Toggle on the Enable Monitoring and Enable Alerting switches to turn monitoring and alerting on for all websites that are members of this group. Monitoring must be enabled to additionally enable alerting.
- Select Save.
Note: Two things to consider when you organize websites using subgroups:
- When you reference your website groups or subgroups throughout your LogicMonitor account (dashboards, reports, alert rules, user roles, and so on), you should wildcard the end of the group name with an asterisk: (For example,
Production*). A wildcarded group name automatically accounts for websites that belong to any subgroups you may later add to the group. - The values of properties set at the subgroup level override those set at the parent group level. For more information on property hierarchies, see Website Properties.
