
Portal Settings
Last updated – 17 March, 2026
You can use the Portal Settings of your LogicMonitor account to customize global behavior and functionality of your LogicMonitor portal for all users that log in. For example, you can add a company logo that is displayed on every portal for all LogicMonitor users.
Tenant Identifier Property Name
Alert aggregation is based on tenants. On the Alerts page, to display aggregation of alerts based on tenants, you must add the tenant.identifier property to your resources or resource groups to identify the property that belongs to a tenant. However, if you are already using some other property to bifurcate the resources or resource groups (that is, a property other than the tenant.identifier property), then to avoid rework, on the Portal Information page, you can override the default tenant.identifier property with your property. If there is an alert for any resource that has your property set, then LogicMonitor gets the tenant value from your property specified in the Tenant Identifier Property Name field.
To sync with the value you have set in the Tenant Identifier Property Name field, LogicMonitor uses the system.tenant.identifier property. It enables LogicMonitor to identify the tenant of a particular resource. The system.tenant.identifier property uses the value of the property set in the Tenant Identifier Property Name field. You can use your own custom property if you already have one (such as, customer.ID or auto.pod). Also, you can use the system.tenant.identifier property for other functionalities such as, the Applies To functionality. For more information, see Grouping Alerts by Tenant.
For more information about accessing your LogicMonitor account when 2FA is enabled, see Two-Factor Authentication Account Access.
Portal Clock Synchronization
LogicMonitor uses the Amazon Time Sync Service as the primary time source for all infrastructure that is hosted in AWS. All instances are configured to regularly synchronize their time with the AWS VPC Time Server.
All resources that are not hosted within AWS use time servers running and hosted on our Authentication and Authorization platform. These servers use the VPC time servers for their own synchronization to ensure that infrastructure resources stay in sync.
For redundancy and as a backup in case the VPC-based time server becomes unavailable temporarily, LogicMonitor also uses 3 geographically diverse time servers that are hosted with our Authentication and Authorization platform
Note: LogicMonitor customers can use the public-facing Amazon NTP servers to ensure that their devices are in sync with LogicMonitor’s infrastructure.
Normalized Property
If you leverage tools like Resource Explorer or Cost Optimization to monitor your cloud resources and devices. In that case, you can use Normalized Properties to consolidate resources and devices from different cloud providers and all other device types into a single property alias. This allows LogicMonitor to group resources and devices mapped to that alias into a single property, simplifying features like alert grouping and resource monitoring across clouds, devices, and environments. You can use Normalized Properties anywhere in LogicMonitor that allows you to filter or group properties by searching for the Normalized Property name, such as dashboard filters or topology maps.
For example, you can group the similar resource and device properties “system.aws.region”, “system.azure.region”, “system.gcp.region”, and “system.device.location” within a single normalized property. You can then filter or group by the normalized property in Resource Explorer to see all resources and devices mapped to that group simultaneously.
Property normalization is supported for all types of properties, including system, auto, and custom properties.
Note: It may take up to 24 hours for the normalized property to reflect on the device once the normalized property configuration is added, updated, deleted, or base properties change.
Each Normalized Property name must contain at least two mapped properties. The order of mapped properties in the list determines the priority of mapping those related properties. Users can add a maximum of 15 normalized properties to the list.
Requirements to Configure the Portal Settings
To configure the Portal settings, you need a LogicMonitor user with the “Manage” role for Account Information. For more information, see Users and Roles.
Configuring the LogicMonitor Portal Settings
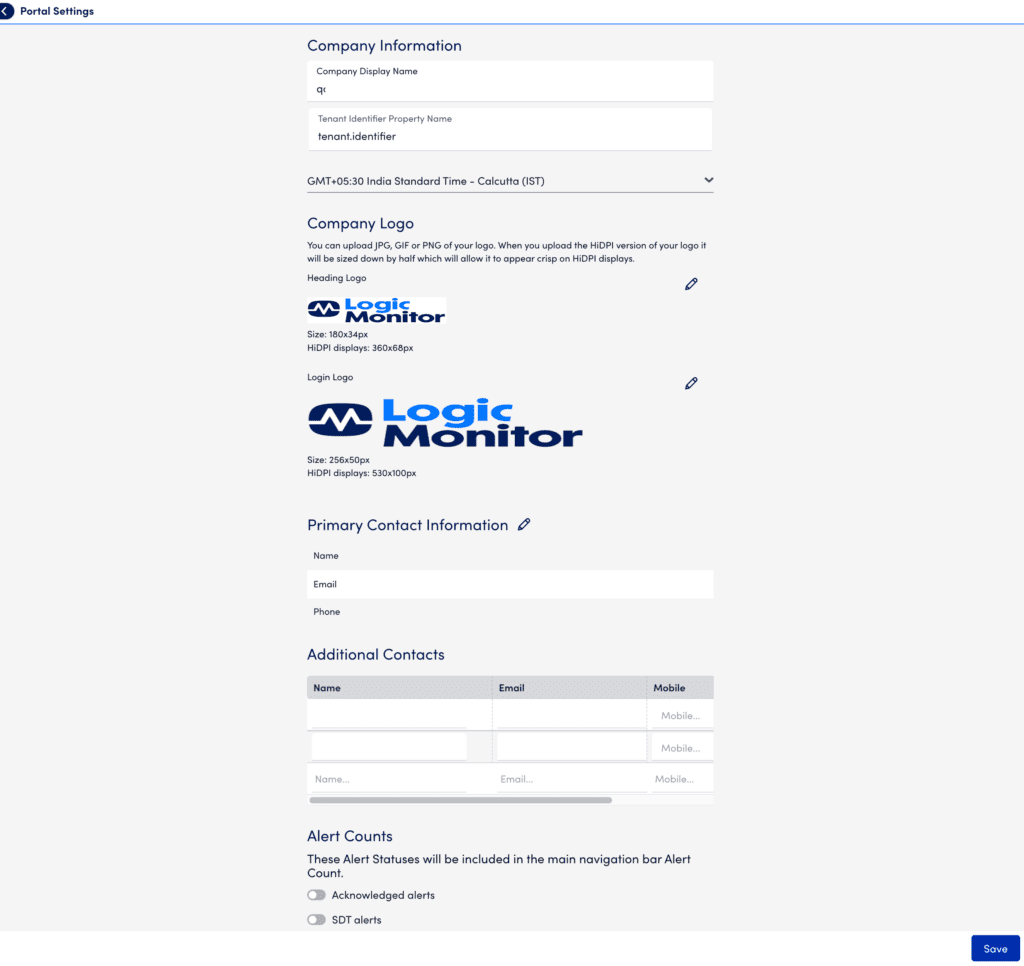
- In LogicMonitor, navigate to Settings > Account Information > Portal Settings.
- In the Company Display Name field, provide the name of the company.
The company name is displayed throughout your LogicMonitor account interface. - In the Tenant Identifier Property Name field, provide the tenant ID property name. For more information, see Tenant Identifier Property Name.
- To configure the time zone of your portal, select a time zone from the Time Zone setting.
Time zones associated with a city name (for example, “America/Los_Angeles”) automatically update according to Daylight Saving Time schedules. Time zones with “UTC” do not automatically update. For more information on time zone, see Portal Clock Synchronization.
Note: Time zones can be configured on a per-user basis. This allows users to view and configure time-based data and settings relative to their local region. For more information, see Users.
- In the Company Logo settings, select the Edit icon to upload a logo for the Heading Logo and Login Logo.
- In the Primary Contact Information setting, select the Edit icon next to Primary Contact Information, and provide the name, email ID, and phone number with the country code details of the user.
Note: LogicMonitor sends email notification to all local users and primary and additional contacts if the Require Two-Factor Authentication for all Roles and Users option, as defined in Security Settings, is modified.
- In the Additional Contacts setting, provide additional contact information for the Name, Email, and Mobile columns.
- In the Alert Counts settings, enable the alert status you want to display as an alert count in the main navigation menu and on the Alerts page. You can enable alert counts for the following:
- Acknowledged Alerts
- SDT Alerts
- Select Save.
The Portal Settings are applied at the global level for all users who log in to the portal.
