
Enabling Multi Sign-on
Last updated - 03 October, 2025
LogicMonitor’s Multi Sign-On solution enables administrators to add multiple tenants (IdPs) and manage users directly from their Identity Provider (IdP). This simplifies the login process and password management while providing the ability to take advantage of all of your IdP’s security features and efficiencies.
Enabling Multi Sign-on
- Login to the LogicMonitor portal with admin rights.
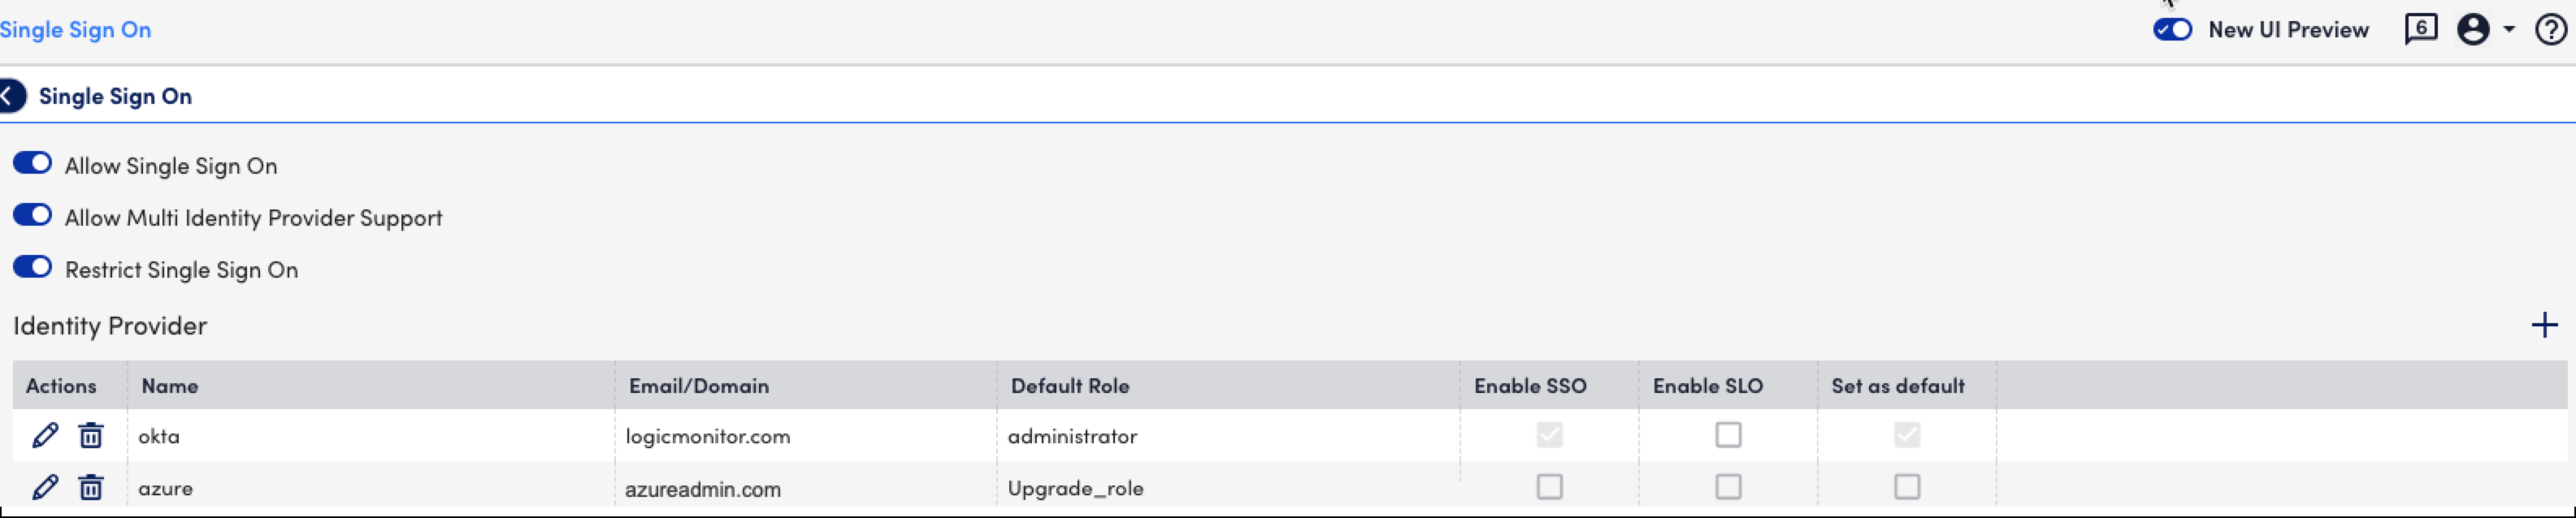
- In LogicMonitor, navigate to Settings > User Access > Single Sign On.
- Select the Allow Single Sign On option to view multi IdP support.
- Select Allow Multi Identity Provider Support for providing access to multiple tenants.
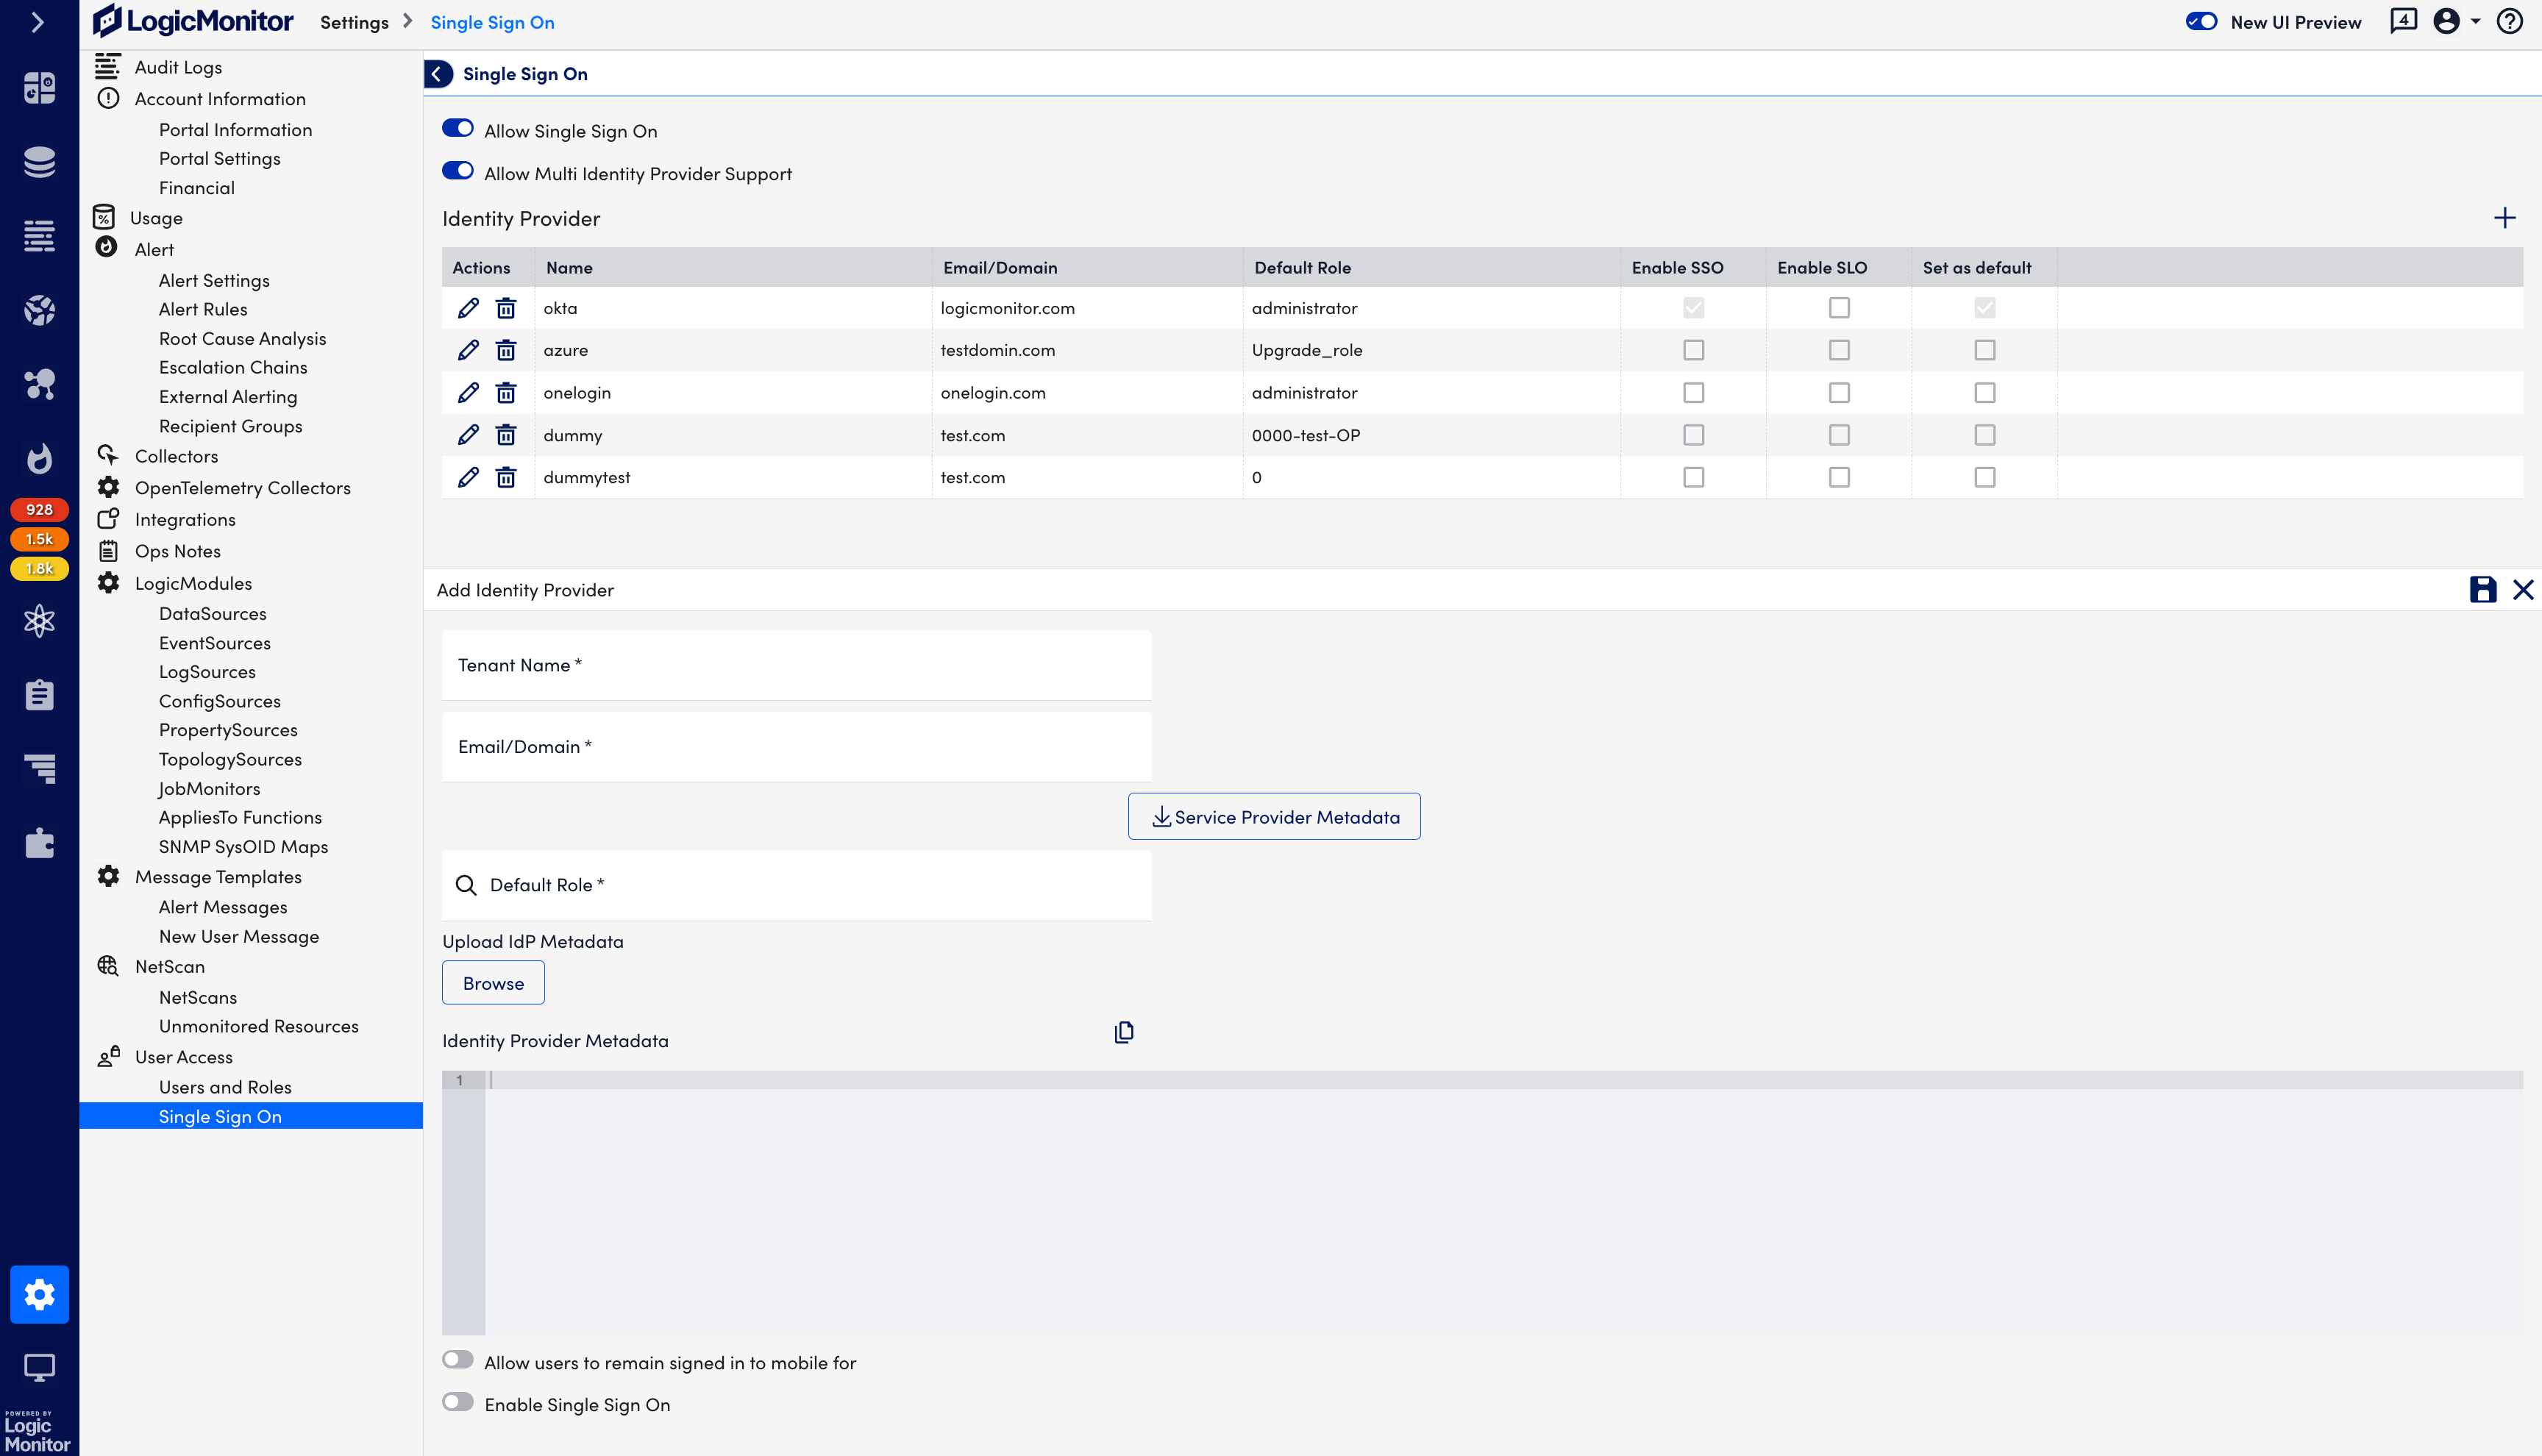
- Select + Add to add an identity provider.
- Select Service Provider Metadata.
- Select one of the options in SAML Assertion Roles Assignment:
- Allow all roles (Default) – Grants all roles from the SAML assertion.
- Allow only default role – Assigns only the tenant’s default role, ignoring any roles from the SAML assertion.
- Custom role mapping – Restricts role assignment to those explicitly listed in an allowlist. (Custom role limit controlled by GCC flag, default: 10 roles.)
- Provide the following tenant information:
- Tenant Name – (Required) Enter the name of the tenant.
- Email/Domain – (Required) Enter the email or domain name of the tenant.
Note: You can provide a list of multiple domains in comma-separated format. However, spaces are not allowed in the field. For example, abc.com,pqr.com,xyz.com - Default Role – (Required) Enter the required role for the tenant.
- Upload IdP Metadata – (Optional) You can upload the identity provider metadata of the tenant.
- Allow users to remain signed in to mobile for – (Optional) You can select the number of days for the user to remain signed in to mobile from the drop-down list.
- Enable Single Sign On: (Optional) Select the Enable Single Sign On option if you want the tenant to use the Single Sign On option.
Note: Only when you select the Enable SSO option, Enable Single Layout and Set as Default options are enabled for selection.
- Select Save to save the details of the tenants.
Note: If you change the Multi Sign-On to Single Sign-On, the default IdP is set as the primary IdP and other tenants are disabled. You must select at least one tenant to set as default IdP.
- Enable or disable the following options from the table grid:
- Enable SSO
- Enable SLO
- Set as Default

- Click Save.
Note: You must at least have one tenant while enabling Multi IdP support.
Editing or Deleting Tenant IdPs
- Login to the LogicMonitor portal with admin rights.
- Navigate to Settings > User Access > Single Sign On.
- Select the Enable Single Sign On option to view Multi IdP support.
- Select Allow Multi Identity Provider Support for providing access to multiple tenants.
- Select Edit or Delete on the extreme right side of the row, to edit or delete the tenant details.

Example
If you want to set up Single Sign-On for multiple tenants. You can enable the Multi IdP support option from the User Access page.
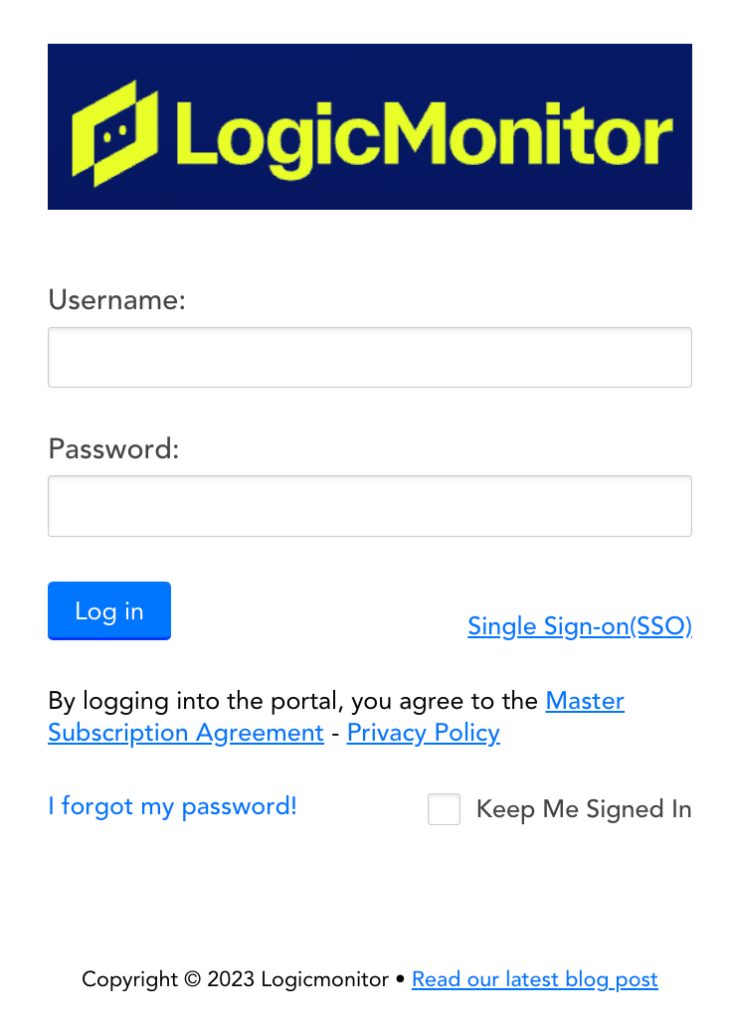
Once you enable Multi Idp support, the user will see the following login page:
The user can click Login with Single Sign-On to get redirected to the User Domain page.
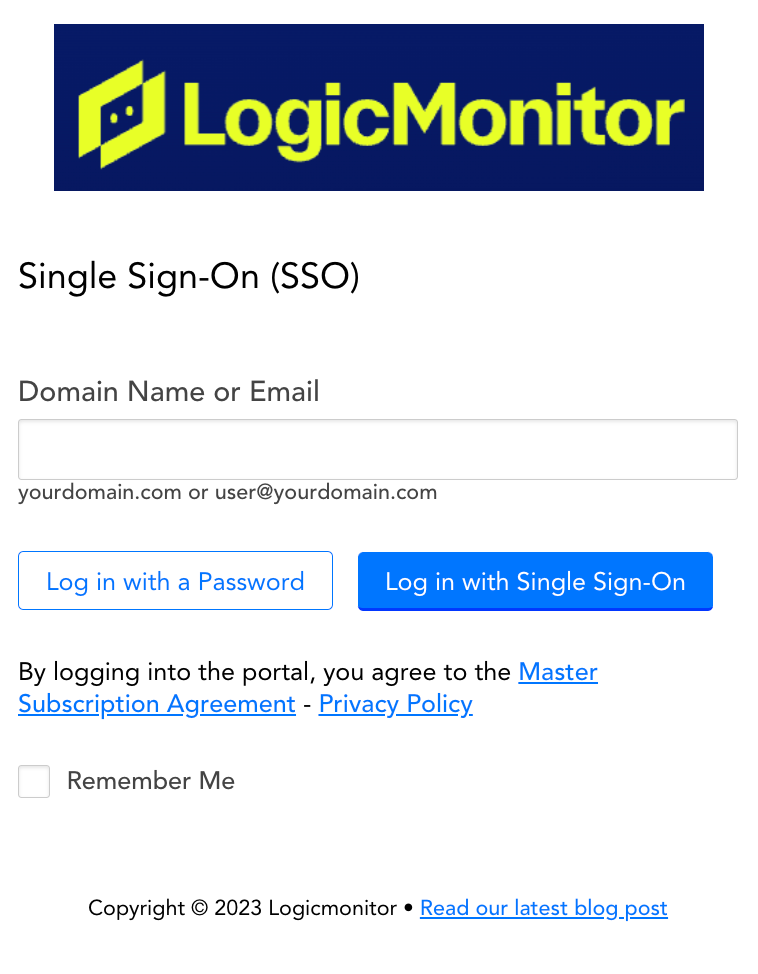
Note: The user must provide the Email ID/ Domain Name provided while configuring tenants.
Restricted Single Sign-On
You can force users to authenticate with a configured Identity Provider using Restricted Single Sign-On in your LogicMonitor portal.
Note: Restricting Single Sign-On disables the ability to enforce 2FA. In addition, when using LogicMonitor’s REST API, users can authenticate API requests with username/password or API tokens.
Requirements for Enabling Restricted Single Sign-On
You must log in with admin rights to enable the Restricted Single Sign-on feature.
Enabling Restricted Single Sign-On
- Navigate to Settings > User Access > Single Sign On.
- Select Restrict Single Sign On to force users to authenticate with your Identity Provider. For more information, see Enforcing SSO.
- Select Save.
