
Testing the Steps of a Web Check
Last updated – 24 July, 2025
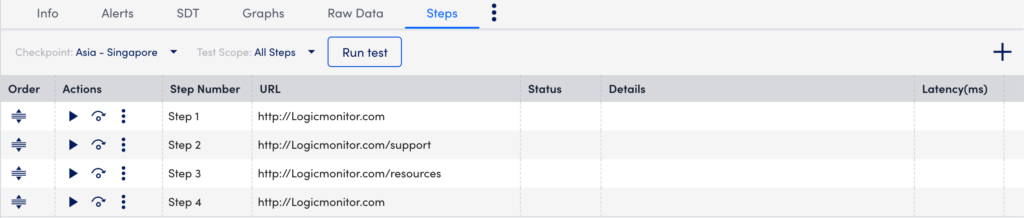
You can test the steps for your Web Checks from the Steps tab. The Steps tab displays the Web Check step that you added while creating the External Web Check.
Testing Multiple Steps
To test all or multiple steps, do the following:
- In LogicMonitor, navigate to Websites > required Web Check.
- Select the Steps tab.
- Select the required checkpoint from the Checkpoint dropdown menu from which the steps should be tested. Depending upon whether the website is being tested by an External Web Check or an Internal Web Check, you can choose from either a list of checkpoints or internal Collectors.
- Select All Steps or To Step X from the Test Scope dropdown menu.
- Select Run test.
The test details display in the Status, Details, and Latency columns. On clicking each step, additional details display in the Test Result tab.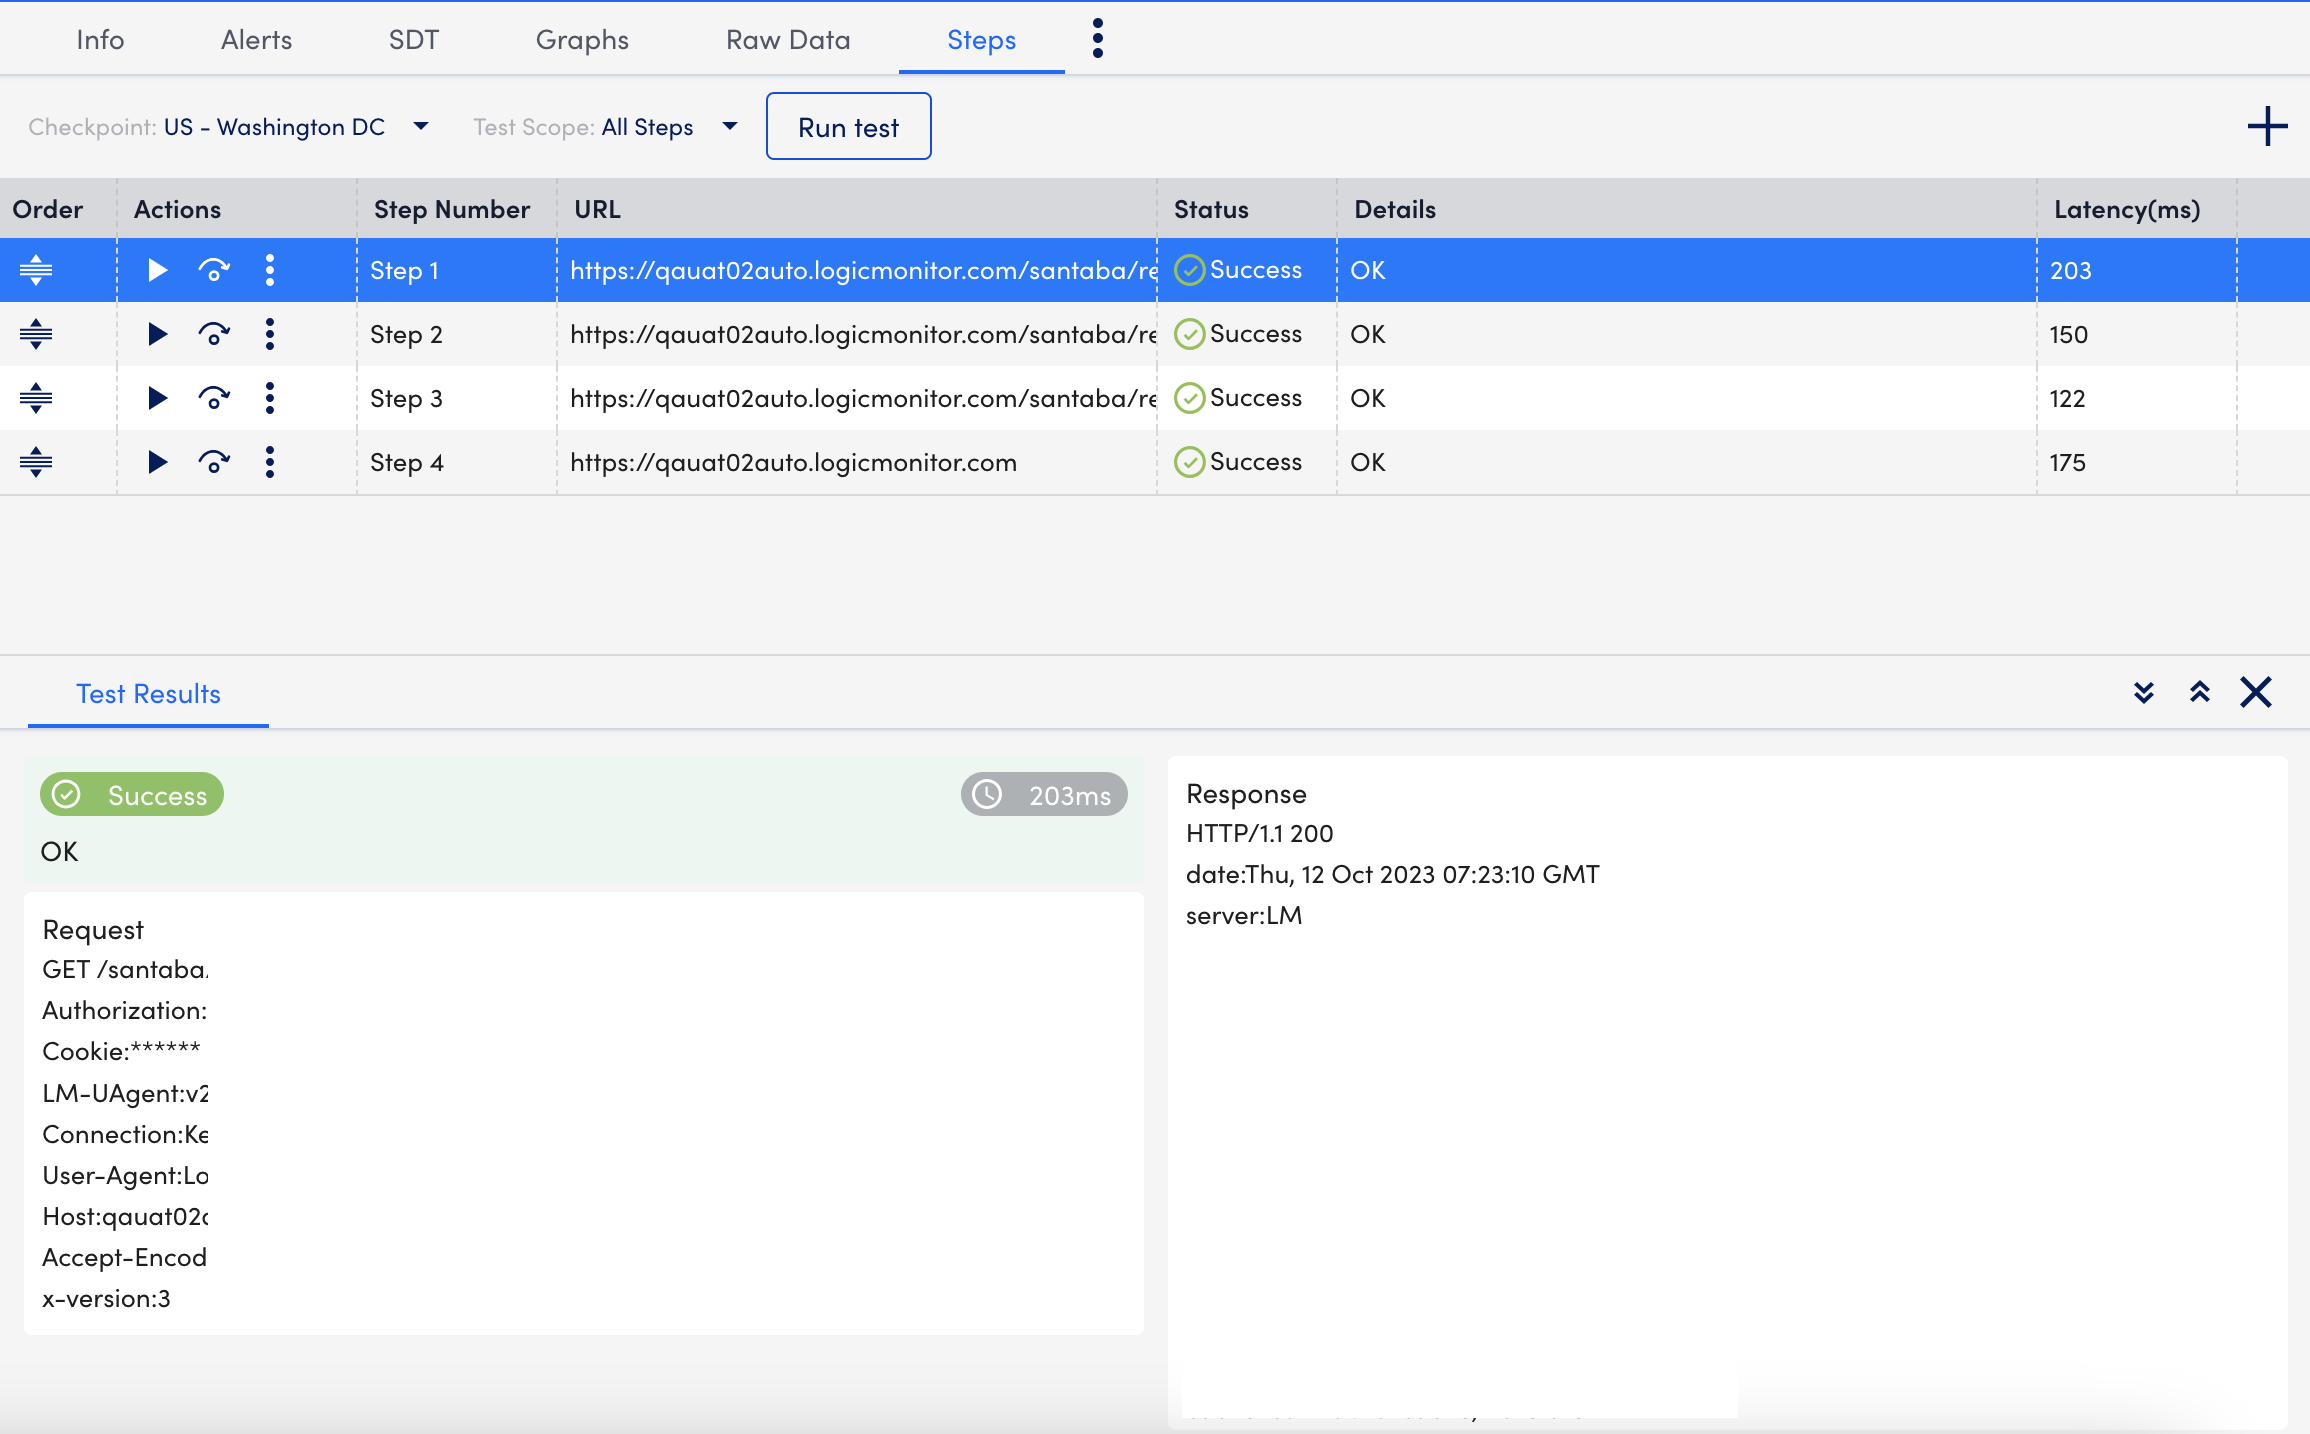
Testing Individual Step
- In LogicMonitor, navigate to Websites > required Web Check.
- Select the Steps tab.
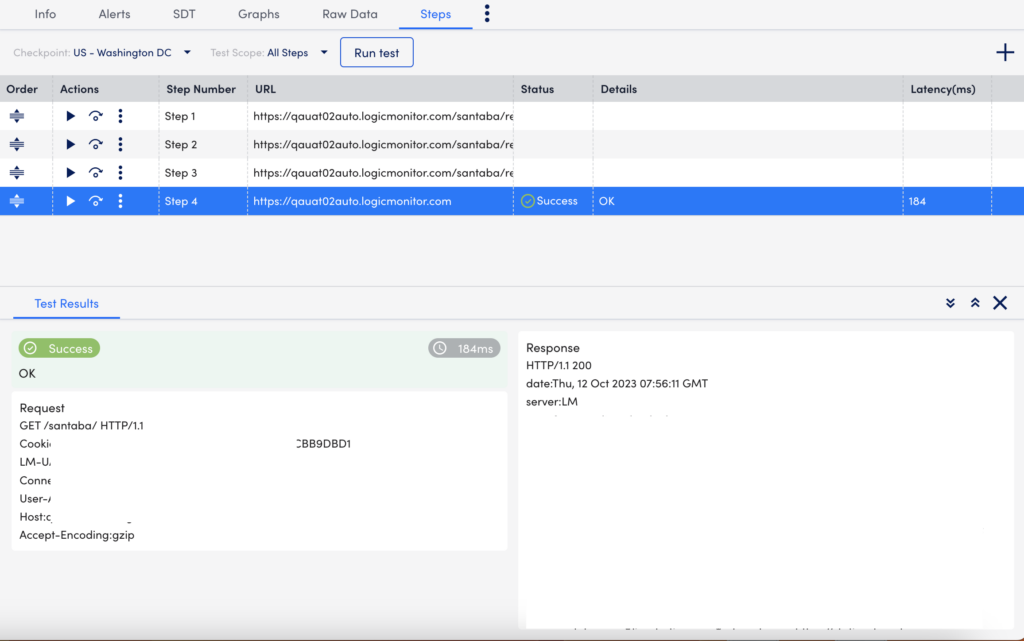
- Select the required step you want to test.
- In the Actions column, you can perform the following:
 (Run test)—Starts the test for the individual step.
 (Skip Step)—Skip this individual step when you run the test for all the steps.
Note: Once you apply the skip test, you can revert it by selecting (Cancel Skip).
  (More Options)—Manage the individual step. For example, you can edit, clone, or delete the step.
The test details display in the Test Results tab.
Adding Steps
- In LogicMonitor, navigate to Websites > required Web Check.
- Select the Steps tab.
- Select
 (Add Step).
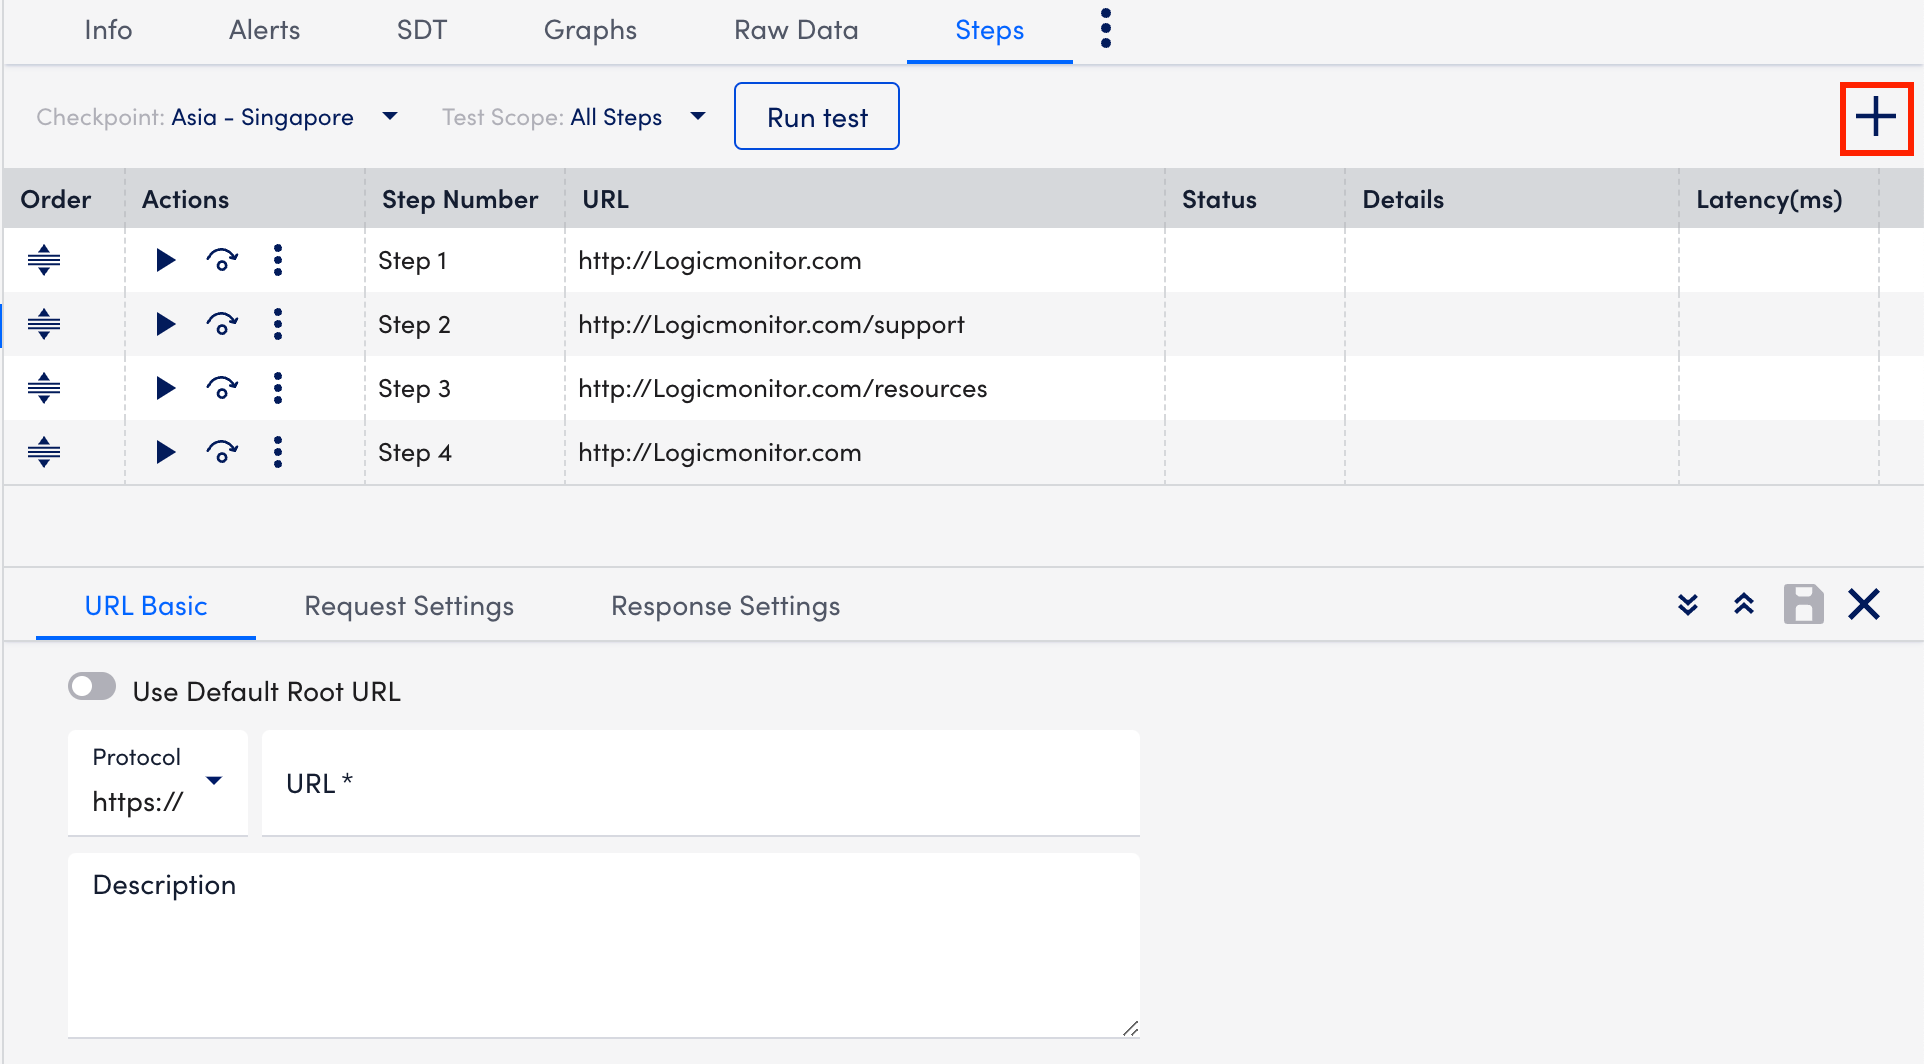
- In the URL Basic tab, perform the following:
- (Optional) Select the Use Default Root URL toggle to use the same root URL as the Web Check and enter the required details. The toggle is turned off by default.
- Select http:// or https:// protocol from the Protocol dropdown menu depending on your web server settings.
- In the URL field, enter the website domain to which your Web Check request will be sent.
- (Optional) In the Description field, enter the necessary description.
- In the Request Settings tab, perform the following:
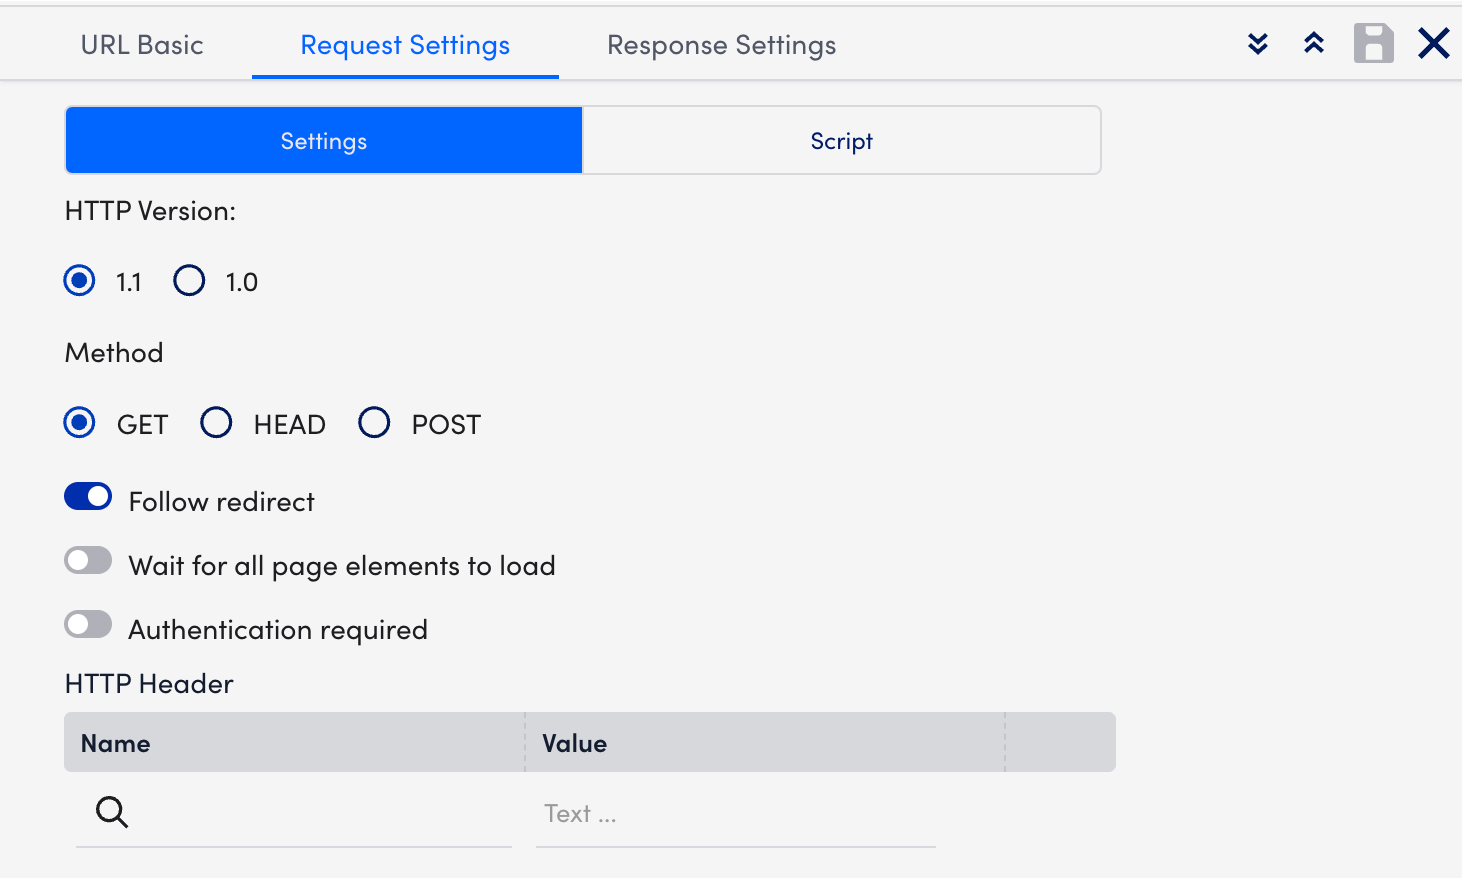
- In the HTTP Version field, select the version of HTTP that should be used to make the request. The version you select is based on your website’s settings.
Note: You can determine this setting in the response headers using the Linux or Unix cURL command (For example,curl –head help.logicmonitor.com). - In the Method field, select the HTTP method (GET, HEAD, or POST) that should be used to make the request.
If you select the POST option, additional configurations display that allow you to specify the data to be included in the request payload. In addition, the Formatted Data option allows you to specify how the data must be formatted. - Toggle on the Follow redirect switch to allow the HTTP request to follow any redirects configured for the URL. This toggle is on by default.
- (Optional) Toggle on the Wait for all page elements to load switch to allow the HTTP request to wait for all page elements (For example, headings, paragraphs, images) to load before checking the response.
- (Optional) Toggle on the Authentication required switch for requests that go to a page requiring either HTTP Basic authentication or NT LAN Manager (NTLM) authentication. Additional configurations display that allow you to specify the type of authentication and the authentication credentials that are used in the HTTP request.
- Select the type of authentication (Basic or NTLM) used by the page from the Auth type dropdown menu.
Basic— HTTP Basic authentication passes the username and password as fields in an HTTP header.
NTML— NT LAN Manager (NTLM) is a suite of Microsoft security protocols that provides authentication, integrity, and confidentiality to users. This authentication type is usually recognizable by a grey dialog that prompts you for a username and password. - In the Username and Password fields, enter your authentication credentials. If using NTLM authorization, you are prompted to enter a domain as well.
- Under the HTTP Header table, add any header key-value pairs that should be included in the HTTP request.
- In the HTTP Version field, select the version of HTTP that should be used to make the request. The version you select is based on your website’s settings.
- In the Response Settings tab, perform the following:
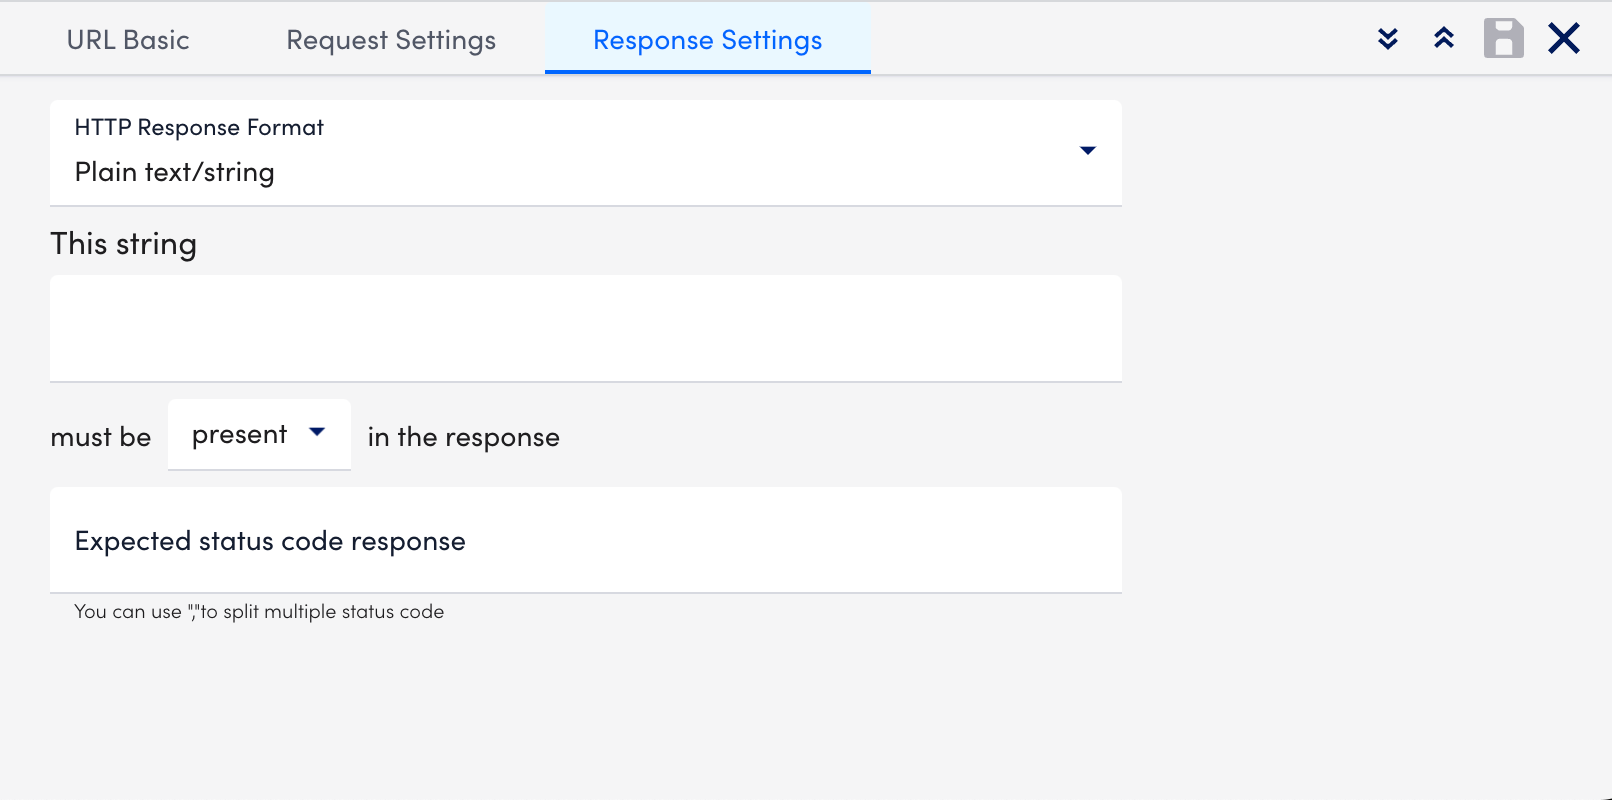
- Select a format for the response to the HTTP request from the HTTP Response Format dropdown menu. Once selected, some of the fields on the page are dynamically updated allowing you to specify format-specific criteria that should be included in (or absent from) the response. If relying on the presence of a string, note that the entry is case-sensitive. Plain text/ string is the default value.
Note: If you select the XML option, additional configuration settings display, and Xpath processing does not support regular expressions. In order to find string matches in the page’s returned XML, you need to use the contains querycontains(//ACADEMY/CATALOG/text(),"Introduction"). This query returns true if the string is present. A useful tool for testing Xpath queries can be found at freeformatter.com. - In the Expected status code response field, enter the expected HTTP status codes that are included in the response. Enter only integers. Commas should separate multiple status codes. If no status is specified, a
200/OKresponse is expected.
- Select a format for the response to the HTTP request from the HTTP Response Format dropdown menu. Once selected, some of the fields on the page are dynamically updated allowing you to specify format-specific criteria that should be included in (or absent from) the response. If relying on the presence of a string, note that the entry is case-sensitive. Plain text/ string is the default value.
- Select
 (Save step only).
Reordering Steps
You can move the steps by selecting  from the Order column for the required step and dragging it to the required location.
