
Edwin AI Jira Server Integration
Last updated – 05 September, 2025
The Edwin AI Jira Server integration enables automated issue management within Jira Server or Jira Data Center environment. For example, you can track any creations, updates, and changes to the transition states of Jira issues based on alert workflows configured in Edwin AI.
Note: Only Jira Server on-premises deployments are currently supported.
The integration uses a Jira Personal Access Token (PAT) to authenticate requests and supports all Jira issue types and custom fields, provided the integration user has appropriate permissions. For more information about PATs, see Using Personal Access Tokens from Atlassian.
Configuring the Edwin AI Jira Server Integration involves the following:
- Creating an Edwin AI user in a Jira Server Account
- Adding a Jira action to an action group and configuring mapped fields
This process supports centralized alert handling and ensures Edwin AI and Jira remain synchronized in real time.
Supported Custom Fields
Edwin AI supports any custom field that exists within your Jira project, as long as the integration user has permission to write to it. Custom fields can be configured with your Edwin AI administrator.
The following table includes example custom fields used by Jira Service Management (JSM):
| Field Name | Custom Field ID |
| Assignment Group | customfield_10218 |
| LM Ref (LogicMonitor Alert IDs) | customfield_16201 |
| Additional Information | customfield_10350 |
| Impact | customfield_10200 |
| Urgency | customfield_10206 |
| Category – Subcategory | customfield_10219 |
| Contact Type | customfield_10332 |
| Environment | customfield_10225 |
| Impacted CI | customfield_10333 |
| Potential Regulatory Reporting Impact (INC) | customfield_12002 |
| Data Regeneration (INC) | customfield_12303 |
Requirements for Configuring the Edwin AI Jira Server Integration
To configure the Edwin AI Jira Server or Jira Data Center integration, you have the following within Jira:
- Jira Server or Data Center (version 9.x or later)
- A Jira user with “Administrator” permissions set
- A Personal Access Token (PAT)
For more information about PATs, see Using Personal Access Tokens from Atlassian.
In addition, in Edwin you need an Edwin AI user with “Manage” permissions set.
Creating a Edwin AI user in a Jira Server Account
- In Jira, navigate to User management and create a new user account to represent Edwin AI.
For more information, see Create, edit, or remove a user from Atlassian.Important: Ensure the new user is assigned to the correct group or project role, and confirm that the user has permission to do the following:
Create issues
Edit issues
View project details
Write required custom fields - Share the following details with your Edwin AI administrator:
- Personal Access Token (PAT)
- Jira project key(s)
- Jira issue type ID(s)
- Custom field ID(s) and field names
Confirm that your custom fields are added. They display in the Add Action Mapped Fields dropdown menu when they have been added.
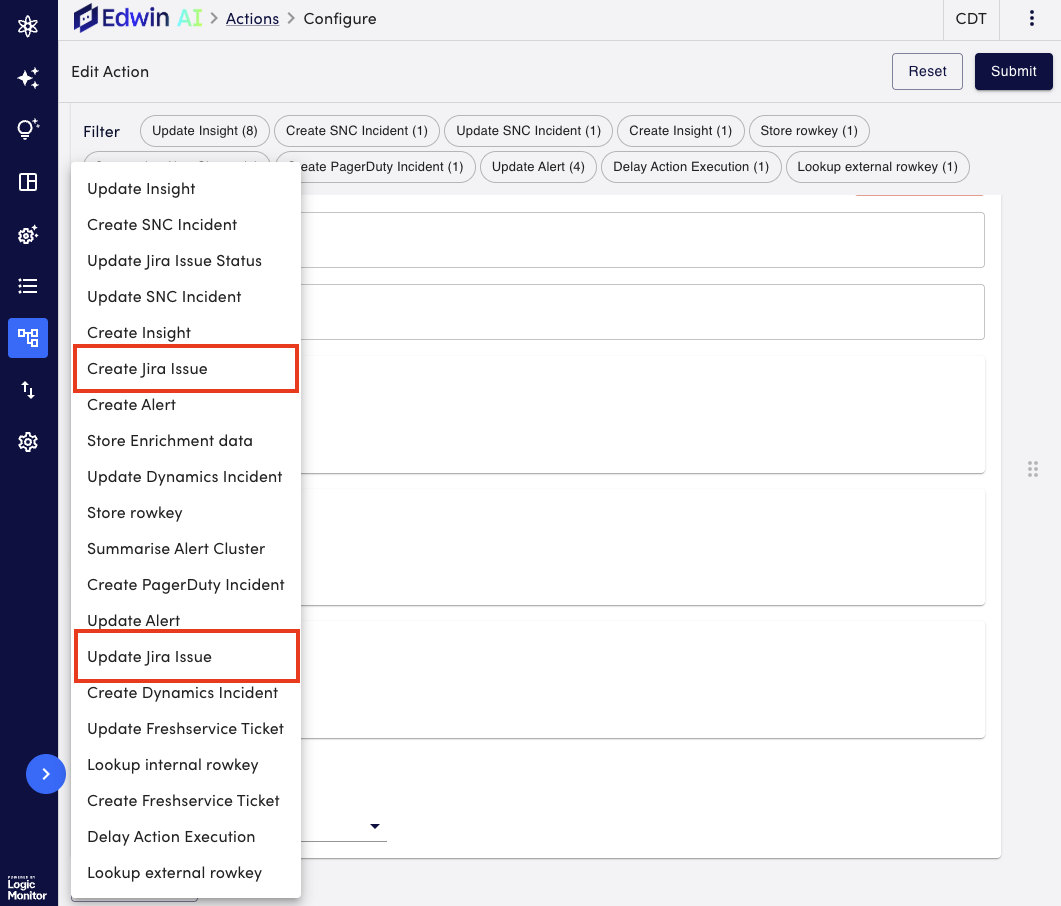
Adding Jira Server Action to An Action Group in Edwin AI
- In LogicMonitor, navigate to Edwin AI > the Actions page.
- Select Edit on either your Alert Correlation action group or Create Incident (Insight) action group.
- To configure your action, select “Create Jira Issue” or “Update Jira Issue” from the Add Action dropdown menu, and do the following:
- Enter in the general information. For more information on each field, see Creating and Editing an Action in Edwin AI.
- Enter the following values for the mapped fields:
These fields determine what Edwin AI sends to Jira when an incident is created.- Title—The summary of the issue.
- Project key—The Jira project where the issue will be created.
- Issue Type ID—The ID of the Jira issue type (for example, Task, Bug, Incident)
- Select Submit.
Your Jira action is added to your action group.
For more information on how to assign actions to rules, see Edwin AI Rules.
