
Log Query Library Management
Last updated - 31 March, 2026
After you create a log query filter, you can manage and reuse it to streamline troubleshooting, analysis, and reporting in LM Logs. A filter defines how log data is grouped, visualized, and shared across your environment.
Updating a Saved Log Query Filter
- In LogicMonitor, navigate to the Logs page.
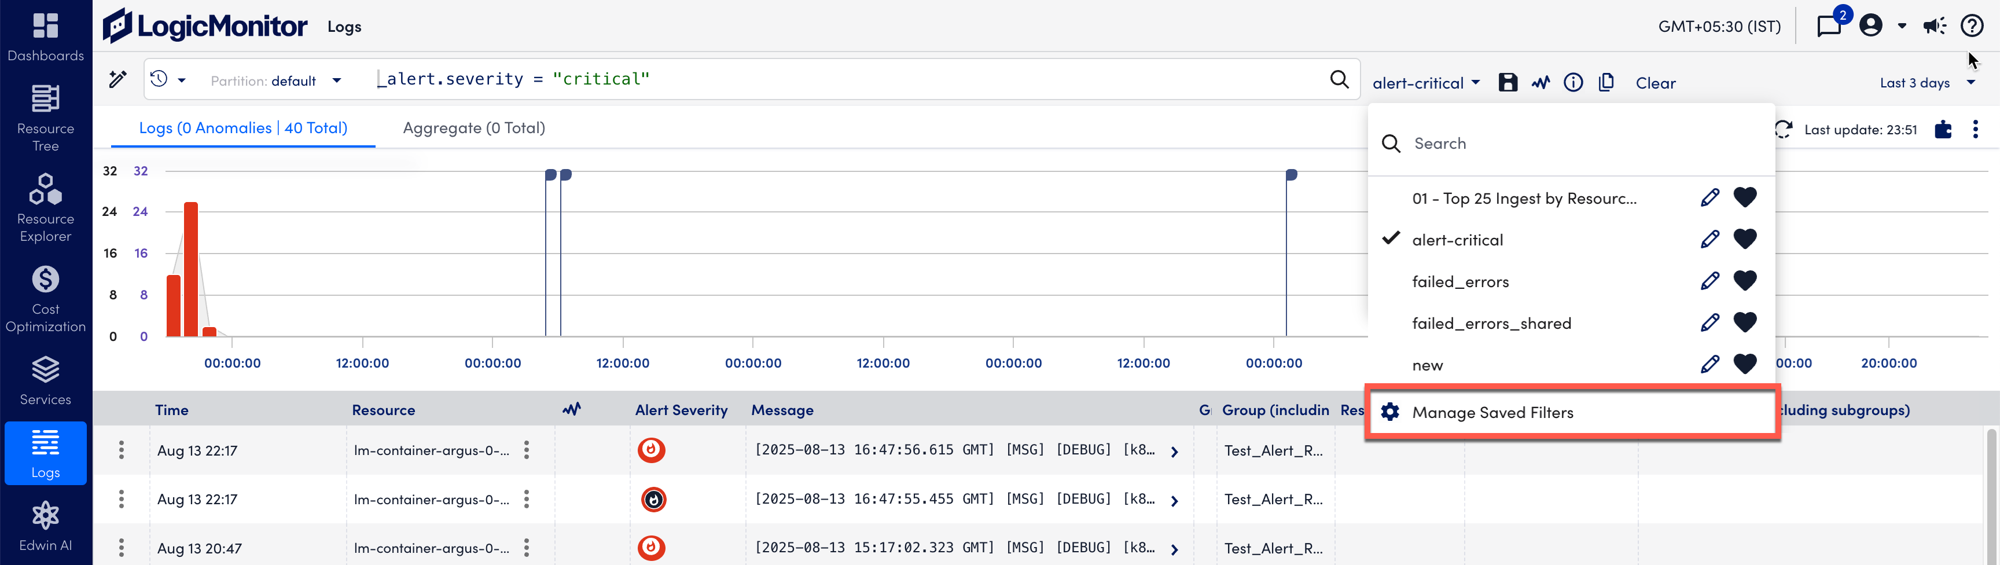
- From the Views dropdown, select the saved view you want to update.
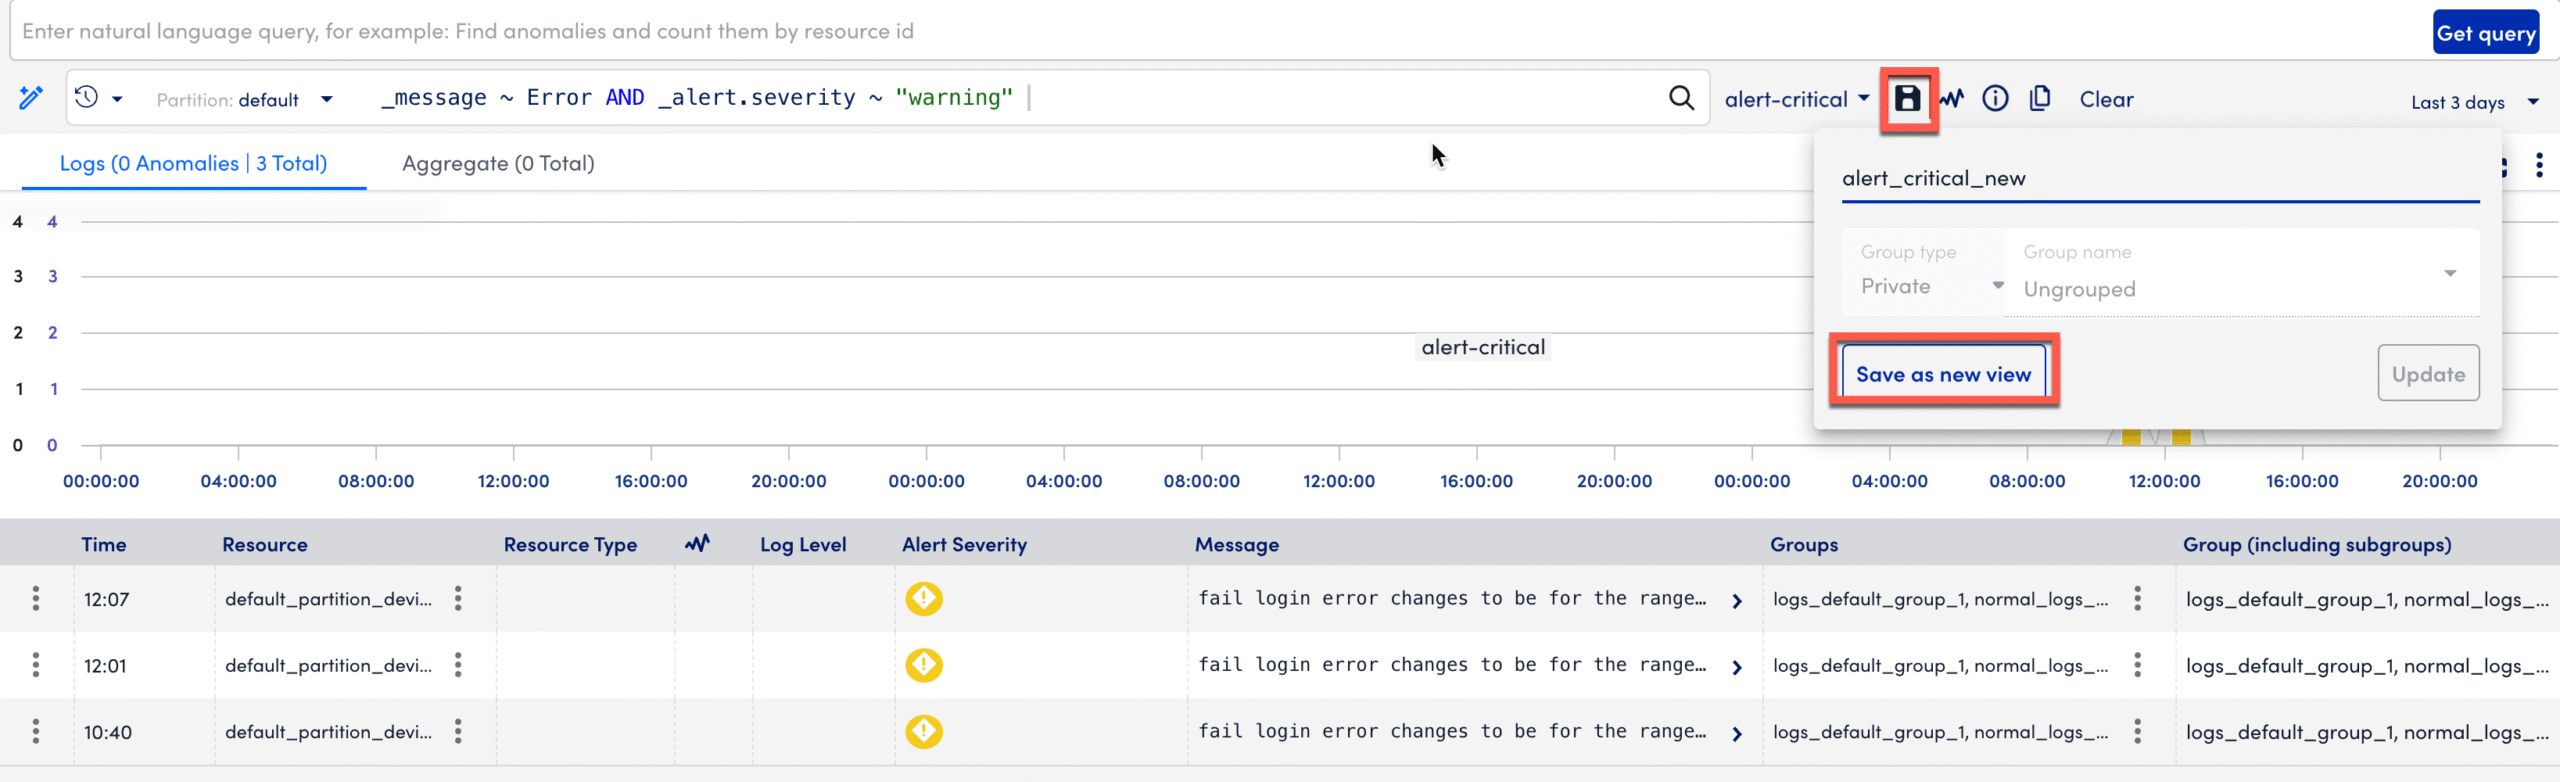
The query of the selected view displays in the query bar. - Modify the query in the query bar and select Run Query.
Ensure the query runs successfully before saving. - Select Save view….
- In the Save View modal, confirm the Name, Group Type, and Group Name.
- Select Update.
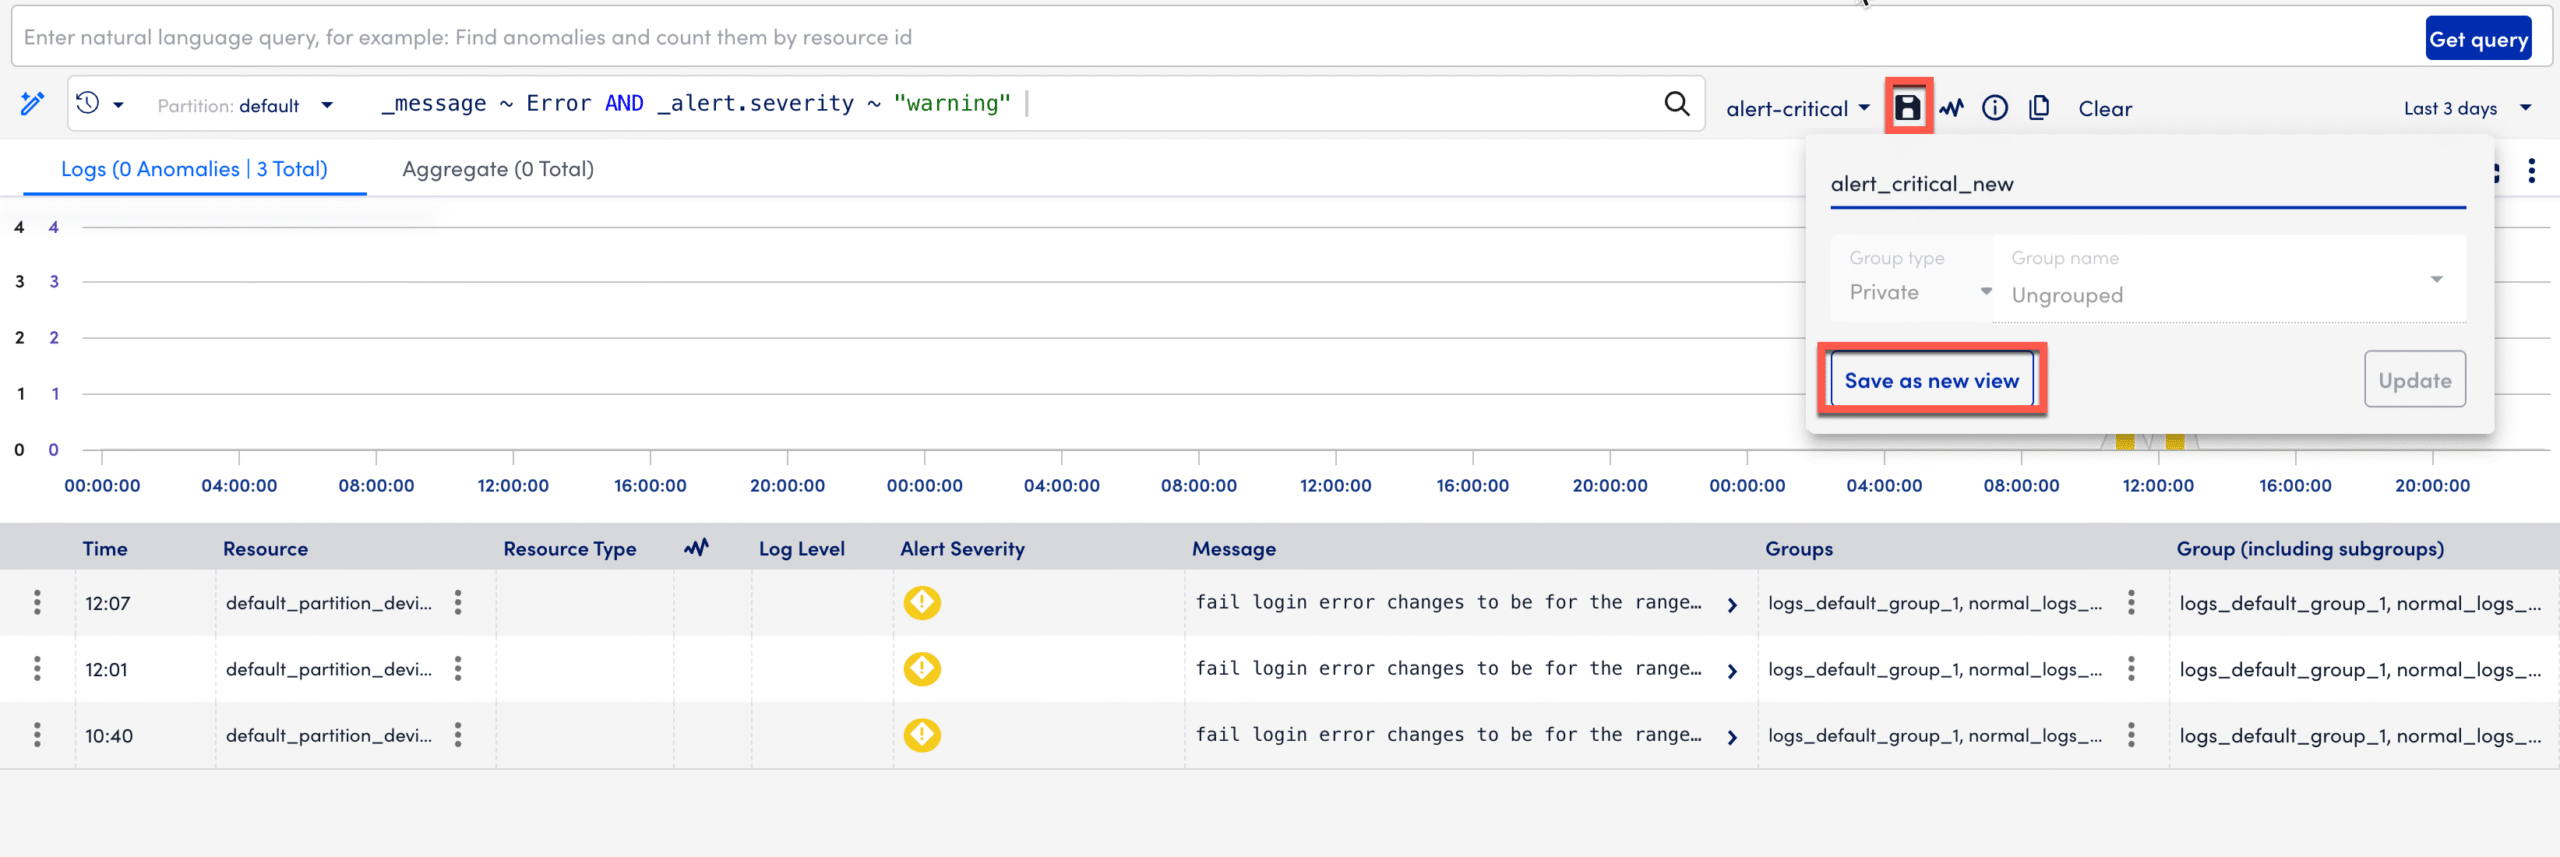
- To create a new view instead of updating the existing one, rename the view before saving and select Save as new view.
Managing Saved Log Queries
- In LogicMonitor, navigate to Logs.
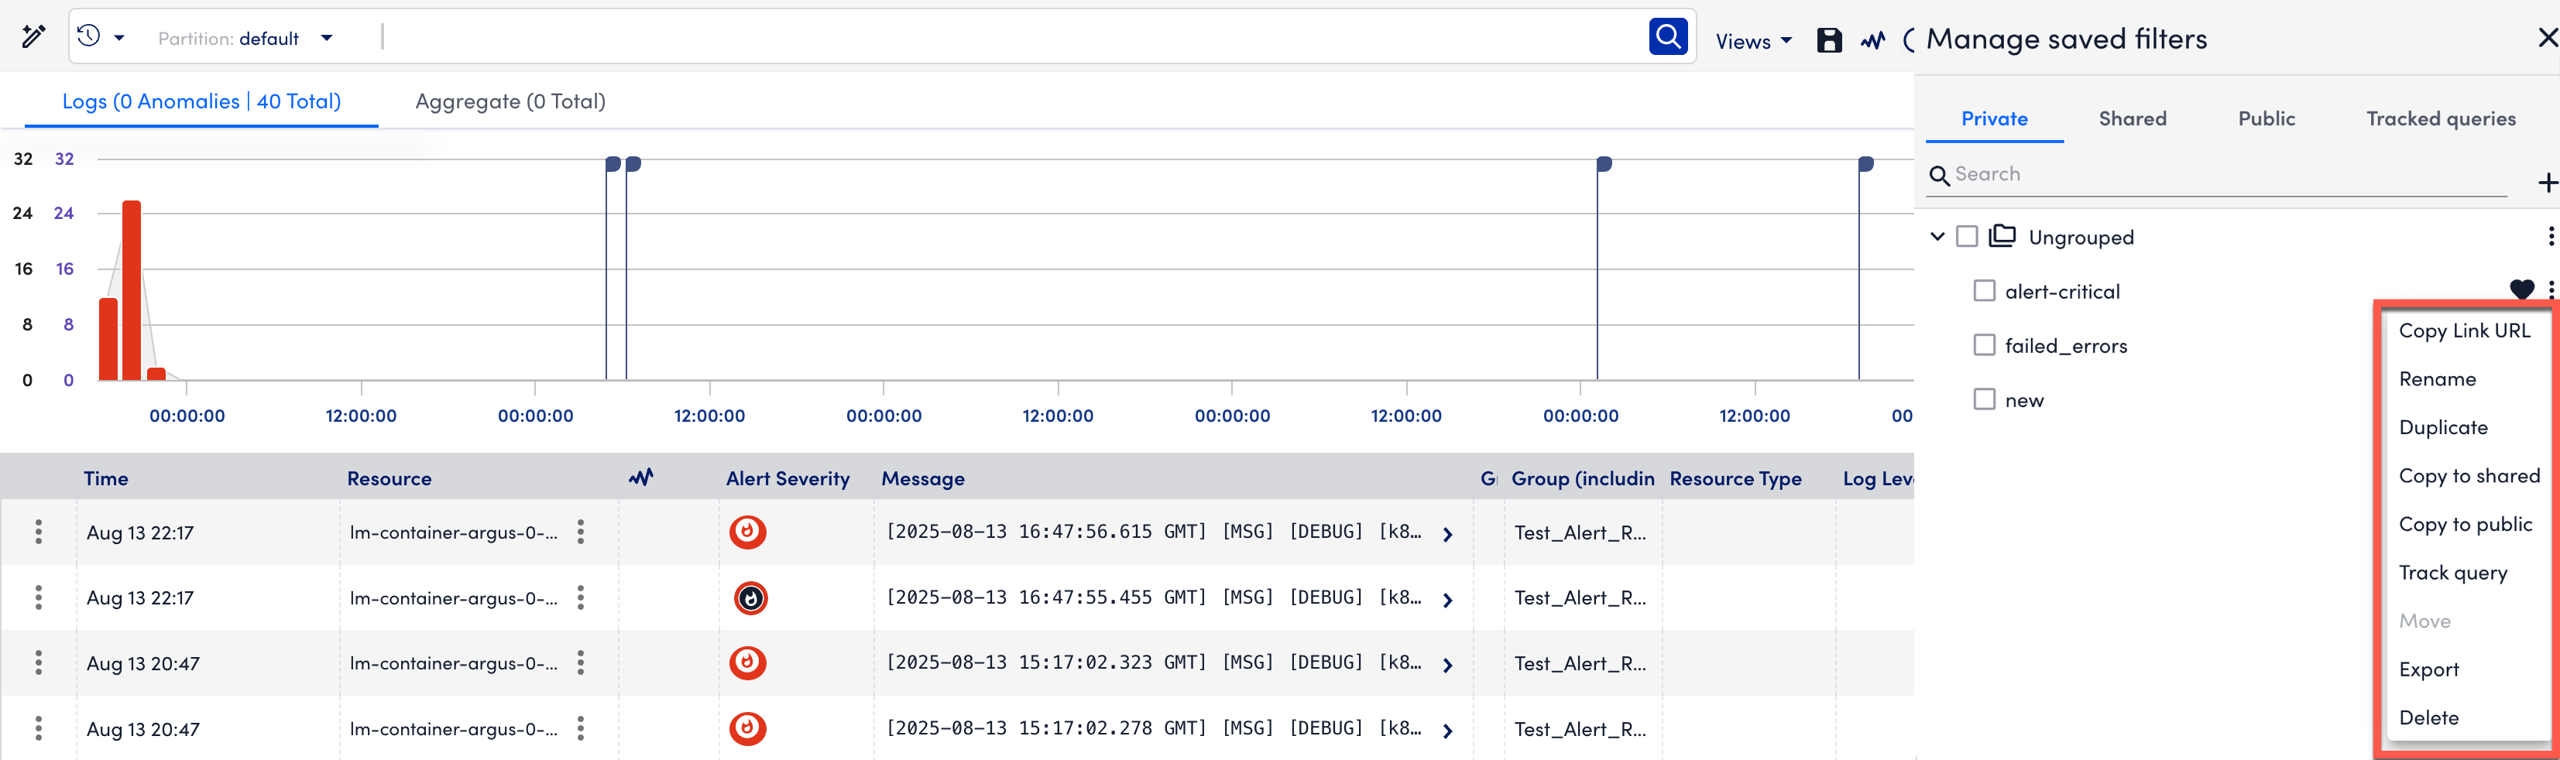
- Select the Views dropdown, then select Manage Saved Filters.
- In the panel, locate the view to manage and select the
 More options.
 - Choose one of the following actions:
- Select Copy Link URL to copy a shareable link to the view.
- Select Rename to update the saved view name.
- Select Duplicate to clone the view and assign it to another group.
- Select Copy to shared to make a query available to other users or teams within the same LogicMonitor portal who share a common role or resource scope.
- Select Copy to Public to publish a query to the Public query library, making it visible to all LM Logs users across the portal.
- Select Track Query to convert the view into a tracked query.
- Select Move to assign the view to a different query group.
- Select Export to download the configuration as a JSON file.
- Select Delete to delete the saved view.
Creating a Log Query Group
Log query groups organize saved views into logical folders.
- In LogicMonitor, navigate to Logs.
- Select the Views dropdown and then Manage Saved Filters.
- In the panel, select
 Add new Group.
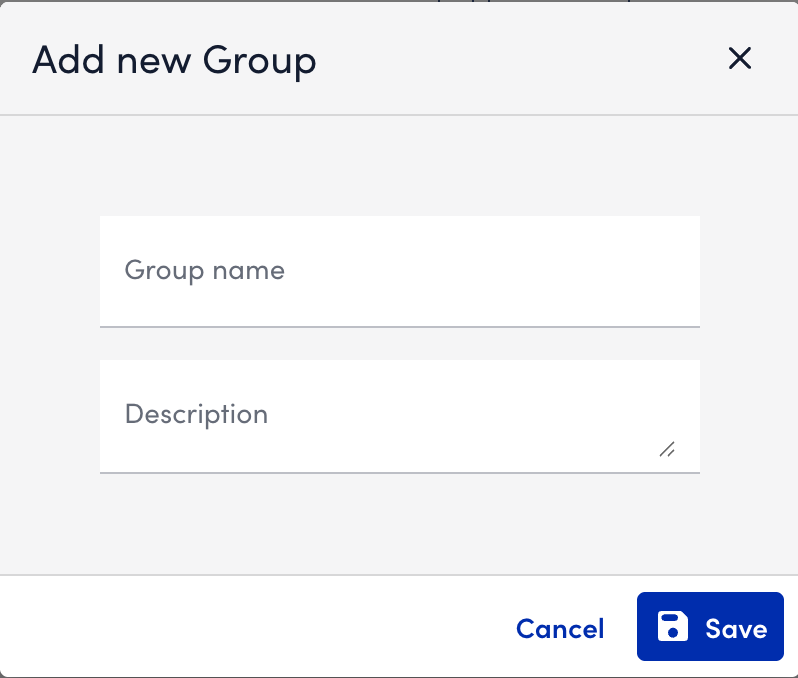
- In the dialog box, enter a Group Name and optional Description.
Note: The group naming rules are as follows:
- The group name cannot be root or Ungrouped.
- Maximum name length: 32 characters.
- Allowed characters: alphanumeric and underscores (_).
- The name cannot start or end with an underscore or begin with a number.
- Maximum description length: 1024 characters.
- Select Save.
Managing a Log Query Group
- In LogicMonitor, navigate to Logs.
- Select the Views dropdown and then select Manage Saved Filters.
- Locate the group to manage and select More options.

- From the menu, select one of the following actions:
- Select Favorite all to mark favorites in bulk.
- Select Unfavorite all to clear favorites in bulk.
- Select Edit group to update the group name or description.
- Select Delete group to remove the group after all views are moved or deleted.
- Select Duplicate group to create an exact copy of an existing log query group, including all saved views within it.
- Select Export group to export saved views to a JSON file.
- Select Import group to import saved views from a JSON file.
Editing a Group
You can edit an existing log query group to update its name or description.
- In the panel, locate the group you want to update.
- Select
 More options next to the group name.
 - From the menu, select Edit group.
- In the Edit Group modal, do the following:
- Enter a new Group Name if you want to rename the group.
- Enter or update the Description to clarify the group’s purpose or scope.
- Select Save to apply your changes.
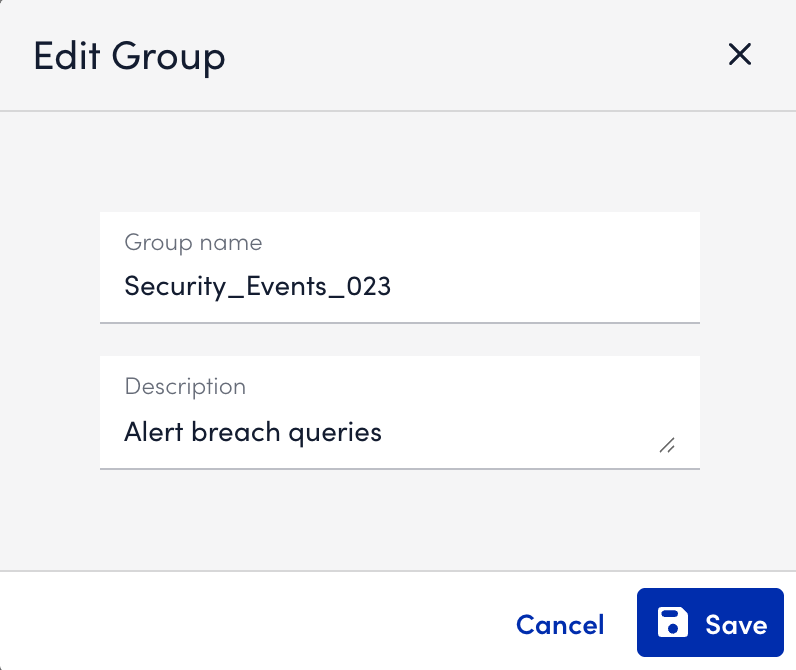
The group is updated with the new name and description.
Deleting a Group
You can delete a log query group that is no longer needed. Before deleting, ensure that all saved views within the group are either moved to another group or deleted.
- In the panel, locate the group you want to remove.
- Select More options next to the group name.
- From the menu, select Delete group.
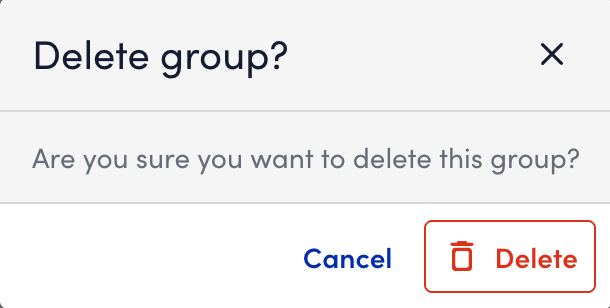
- A confirmation dialog displays. Review the warning message.
- Select Delete.
The group is permanently removed from the Manage Saved Filters panel.
Note: Once a group is deleted, it cannot be recovered. Any saved views not moved to another group before deletion are also permanently removed.
Duplicating a Group
You can duplicate an existing log query group to create a copy of its structure and contents. This is useful when you want to reuse a group of saved queries in a different environment, share them with another team, or create a test version without altering the original group.
- In the panel, locate the group you want to duplicate.
- Select More options next to the group name.
- From the menu, select Duplicate group.
- In the Duplicate Group modal, review or update the suggested group name. A numerical suffix, such as
_1, is automatically added. - (Optional) Update the Description to reflect the purpose of the new group.
- (Optional) Update the Group type as needed.
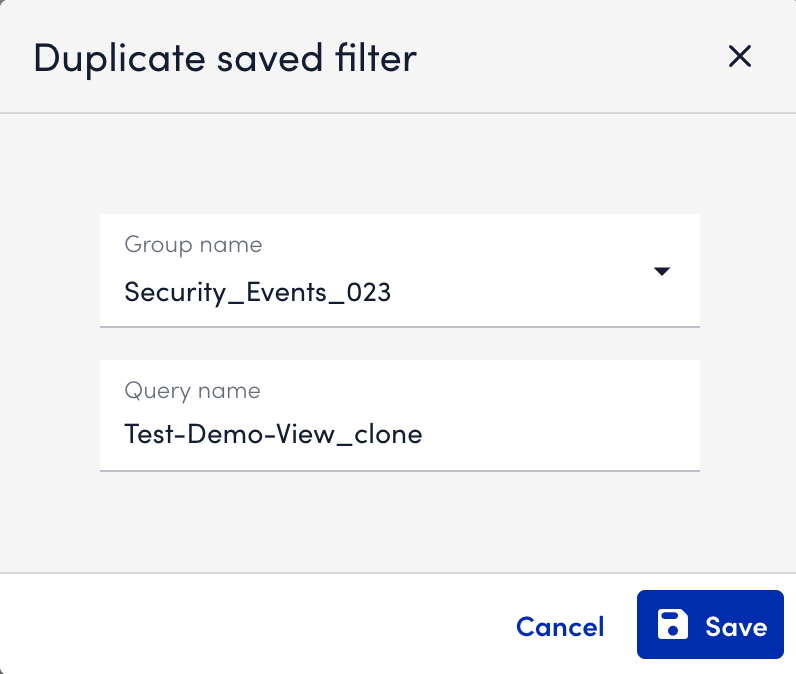
- Select Save.
The duplicated group displays in the Manage Saved Filters panel with all the saved queries, filters, and configurations from the original group.
