
NetApp Active Discovery
Last updated – 07 May, 2026
NetApp Active Discovery discovers instances using the NetApp ONTAP API. It queries NetApp ONTAP systems to identify available resources and automatically populate instances in LogicMonitor.
Methods of NetApp Active Discovery
There are two methods of NetApp Active Discovery:
- Performance Object—A method suitable for discovering instances where returned results do not include duplicate name values. This method includes predefined instance grouping behavior.
- XML—A flexible method that enables you to define custom fields for instance identification, grouping, and description using XML API responses.
Requirements for Configuring NetApp Active Discovery
To enable NetApp Active Discovery, you need the following:
- You must configure access to a NetApp ONTAP system with valid credentials
- The NetApp ONTAP API is accessible from the LogicMonitor Collector
- The LogicMonitor Collector connects to the NetApp system
- Appropriate permissions in LogicMonitor to configure DataSources and Active Discovery settings
- The target NetApp objects (for example, volumes, disks, or LUNs) are available through the ONTAP API
Configuring NetApp Active Discovery
- In LogicMonitor, navigate to Modules.
- To enable NetApp Active Discovery, create new DataSource or open existing DataSource.
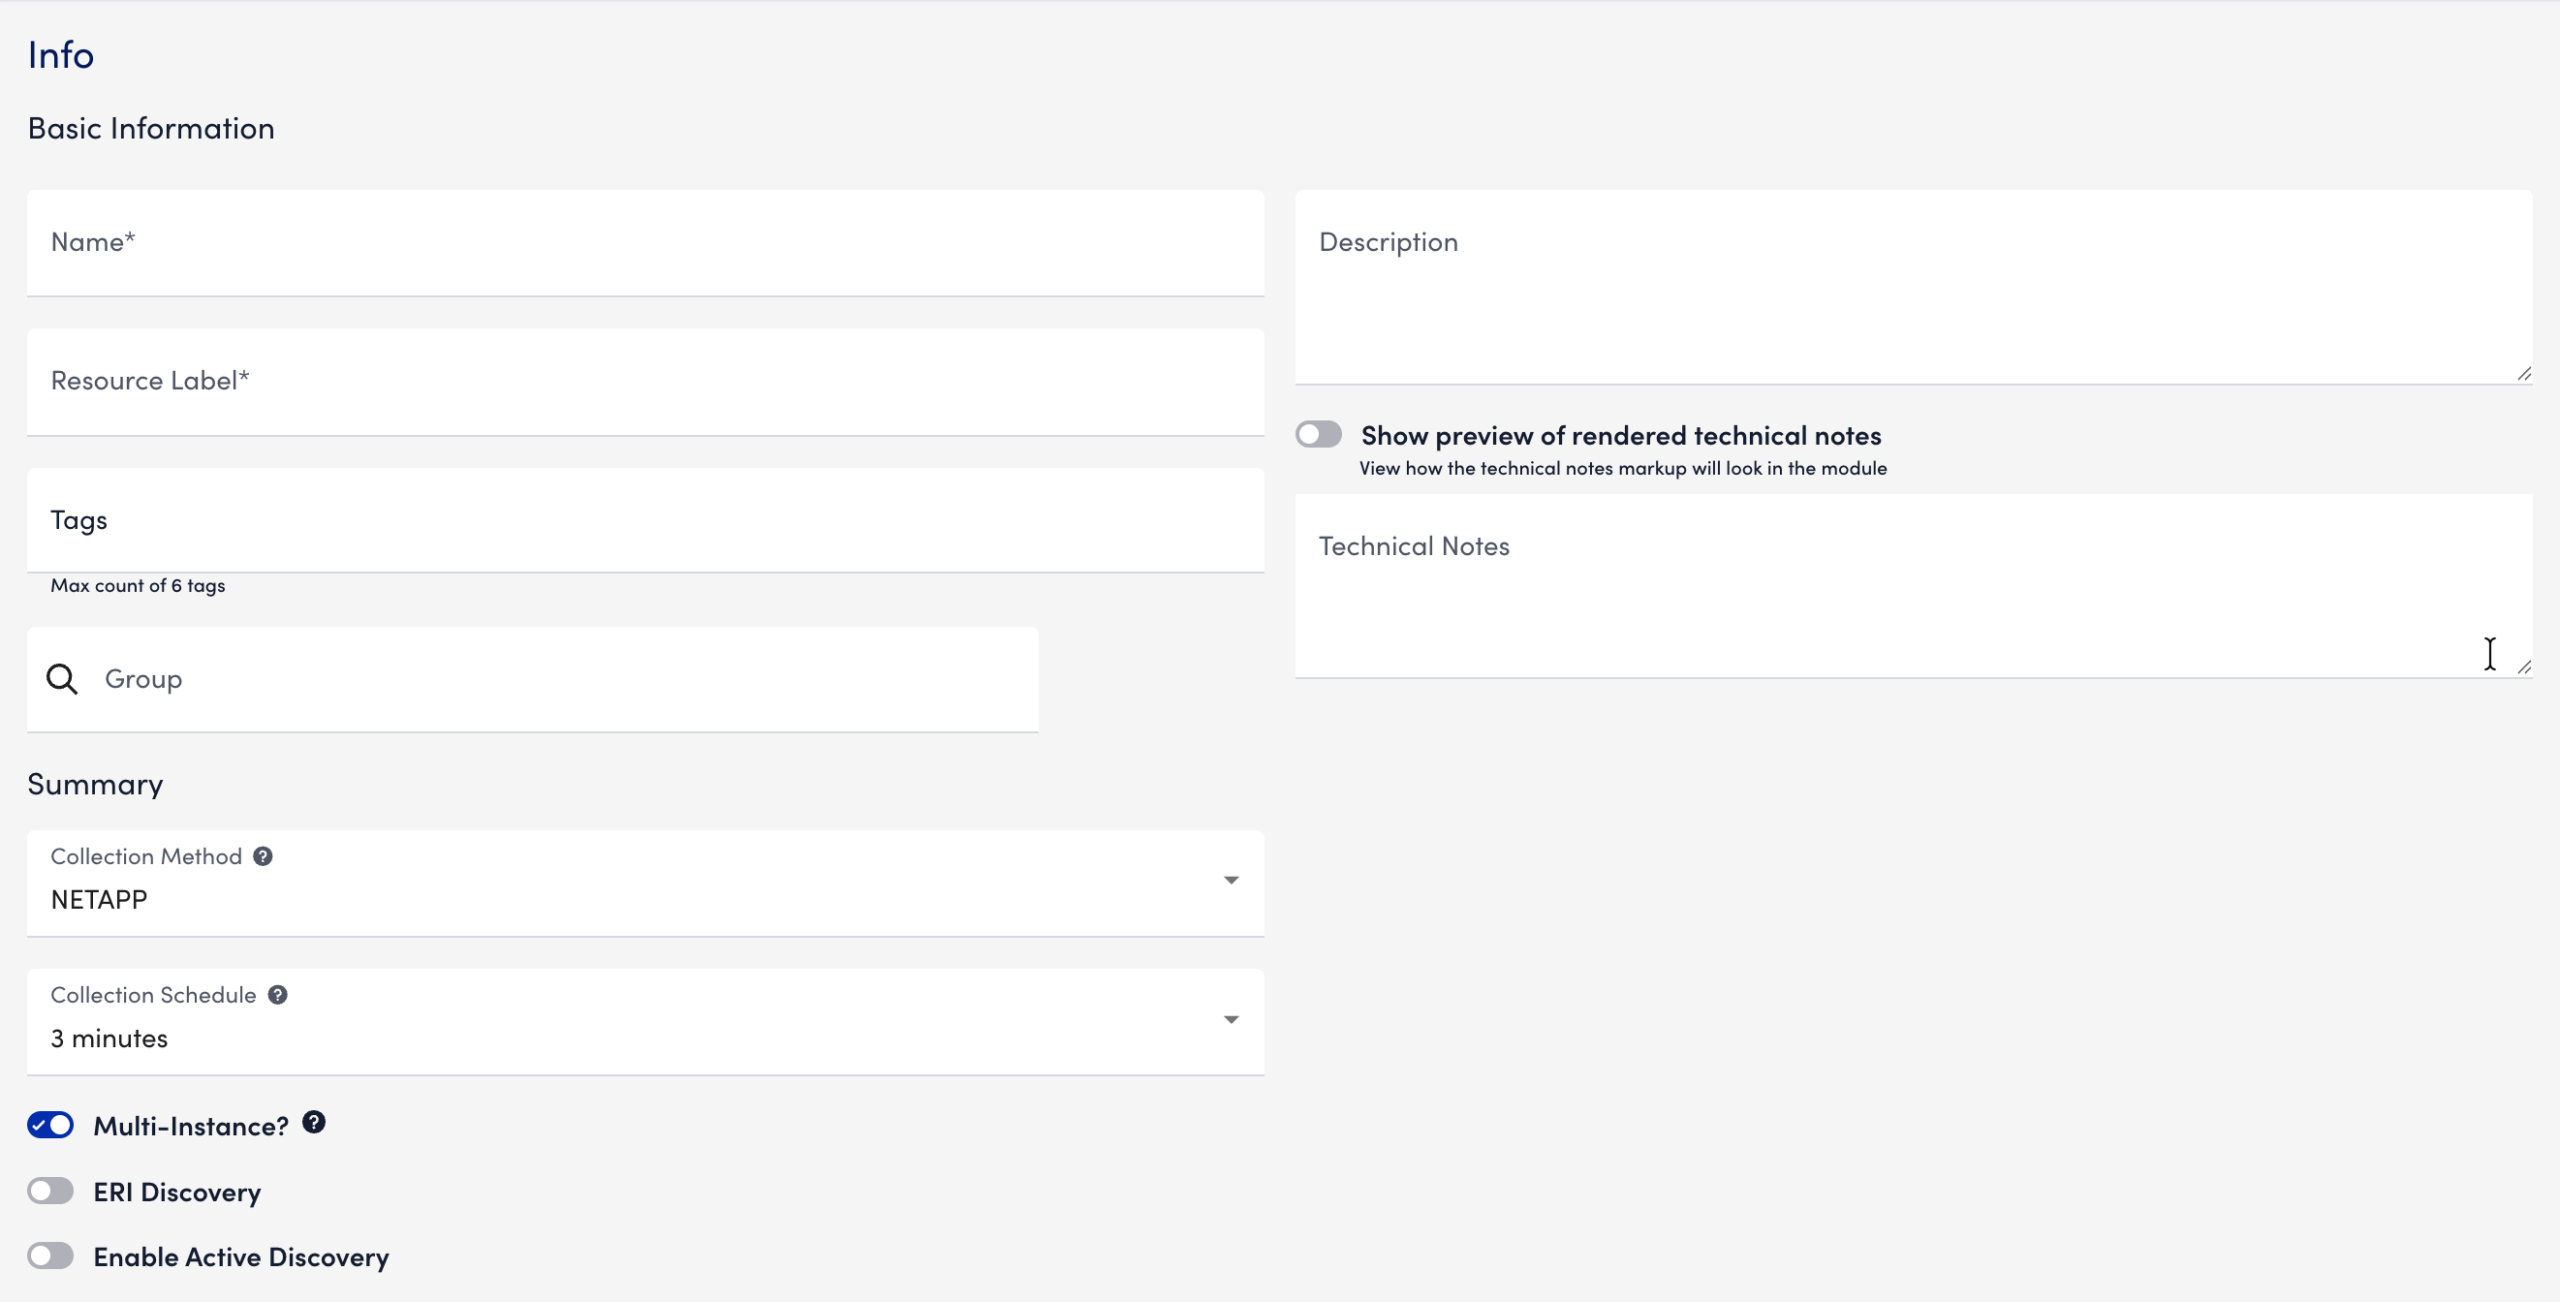
For more information, see DataSources Configuration . - On the Info tab and Basic Information section, do the following:
- In the Name field, enter a unique name.
- (Optional) In the Description field, enter additional details.
- In the Tags field, add tags to filter the module.
- In the Group field, specify the group to which the DataSource is added.
- In the Technical Notes field, enter any notes or technical information.
- Select the required collection method from the Collection Method dropdown menu.
For more information, see Data Collection Methods Overview. - Select the required duration from the Collection Schedule dropdown menu.
- Toggle the Multi-Instance switch to make your DataSource a multi-instance one.
Important: Only when you enable the Multi-instance toggle is the Enable Active Discovery toggle active for use. - Toggle the ERI Discovery switch to enable External Resource IDs for the DataSource.
- Toggle the Enable Active Discovery toggle to add the details for Active Discovery.
- In the Access Groups section, add access groups as needed to control who can view or edit the module.
For more information, see Access Groups for Modules. - In the AppliesTo section, based on your requirements, add any AppliesTo scripting method.
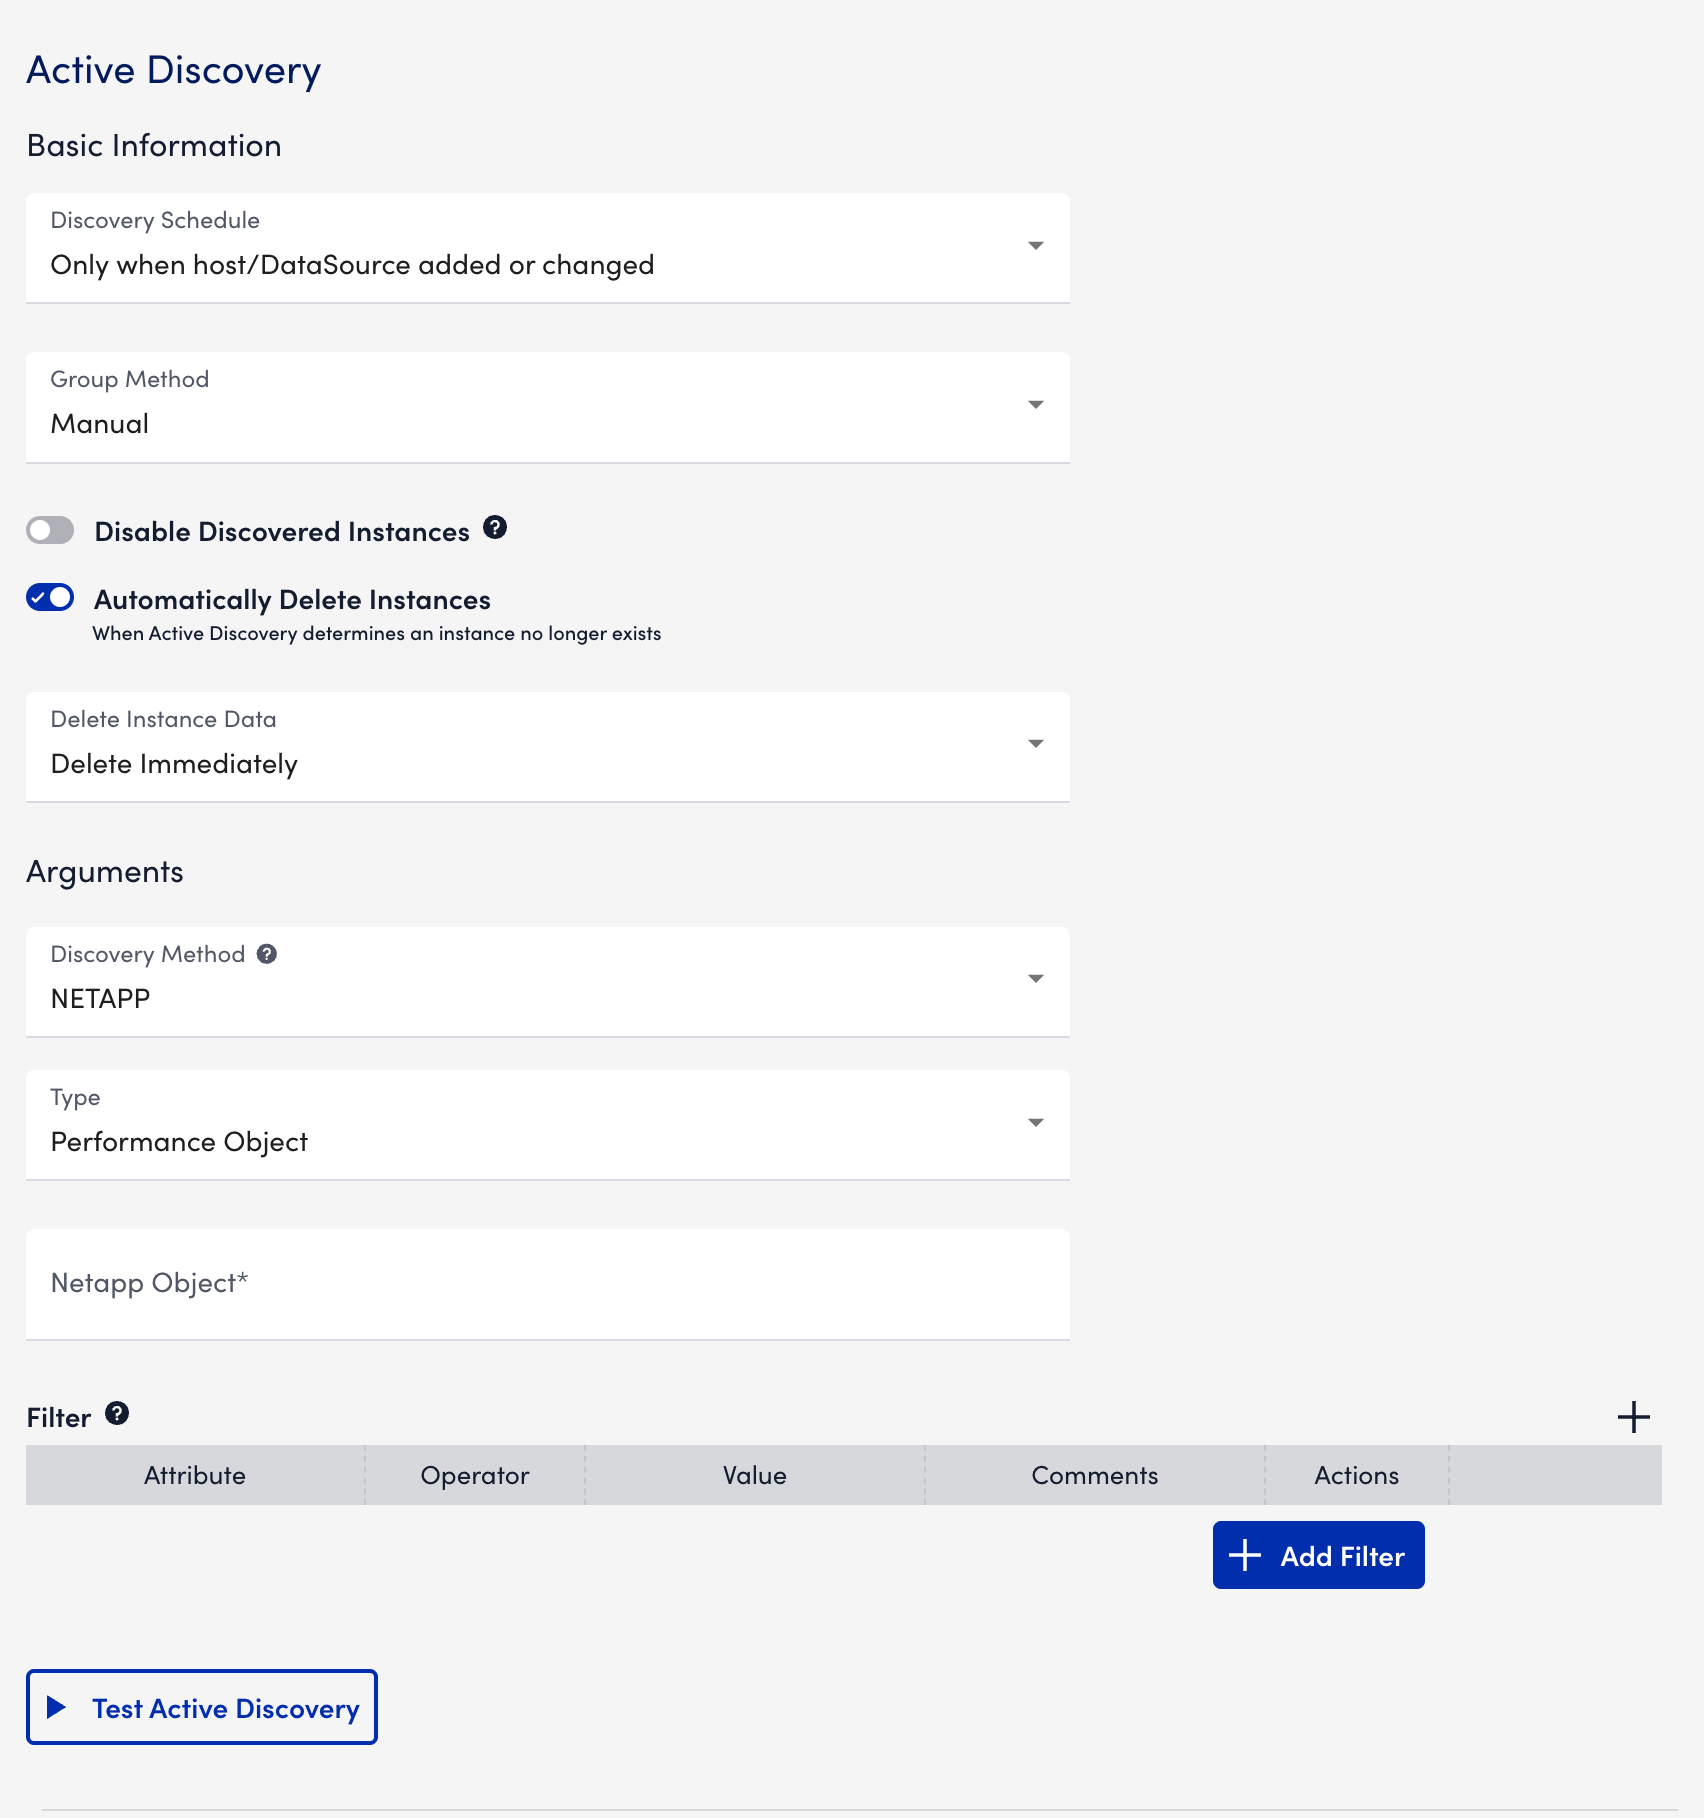
This determines which resources the module applies to. For more information, see AppliesTo Function Scripting Overview. - In the Active Discovery section, do the following:
- Select the required time period from the Discovery Schedule dropdown menu.
- Select the method (Manual, Netapp, Regular Expression) for grouping from the Group Method dropdown menu.
- Toggle off the Disable Discovered Instances switch so that newly discovered instances remain enabled and actively monitored.
- Toggle the Automatically Delete Instances switch to enable the system to remove instances that are no longer detected during discovery.
- Select the required option from the Delete Instance Data dropdown menu to set when you want the data removed.
- Select NETAPP to use the NetApp-specific discovery mechanism from the Discovery Method dropdown menu,
- Select Performance Object or XML to configure discovery for NetApp performance-related objects or XML-related objects, respectively, from the Type dropdown menu.
Note: If you select XML, you are required to enter XML-specific fields (for example, XML Request, Instance Locator, Instance Value, and so on). The following is a sample XML response:<results status='passed'>
<attributes-list>
<instance-info>
<name>system</name>
<uuid>scenariolab-01:kernel:system</uuid>
</instance-info>
<instance-info>
<name>system</name>
<uuid>scenariolab-04:kernel:system</uuid>
</instance-info>
</attributes-list>
</results> - In the NetApp Object field, enter the specific NetApp performance object you want to discover (for example, volumes, aggregates, or other supported objects).
- (Optional) Use the Filter section to refine discovery results by adding attribute-based filters, specifying operators and values as needed.
For example, filter using##WILDALIAS##to discover only volumes containing “vol0” in the name.
For example, filter usingVOLUME-ID-ATTRIBUTES.CONTAINING-AGGREGATE-NAMEto discover volumes from a specific aggregate. - After completing the configuration, select Test Active Discovery to validate the setup and confirm that the expected instances are discovered correctly.
- In the Collection section, enter the required details based on your collection method.
For more information, see Data Collection Methods Overview. - In the Datapoints section, add relevant normal or complex datapoints based on your requirement.
For more information, see Datapoint Overview. - Select Save.
The DataSource is enabled with NetApp Active Discovery.
