
JobMonitor Definitions Configuration
Last updated - 23 March, 2026
On Windows, Linux, and Unix systems, you can use JobMonitors to track scheduled tasks and cron jobs, verify that jobs start and end on time, and confirm that they complete with the correct exit code.
LogicMonitor portal does not provide pre-defined JobMonitors. You can create JobMonitors using one of the following methods:
- Create JobMonitors manually using the Add option on the My Module Toolbox page.
- Import JobMonitors from XML or JSON files created by other users.
- Import JobMonitor definitions from LogicMonitor public repository created by members of the LogicMonitor user base.
Regardless of how JobMonitors are added, every JobMonitor definition uses the same configurations.
Configuring a JobMonitor Definitions
- In LogicMonitor, navigate to Settings > Modules.
The My Module Toolbox page displays. - Select
 Add.
Add. - In the Add modal, select JobMonitor.
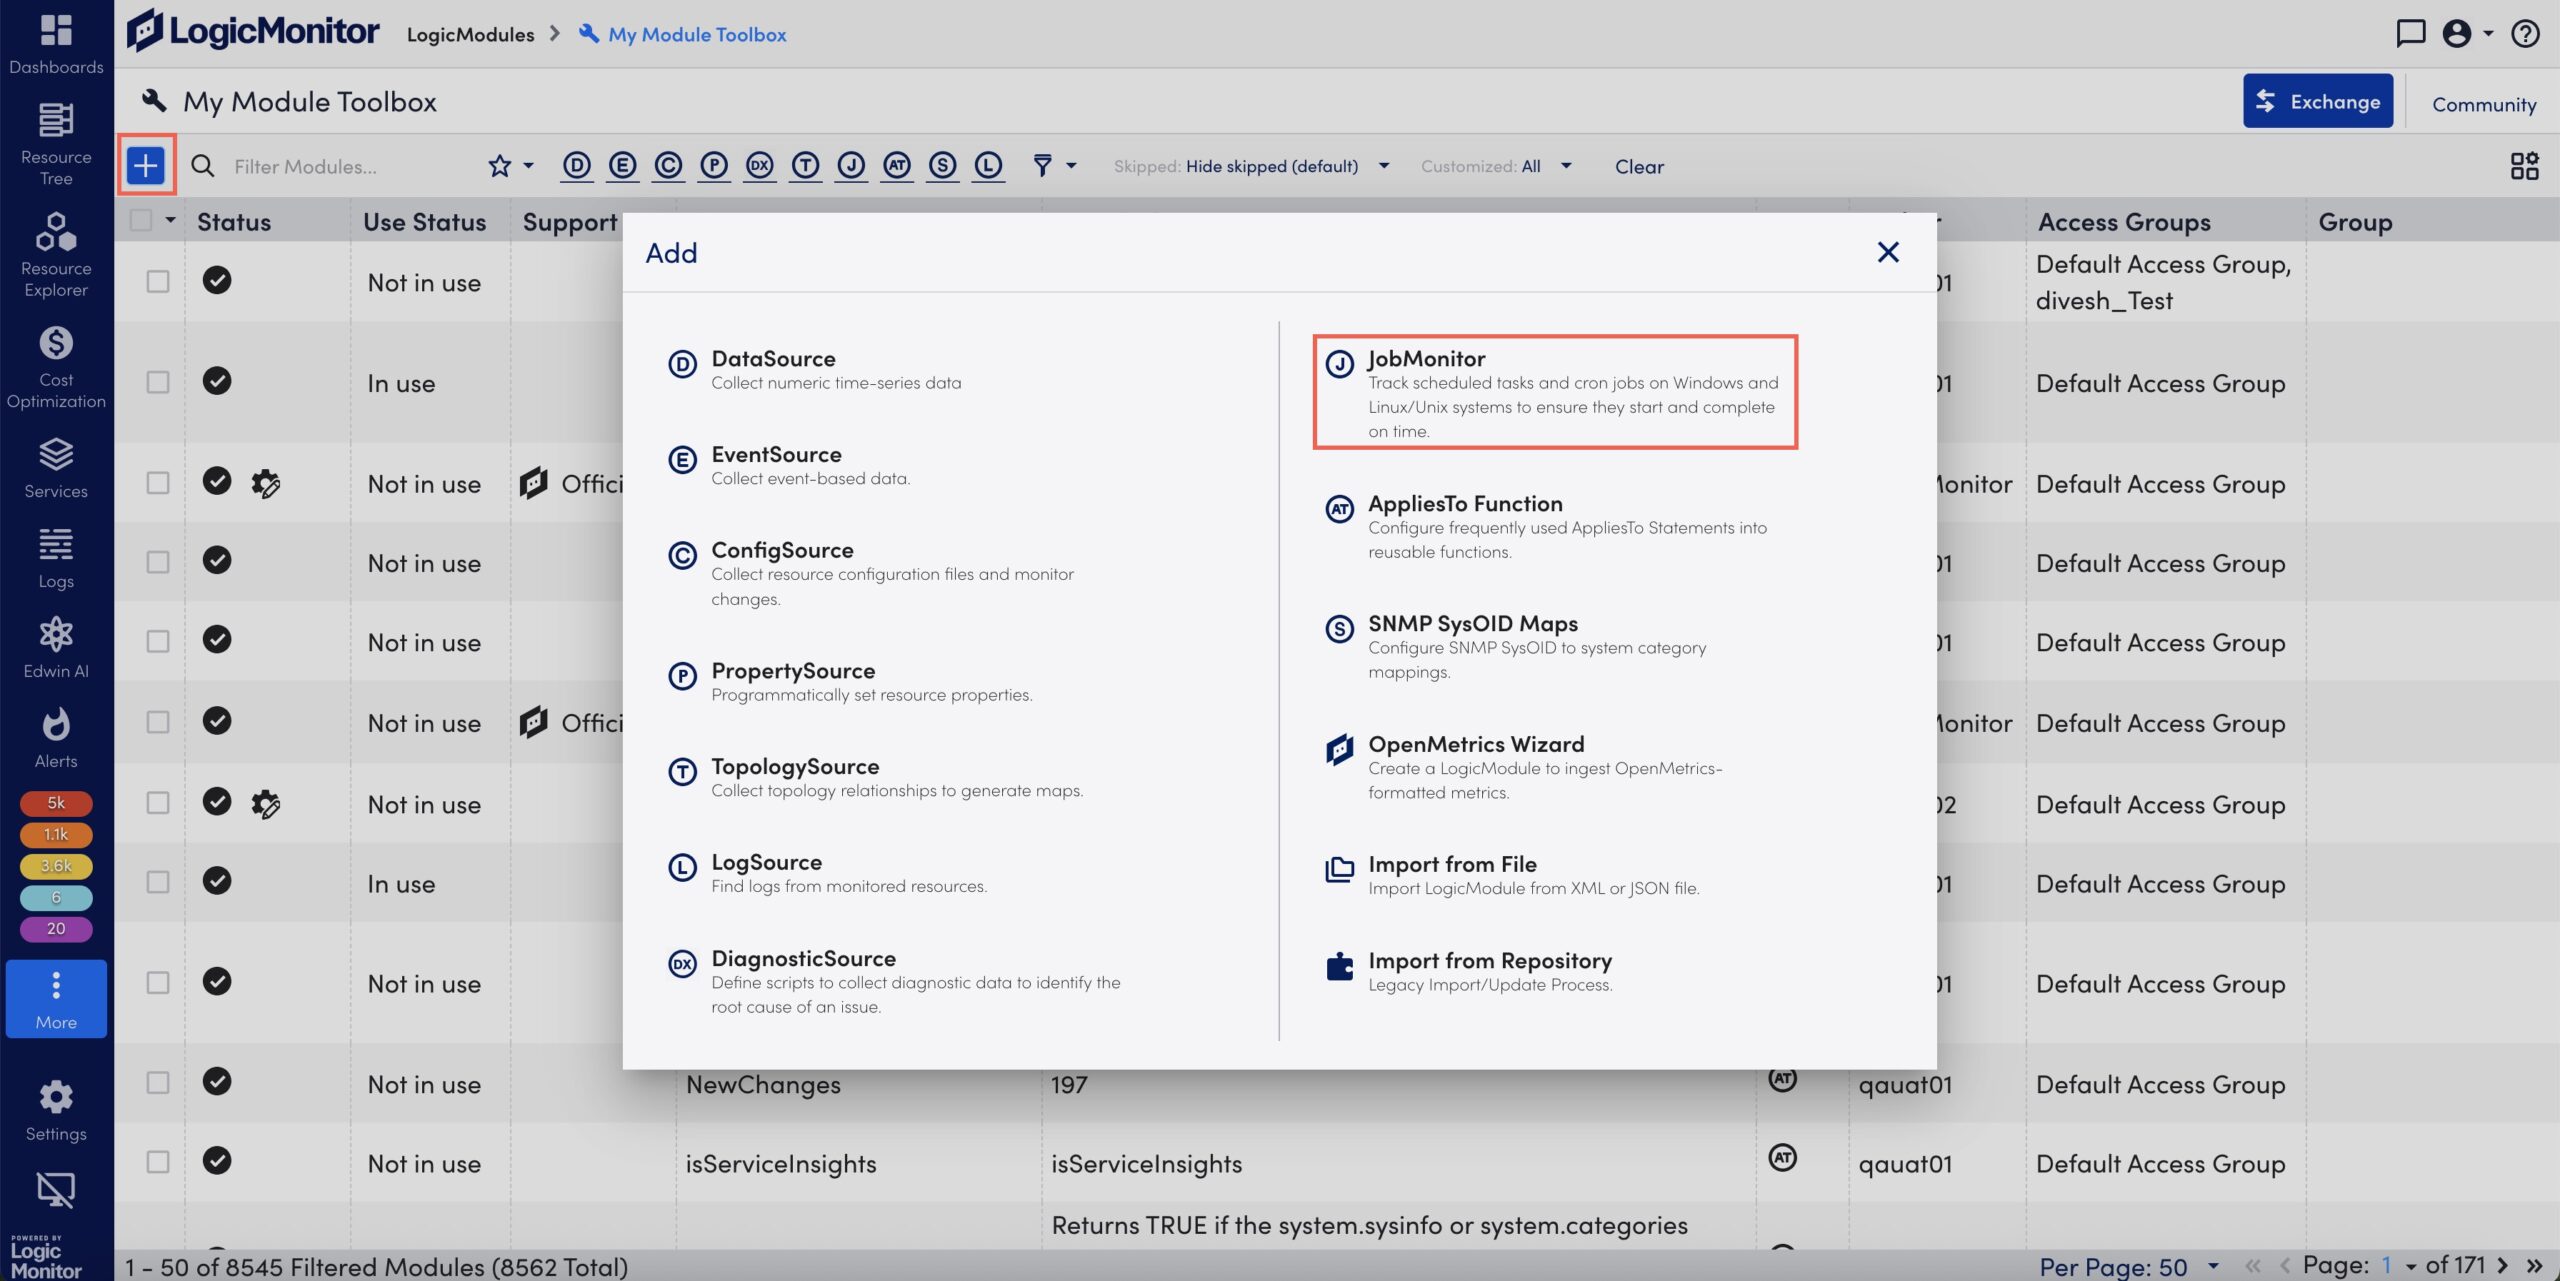
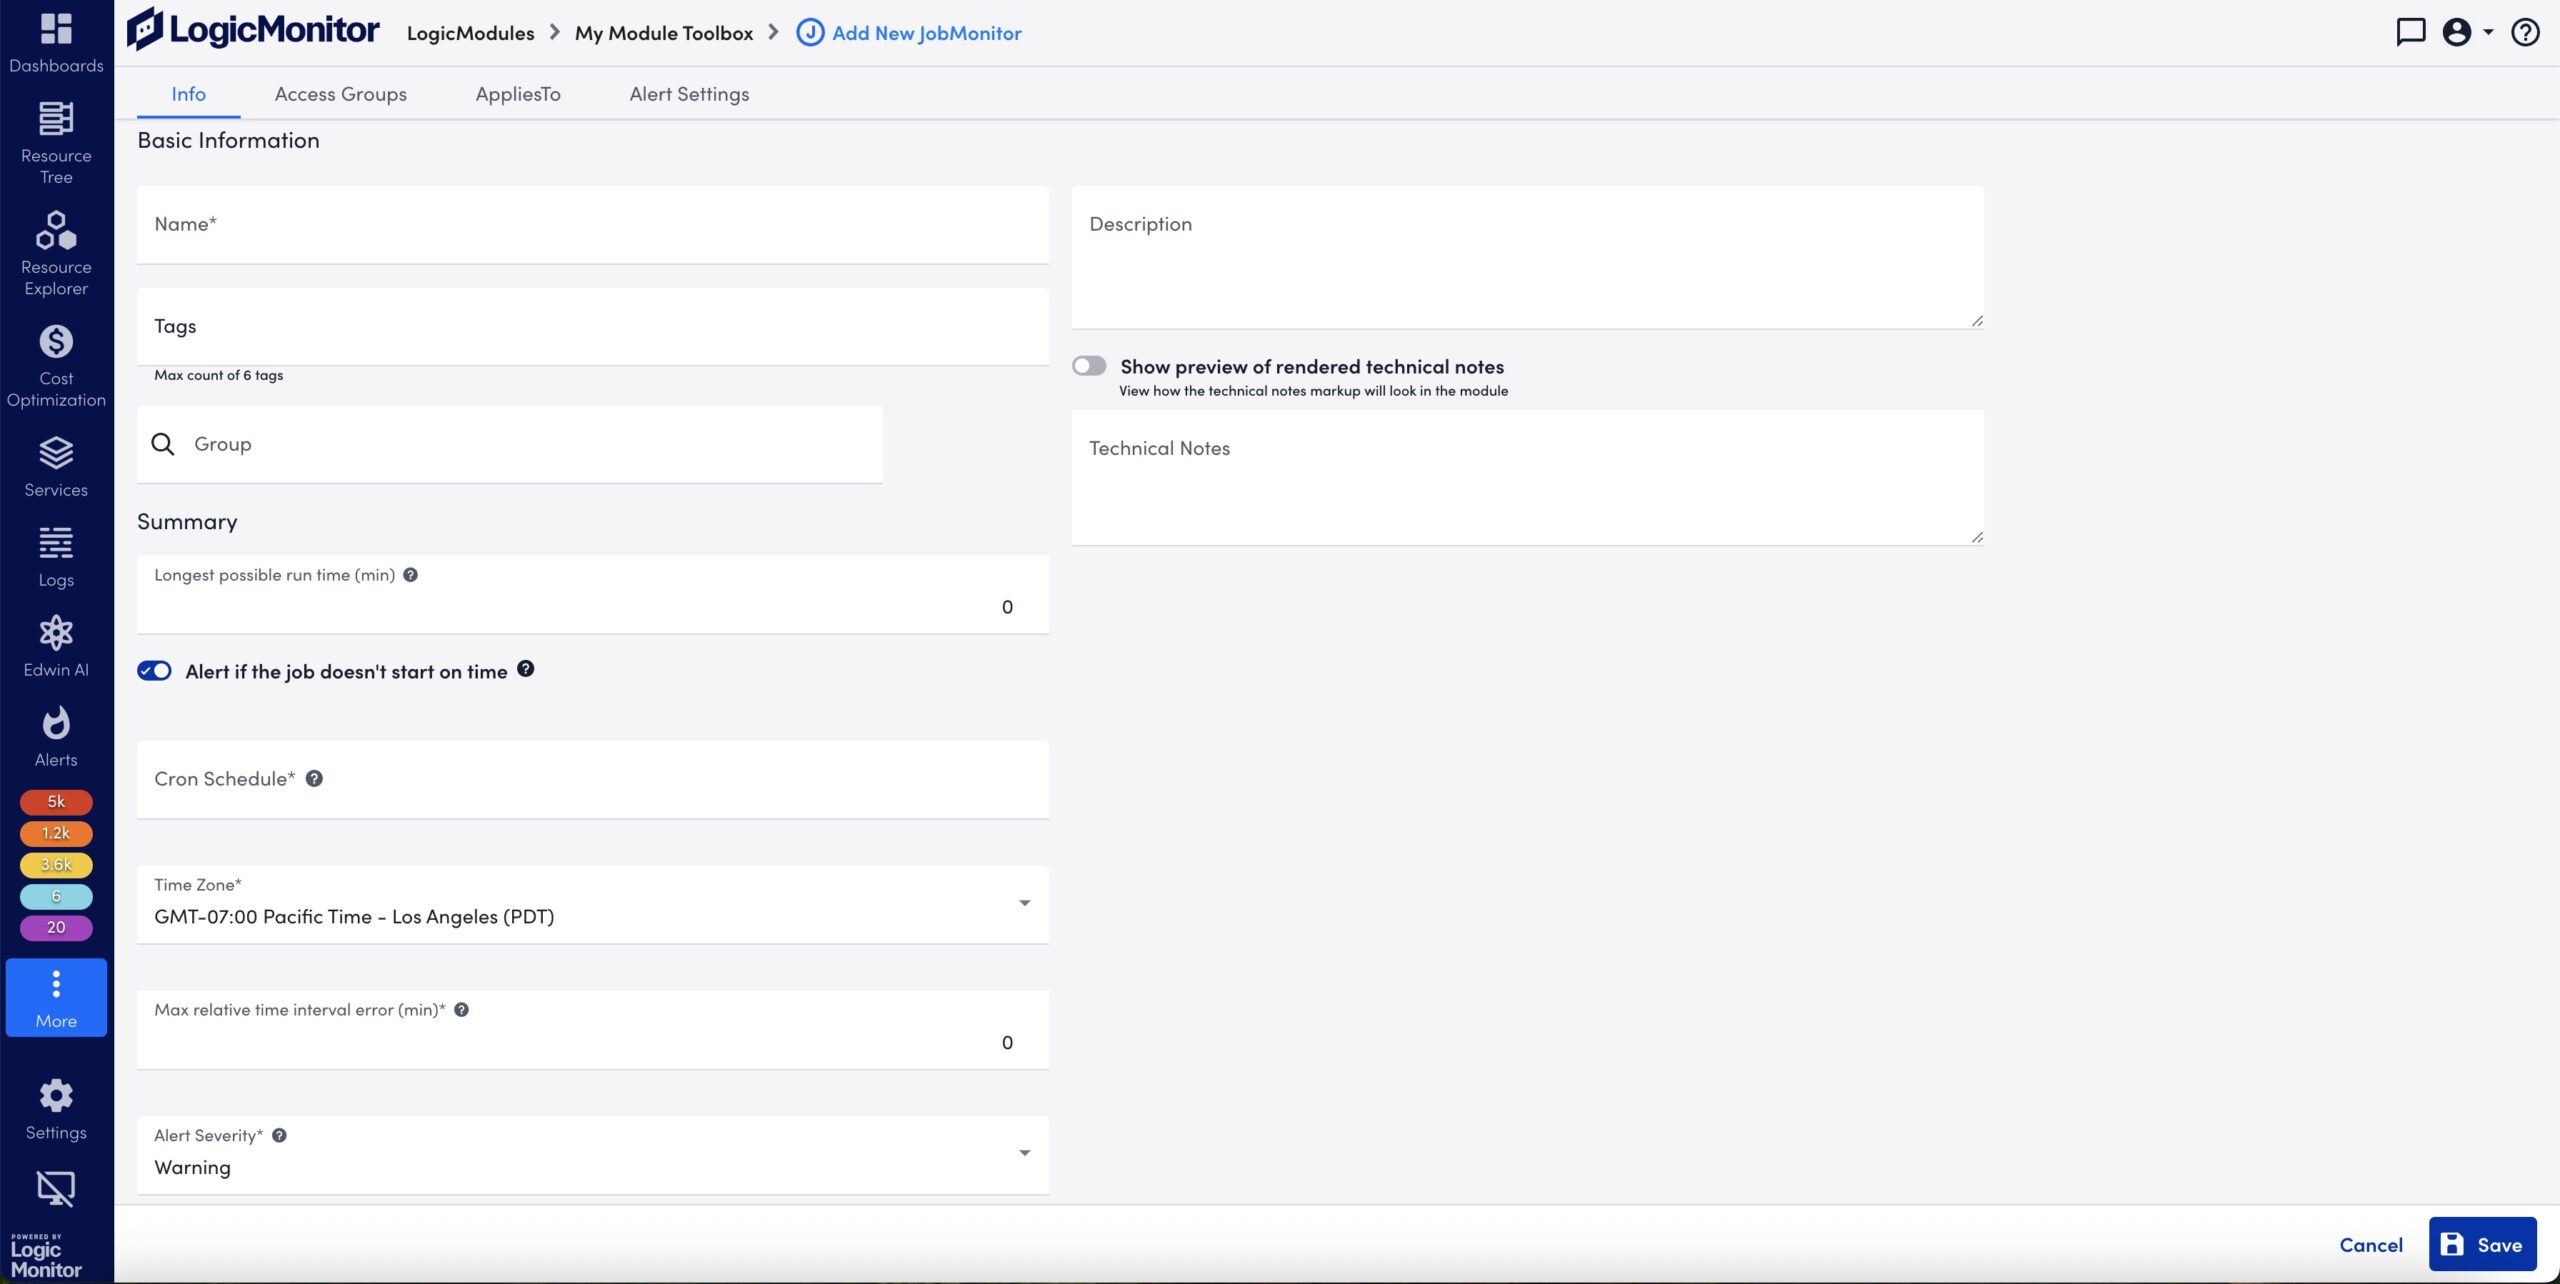
The Add New JobMonitor page displays. - On the Info tab, do the following:
- In the Name field, enter a unique name for the JobMonitor.
Note: For LogicMonitor to identify the JobMonitor in the host system, name the JobMonitor in strict accordance with the job wrapper. JobMonitor names cannot include the operators and comparison functions used by LogicMonitor’s datapoint expression syntax. For more information, see Complex Datapoints.
- In the Description field, enter an informative description of the job.
- In the Tags field, tag the JobMonitor with keywords that can facilitate its search.
For example, add tags related to JobMonitor name, purpose, scope, and so on. - In the Group field, specify the group to which the JobMonitor must be added.
When created, the JobMonitor displays in the selected group in the Resource tree. You can enter a new group, select an existing group, or leave the field blank for no grouping. - In the Technical Notes field, enter any notes or technical information.
- In the Summary section, specify the maximum number of minutes the JobMonitor can run before it triggers an alert.
Recommendation: Set the Longest possible run time (min) field to 0 if you do not know how long the JobMonitor takes.
- Toggle the Alert if the job isn’t started on time switch to set the conditions under which an alert and its severity are raised when a job does not start on time, and then do the following:
By default, the switch is disabled and monitoring occurs only for the JobMonitor’s run time and exit code.- In the Cron Schedule field, using a Cron expression, specify when the job is expected to start. For more information on writing Cron expressions, see Help Constructing Cron Expressions.
- Select a time zone from the Time Zone dropdown menu.
- In the Max Relative Time Interval Error (min) field, specify the number of minutes the JobMonitor start time can be delayed before an alert is triggered.
For example, a job is planned to start at 10:00 AM Pacific Time every day. If this job does not start, the server triggers an alert at 10:03 AM, and this alert start time is 10:00 AM.
Note: The interval specified must be shorter than the interval entered into the Effective Interval (min) field. If it is not, the alert is no longer active by the time the Max Relative Time Interval Error (min) time is reached and no alert is triggered.
- In the Alert Severity field, select the alert severity that must be triggered if the job does not start as scheduled, runs longer than expected, or exits with an unexpected code.
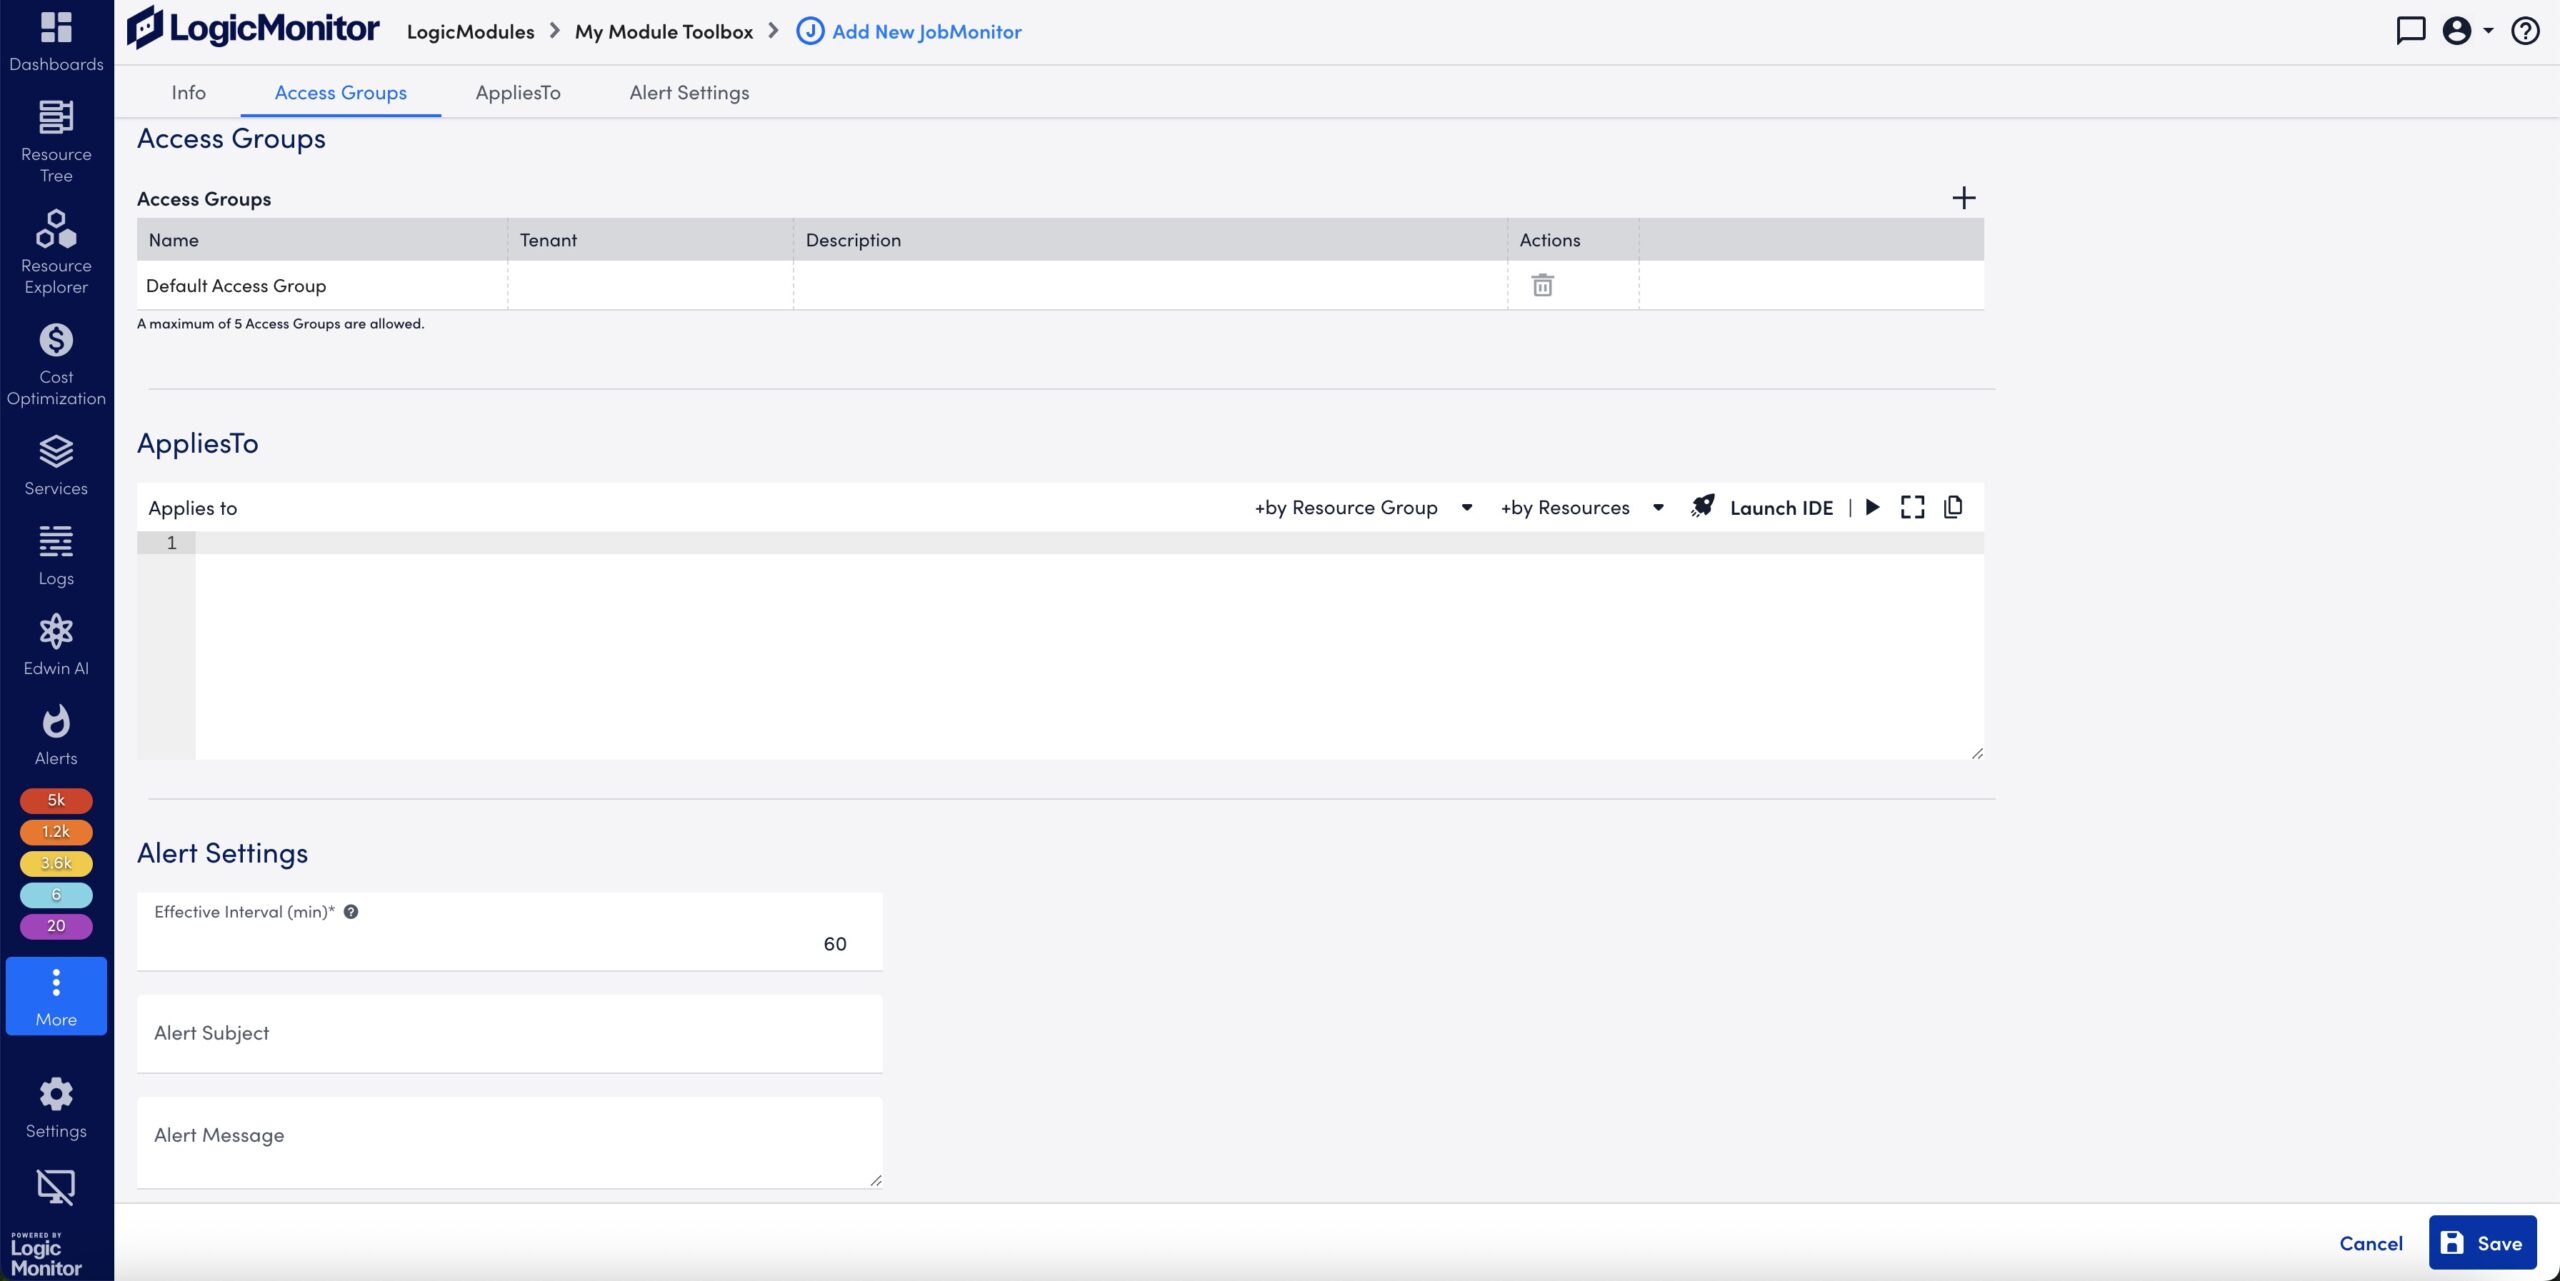
- Select the Access Groups tab and configure access groups as needed.
For more information, see Access Groups for Modules. - Select the AppliesTo tab, and do the following:
- Enter the applies to criteria.
The Applies to field accepts LogicMonitor’s AppliesTo scripting as input to determine which resources are associated with the JobMonitor.
For more information, see AppliesTo Function Scripting Overview. - Select
 Test AppliesTo.
This test returns a count of matching resources, and displays them in the AppliesTo Results panel.
- Enter the applies to criteria.
- Select the Alert Setting tab, and do the following:
- In the Effective Interval (min) field, specify the number of minutes that alerts triggered for this JobMonitor must remain active before they auto-clear.
For example, if a JobMonitor alert begins at 10:00 AM Pacific Time, and its effective interval is 10 minutes, then the JobMonitor alert ends at 10:10 AM.
- In the Effective Interval (min) field, specify the number of minutes that alerts triggered for this JobMonitor must remain active before they auto-clear.
Note: If the Alert if the job isn’t started on time switch is enabled, the effective time interval must be longer than the interval set in the Max Relative Time Interval Error (min) field. If it is not, the alert is no longer active when the error interval is reached, no alert is triggered.
- In the Alert Subject field, enter the JobMonitor alert subject to display in alert notifications.
The value entered overrides the default subject. - In the Alert Message field, enter the JobMonitor alert message to display in alert notifications.
The value entered overrides the default message. To customize the alert message, use tokens that are substituted with content when alerts are routed to recipients.
For more information, see Tokens Available in LogicModule Alert Messages.
Note: If a JobMonitor is disabled, all its active alerts are updated with a “Cleared On” time reflecting when the JobMonitor was disabled.
- Select Save.
The JobMonitor is created and added to the My Module Toolbox page.
