
WMI Active Discovery
Last updated – 21 May, 2026
Windows Management Instrumentation (WMI) is a Windows-native protocol used for collecting and managing system data. LogicMonitor supports WMI during Active Discovery to identify instances for DataSources.
WMI Active Discovery is configured as part of Active Discovery within a DataSource definition. Because Active Discovery is set on a per-DataSource basis, WMI-specific discovery settings are defined when you create or edit a DataSource.
For more information about how Active Discovery works, see Active Discovery.
For more information about how to create or modify DataSources, see DataSource Configuration.
WMI organizes information in the following hierarchy:
- Namespace – The root context (for example,
root\CIMv2) - Class – Represents a set of objects (for example,
Win32_NetworkAdapter) - Property – Attributes of class instances (for example,
Name,MACAddress)
For example, to get the names of all network adapter instances in a Windows system, specify the following WMI class and property information:
- WMI Class: Win32_NetworkAdapter
- WMI Property: Name
The network adapter instances are returned with their names as instance identifiers as follows:
- Intel® PRO/1000 MT Network Connection
- Citrix Virtual Adapter
- Microsoft ISATAP Adapter
With WMI Active Discovery you can extract instance-level property (ILP) information about each instance discovered in a WMI class. This extracted information is stored as one or more system properties for the device, helps you understand and troubleshoot the device.
When ILP extraction is enabled, additional properties such as MACAddress, IPAddress, and Manufacturer are collected for each instance. These properties can be used for filtering, grouping, alerting, and providing additional context during troubleshooting.
Requirements for Configuring WMI Active Discovery
To configure WMI Active Discovery, you need the following:
- WMI services enabled on the target Windows system
- A LogicMonitor Collector with network access to the target device
- Credentials with permissions to query WMI on the target system
Configuring WMI Active Discovery
- In LogicMonitor, navigate to
 More > Modules > My Module Toolbox.
 - Select
 Add > DataSource.
 - In the Info tab, provide the basic information.
For more information, see DataSource Configuration. - In the Summary section, provide the following information:
- Select “WMI” from the Collection Method dropdown menu. This defines how data is collected for the DataSource.
- Select an interval from Collection Schedule based on how frequently the monitored data updates.
Note: Use shorter intervals for rapidly changing or critical metrics. Longer intervals reduce system load on both the monitored resource and the Collector.
- Toggle the Multi-Instance switch to enable monitoring of multiple instances of an object. For example, multiple disks or volumes on a server.
- (Optional) Toggle the ERI Discovery switch to runs once for each instance to assign external resource identifiers (ERIs).
- Toggle the Enable Active Discovery switch to enable LogicMonitor to automatically detect instances.Note: This option is available only when Multi-Instance switch is enabled

- Select Access Groups to assign access to the DataSource.
For more information, see Access Groups for Modules. - In the AppliesTo field, enter AppliesTo scripting to determine which resources are associated with this DataSource. For more information, see AppliesTo Scripting Overview.
- (Optional) In the ERI Discovery section, provide the following information:
- Select an option from the External Resource ID Discovery Schedule dropdown menu to set the ERI Discovery schedule.
- Select the script type either an “Embedded Groovy Script” or “Embedded PowerShell Script” from the Script Type dropdown menu.
- Add the script according to the selected script type, and then run it to initiate ERI Discovery.
After you run the script, LogicMonitor executes ERI Discovery using the selected schedule and script type.
- In the Active Discovery section, provide the following information:
- Select an option from the Discovery Schedule dropdown menu to set the Active Discovery schedule.
- Select one of the following using the Group Method dropdown menu to determine how instances are grouped after discovery:
- Select Manual to manually organize instances into groups after discovery, or leave them permanently ungrouped.
- Select Regular Expression to group instances based on pattern matching using regular expressions.
- Select Instance level property to automatically create instance groups based on unique values of the selected instance-level property (ILP).
For information, see Instance Groups.
- (Optional) Toggle the Disable Discovered Instances switch to place newly discovered instances in a disabled state by default. These instances move to the dynamic Unmonitored group and are not monitored until you enable them.
For more information, see Instance Groups. - (Optional) Toggle the Automatically Delete Instances switch to remove instances from monitoring when Active Discovery no longer detects them. You can delete the instance immediately or retain its history for 30 days.
Recommendation: Keep this option disabled if you want to continue receiving alerts for missing instances.
- Select “WMI” from the Discovery Method dropdown menu to query a Windows WMI class for instances.
- In the WMI Namespace field, specify the namespace where the WMI class resides. For example,
root\cimv2, which is the default namespace for most Windows systems. - In the WMI Class field, specify the WMI class to query for instances. For example: Use Win32_LogicalDisk to return all logical disks on the system.
- In the Property used as instance identifier field, specify the property within the WMI class that uniquely identifies each instance. For example, for
Win32_LogicalDisk, useDeviceID.
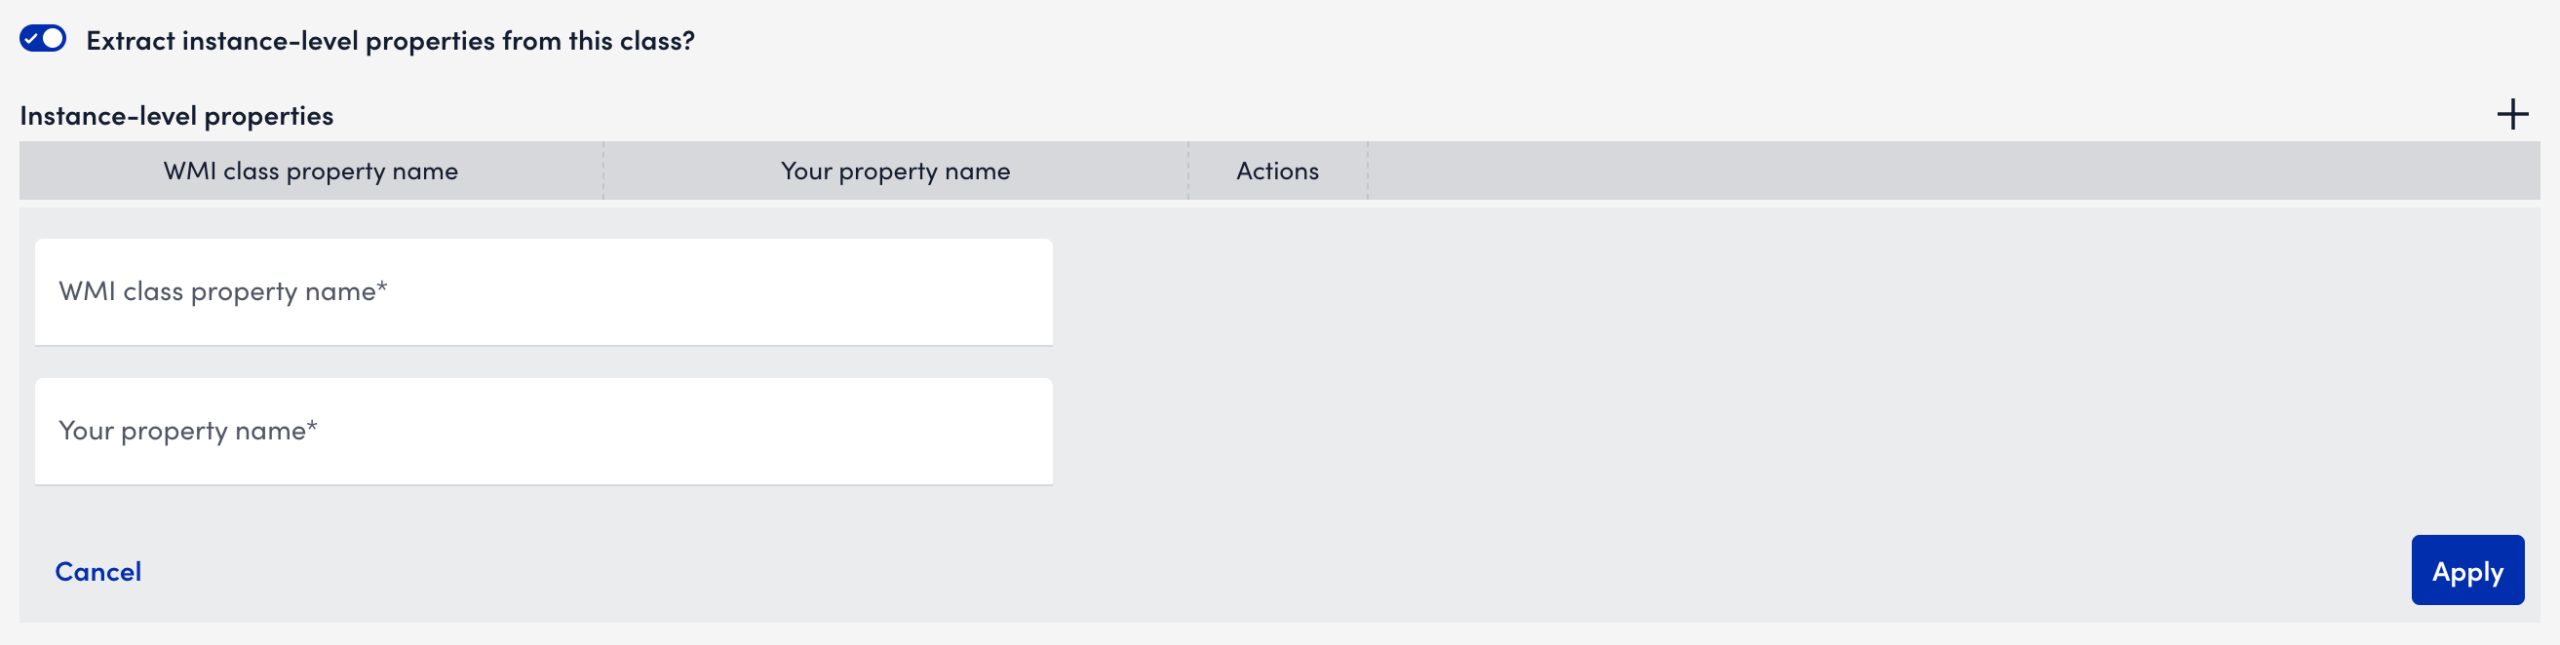
- (Optional) Toggle the Extract instance-level properties from this class? switch to collect instance-level properties from the selected WMI class. These properties can be used for alerting, grouping, or display.
When this option is enabled, do the following:- In the WMI class property name field, enter the WMI class property name as it exists in the class.
- In the Your property name field, enter a custom property name as it will display in LogicMonitor.
- Select Apply. The property mapping is saved.
- (Optional) Toggle the Extract instance-level properties from another related class? switch to collect instance-level properties from a related WMI class.
When this switch is enabled, do the following:- In the WMI Class field, enter the name of the related WMI class.
- In the Source WMI Class field, enter the property from the primary class used as the key.
- In the Linked WMI Class field, enter the property from the related class used as the join key.
Note: This configuration creates a one to one mapping between instances in the primary and related classes using the defined keys.For example, use
Win32_DiskDriveto extractModelorSerialNumber, linked to theWin32_DiskPartitionclass usingDeviceID. - Toggle the Case-insensitive switch to make property matching case-insensitive.
- Toggle the Replace all non-alpha/digit characters to _ before matching switch to replace all non-alpha and digit characters to _ before matching.
- In the Instance-level properties, select
 Add Related ILP.
 - In the property field, enter the WMI class property name as it exists in the class.
- In the Your Property Name field, enter a custom property name as it will display in LogicMonitor.
- Select Apply.
- Enter a tokenized value or property reference in the External Resource ID Template field that generates a unique external resource ID for each instance. Use this to associate discovered instances with externally managed resources.
For example, use##WILDVALUE##or a custom instance-level property such as##volumeDisplayName##. - Select the system or integration that the external resource ID maps to using the External Resource ID Type. This setting determines how LogicMonitor interprets and uses the value from the template.
For example, select “ServiceNow” if the external resource IDs match records in your ServiceNow CMDB.
- To add a filter, do the following:
- In the Property name field, enter a property name.
- From the Operator dropdown menu, select a comparison operator.
- In the Value field, enter a value to match.
- In the Comments field, enter any relevant comments.
- Select Apply.
The filter is added and applied to the Active Discovery configuration.
- Select Test Active Discovery.

- In the Collection section, enter the required details based on your collection method.
For more information, see Data Collection Methods Overview. - In the Datapoints section, add relevant normal or complex datapoints based on your requirement.
For more information, see Datapoint Overview. - Select
 Save.
Save.
LogicMonitor runs Active Discovery using the configured settings. The discovered instances are displayed based on your configuration, and you can verify that the correct instances are identified and grouped as expected.
