Selenium Web Checks
Last updated - 23 July, 2025
You can manage Selenium Web Checks using LogicMonitor by recording a browser transaction and then uploading the Web check to LogicMonitor. LogicMonitor collects latency data from the Selenium Synthetics check (the length of time that it took for the test or user workflow specified in a .side file to be completed). It also captures if the check or workflow resulted in an unexpected error, indicating a possible issue with the website.
After the data is ingested into LogicMonitor, you can use LM APM and LM Logs to view the data for potential user issues.
Using LogicMonitor to manage Selenium Web Checks offers you the following benefits:
- Cost-effectiveness— Selenium allows you to perform automated functional testing seamlessly, without much monitoring.
- Multiple browser support— Selenium supports major browsers for testing purposes. For more information, see Tools and Support from Selenium documentation.
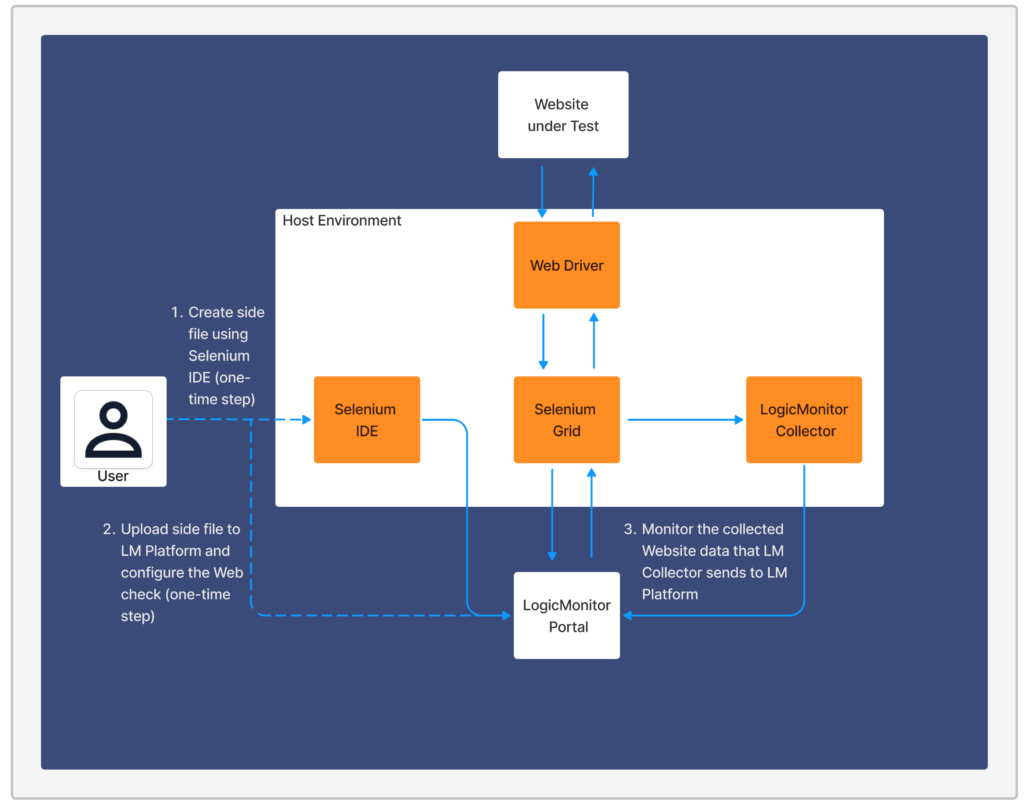
The following diagram illustrates the Selenium Web Checks workflow: