
Edwin AI Model Creation
Last updated - 19 August, 2025
Edwin AI models define how alerts are filtered and grouped into actionable insights using string or list-based correlation. For more information, see Edwin AI Models.
Requirements for Creating Edwin AI Models
To create and run an Edwin AI model, ensure the following:
- You have a user with “Manage” access and permissions set
- Deduplicated alerts flowing into your environment
- Field availability is consistently populated
- Cluster configuration (It takes a minimum of two alerts defined to form a correlation cluster)
Note: If your environment provides services for multiple LogicMonitor accounts, and you use correlation by tenant, ensure that each resource or resource group has the tenant.identifier property properly configured.
Creating an Edwin AI Model
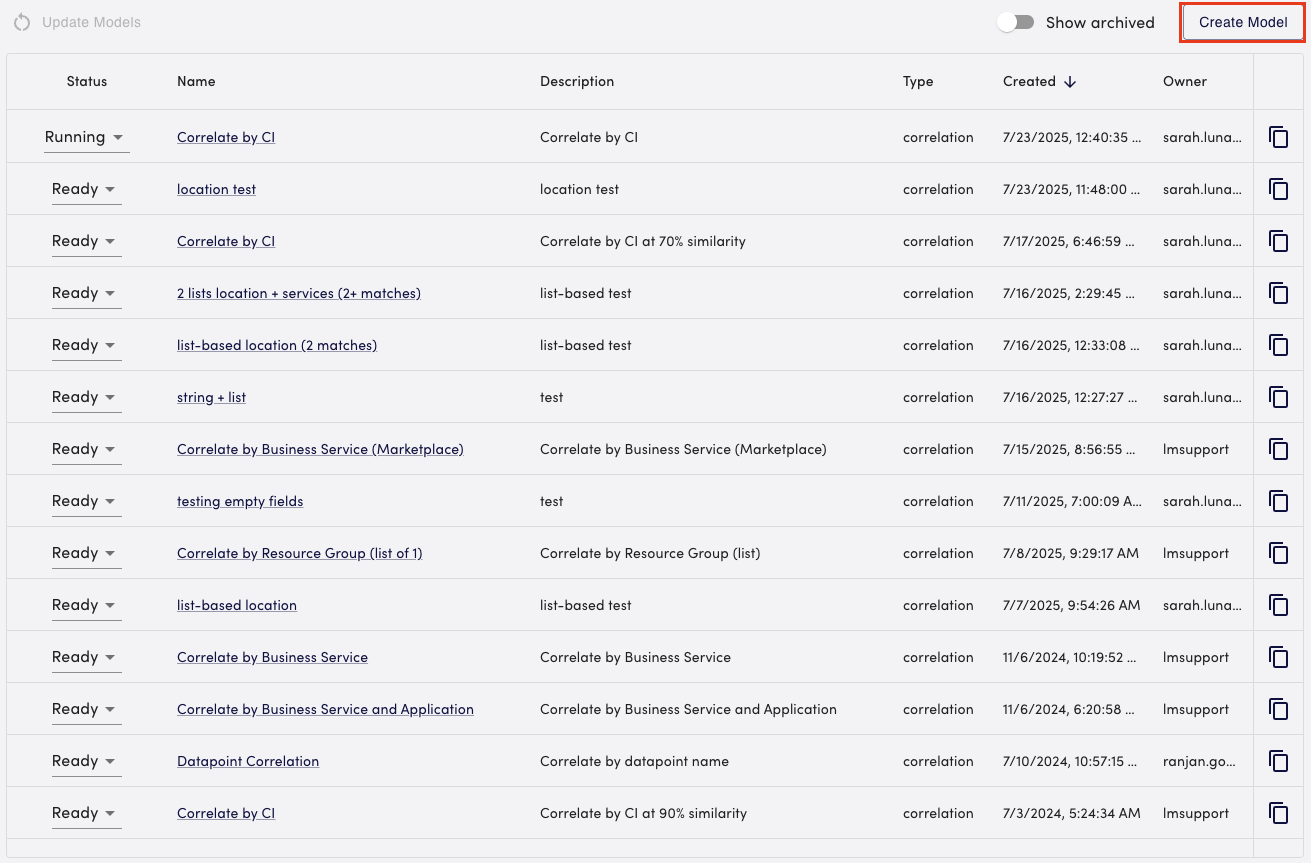
- In LogicMonitor, navigate to Edwin AI > Models page > select Create Model.
- In the General section, do the following:
- In the Name field, add a name.
- In the Description field, add a description.
- (Optional) To configure a condition in the Dataset, do the following:
- Select Add Condition.
- From the Field dropdown menu, select your field.
- From the Operation dropdown menu, select the operation for the condition.
- In the Value field, enter in your value.
- Select Add to add your condition.
The dataset populates in a modal.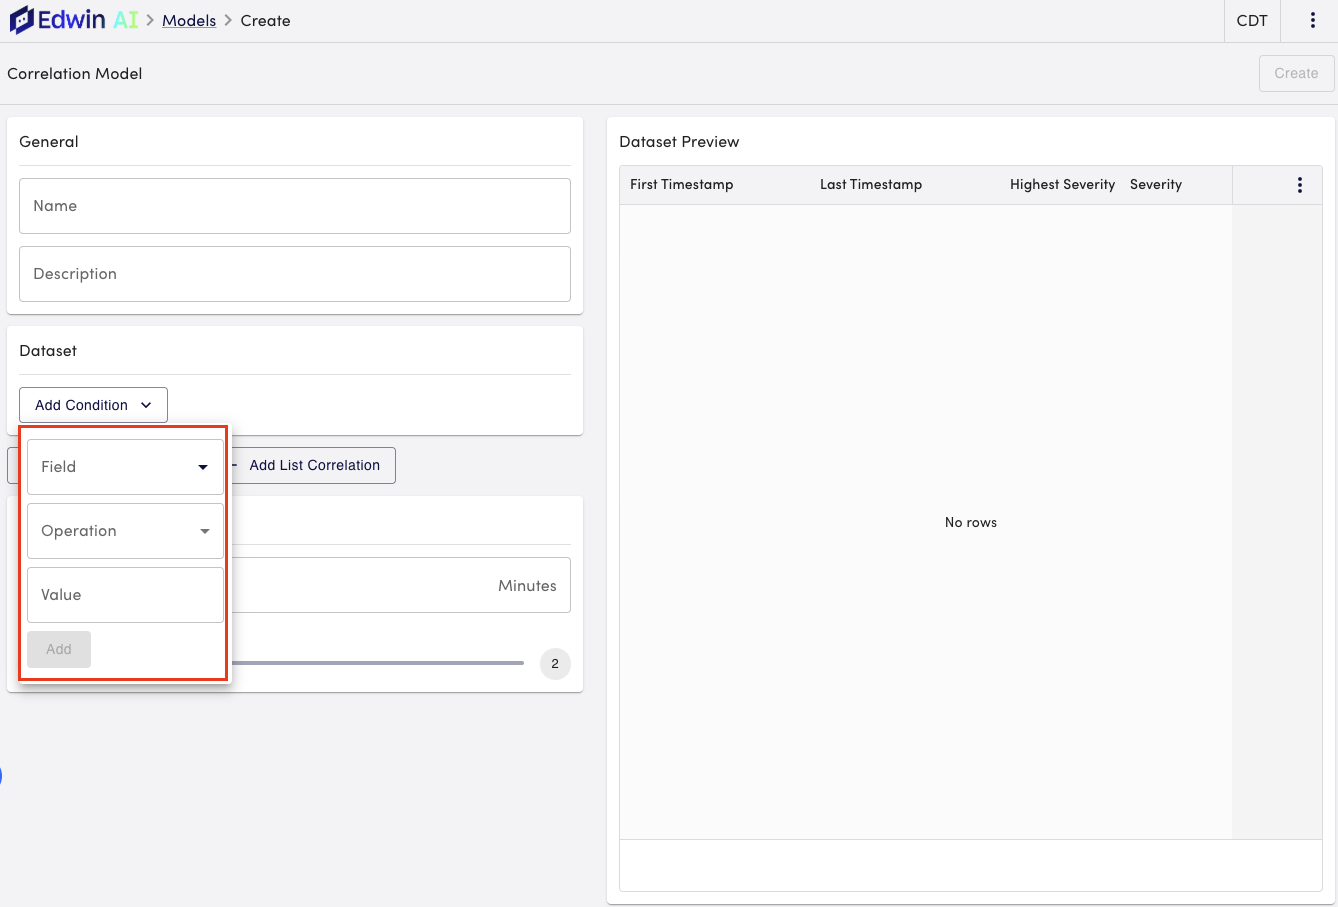
- Select AND or OR, to specify logic.
The dataset defaults to “AND” unless “OR” is selected. - (Optional)To configure an additional condition, do one of the following:
- (Optional) To add a field based filter, select the funnel icon.
You can use this to add multiple fields, for example, CI, Name, and Object. - (Optional) To add nested logic, select the forked-arrow icon.
This supports grouping conditions using “AND/OR” combinations.
You can nest multiple condition block to mirror complex logic, similar to using parenthesis in queries.
- (Optional) To add a field based filter, select the funnel icon.
- To configure the correlation logic, do any of the following:
- To configure a string correlation, select Add String Similarity, and complete the String similarity form by doing the following:
- From the Field dropdown menu, select your field.
- To adjust the similarity percentage, move the Similarity slider.
- (Optional) To enter a location, select one from the Locale dropdown menu.
- (Optional) To remove numbers from a string so that only letters are matched in a text string, enable Remove Numbers.
- (Optional) To remove white spaces at the end of a text string, enable Trim Text.
- (Optional) To match either upper or lowercase words in a text string, enable Case Sensitive.
- (Optional) To add words that should be excluded when comparing string, select Stop Words.
Stop words helps remove common or irrelevant part of value (for example, domain suffixes or shared prefixes) and ensures that only the unique part of the strings are evaluated.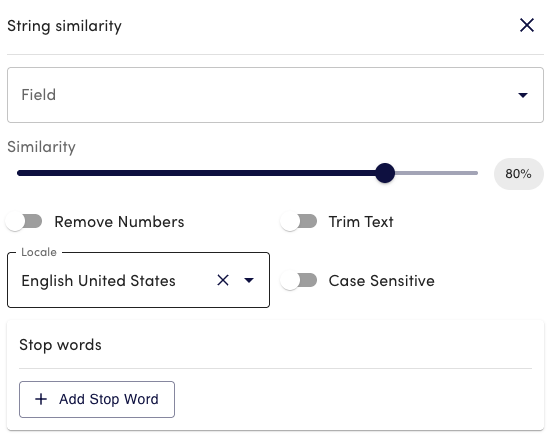
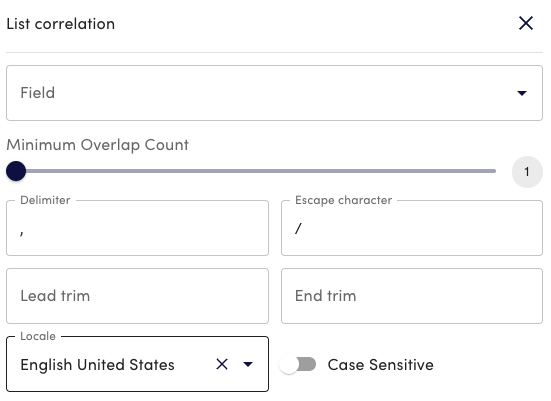
- To configure a list-based correlation, select Add List Correlation, and complete the List correlation form by doing the following:
For more information, see Edwin AI List Based Correlations.- From the Field dropdown menu, select the field.
- To adjust the overlap count, move the Minimum Overlap Count slider.
- In the Delimiter field, enter the delimiter. For example, a comma or semi-colon.
- In the Escape character field, end the escape character. For example, a forward slash.
- (Optional) To remove leading characters, enter them into the Lead trim field.
You can use this for list items that begin with characters like quotes or brackets. - (Optional) To remover trailing character, enter them into the End trim field.
You can use this when list items end with characters like quotes, brackets, or punctuation. - (Optional) To enter a location, select one from the Locale dropdown menu.
- (Optional) To enable case sensitivity, toggle the Case Sensitive switch.
Note: You can add multiple string and list-based correlations to a model. The correlations stack, meaning that all correlations added are factored in when the model runs.
- To configure a string correlation, select Add String Similarity, and complete the String similarity form by doing the following:
- (Optional) In the Other section, do the following:
- To modify the number of minutes before timeout, enter in the number of minutes in the Timeout field.
The Timeout field defaults to 15 minutes.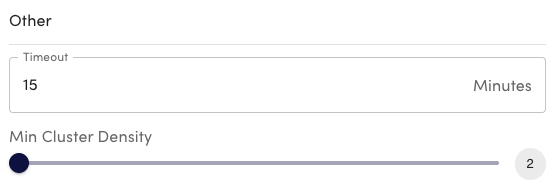
- (Optional) To adjust the cluster density, move the Min Cluster Density slider.
The minimum cluster density defaults to 2.
- To modify the number of minutes before timeout, enter in the number of minutes in the Timeout field.
- Select Create to save the model.
Saving the model puts it into a “Ready” state by default.Note: Changes cannot be made to the model after it has been saved.
Running a Model
- In Edwin AI, navigate to the Models page > select “Running” from the Status dropdown menu of the model.
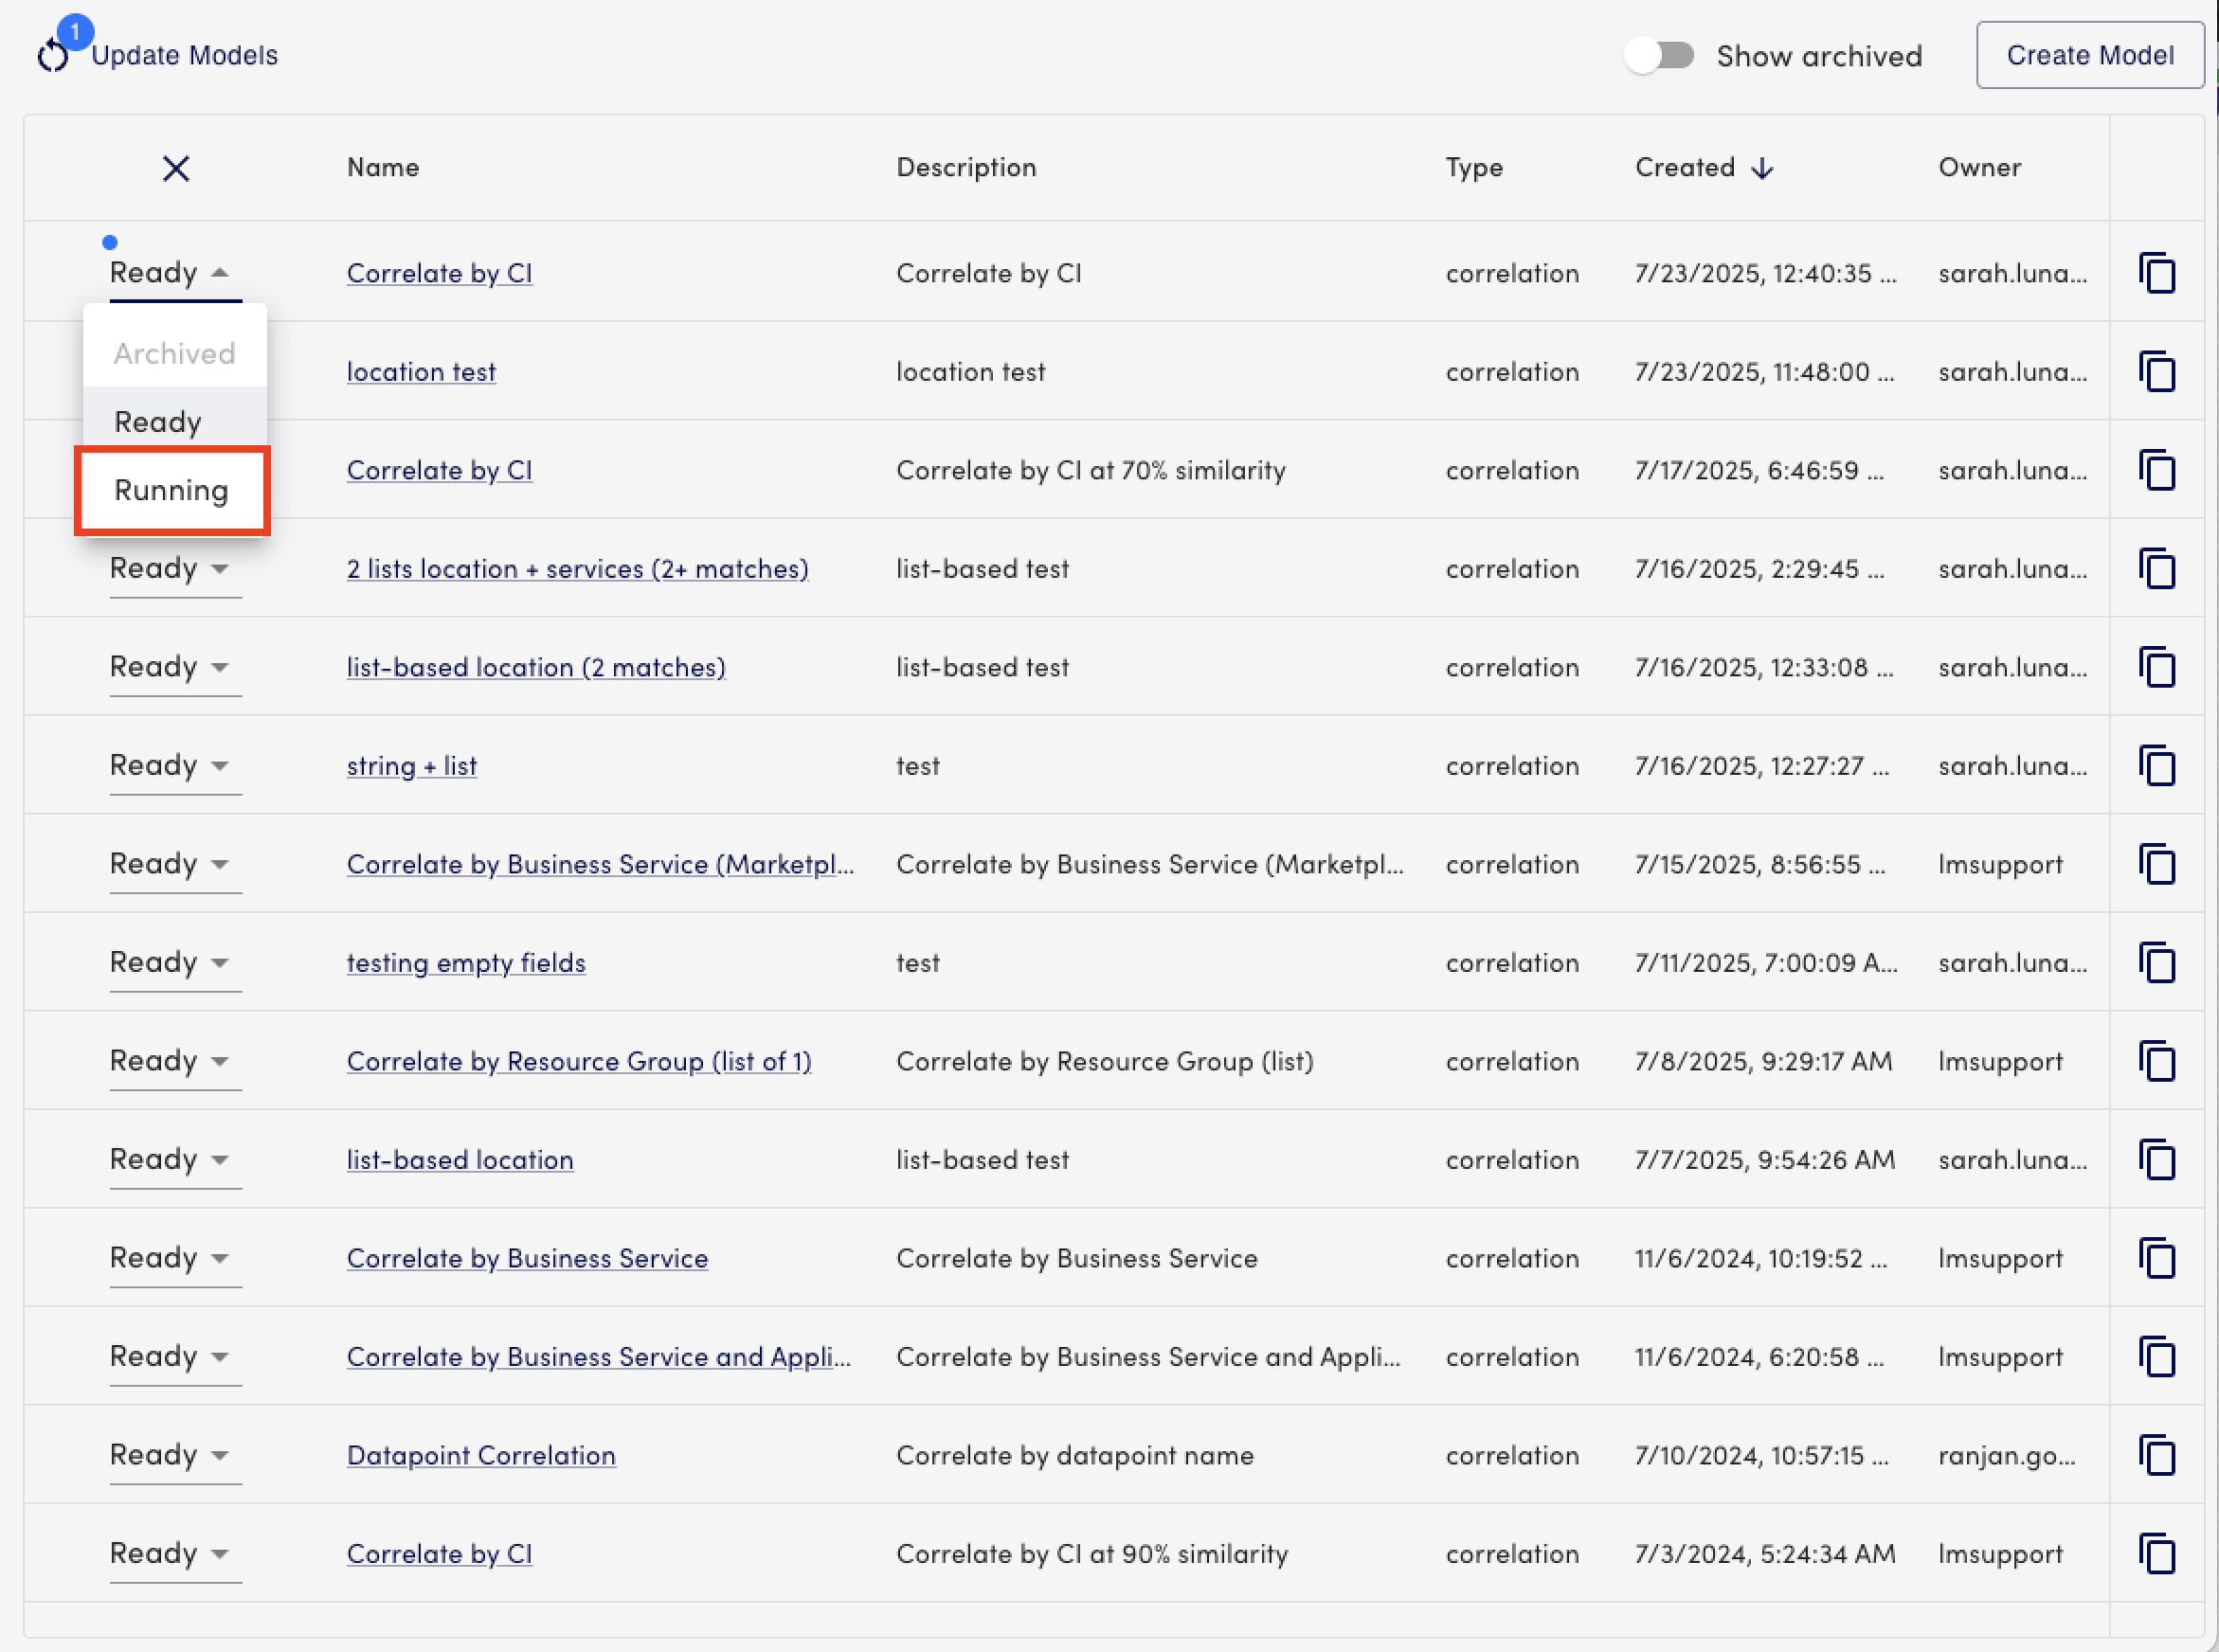
Your model is now active and running.
