Creating and Editing Action in Edwin AI
Last updated on 16 October, 2024Actions are a pre-configured set of sequential steps that are executed to achieve a desired outcome. For example, to update an alert or create an incident in ServiceNow. For information on pre-delivered actions in Edwin AI, see Default Actions in Edwin AI.
Depending on the source, Actions are defined as:
- Automatic actions that can be applied to events, ML records, and ServiceNow events. You can apply actions to alerts and insights, but not do any automatic processing.
- Interactive actions that can be triggered by a user manually such as creating, assigning, or closing an incident.

Prerequisite
| Role | Description |
|---|---|
| Configuration | Check the Manage option. For more information on roles and permissions, see Edwin AI Roles and Users. |
Procedure
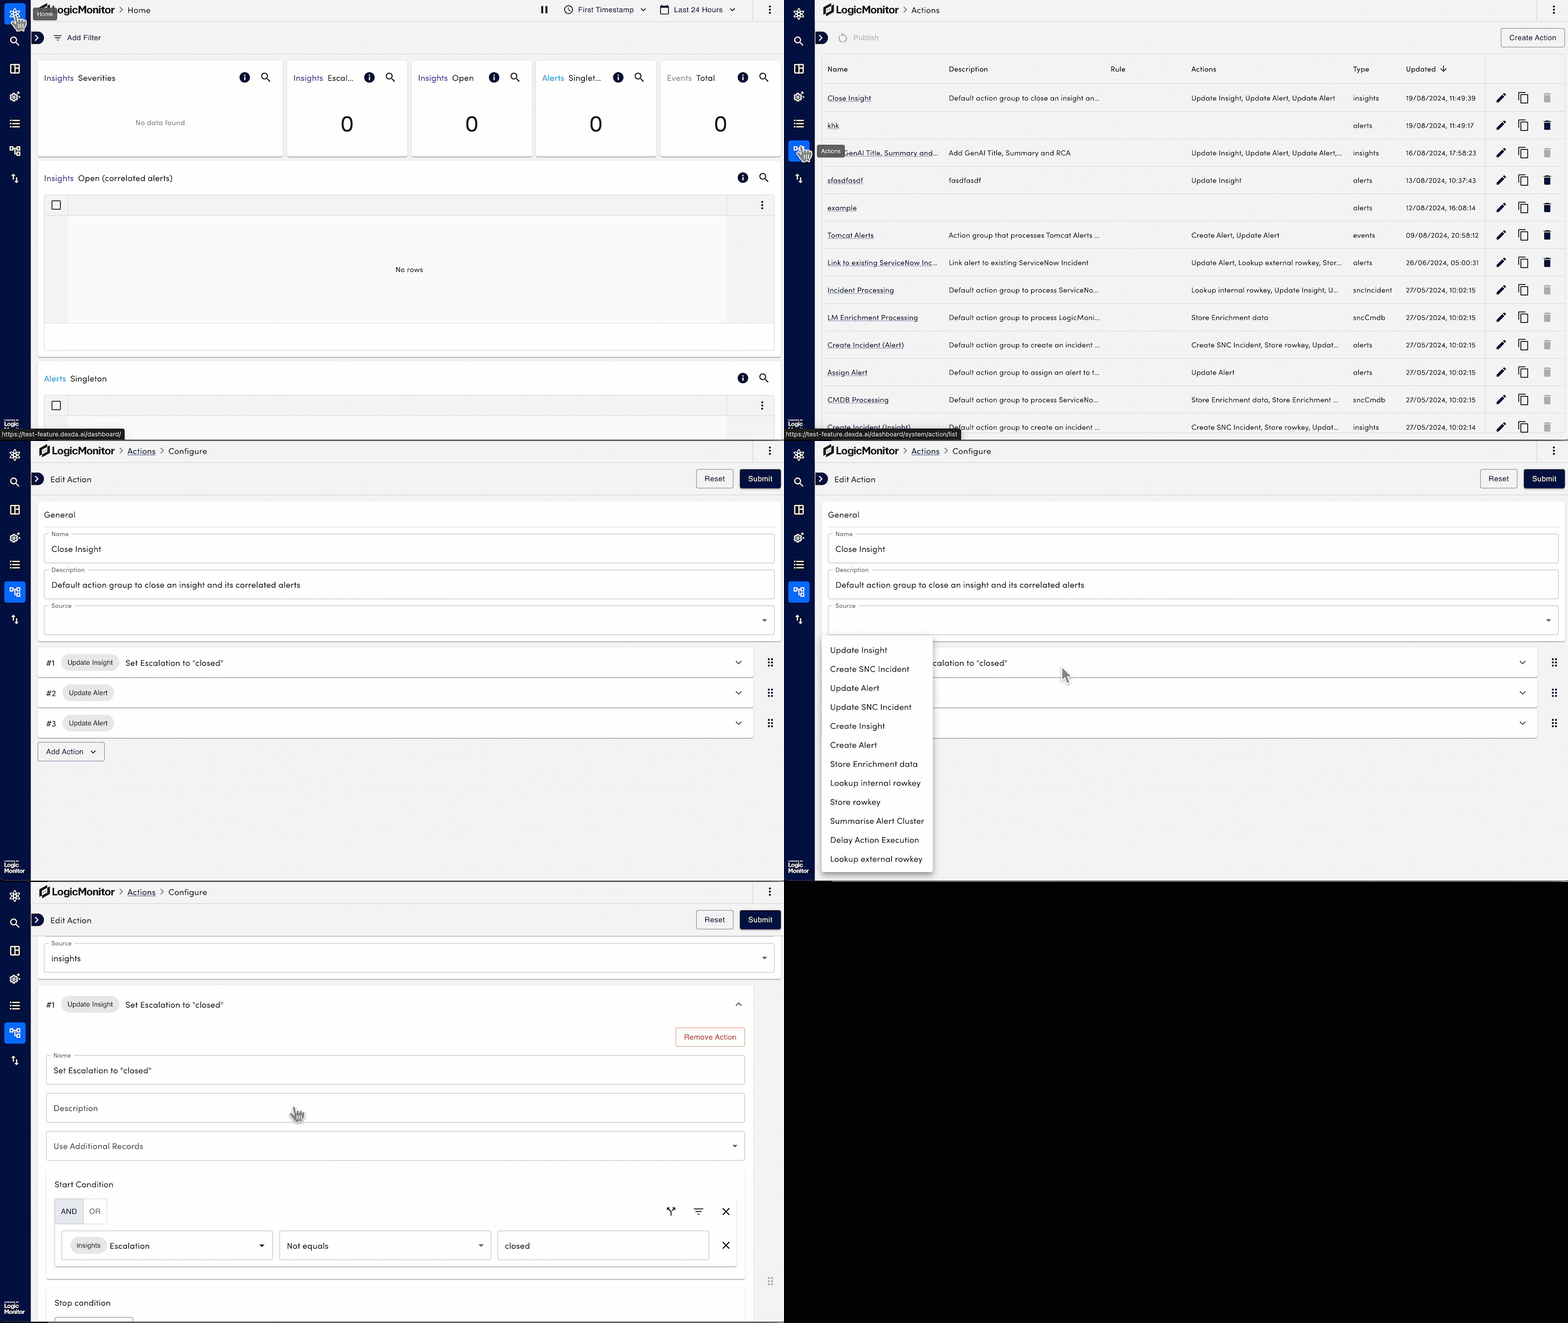
- On the left-side pane, navigate to Actions.
Tip: For info on navigating the actions page, see the Actions page. - Select Create Action. You will see a configuration page.
- On the configuration page, enter the details as follows:
- Name: Enter a descriptive name that is easy to search.
- Description: Enter a brief description of what the action can do.
- Source: Select a source. For more information on available sources, see Configuration Parameter.
- Sequence: Sequence is a collection of steps under one action that has an outcome. A list of actions under the sequence is executed to achieve an overall outcome.
- Settings: General information and lifecycle configuration for the action in the step.
- Name: Add a descriptive name for the step, for example, Set escalation to closed. Displays in the step sequence in the left panel.
- Description: When needed, explain further what the step in the sequence does.
- Execute: Select Add expression to add filters to run the action only if specified conditions are met. Select Add outcome to stop the action from running when specified conditions are met.
- Mappings: Control data movement from the source record to the record created or updated by the selected action. Available options here depend on the selected action, see Configuration Parameters.
- Advanced: In the Advanced tab you can use other configuration fields than the default ones.
- Select Submit to save all changes.