Disclaimer: This content applies to the legacy UI and is no longer maintained. It will be removed at a future time. For up-to-date content, see LogicMonitor Users. At the time of removal, you will automatically be redirected to the up-to-date content.
Users
Last updated - 25 July, 2025
Creating Users
To add new users to your LogicMonitor account, navigate to Settings > User Access > Users & Roles > Add > User. As discussed next, there are several settings that must be established in order to create user accounts. These settings determine credentials, some basic interface behavior, and a user’s level of permissions.
Note: Role Access view permissions and User Access manage permissions are required in order to provision user accounts.
API Only Access
If toggled on, this option will allow creation of a user only capable of API access. For such a user, only the Username, API Tokens, Roles, Status and Notes fields are relevant. API only users don’t have passwords or other user interface-specific fields, making them a more secure option if you are creating a dedicated user for an API-based integration.
Username
A name or email address to be used to log in to the account.
First Name and Last Name
Name fields to help identify the user.
Primary email address for the user. This contact method will be used for email alert and report delivery.
Password
The password to be used upon initial login.
Passwords must be a minimum of twelve characters, containing:
- At least one uppercase letter
- At least one lowercase letter
- At least one digit
- At least one of the following special characters: ~, !, $, %, ^, (, ), _, –, +, =, }, {, ], [, @, #, &, \, |, ;, :, < , >, . ,?, /
Note: Along with the above password conditions, your password is verified automatically for any previous data breaches using the Have I Been Pwned integration with LogicMonitor. This integration allows LogicMonitor to check if you are using a compromised login password when creating an account, updating an account, and resetting the password to your account. If you wish to verify your password manually, see Have I Been Pwned.
Force Password Change
By default, the Force Password Change? option is checked when creating a new user. It will cause the system to immediately prompt the new user for a password change upon their initial login.
Password changes can also be required of existing users at any time. If the user is logged in at the time this is option is checked, they will receive a notification stating they will need to change their password the next time they log in. Once the user has completed the password change, the Force Password Change? option resets to unchecked.
Enable Two-Factor Authentication
If this option is selected, the user will be required to use two-factor authentication upon next login. For more information on LogicMonitor’s implementation of this additional security layer, see Two-Factor Authentication.
Note: Currently, two-factor authentication is not enforced when logging in through our mobile client.
Phone
The phone option is not required. If entered, it is available as a contact method for voice alerts and native SMS alerts.
To add the country code, you can either select the country flag from the drop-down list or you can enter the code manually.
Note: You must enter a valid phone number with a valid format. Refrain from entering alphabets, special characters, and spaces.
For example: +918085808505, +14155552671
SMS Email Address
Not required. If entered, this email address will be available as a contact method for email SMS alerts.
SMS Email Format
The format for email SMS alert notifications that the SMS email address will receive. Select “Full-text” to receive the entire alert message or “Short (160 chars)” to receive an abbreviated version.
Time Zone
The Time Zone field for all new users defaults to the time zone specified for the LogicMonitor account (as configured in the global portal settings). However, if a user is located in a different time zone, it can be selected from this field’s dropdown menu to allow the user to view and configure time-based data and settings relative to their local region.
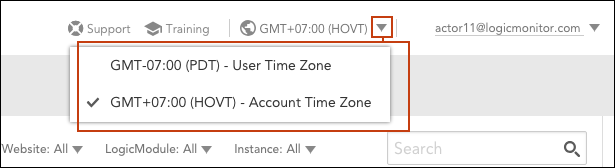
When a user account is configured to a time zone other than the global LogicMonitor account, their UI will display time-based data (e.g. alerts, report output, one-time events, raw data, etc.) according to their chosen time zone. Users can easily toggle between their user-specific and account level time zones from the UI header, as shown next.
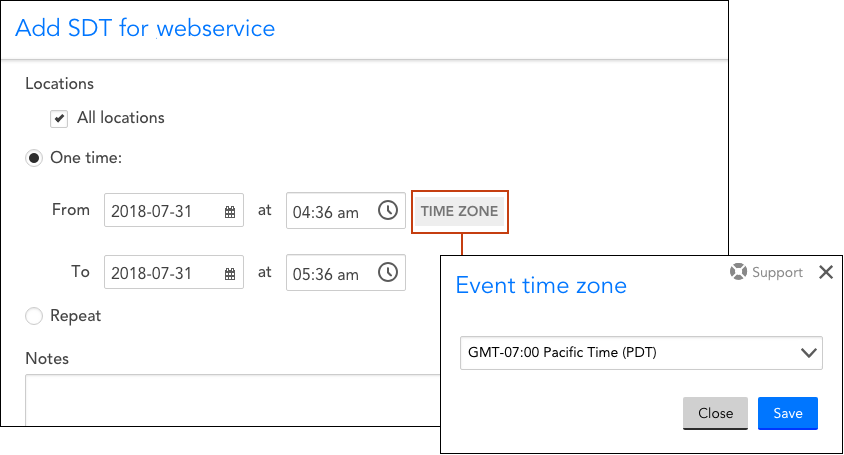
All events a user configures (e.g. SDT, Collector upgrades, report deliveries, SLA periods, etc.) will be configured, by default, in the user’s specific time zone. However, this can be overridden on a case-by-case basis using the Event time zone dropdown menu, shown next, that accompanies all time-related settings throughout the interface.
User Groups
In the User Groups area of user configurations, you can assign the user to one or more previously-configured user groups. If your organization doesn’t organize users by group, or if the group hasn’t yet been created, leave the table empty to assign the user to the default “Ungrouped” group. For more information on user groups, see the User Groups section of this support article.
API Tokens
The API tokens associated with the user. The API Tokens entered here can be used to authenticate REST API requests, and will assume the role(s) of the user. Make sure to save the Access Key to a secure location when you add an API Token, as that value will not be displayed again.
Roles
The roles assigned to this user. If a user is assigned multiple roles, the user’s privileges are a sum of the privileges of each of the assigned roles. For example, if one assigned role provides view only permissions to all resources, but another assigned role provides manage permissions to all resources, the user will have view and manage permissions for all resources. If yet another assigned role provides view permissions for all dashboards, but no permissions for resources, the user will maintain manage permissions for all resources and additionally gain view permissions for all dashboards. For more information on user roles, see Roles.
View Permission
The View Permission area of a user configuration determines the visibility of the pages on the LogicMonitor Portal. It is a user-level access and view permission. If a toggle for a page is not selected, the user does not have access to that page on the LogicMonitor Portal regardless of the permission levels provided to the user by the assigned role. For example, if a user does not have view permission to Logs, Traces, and Reports, then on the LogicMonitor Portal, the Logs, Traces, and Reports pages are not visible to that user.
However, if the same user has an Admin role with read and write permission to Logs, Traces, and Reports, then the user can access public APIs through tools such as Postman and send API requests for Logs, Traces, and Reports. Before making any API request, LogicMonitor checks for the permissions granted to the user’s role.
Generally, select all the pages and let the user’s assigned role determine the visibility and access. However, there may be circumstances in which the user needs to be restricted from a particular page.
Status
Users are active by default. Suspended users will be unable to log in to the system.
Note
The user note is for reference. It does not display anywhere else in the interface.
Managing Users
Existing users can be viewed at Settings | Users & Roles | Users. All users are nested in group(s) and listed in table form.
From this table, you can:
- Filter users–Use the filters to filter users by user group, assigned role, and/or status.
- Search users–Search for users using first name, last name, user name, role name, or group name.
- Sort users–Clicking the header name for most columns allows you to toggle between ascending and descending table sort order for that column.
- Expand user details–Click the arrow to the left of a user to expand listing to display additional details.
- Manage table columns–Click the Settings button to add/remove columns in the user table, as well as reorder columns.
- Edit or delete a user–Click the gear icon to open the Manage User dialog. From this dialog, you can update a user’s configurations or delete a user.
- Log off Users–Place a checkmark in the leftmost column of one or more users and select Actions > Logoff Users to log them out of the platform.
- Move users to other groups–Place a checkmark in the leftmost column of one or more users and select Actions > Move Users to Group to add users to another group. Because LogicMonitor supports the ability to include one user account in multiple user groups, the default behavior is to copy the user to the specified group, while leaving in its existing group as well. For more information on user groups, see the User Groups section of this support article.
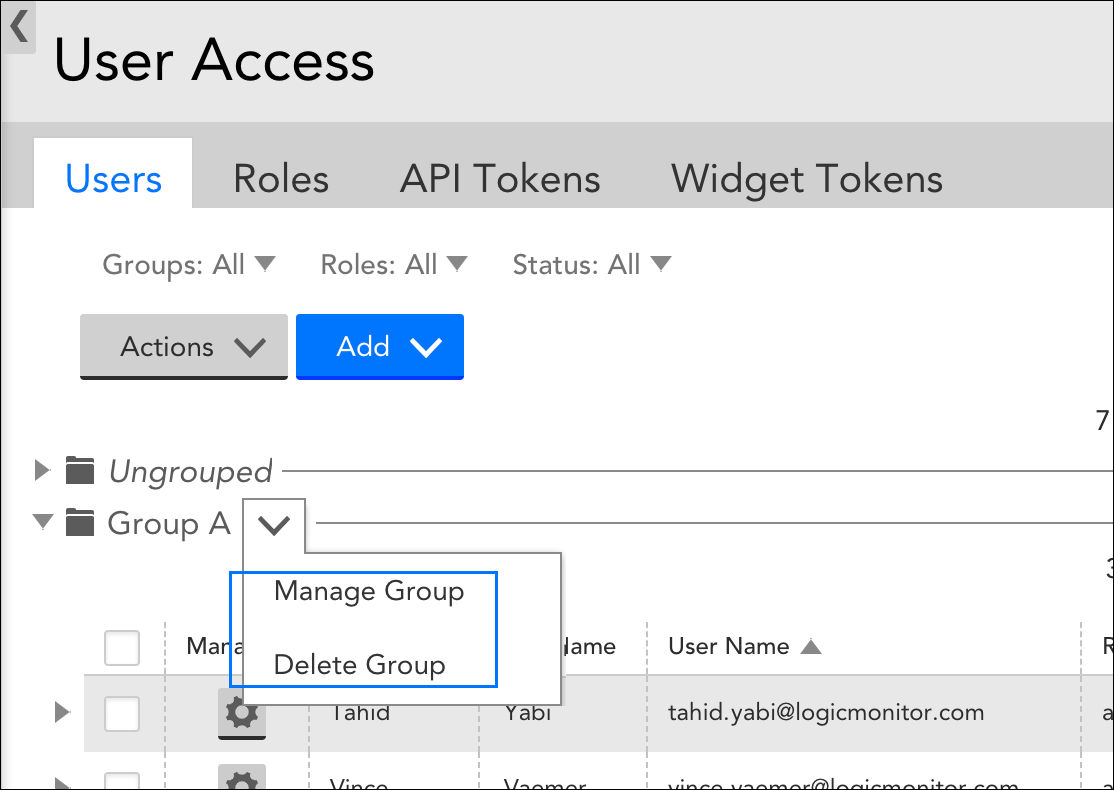
- Manage user groups–Click the drop-down arrow to the right of a user group name to edit or delete the group.
Note: Another user management tool is the User report. It can be used to generate detailed data for LogicMonitor user accounts—on a global or granular level. For more information, see User Report.
User Groups
As with other areas of LogicMonitor, users can be organized into logical groupings. In addition to providing basic organization, user groups provide granular role-based access control (RBAC) for the viewing and management of users across the platform. For example, by assigning permissions to a user that only allow that user access to certain user groups, you can restrict which users are displayed to that user when they perform tasks such as establishing report delivery recipients, alert delivery recipients (i.e. escalation chains), or recipient groups.
Creating User Groups and Adding Users
To create a user group, navigate to Settings | Users & Roles | Users | Add | User Group.
Users can be added to user groups when creating the user (i.e. from the Add User dialog), editing the user (i.e. from the Manage User dialog), or, as discussed in the Managing Users section of this support article, from the table of users that displays on the Users tab.
Note: While a single user can exist in multiple user groups, it cannot simultaneously exist in the default “Ungrouped” user group and another user group. Once a user is assigned to a user group other than the default “Ungrouped” group, it is removed from that default placeholder group.
Managing Users Groups
User groups can be edited or deleted from the Users tab by clicking the drop-down arrow located to the right of a user group name.
When deleting a user group, you have the option to delete the group only, or the group and all its member users:
- Delete group only–This option deletes the group only. Members that are members of other groups will remain in those groups; members that are not members of other groups will be moved to the default “Ungrouped” user group.
- Delete group and all the users within the group–This option deletes the user group and all of its member users.
Understanding the “lmsupport” User and Remote Support Access
Upon setup of your LogicMonitor portal, a user account named “lmsupport” is auto created with the readonly role assigned. The purpose of this account is to provide LogicMonitor with remote support access to your portal for troubleshooting purposes.
Depending upon the options chosen at the time of setup, the lmsupport user account is initially created as either active or suspended. This designation directly determines whether or not LogicMonitor support can access your portal and, for security purposes, the status (enabled or disabled) of LogicMonitor’s remote support access always displays in the user interface.
The “Active” or “Suspended” status of the lmsupport user account, as well as its level of privileges, can be updated in the same manner as any other user account.
Note: If you toggle the lmsupport user account between active and suspended states, you’ll need to refresh the interface or navigate to a different area in order for the “Remote Support Access” status display to update.
