Disclaimer: This content applies to the legacy UI and is no longer maintained. It will be removed at a future time. For up-to-date content, see Alert List Widget. At the time of removal, you will automatically be redirected to the up-to-date content.
Alert List Widget
Last updated - 24 July, 2025
The Alert List widget is a status widget, enabling you to pre filter your alert table for display on a dashboard.
Overview
The Alert List widget provides much of the same functionality as the Alerts Page, enabling you to filter, sort, and arrange alert information for easy display. Filters and sort order are preserved, enabling display of the information most important to you or your end user.
Create an Alert List Widget
Click on the Add drop-down and select Alert List widget from the list. The Configuration form for setting up the widget will be displayed. See these instructions for help filling our the title, description, dashboard and refresh frequency fields.
Alert Settings
This section of the form configures what data will be used and how it will be displayed in the widget.
You can select filters for the visible filters (Group, Device, Datasource, and Instance), as well as other filters available under the “More” dropdown. Only alerts that match the set filters will display in the widget. For more information on these filters, which function the same here as they do on the Alerts page, see Managing Alerts from the Alerts page.
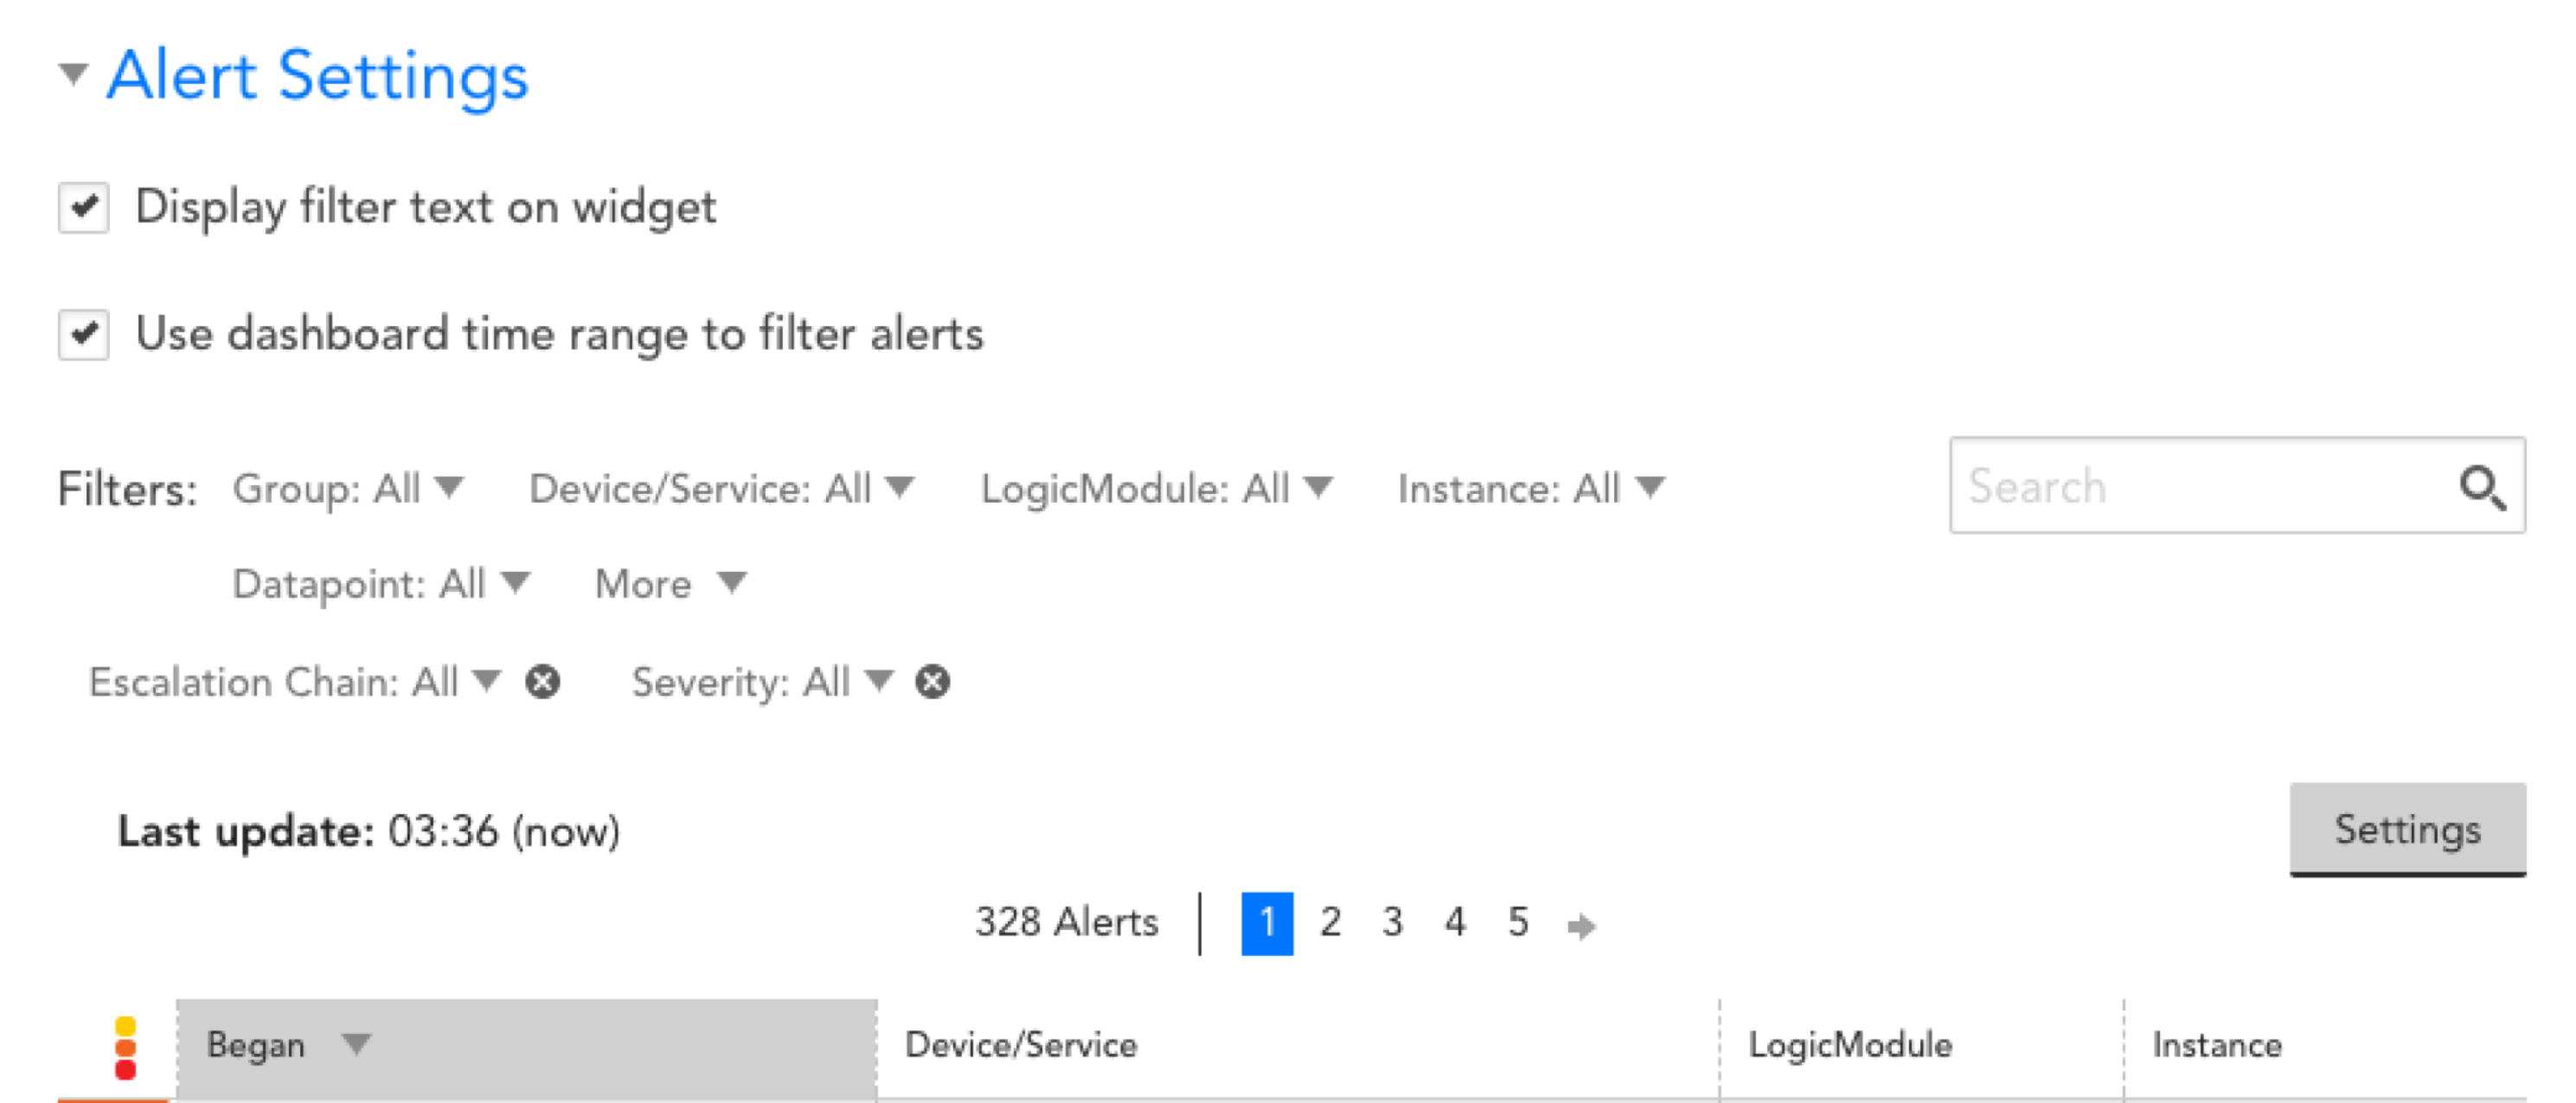
Clicking the Settings button will give you additional configuration options, including font size and the ability to Manage Columns.
Selecting Manage Columns gives you the ability to choose which columns will display. You can also drag and drop them to change the order in which they are displayed in the table.
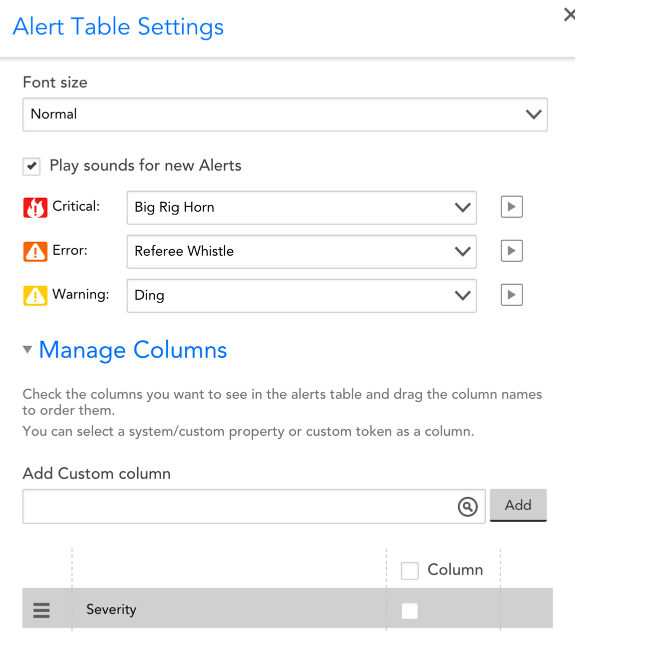
Play sounds for new Alerts
Selecting this box will allow you to configure distinct sounds to play for each alert severity. The sounds will only play from the Alert List widget when you have the Dashboard open.
Add Custom column
This field allows you to add custom columns to the Alerts Table that display properties or LM tokens. To add a property as a custom column, simply start typing the name of the property whose values you would like to see for each alert into the Add Custom Column field and matching search results will be auto-generated as you type.
To add a token as a custom column, you must prepend and append the token name with “##” (e.g. ##ALERTID##). Token names are not case sensitive (i.e. ##AlertID## also works). Search results are not auto-generated when typing token names into the Add Custom Column field.
Note: Any values assigned to properties with names ending in .pass, .auth, .key, or password will be obfuscated in the Alerts table for security purposes. Values assigned to the snmp.community, snmp.privtoken, and snmp.authtoken properties, as well as the aws.accesskey property, will also be obfuscated.
Display filter text
Check this box if you would like to display the selected filters for the alerts table shown in the widget.
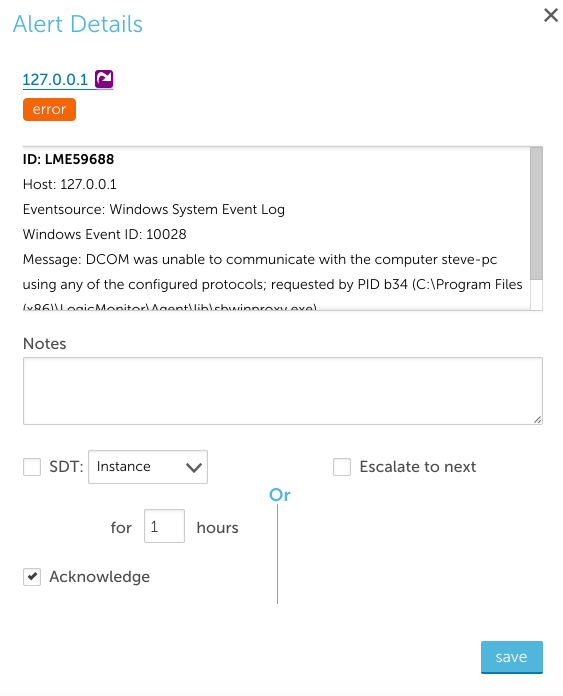
Acknowledging Alerts From an Alert List Widget
You can acknowledge alerts from your Alert List widget. Simply click on the alert from the widget and a new window will open. For more information on acknowledging alerts, see this page.