
Adding an API Token
Last updated – 19 January, 2026
API Tokens can be used to authenticate requests to LogicMonitor’s REST API. API Tokens (LMv1 and Bearer tokens) enable you to control which users in your account use the REST API, and monitor how often they are using it. For more information on API tokens (LMv1, Bearer) and best practices to use API tokens, see Application Authentication Overview.
Creating API Tokens
You can create two types of API tokens that are LMv1 tokens and Bearer tokens. These tokens are created on a per-user basis.
Important:
- Any user except an out-of-the-box administrator user role can create API tokens. Ensure to check the Allow Creation of API Token checkbox under Settings > User Profile.
- LogicMonitor does not allow REST API requests made using API tokens created by lm_support users and users with an out-of-the-box Administrator role.
Creating LMv1 Tokens
LMv1 token is a key-based authentication which allows you to authenticate API calls to the LogicMonitor platform. It consists of a key pair (access-id and access-key). Follow the steps to create LMv1 tokens:
- In LogicMonitor, navigate to Settings > User Access > Users and Roles > LMv1 API Token tab.
- Select the Add API Token + icon. The Add LMv1 API Token page displays.
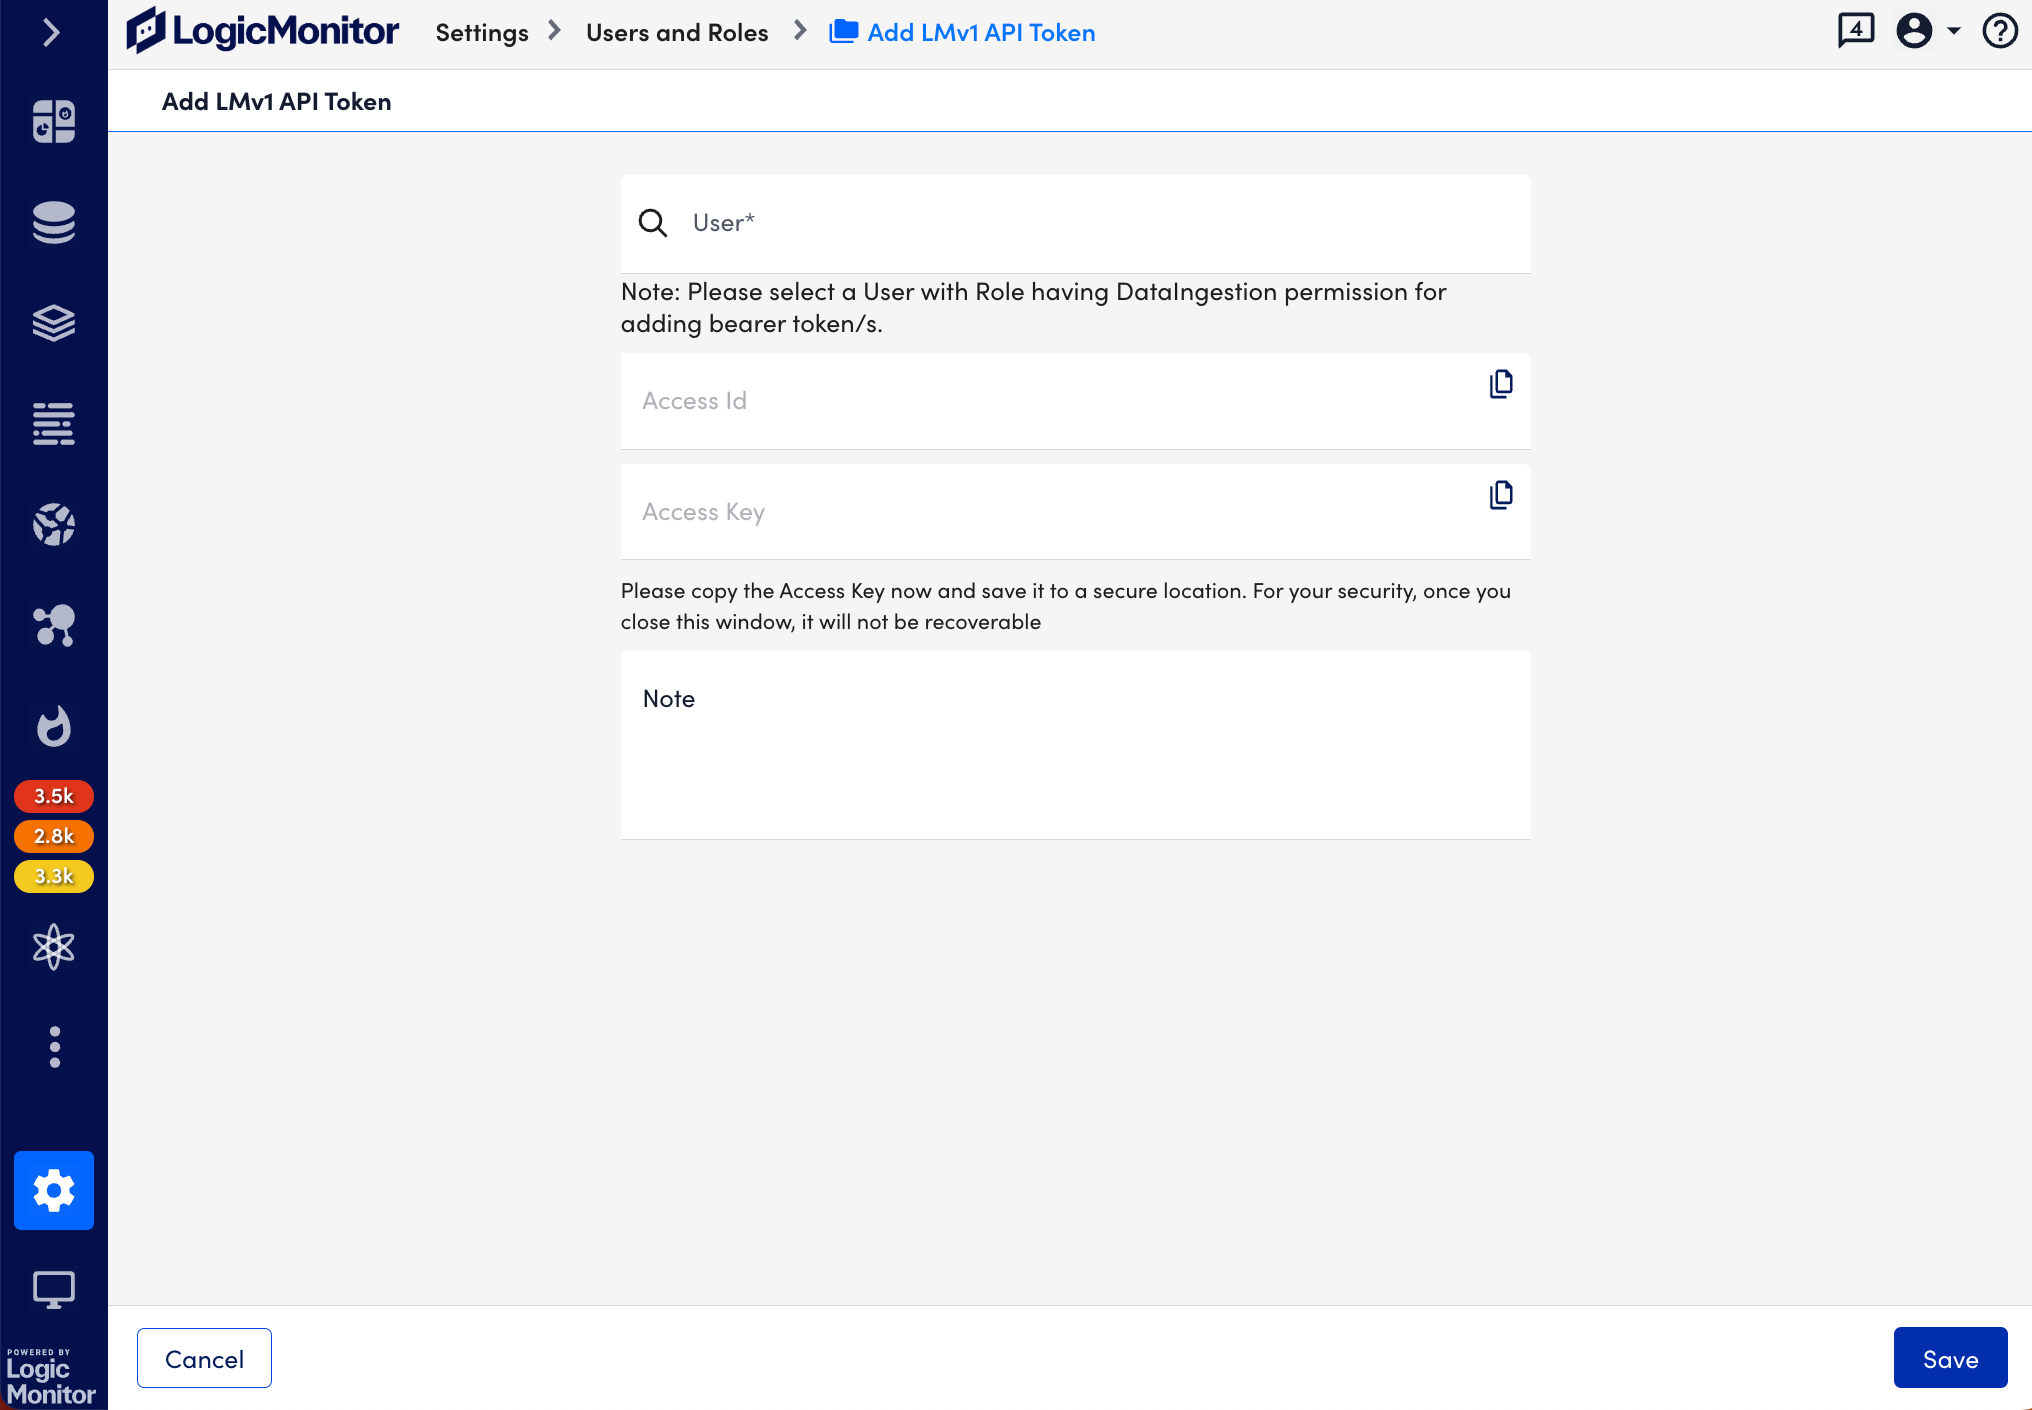
- In the User field, select a user with role having DataIngestion permission for adding bearer token.
After you select an email address, the Access ID and Access Key are automatically populated.
Note: An email notification is sent to the email associated with this user if changes are made to the API token after saving.
- (Optional) Select the Copy button against the Access ID and Access Key.
Recommendation: Copy the Access key and save it to a secure location.
- (Optional) In the Note field, enter a relevant note.
- Select Save.
The new LMv1 token is created and displayed in the table, and an email notification is sent to the email associated with the user.
Viewing LMv1 API Tokens
Navigate to Settings > Users and Roles > LMv1 API Tokens tab to view all LMv1 API tokens across account users. For each token, you can see the associated user, access ID, roles, note, created on date, last used date, last used IP address to access LogicMonitor, and the enabled/disabled status.
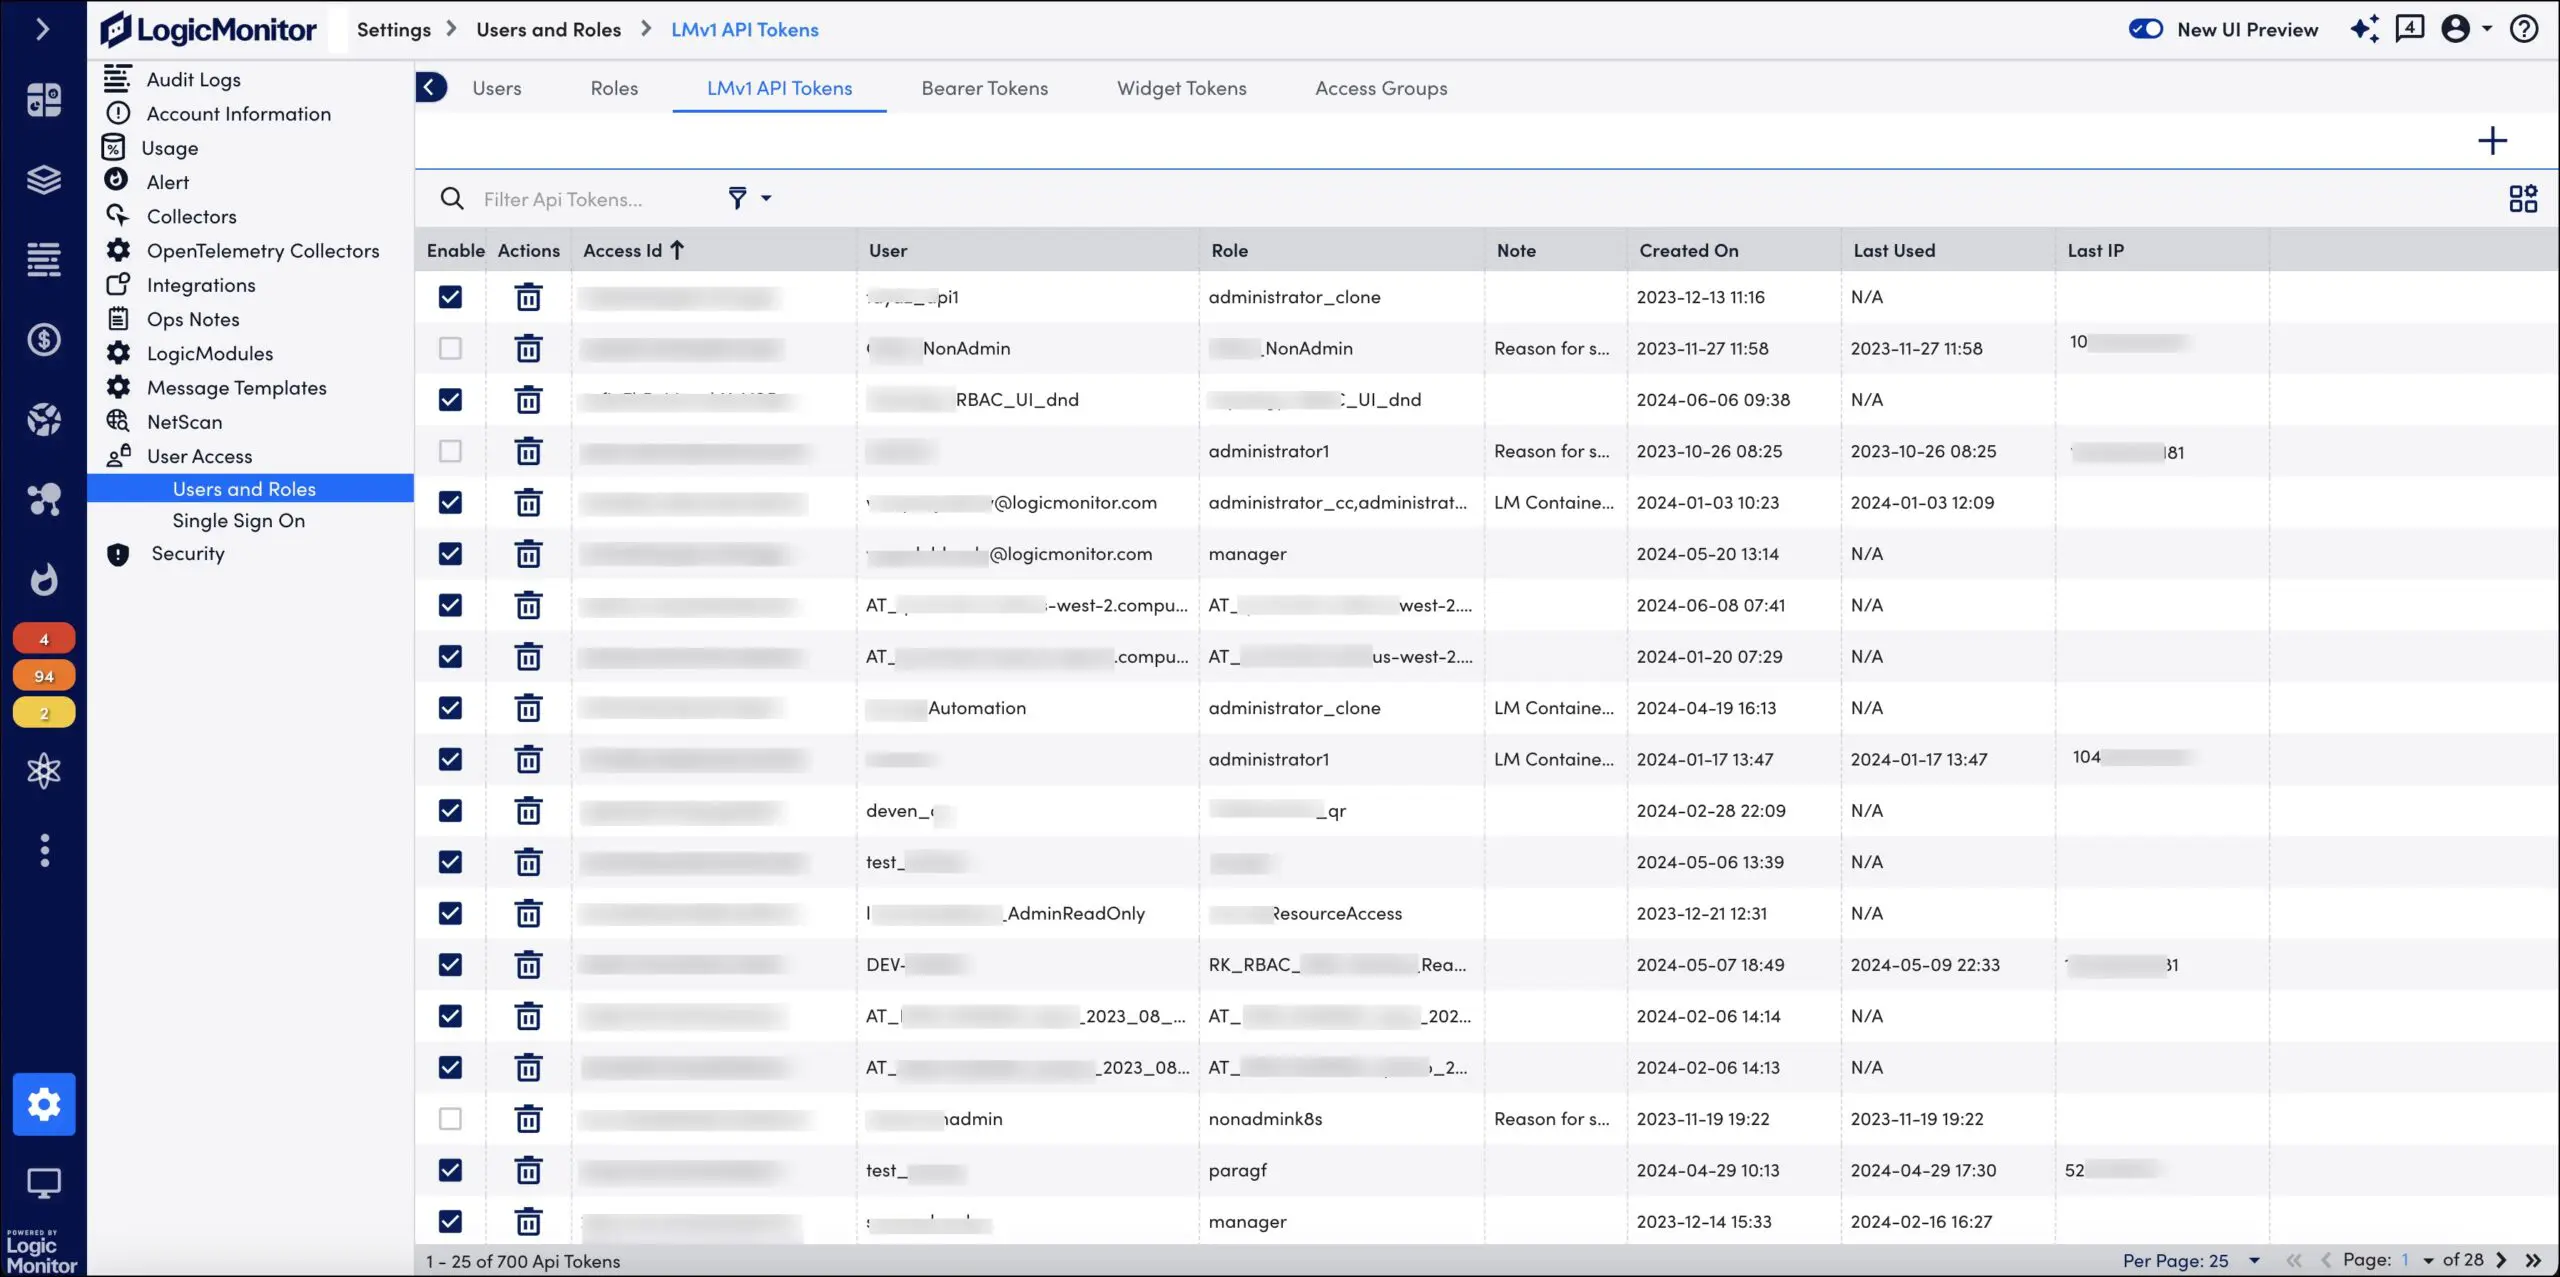
Disabling Unused LMv1 API Tokens
As a mitigation against risks related to the disclosure of previously generated and unused LMv1 API tokens, LogicMonitor has introduced a feature to auto-disable unused tokens after a set days of inactivity. Admin user with Manage Security permission can set the number of inactive days after which the unused token is auto-disabled. For more information on how to disable tokens, see Configuring the Security Settings.
When the unused token is disabled, LogicMonitor sends an email alert to the owner of the LMv1 API token about the disabled token and the reason for disabling it. A log of disabled token is maintained on the Audit Logs page. Similarly, details of the disabled tokens are also available in the table for LMv1 API token. To access the details, navigate to Settings > User Access > Users and Roles and access the LMv1 API Tokens tab. The details of the disabled token are greyed and cannot be edited.
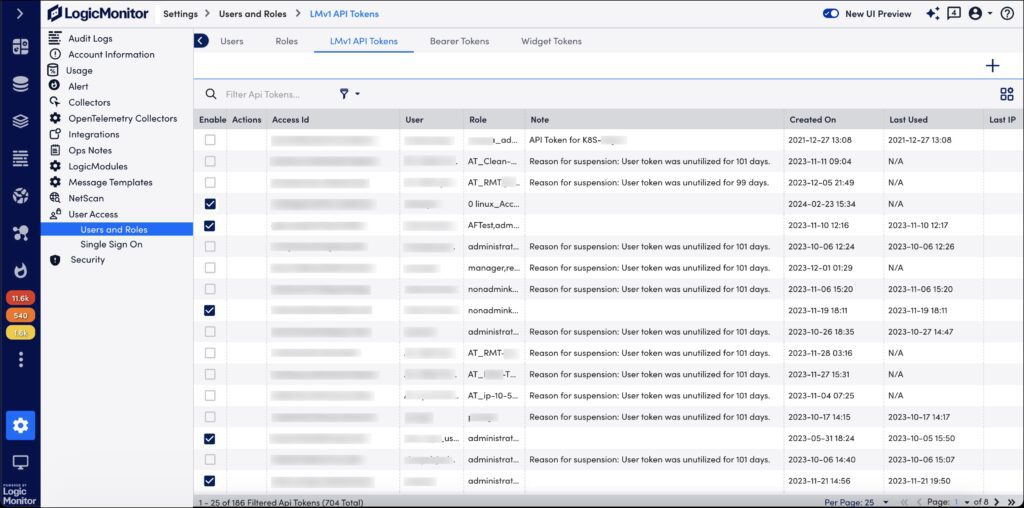
Admin user with Allow Creation of API Tokens permission can activate the disabled token. To do so, under the Enable column, select the checkbox for the LMv1 API token that you want to activate.
