Instance Group Management
Last updated on 29 April, 2025Instance groups can be created and populated manually or automatically. You can automatically group instance groups as a function of the Active Discovery process, which is configured from the DataSource definition using the following methods:
- NetScaler—Exclusively used for Citrix NetScalers and automatically organizes instances (for example, services) based on the load-balancing virtual IPs (VIPs) they belong to.
- NetScalerServiceGroup—Exclusively used for Citrix NetScalers and automatically organizes instances (for example, services) based on service group names.
- Regular Expression—Supports different parameters to determine how instances are grouped in LogicMonitor. They define the grouping method either by assigning instances to predefined groups or automatically extracting group names. They also specify which instance property such as name or value should be used for grouping. This ensures instances are categorized in a way that aligns with your monitoring needs.
The following parameters are supported:- (Optional) useValue—Specifies which instance property (name or value) should be evaluated. It is optional; if not specified, LogicMonitor will default to using the instance name (also known as WILDALIAS). useValue=”name”|”value”|”description”|”auto.instance_property_name”
- dynamicGroup—Enables automatic grouping of instances based on extracted values from their names or values using a capturing regular expression. The first capture group in the regex determines the group name. dynamicGroup=”a regex with capturing”
- groupName1—Enables instances to be assigned to predefined groups based on their name or value. groupName1=”regex1″ groupName2=”regex2″
- Instance Level Property—Creates instance groups based on unique Instance Level Property (ILP) values.
For more information, see Active Discovery.
If an instance is not being monitored because either the monitoring was disabled or the newly discovered instances were set to be disabled based on Active Discovery configurations, then LogicMonitor creates an “Unmonitored” instance group and places those instances in it.
If an instance is being monitored and does not belong to any instance group, LogicMonitor creates an “Ungrouped” instance group and places those instances in it.
Requirements for Managing Instance Group
To manage an instance group, you need a user with the “Threshold” and “Manage” permissions set at the Resource group level.
Manually Assigning Instances to Instance Groups
- In LogicMonitor, navigate to Resource Tree> select multi-instance datasource.
- Select the Instances tab and select All Instances.
All the instances display with the Instance Group column displaying if the instances belong to any group or are still ungrouped. - Select the checkbox against the instance or instances that you require to move to your instance group.
- Select Action and then select Move to Instance Group.
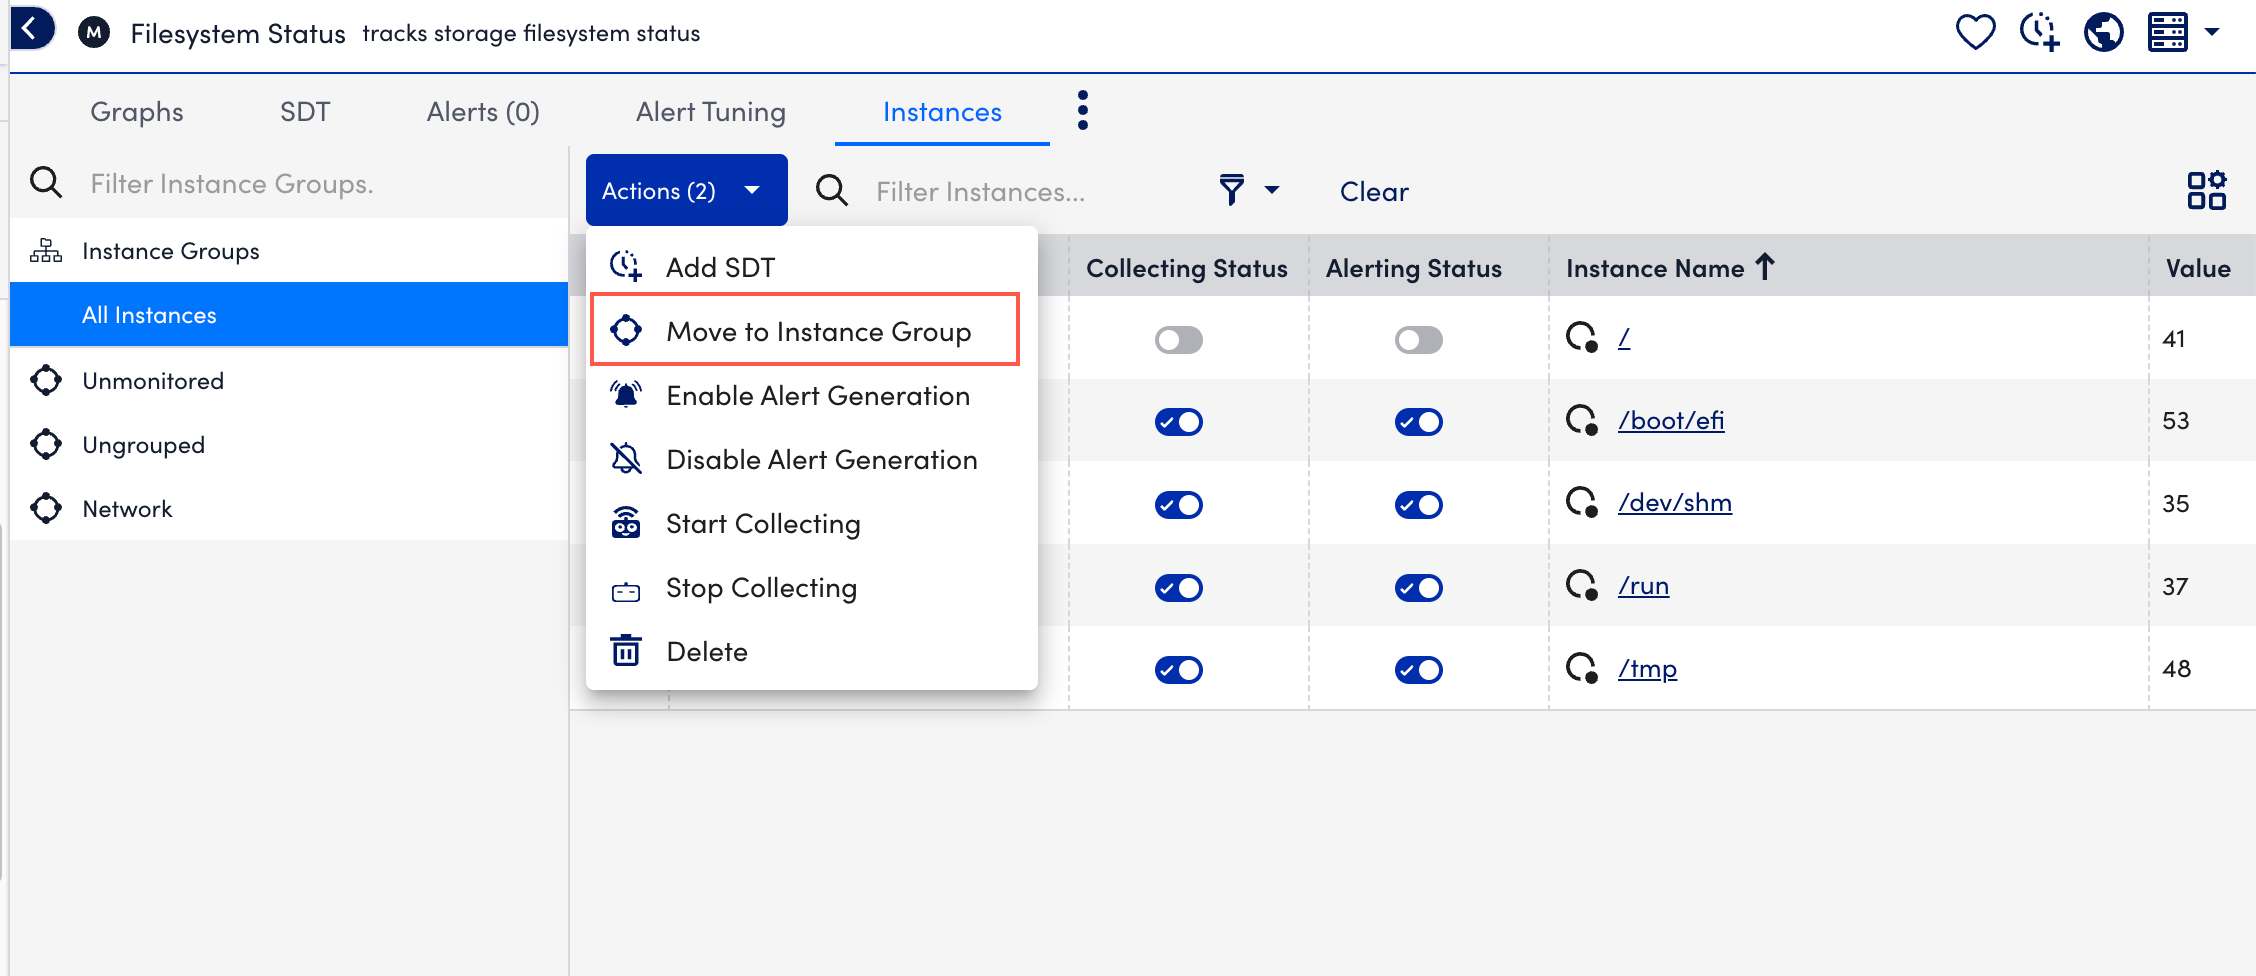
- In the Confirm Your Action modal, do one of the following:
- Select the Move To Instance Group option and then select the required existing instance group from the Instance Group field.
or - Select the Create New Instance Group option and then add a name and description for the instance group.
- Select Move.
The selected instances are moved to your selected instance group.
- Select the Move To Instance Group option and then select the required existing instance group from the Instance Group field.
Automatically Assigning Instances to Instance Groups
- In LogicMonitor, navigate to My Module Toolbox.
- Select a DataSource.
- Select
 Edit to expand the Active Discovery options.
 - From the Group Method dropdown menu, do one of the following:
- Select Regular Expression and specify the parameters to categorize the instances to align with your monitoring needs in the Parameters field.
You can specify as many parameters as you need, separated by a comma.
UsinguseValue="value"in combination with eitherdynamicGrouporgroupNameallows instances to be grouped based on their values (WILDVALUE) rather than their names.
The following code illustrates this scenario with the parameter values:useValue="value"dynamicGroup="\w+"useValue="value"Controllers="tray\d+controller."Batteries="tray\d+battery."CacheDIMMs="tray\d+dimm."Fans="tray\d+fan."PowerSupplies="tray\d+psu."SFPs="tray\d+sfp."
For Linux hosts with block devices (for example,sda,sdb,sdc), each with multiple partitions (sda1,sda2,sdb2,sdc5), you can group partitions under their parent block devices using the following parameter values:dynamicGroup="^(.d.)"
This groupssda1,sda2, andsda3under “sda” and groupssdc5under “sdc”.
For a Linux host with physical disks (sda,sdb,sdc) and Logical Volume Manager (LVM) disks (dm0,dm1,dm2) use the following:physical="sd.*"LVM="dm.*"
All LVM disks (dm0,dm1,dm2) will be grouped under “LVM”. All physical disks (sda,sdb,sdc) will be grouped under “physical”
- Select Regular Expression and specify the parameters to categorize the instances to align with your monitoring needs in the Parameters field.
Recommendation: To avoid escaping characters unnecessarily when using double quotes (“), single quotes (‘) can be used in some cases:
- dynamicGroup=’/w’
- dynamicGroup=”//w”
- Select Instance Level Property and specify the parameters to categorize the instances to align with your monitoring needs in the Parameters field.
For example, to group instances by port speed, you need to enter the following:auto.port_speed
This would generate distinct groups for instances with speeds such as 100Mbps, 1Gbps, 10Gbps, and so on. For more details on instance properties, refer to Resource and Instance Properties.
Note: ILPs are case-sensitive in this field.
- Select Save.
For more information on the different active discovery options, see Configuring Active Discovery.
Managing Unmonitored and Ungrouped Instances
- In LogicMonitor, navigate to Resource Tree> select multi-instance datasource.
- Select the Instances tab.
- In the left tree, select Unmonitored and do the following:
This displays all the instances that have monitoring disabled.- Toggle the Collecting Status switch against the instance for which you want to enable monitoring.
- Toggle the Alerting Status switch against the instance for which you want to enable alert generation.
- In the left tree, select Ungrouped and do the following:
This displays all the instances that have monitoring disabled.- Select the checkbox against the instance or instances that you require to move to your instance group.
- Select Action and then select Move to Instance Group.
- In the Confirm Your Action modal, follow the onscreen instructions.
- Toggle the Collecting Status switch against the instance for which you want to enable monitoring.
- Toggle the Alerting Status switch against the instance for which you want to enable alert generation.