Disclaimer: This content applies to the legacy UI and is no longer maintained. It will be removed at a future time. For up-to-date content, see Big Number Widget. At the time of removal, you will automatically be redirected to the up-to-date content.
Big Number Widget
Last updated - 24 July, 2025
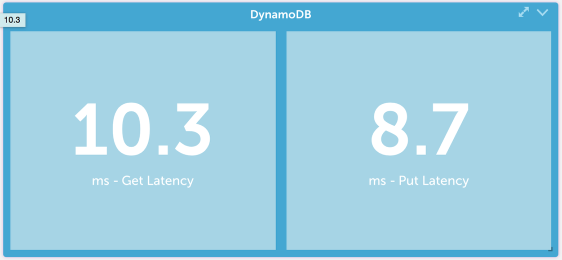
Whether your business measures success based on the current value of a single metric, the aggregate value of metrics across devices, a value from your database, or a combination of any of the above, you can represent it in an at-a-glance view with the Big Number widget.
Overview
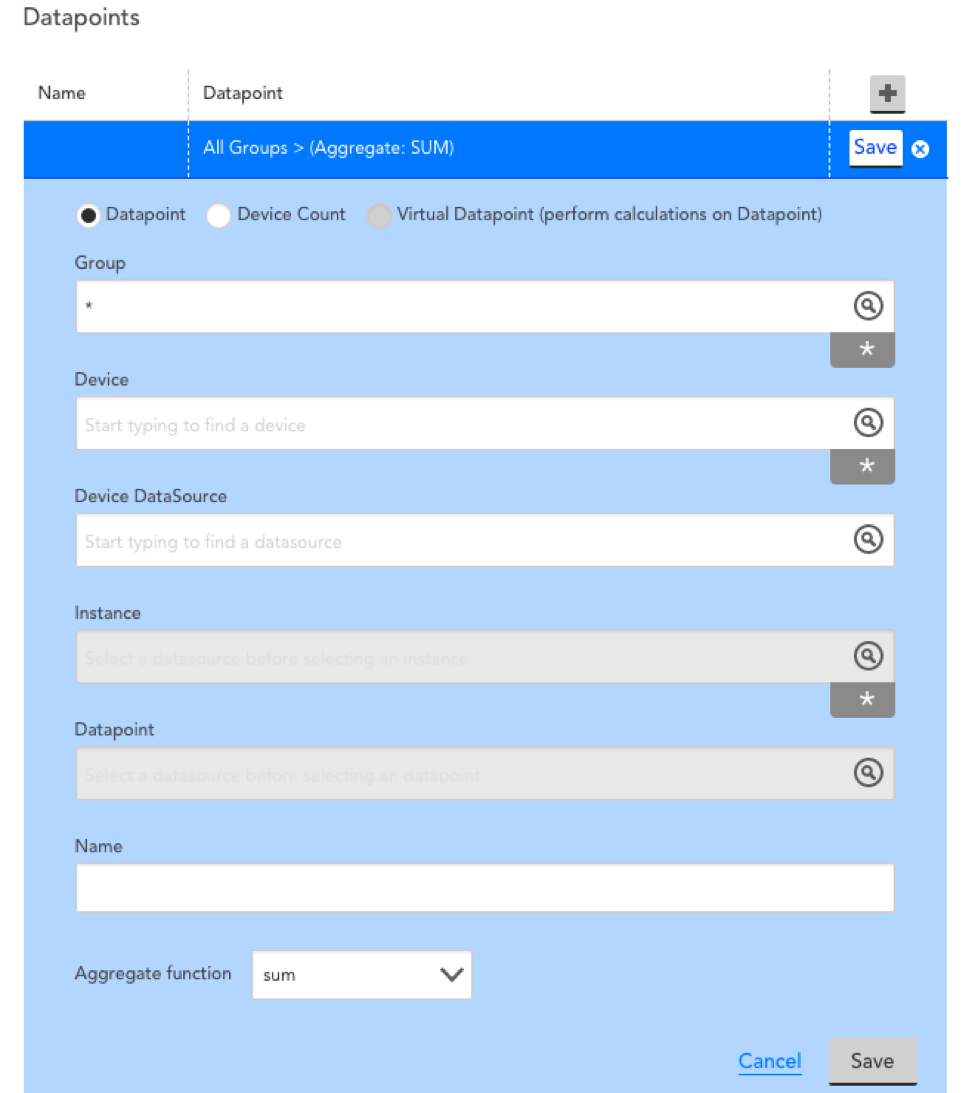
Creating a Big Number widget is a multi-step process. First, select the datapoints you wish to include. These can be values of a datapoint on a single instance or values of datapoints across instances.
Once your datapoints have been added, you can create virtual datapoints if desired. This gives you the ability to change units of measure, combine values, or perform a function on the value prior to display. You can also add two values together to create a single value, although ensuring the values are in the same unit of measure is recommended.
The final step is to select which values will appear as numbers in the Big Number widget.
Create a Big Number Widget
Click on the Add drop-down and select Big Number widget from the list. The Configuration form for setting up the widget will be displayed. See these instructions for help filling out the title, description, dashboard and refresh frequency fields.
Big Number Options
Begin adding datapoints and virtual datapoints by following our instructions for configuring datapoints to be displayed in your widget. Additional configuration items for each datapoint include Name and Aggregate function:
Name
Provide a name for this datapoint configuration.
Aggregate function
This field displays only for real datapoints that have been set to monitor more than one individual instance. It allows you to choose the max, min, or sum of the values from the multiple instances.
Example Configuration
When configuring the Big Number widget, you first need to select the datapoints which will be represented in the widget. The following configuration will give you the value of the CPUutilization datapoint for an AWS EC2 instance :
Numbers
Once you have configured the individual datapoints, you will be able to configure the “Numbers” section, which determines how the datapoints will be displayed:
Position
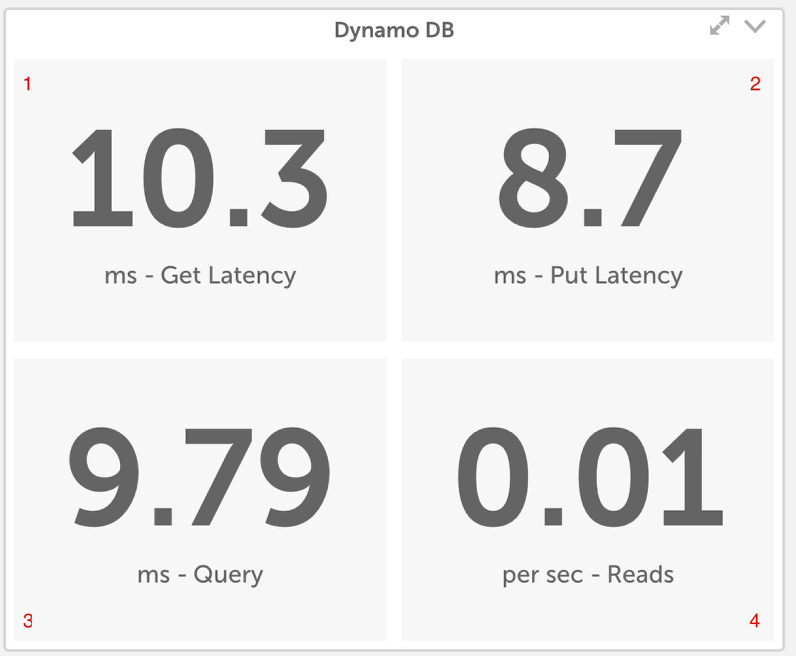
Assign where the value should display in the widget. In the example Big Number widget displayed below, you can see that position 1 displays in the upper lefthand quadrant, position 2 in the upper righthand quadrant, position 3 in the lower lefthand quadrant, and position 4 in the lower righthand quadrant.
Unit label
Enter text to clarify the unit of measure for the number displayed.
Bottom label
Enter the text you would like to see as the bottom label for the value.
Datapoint
Select the data point whose value you want to display on each number section. You will be able to choose from all the data point and virtual data points you configured under Big Number Datapoint Options. Additionally, selecting the “Device Count” datapoint will return the number of devices that match any AppliesTo expression.
Rounding Change
Round to the nearest whole number, tenth (one decimal place) or hundredth. For values with more decimal places, a virtual datapoint is recommended.
Change Number color according to thresholds
Toggling this option on will allow you to change the color of a datapoint’s dedicated quadrant to yellow, orange or red as soon as it meets the criteria of a specified alert threshold. This is an excellent way to provide an at-a-glance warning about the status of your metrics’ values.

Example Big Number Widget