
Disclaimer: This content applies to the legacy UI and is no longer maintained. It will be removed at a future time. For up-to-date content, see SDT Tab. At the time of removal, you will automatically be redirected to the up-to-date content.
SDT Tab
Last updated - 25 July, 2025
Overview
Configuring SDT (scheduled downtime) allows you to suppress all routed alert notifications during periods when alerts are expected as a result of upgrades, maintenance or other scheduled activities. This functionality is ideal for eliminating alert noise around activities that are planned and, therefore, aren’t cause for alarm. Alerts for entities in SDT still appear on the Alerts page of your LogicMonitor account, but are not routed.
SDT can be applied to many different types of entities across your account including resources, websites, groups, Collectors, or LogicModules (DataSources, EventSources, and so on).
For many of these entities, SDT can be scheduled from the SDT tab. This support article discusses scheduling and managing SDT for resources and LogicModules; see Website SDTs and Collector SDT respectively for information on scheduling SDT for websites and Collectors.
Note: Entities that are in SDT will still be subject to Active Discovery, if applicable.
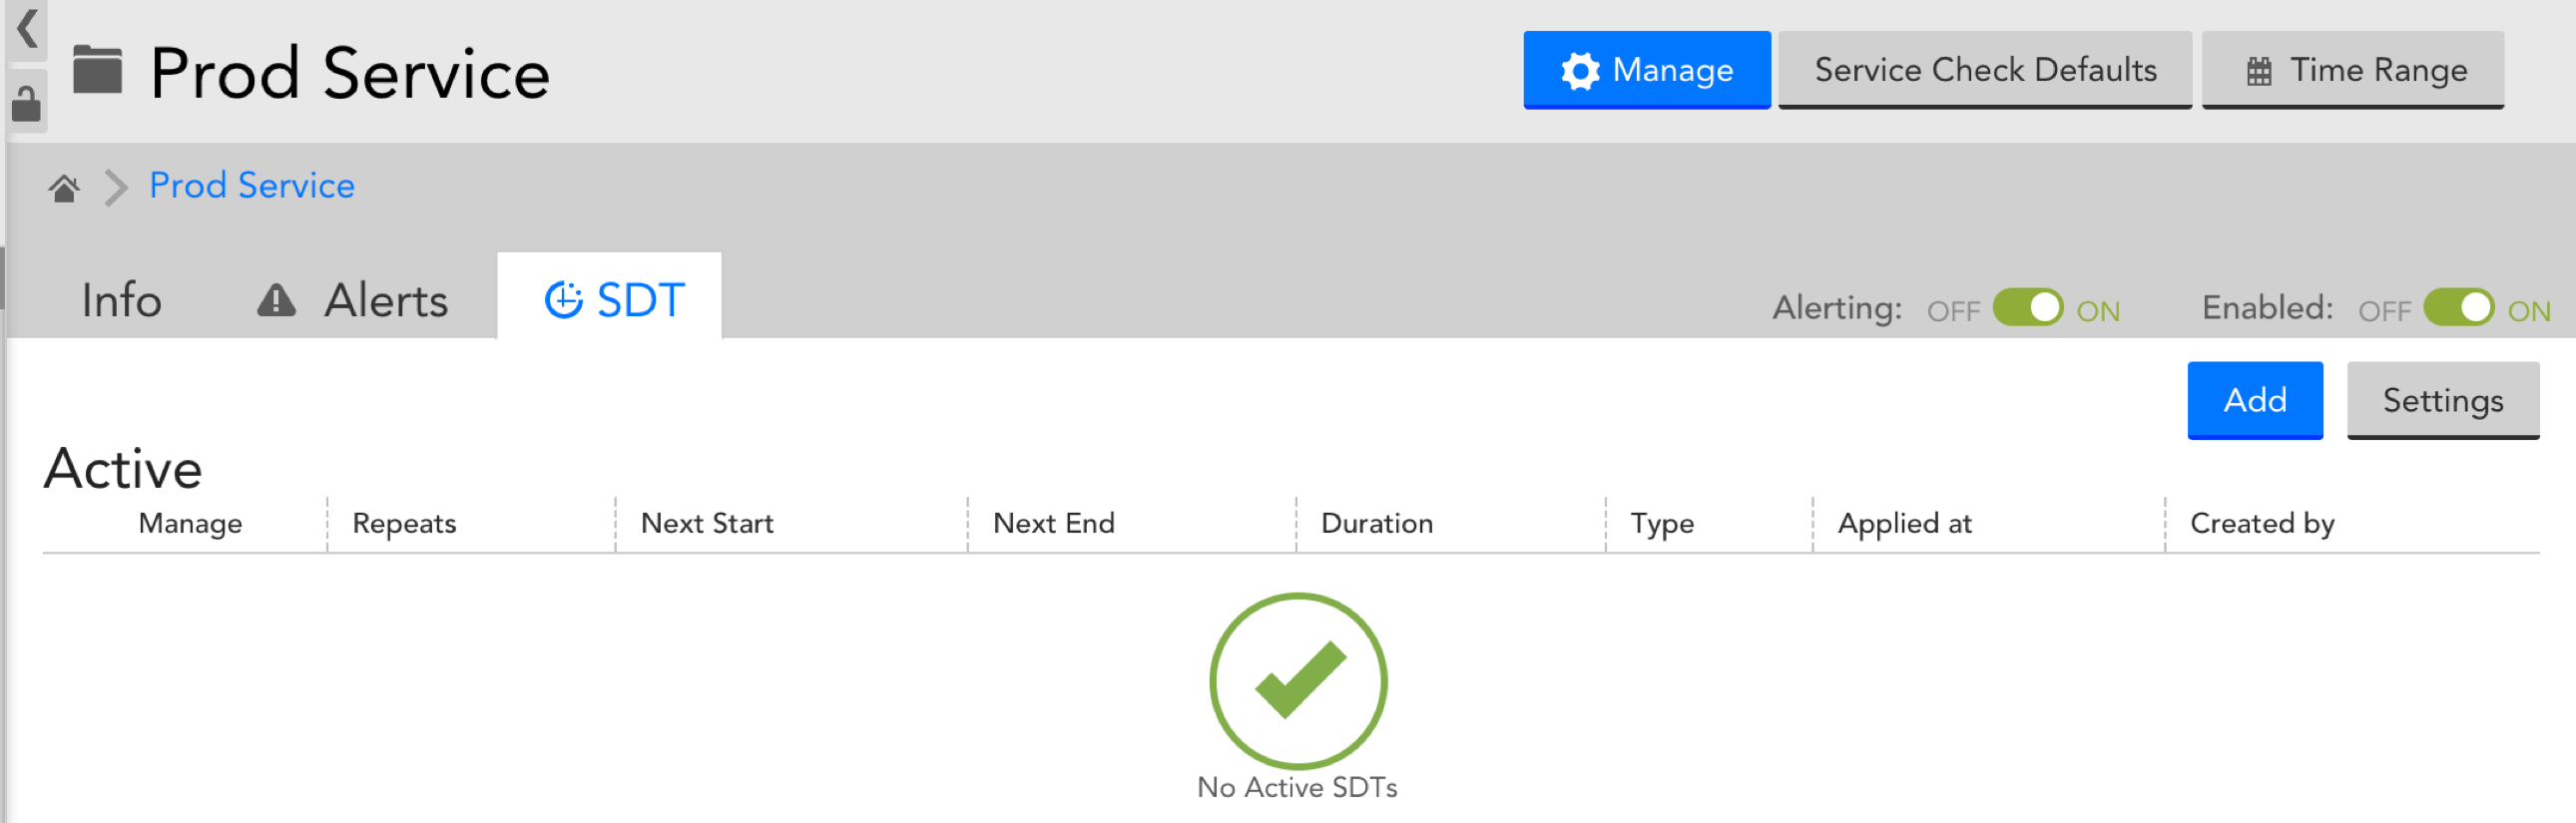
Adding an SDT
Select the Add button on the SDT Tab for the item you’d like to schedule downtime for (i.e. group, device, datasource or instance):
Once you click “Add,” the following lightbox will appear:
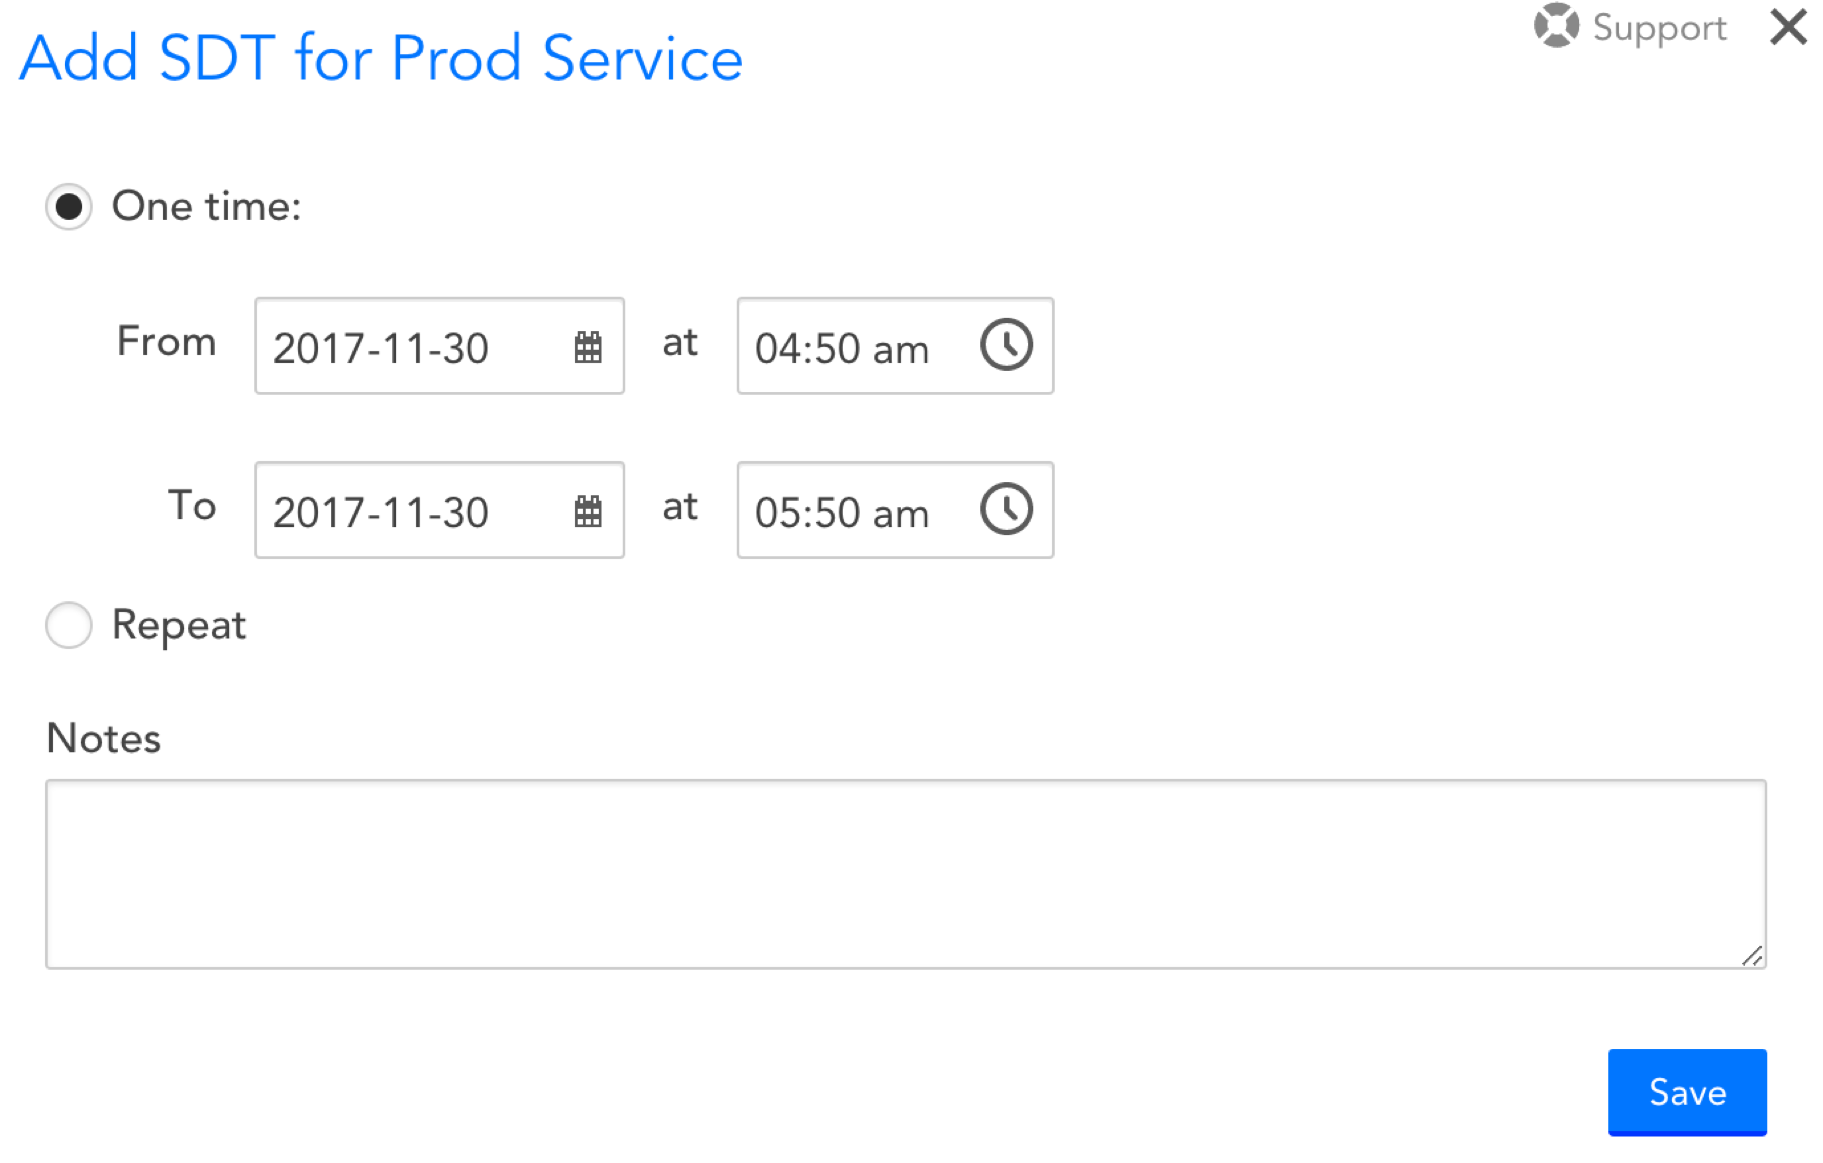
The Add SDT dialog is identical for devices, datasources and instances. For groups, there is an additional Datasource field (pictured above), that allows you to put one or all datasources across the group into SDT. When an SDT is applied at the device level it automatically applies to all datasources.
Datasource (Group SDT only)
Select all datasources to put all datasources for all devices in the group into SDT. Select a single datasource to apply the SDT to one datasource across all member devices (e.g. you are upgrading your website so you expect the Apache datasource across all web servers to trigger alerts, but CPU, disks, and interfaces metrics for those web servers should be fine).
One time SDT
Select the duration for a singular SDT.
Repeat SDT
Select the repeat interval for the SDT and the duration. The next SDT to be applied will display in the Upcoming SDTs section. There are four available recurring SDT options:
- Daily: Schedule the time an SDT should occur each day.
- Weekly: Select the day of the week an SDT should occur weekly.
- Monthly (on specific day): Select the exact static day of the month (ie. the 2nd) that an SDT should occur monthly.
- Monthly (day of the week): Select the day of the week a monthly SDT should occur, e.g. the second Thursday of each month at 8pm.
Notes
Notes will display in the manage SDTs tables, providing context for the SDT reason.
Overriding SDT for Alert Clear Notifications
Configuring SDT (scheduled downtime) allows you to suppress all routed alert notifications during periods when alerts are expected as a result of upgrades, maintenance or other scheduled activities. However, many LogicMonitor users also place resources into SDT on an impromptu basis for the purpose of temporarily suppressing recurring or escalating alert notifications while troubleshooting the root cause of an alert. And while this is effective for reducing alert noise, for users that route alert notifications to third-party applications for the purpose of opening and closing tickets in those applications, the lack of an alert clear notification can result in orphaned tickets.
To reduce the incidence of orphaned tickets in third-party applications, it is recommended that the Send notification when alerts clear option found in alert rules be checked for any alert rules that route alert notifications to alert integrations. This option ensures that alert clear notifications are always routed for any DataSource alerts previously routed. In other words, if a DataSource alert notification was routed, an alert clear notification will also be routed, even if the resource is subsequently placed into SDT after the initial notification is routed. For more information, see Alert Rules.
Note: The ability to override the notification suppression actions of SDT and always route alert clear notifications only applies to alerts triggered by DataSources; alert clear notifications for EventSources, for example, will not be delivered if the triggering instance or resource is in SDT.
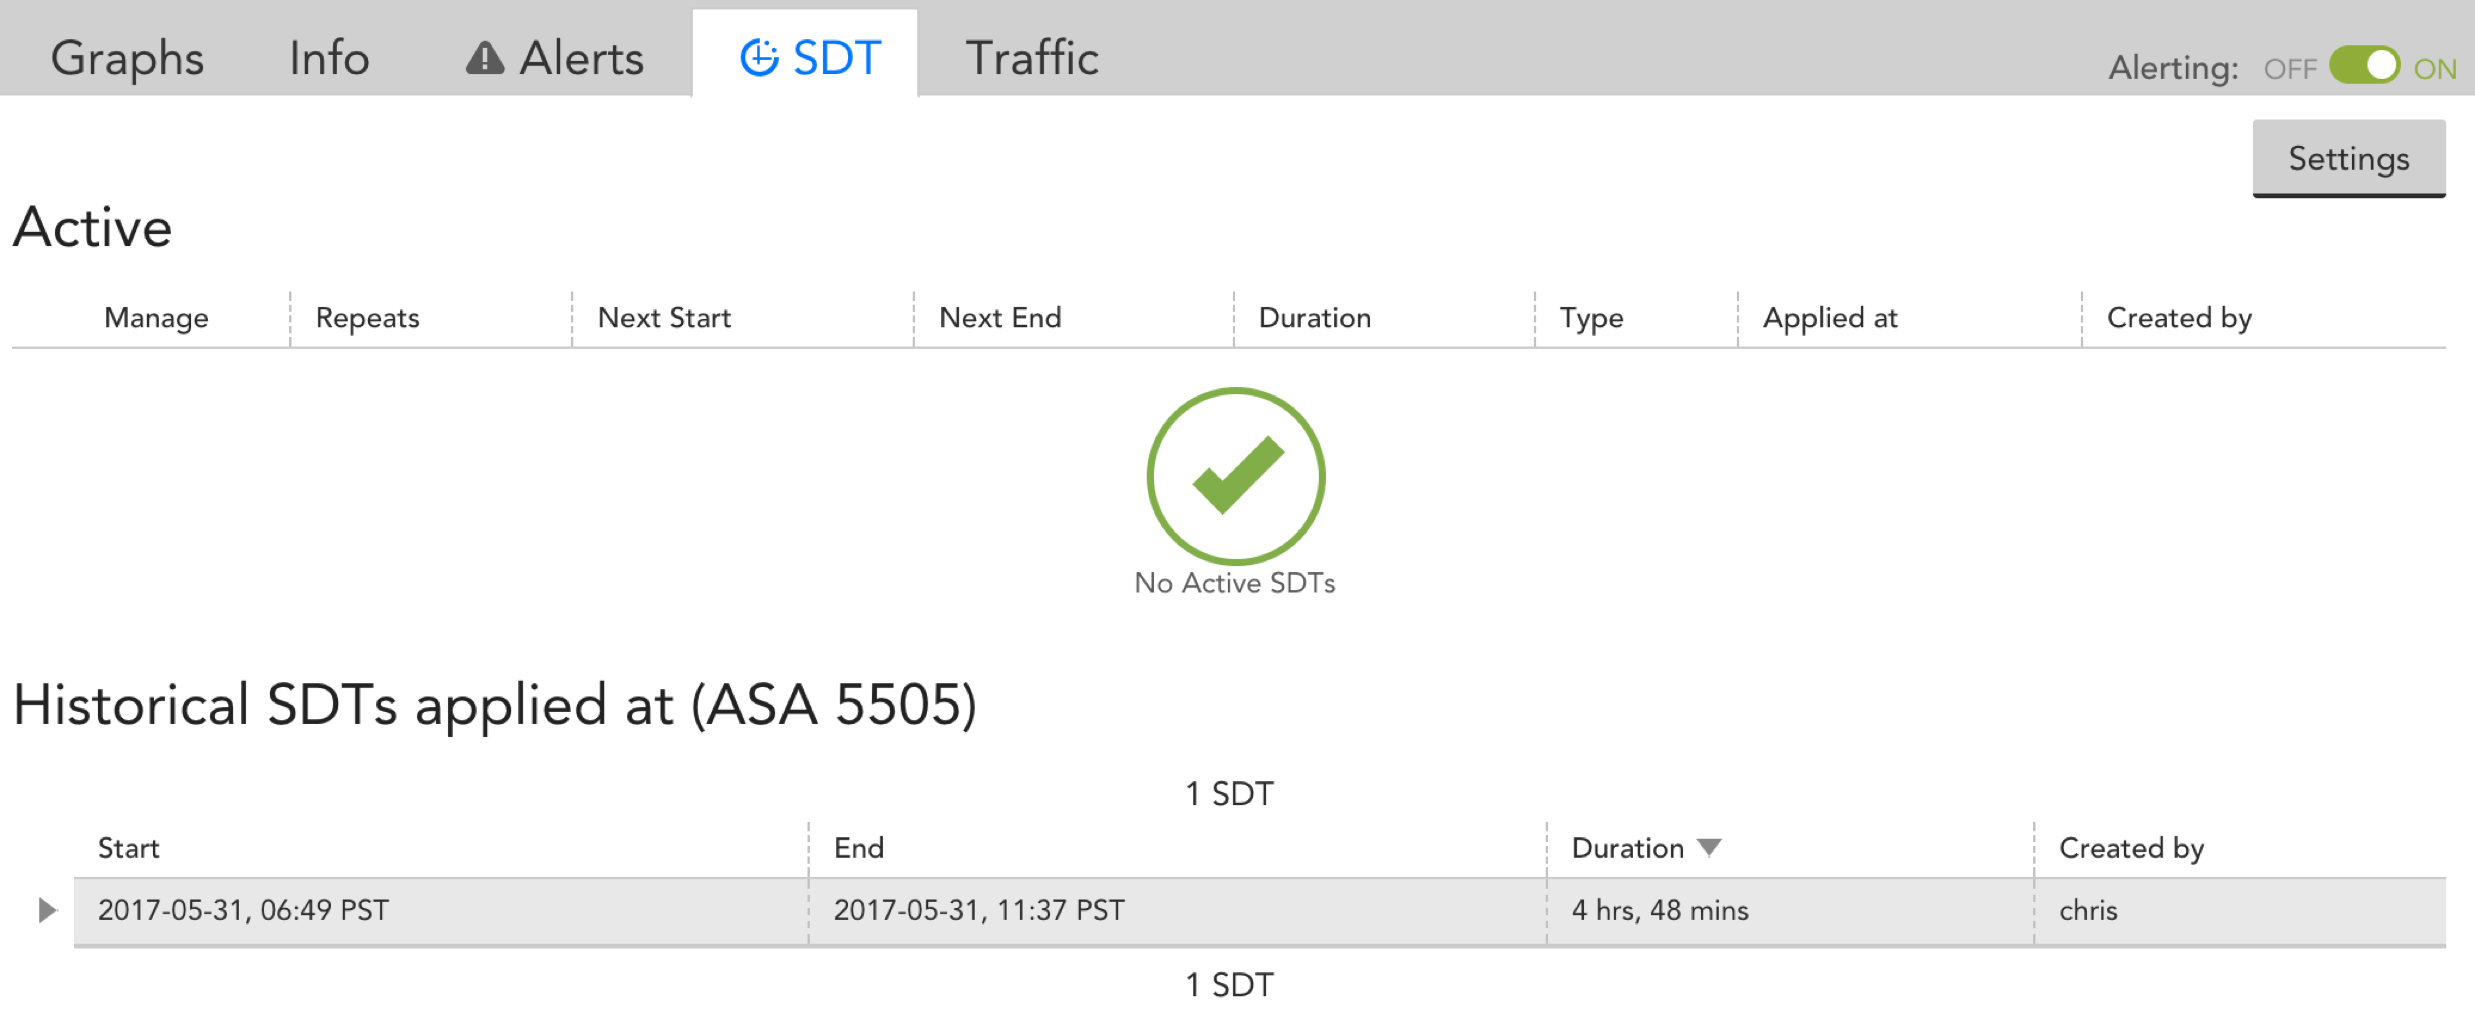
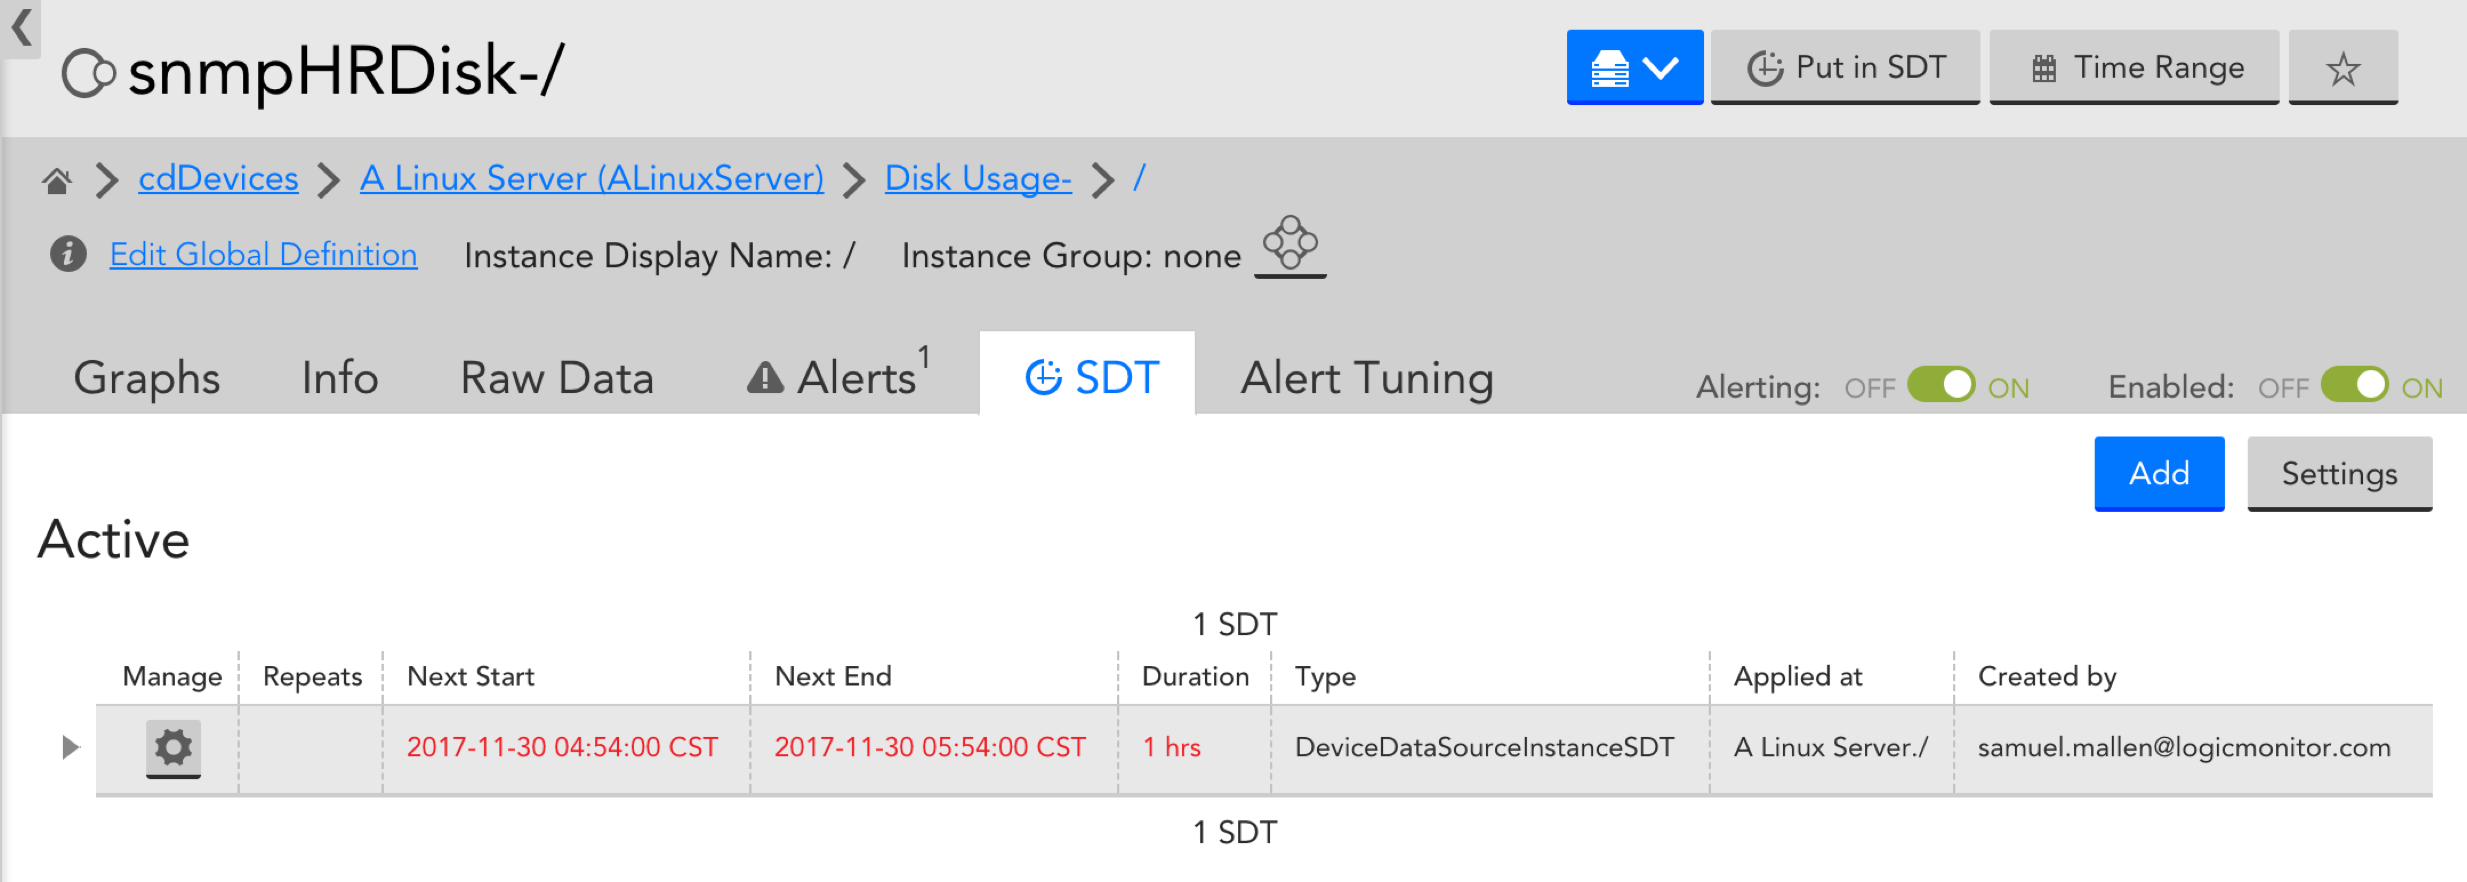
Viewing Existing SDTs
Entities in SDT will be displayed with an SDT-specific icon at every level of the device tree. Additionally, you can use the SDT tab for a group, device, datasource or instance to see a table of all active and upcoming SDTs that apply to the entity. For example:
At a Group, you will see any SDT for sub groups, member devices, or member datasources. These are SDTs that will result in part of the group not generating alert notifications.
At an instance level, you will see any SDT for a parent device or group. These are SDTs that will result in the instance not generating alert notifications.
The font size and columns displayed in the SDT tables can be adjusted by selecting Settings.
Manage

Selecting the manage gear icon will display the SDT configuration window. This allows you to update SDT time, date, or schedule.
Repeats
If the SDT is scheduled to recur, the repeats column will indicate if it is daily, weekly, or monthly.
Next Start and Next End
The start and end time for the next scheduled downtime. This will be removed when the SDT begins if it is a one time event. If it is a repeat event, the next start time will update accordingly.
Duration
The length of the SDT.
Type
Indicates if the SDT is a device group, device, datasource, or instance SDT.
Applied At
The applied at field indicates where the SDT was applied. This is the name of the group, device, datasource or instance.
Created By
The user name of the user who created the SDT.
Viewing SDT History
You can view a history of SDTs at the node-level to which the SDT was set. For instance, if an SDT was set for an instance, the historical record for that SDT will only be available in that instance’s SDT tab, not at the device/device group level in which that instance lives.

Can I change or stop an active SDT?
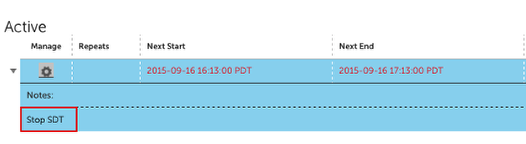
If you have a SDT scheduled but you no longer need it, you can stop an active SDT. Navigate to the SDT tab for the appropriate Group, Device, or Instance. Click the dropdown to expand the Active SDT row. Select Stop SDT. This will effectively set the end time to the time Stop was selected.
If you need to extend the SDT, selecting the gear icon to manage will provide you the option to change the end time.
