
Website Status Widget
Last updated - 24 July, 2025
The Website Status widget displays the status of multiple testing locations, verifying the availability of either one or multiple websites. Each line in the graph represents the boolean state of the status, where “1” means the websites is available and “0” means it is unreachable.
To configure a Website Status widget, you must enter the following details:
- Enter basic information
- Select a default time range
- Choose to display individual or overall status information
- Configure widget display settings
Website Status Options
You can select one of the following options while configuring a Website Status widget:
- Individual Status: Displays the status of multiple testing locations for one website; each line in the graph represents a specific testing location.
- Overall Status: Displays the status of multiple websites in one graph; each line in the graph represents a specific website.
Configuring a Website Status Widget
- Create an Alert List widget. For more information, see Widget Creation.
- Complete the Basic Information fields. For more information, see Configuring Standard Widget Settings.
- (Optional) In the Default Time Range field, select the length of time to represent the status in the graph.
- In the Website Status Options settings, select one of the following options to configure:
- (Default) Individual Status:
- In the Website Group field, select the website group to which the website belongs.
- In the Website field, select the website within that group.
- In the Location table, select one or more locations to monitor.
The status for each testing location selected displays as a separate line on the widget’s graph.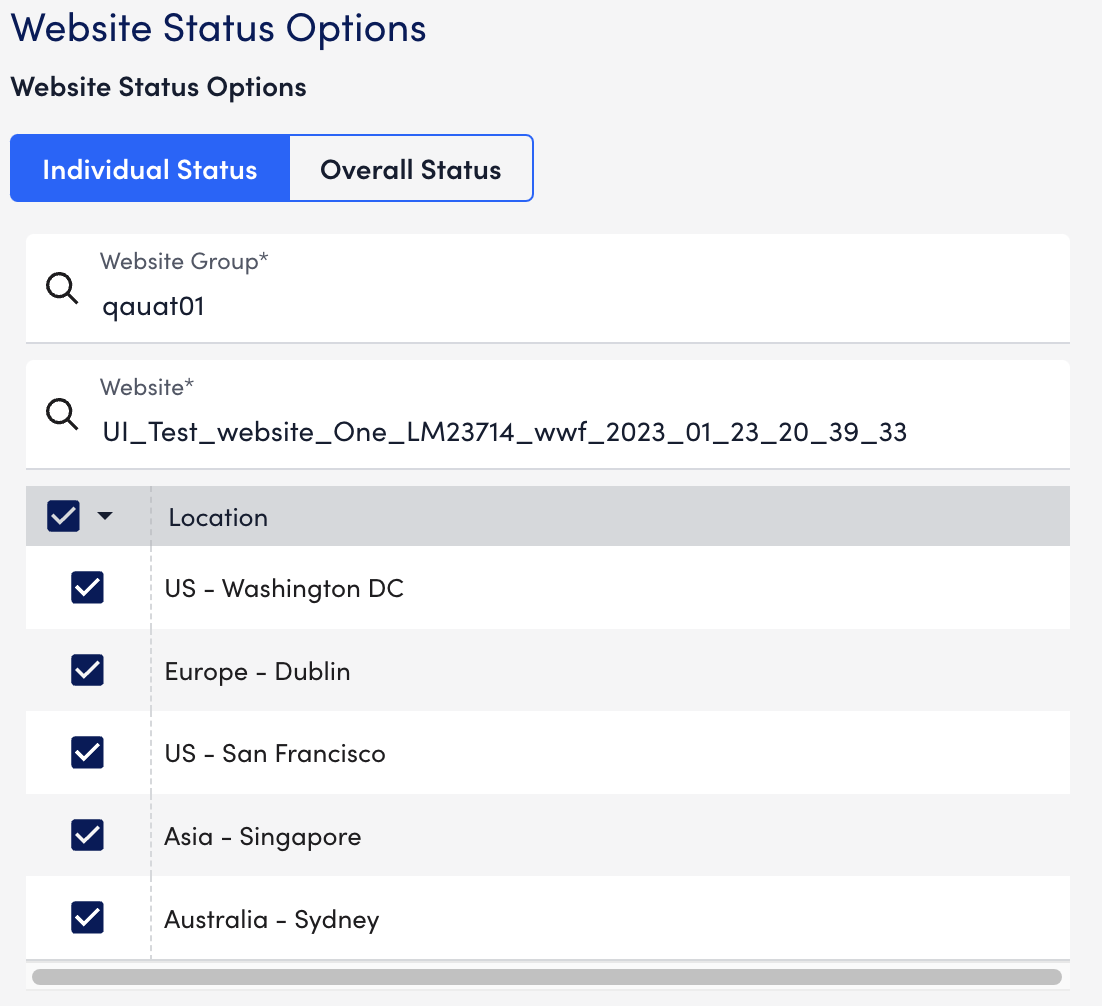
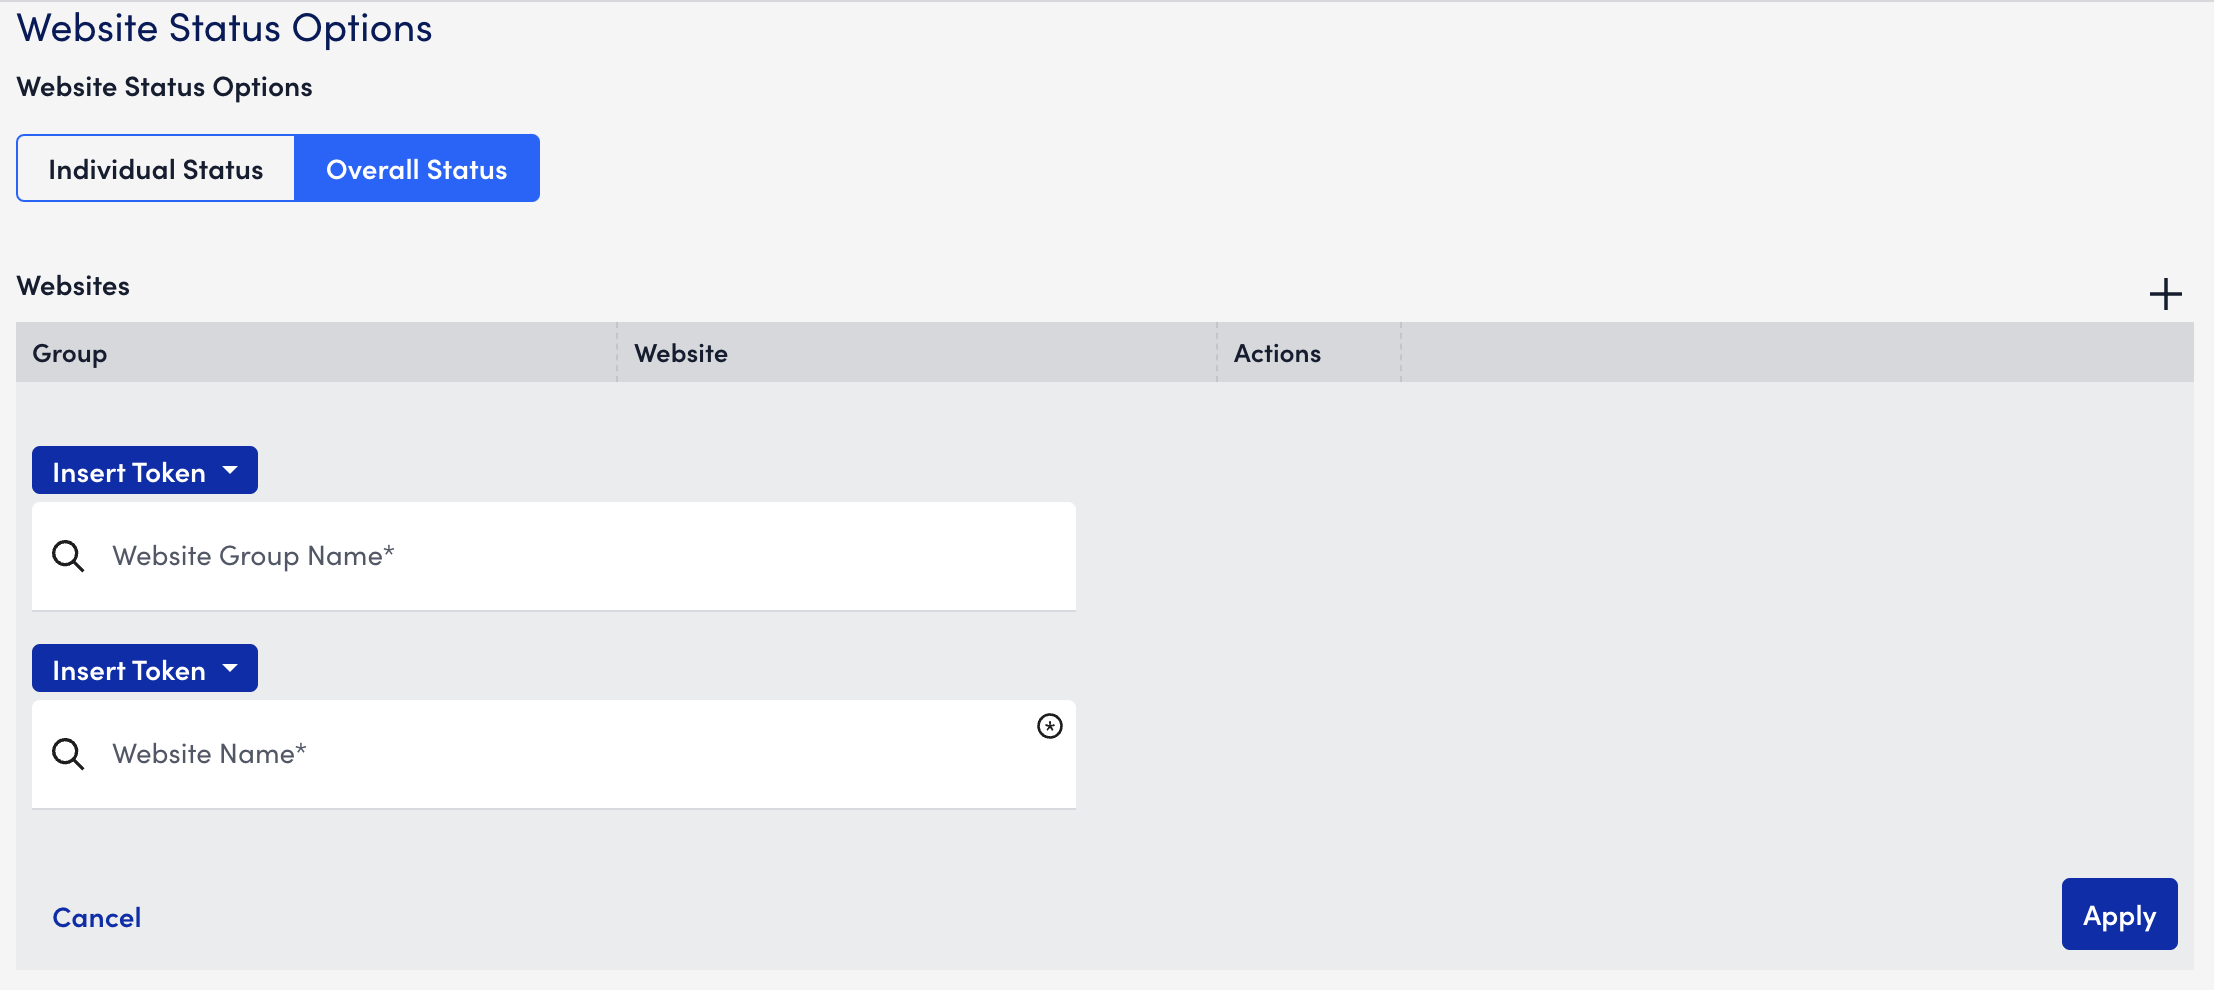
- Overall Status:
- Select + Add Record.
- In the Website Group Name field, enter the name of website group to which the website belongs and select it from the results list or enter a * glob expression to select all website groups.
- In the Website Name field, enter the name of a website related to the website group and select it from the results or enter a * glob expression to select all websites related to the selected website group.
- Select Apply.
- (Default) Individual Status:
- Complete the standard widget configurations, and then Save the widget. For more information, see Configuring Standard Widget Settings.
