External Ping Checks using LM Uptime
Last updated on 24 June, 2025External Ping Checks are performed by LogicMonitor-hosted, geographically distributed checkpoints outside your network to verify external accessibility to a hostname or IP address.
Requirements for Creating External Web Checks using LM Uptime
To create external web checks, you need the following:
- A user with “Manage” permission for Resources. For more information, see Resource Role Permissions.
- LM Uptime license edition
Creating External Ping Checks
- In LogicMonitor, navigate to Resource Tree >
 > select Ping Check.
 - Select the Basic tab and do the following:
- In the Name field, enter a name for the Ping Check.
- In the Description field, enter a description for the Ping Check. For example, you could describe the scope and purpose of the Ping Check.
- Select from the existing group list where the Ping Check should belong from the Where should it be placed? dropdown menu. By default, the root (top-level) group is selected.
- In the Properties table, add the relevant properties. For example, add
http.portwith the value80.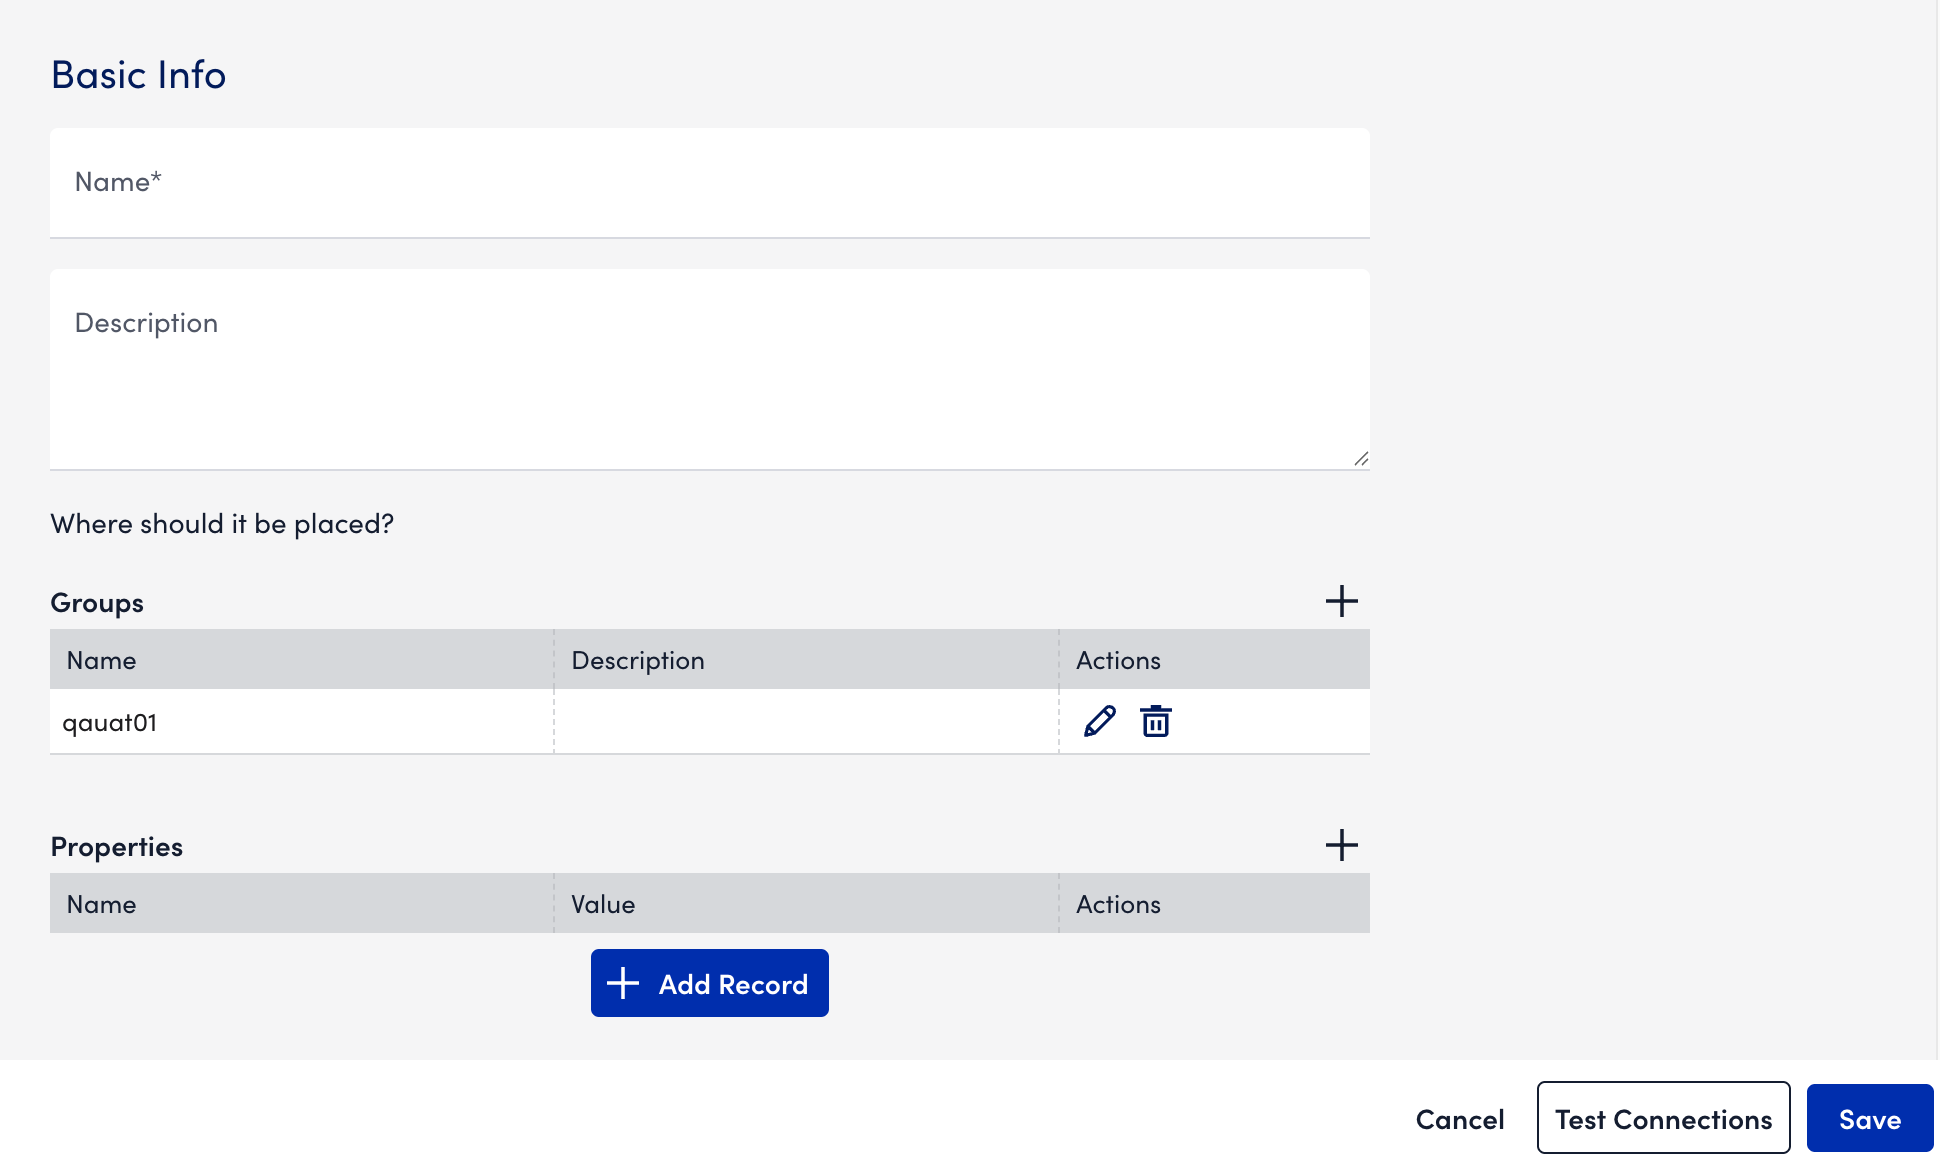
- Select the Settings tab and do the following:
- In the Host Name or IP field, enter the host name or IP address to which the ping test is sent.
- Select the number of packets to send for the Ping Check from the Number of Packets to Send dropdown menu.
LogicMonitor defaults to five packets, but you can choose to send up to 50. Packets are sent one by one, with a delay of 250 milliseconds between each packet.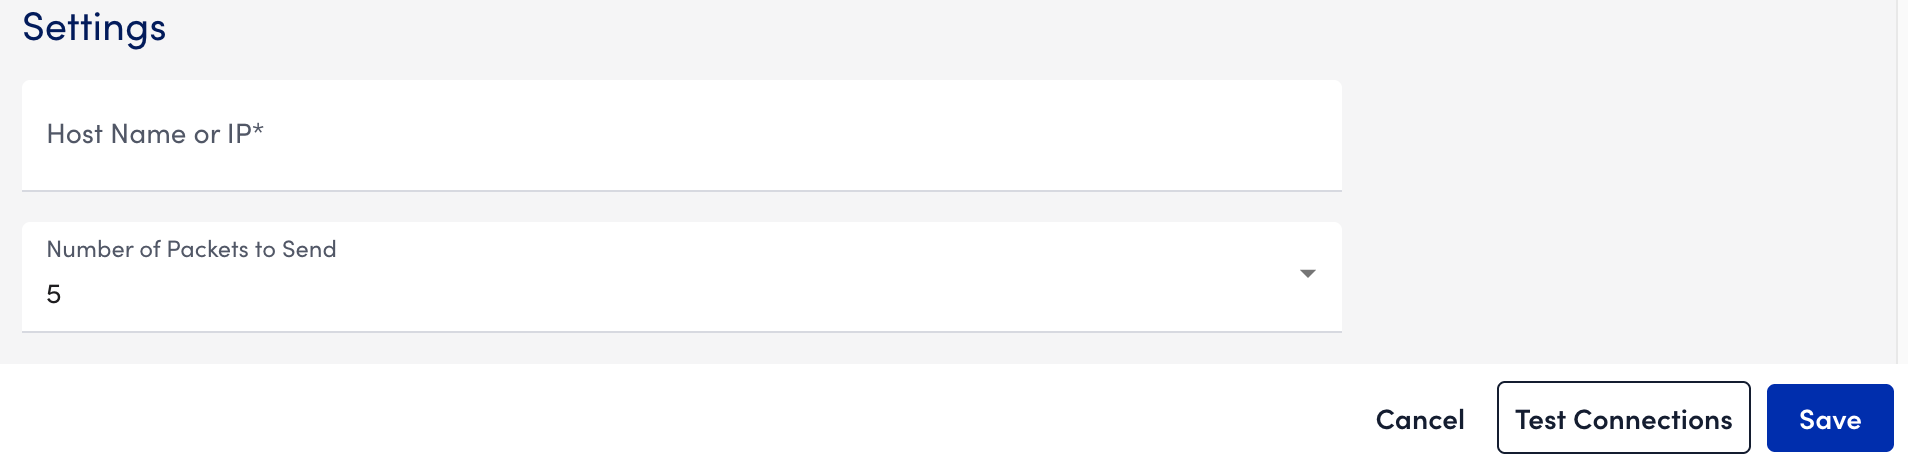
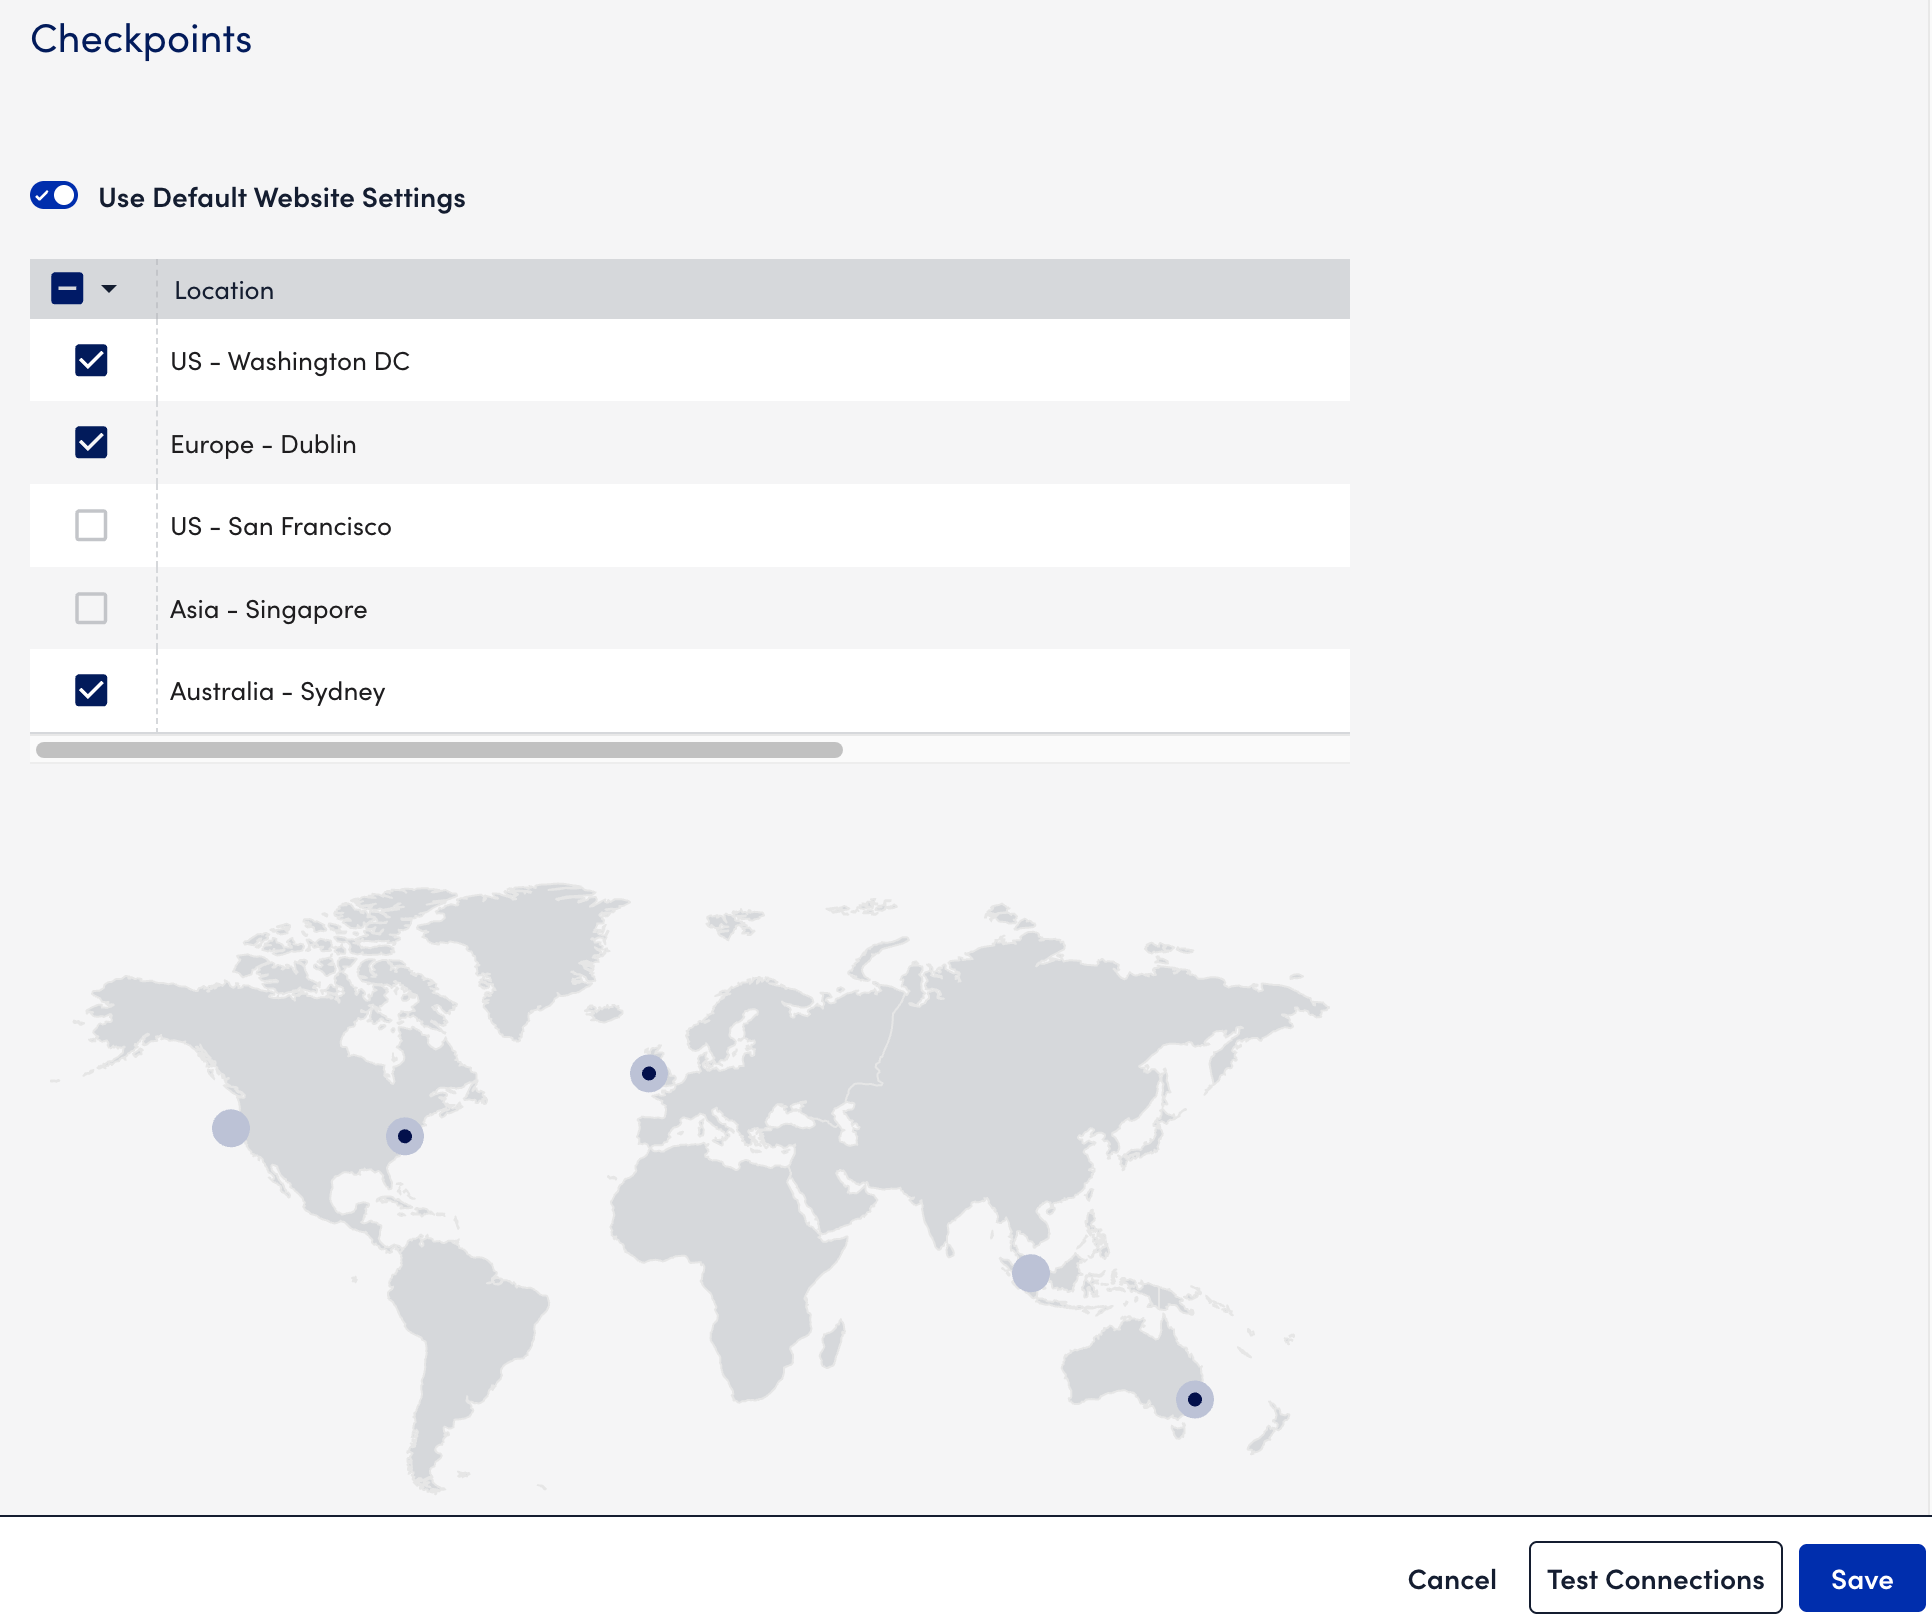
- LogicMonitor hosts five geographically dispersed checkpoints, from which the check can be sent. The Use Default Website Settings switch is selected by default.
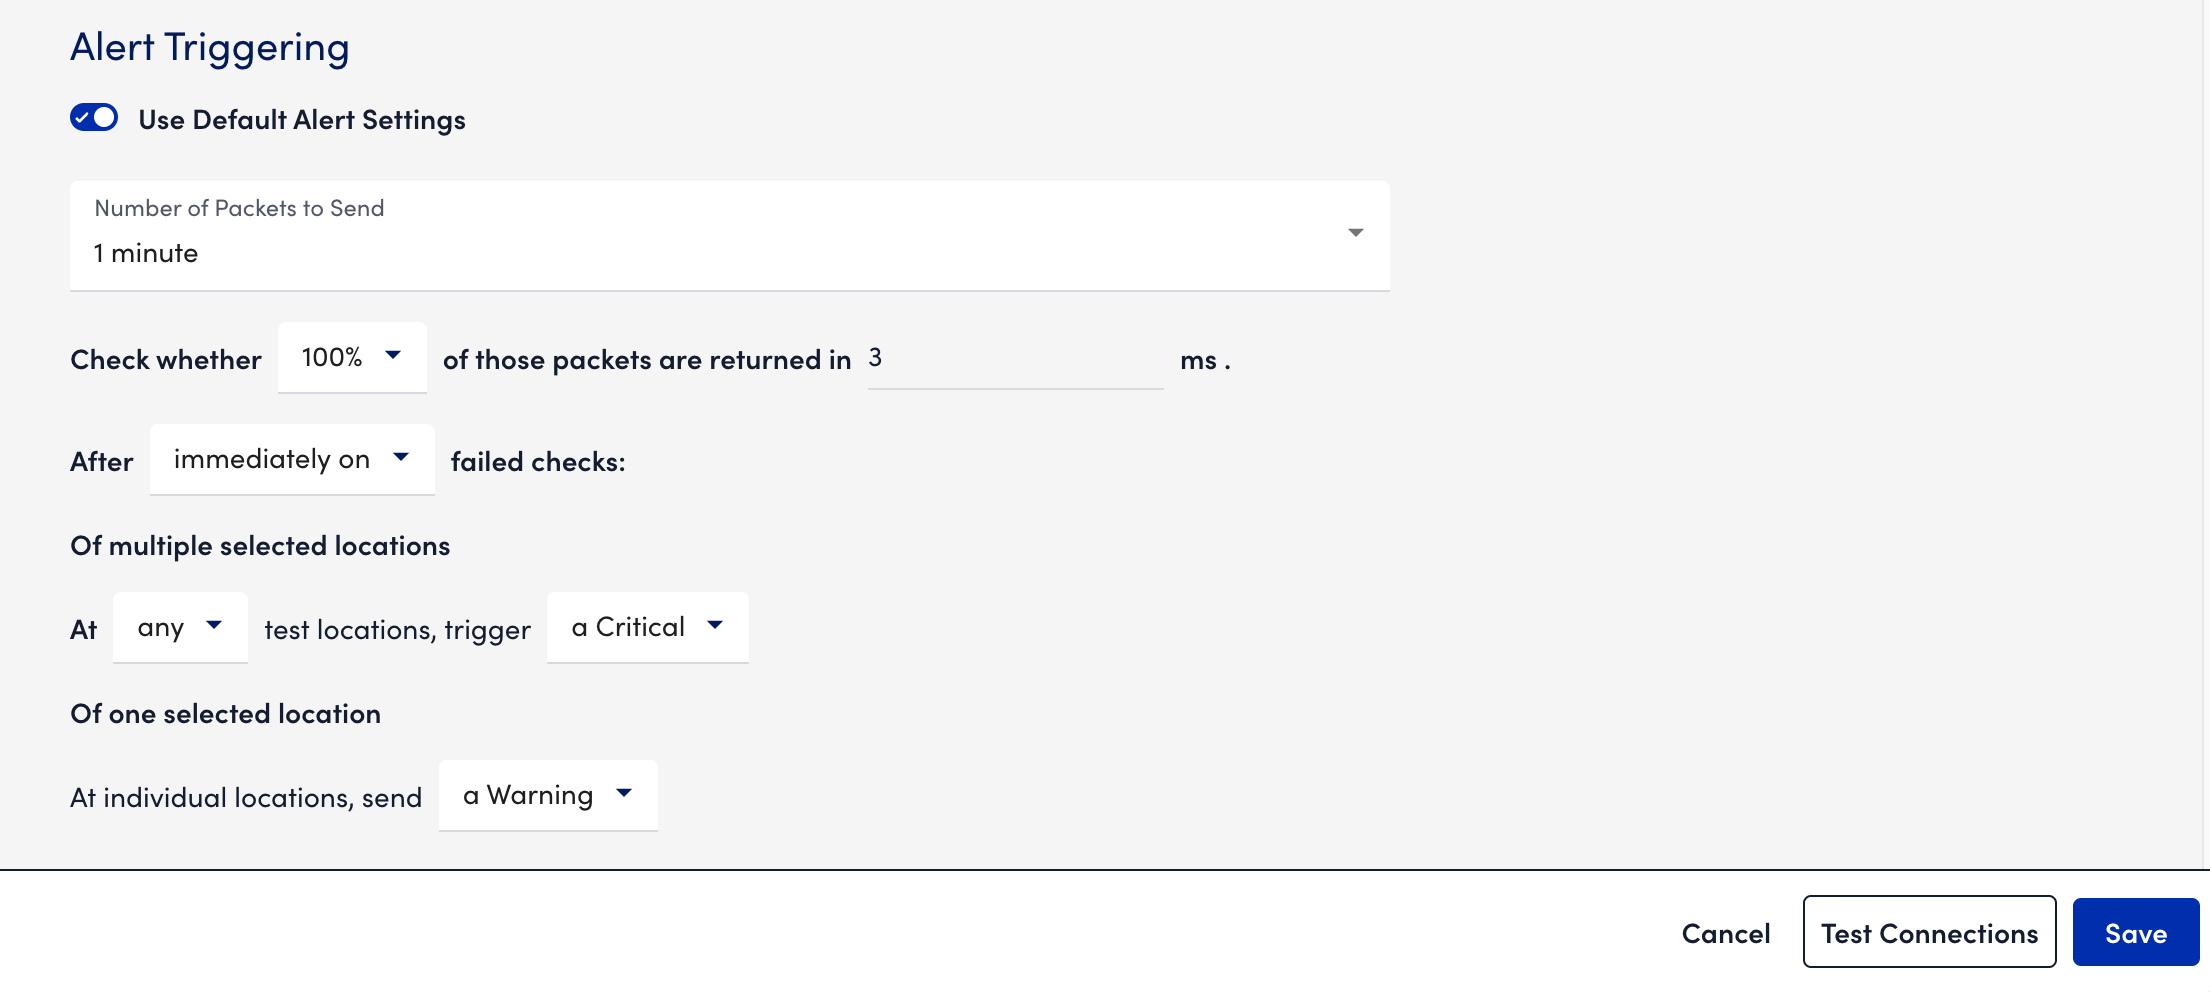
- Select the Alert Triggering tab and do the following:
- Toggle the Use Default Alert Settings switch to use the recommended default settings.
Important: If you want to customize and not use the default settings, you need ‘Resources: Group Threshold’ permission. For more information, see Access Group Permissions. - Select how often the designated checkpoints will ping the host name or IP address from the Number of Packets to Send dropdown menu. You can choose from frequencies that range from once a minute to once every 10 minutes.
- In the Check whether (X)% of those packets are returned in (X) ms fields, select the percentage of packets that must be returned and the designated time period (milliseconds) for the check to be deemed successful.
Packets are sent one by one, with a delay of 250 milliseconds between each packet. For example, if you leave the default of five packets in the Number of Packets to Send field, it will take 1000 milliseconds (1 second) to deliver all five packets.
Note: These two fields technically operate independently of each other. If either criterion is not met, the check is considered a failed check. For example, any returned packet takes longer than the minimum allowed return time or the number of packets returned is less than the minimum percentage threshold. - Select the number of consecutive checks that must fail in order for an alert to be triggered from the After X failed checks dropdown menu.
- From the At X test location and trigger X dropdown menus, select the location and severity of the alerts respectively. You can select the location and severity of multiple or one selected alert.
For more information on the different scenarios on alert generation, see Website Data Alerting for LM Uptime.
- Toggle the Use Default Alert Settings switch to use the recommended default settings.
- (Optional) Use the Test Connections to verify that the selected locations can successfully reach your website.
The Test Connection Results pane displays the status of the checkpoint locations.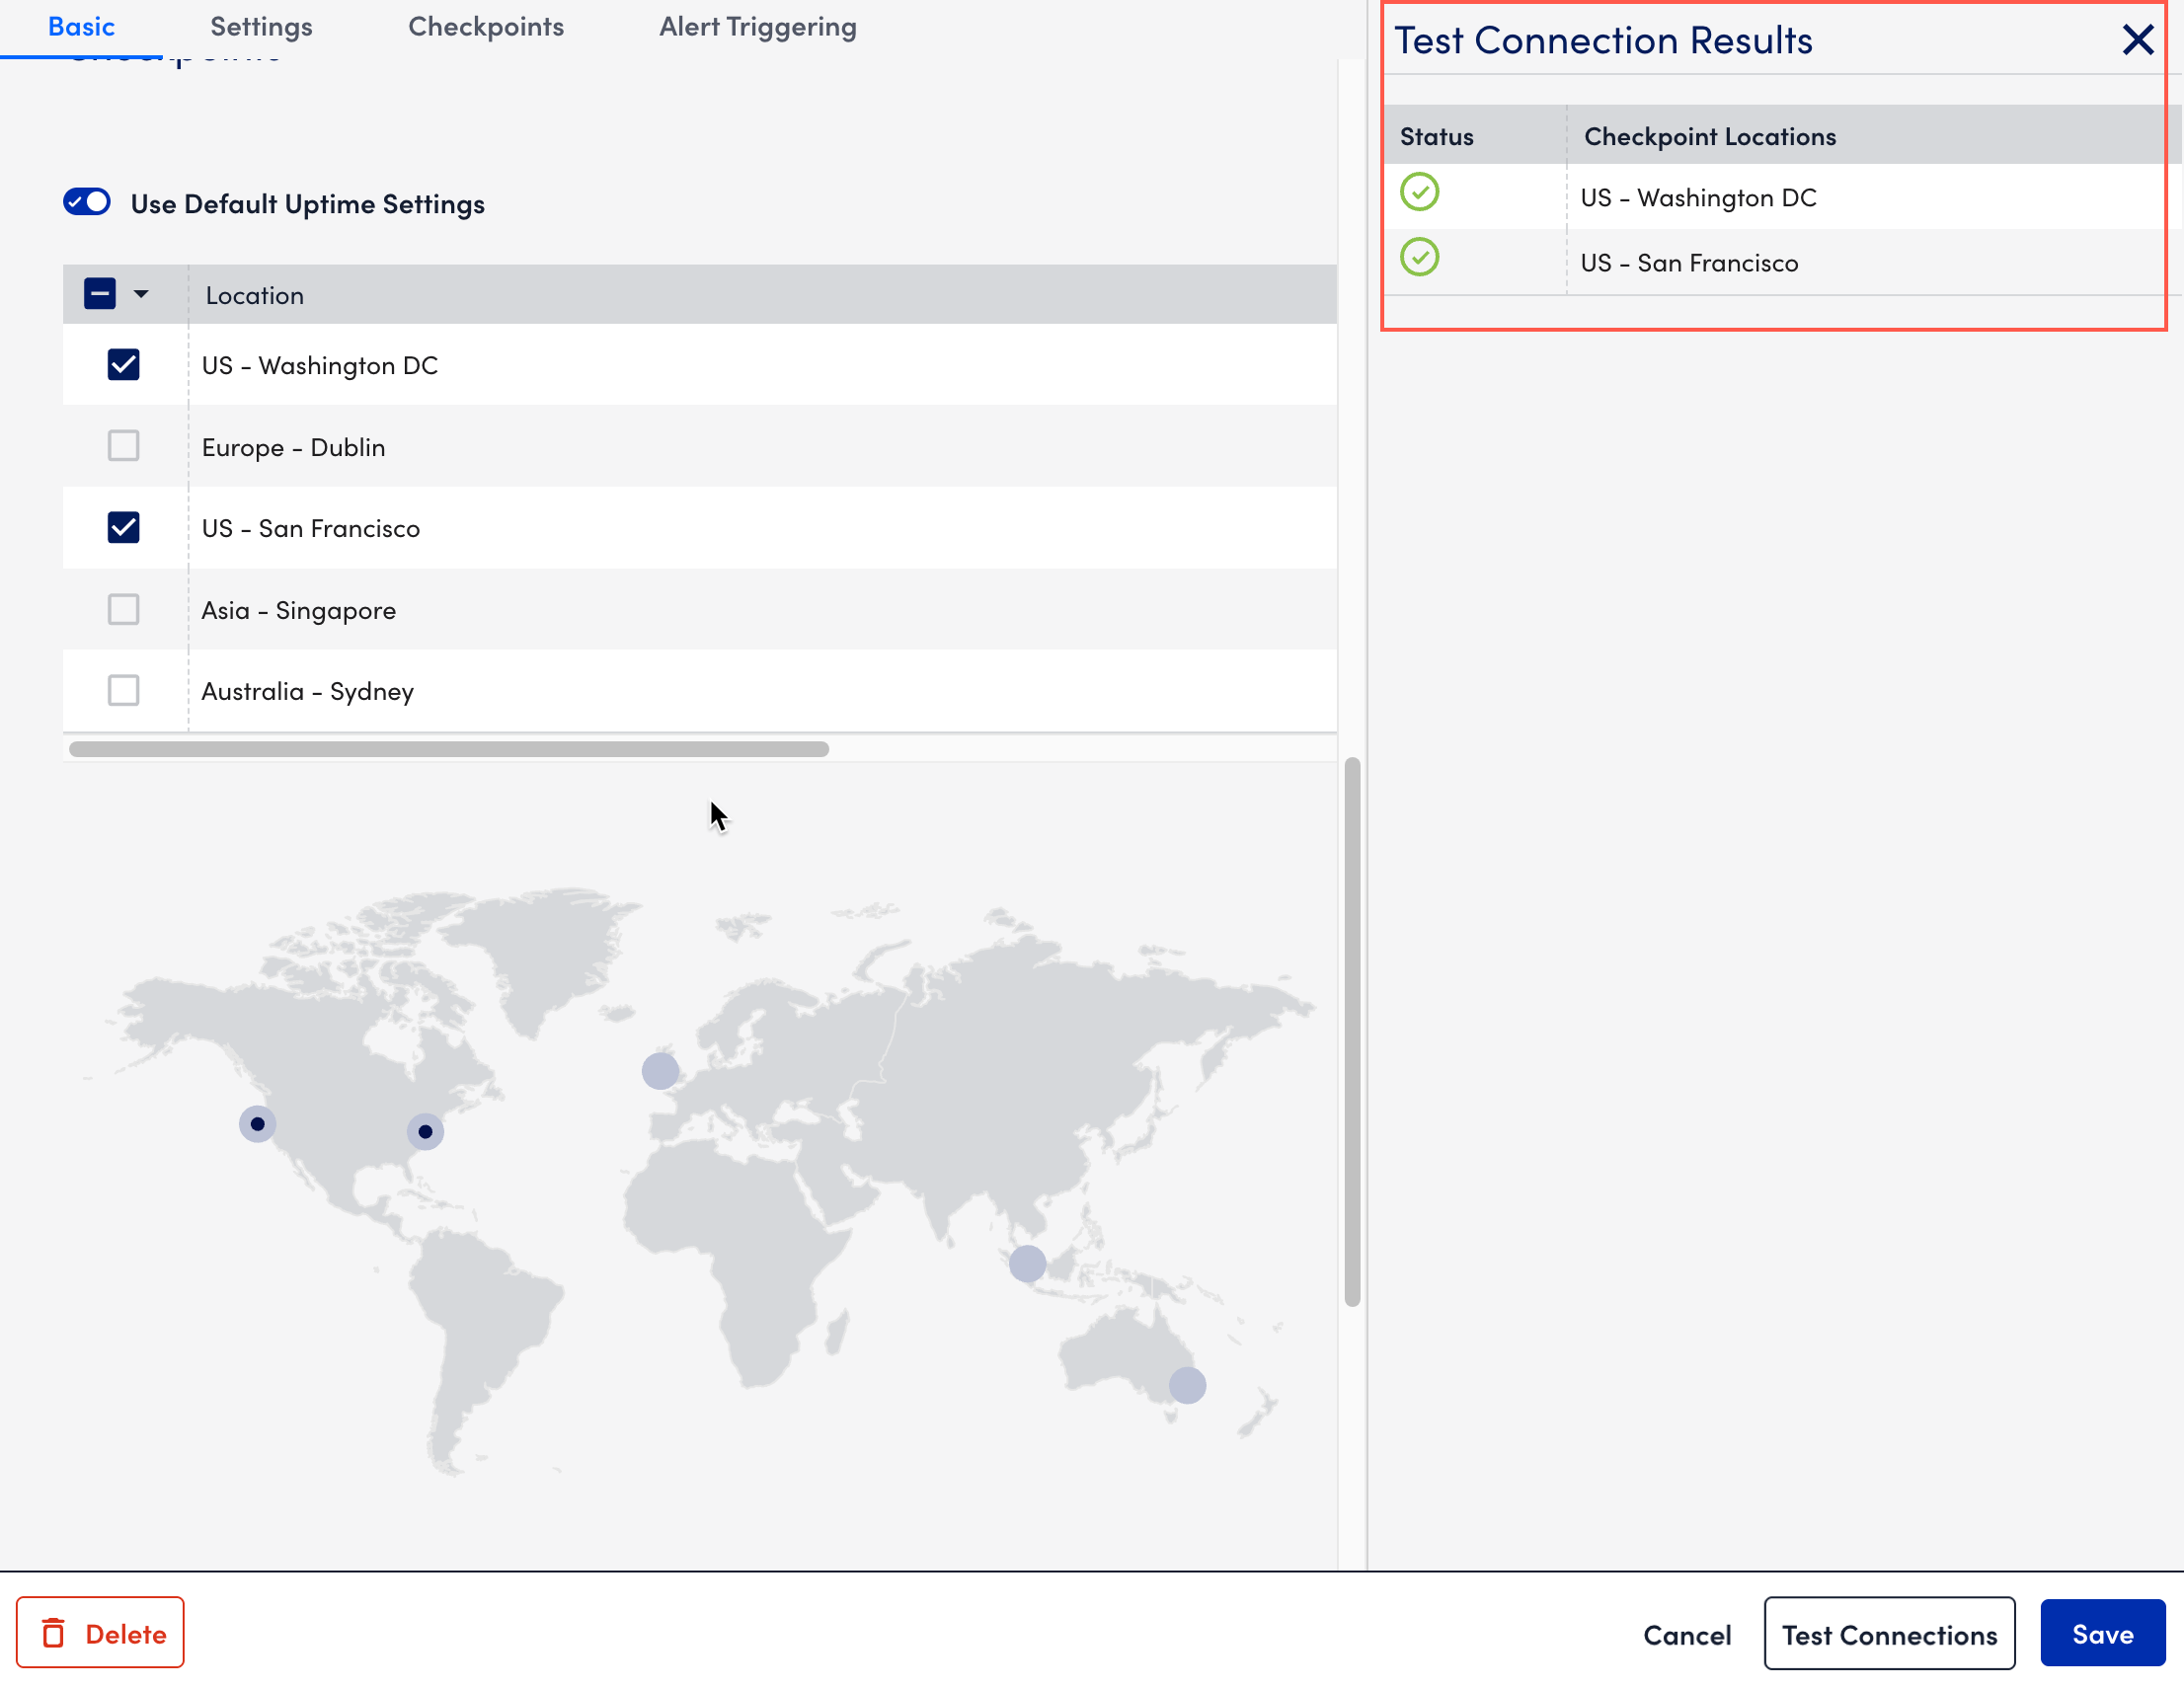
- Select Save.
The external ping check is added to the resources.