
OCI Monitoring Setup
Last updated - 17 March, 2026
You can configure LogicMonitor to monitor your Oracle Cloud Infrastructure (OCI) accounts and related resources. This enables you to monitor your compute, storage, and database resources, and to integrate your OCI environment monitoring with other cloud environments LogicMonitor may already monitor.
Setting up OCI Monitoring involves the following:
- Configuring OCI to allow LogicMonitor to monitor resources.
- Adding an OCI account to LogicMonitor.
- Selecting the OCI services you want to monitor.
For more information on OCI resources that LogicMonitor supports, see Oracle Cloud Infrastructure (OCI) Monitoring.
Requirements for Configuring OCI Monitoring
To enable LogicMonitor to monitor resources in your OCI environment, your OCI account must have the following:
- An OCI User for LogicMonitor, added to a group to manage user access.
For more information, see Creating a User and Creating a Group from OCI. - A policy for the OCI group with a compartment at the “tenancy(root)” level.
For more information on creating OCI policies, see Policy Syntax from OCI. - Create a policy for the OCI group with a compartment at the “tenancy(root)” level. For more information on creating OCI policies, see Policy Syntax from OCI.
- The following permission statement within the policy you create:
- Allow group ‘<group-name>’ to read all-resources in tenancy
- om the OCI user:
- OCI Tenancy ID
- OCI User ID
- OCI Private Key
For more information, see Required Keys and OCIDs from OCI.
Configuring OCI Monitoring
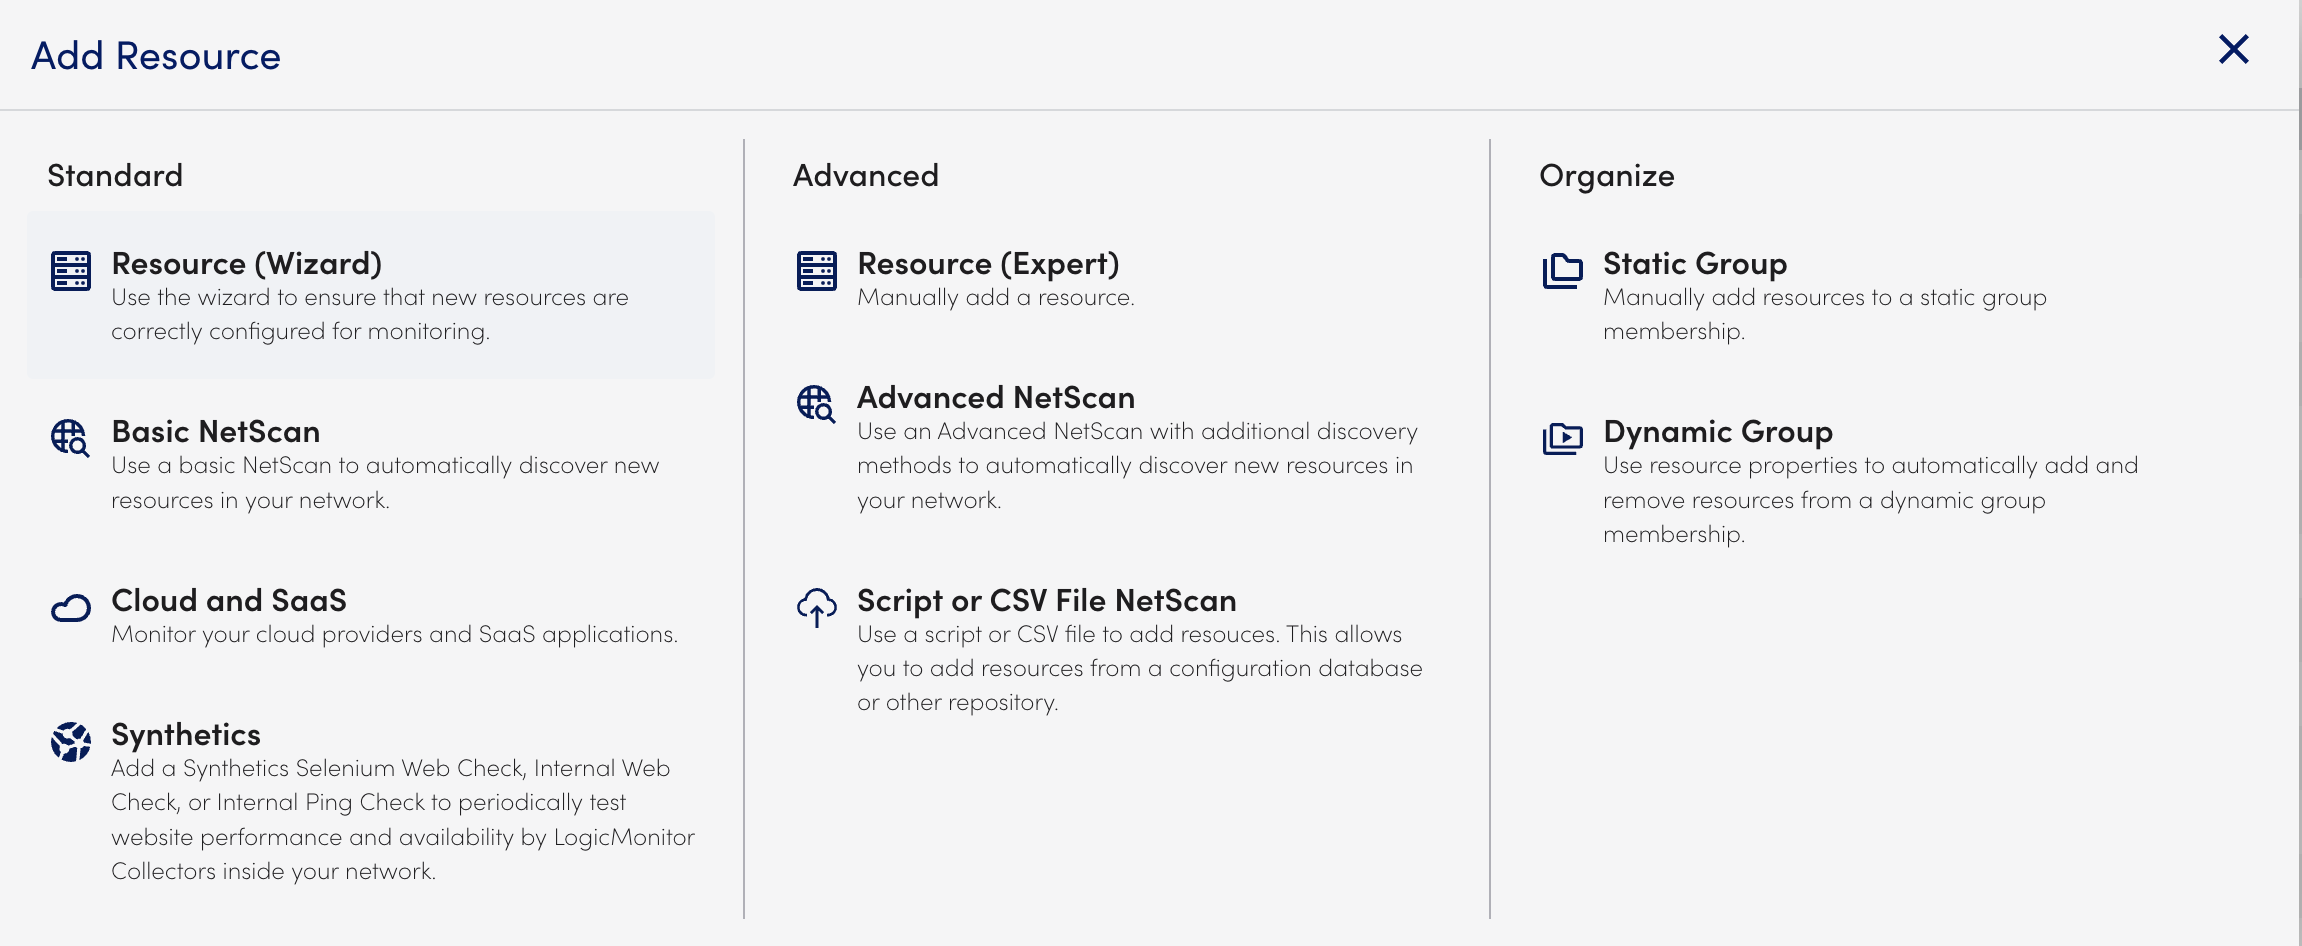
- In LogicMonitor, navigate to Resource Tree and select
 to add a new resource.
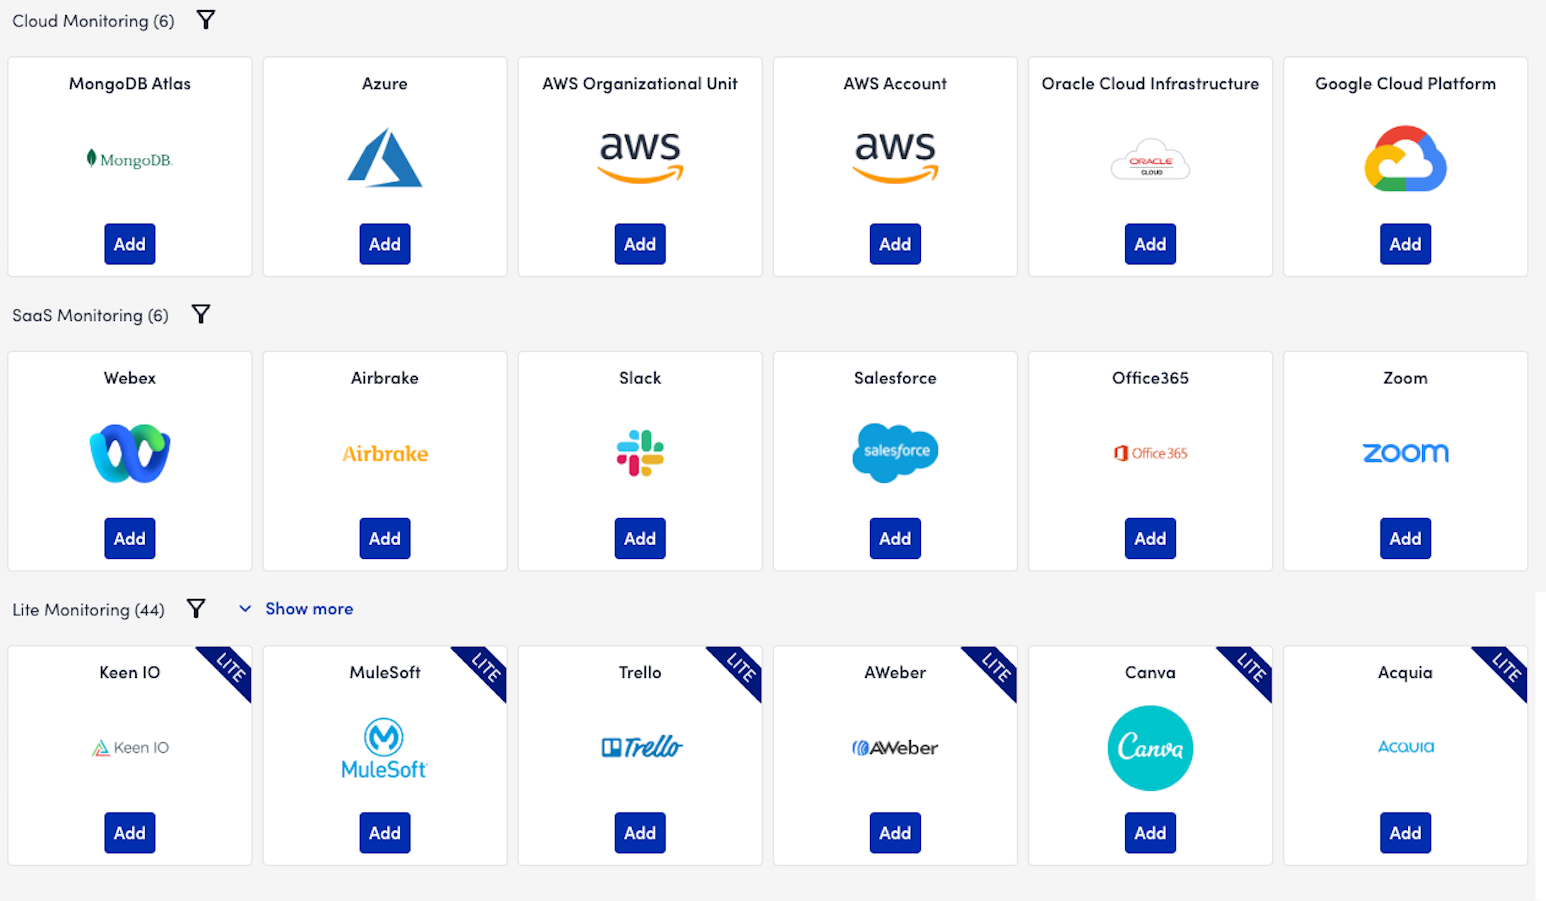
 - Select Cloud and SaaS.
- Select Add for Oracle Cloud Infrastructure.
- In the Name step of the wizard, do the following:
- In the Name field, enter a name for your OCI account in LogicMonitor.
- (Optional) In the Description field, enter a description to provide more information about the account.
- (Optional) In the Properties settings, select Add Property and enter any name and value pairs for the OCI account.
For more information, see Resource and Instance Properties.
- In the Permissions step of the wizard, enter the OCI Tenancy ID, OCI User ID, and OCI Private Key.
For more information on getting OCIDs, see Requirements for Configuring OCI Monitoring.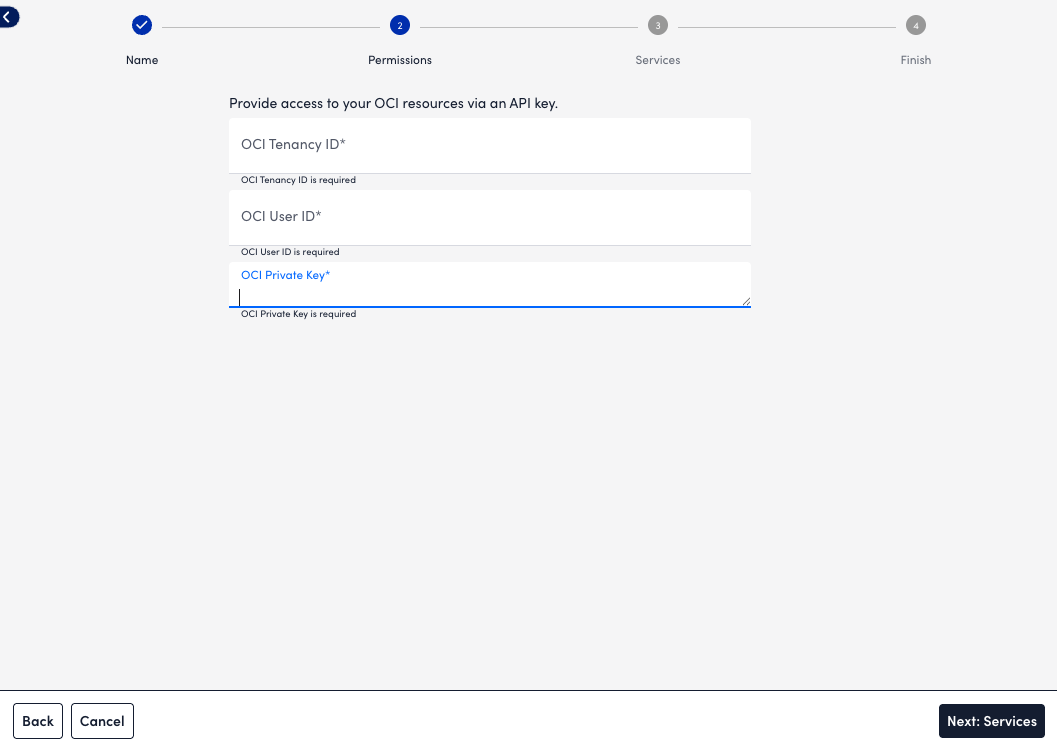
- Select Next: Services, and select which OCI services to monitor.
For a list of the monitored OCI services, see Cloud Services and Resource Units.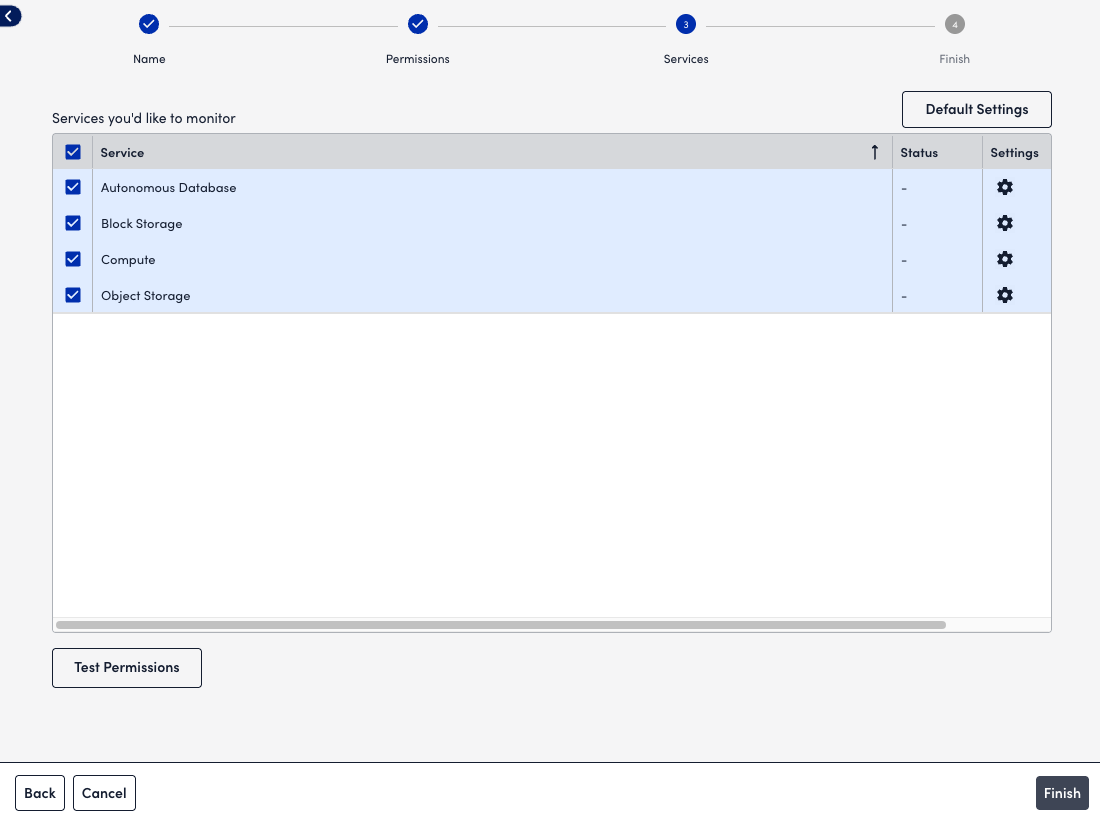
Configure how you want LogicMonitor to monitor services by doing the following:- To configure monitoring preferences for all services to inherit, select Default Settings, and then do the following:
- On the Global Settings tab, you can configure the following behavior:
- To configure how often LogicMonitor automatically checks for new OCI resources in your account, select a frequency using the NetScan Frequency setting.
- To delete the resources immediately or after a time period when no data is received for the resource, toggle on Automatically delete OCI resources if they are no longer available in the cloud portal, and then choose the timeframe for deletion using the When OCI resources terminate option.
This does not remove resource stopped or terminated prior to adjusting this setting. These resources must be deleted manually. - To disable alerting after the resources are deleted, toggle on Automatically disable alerting for OCI resources if they are no longer available in the cloud portal.
- To select regions that apply to the account and where services should be discovered, choose the regions from Monitored Regions.
- On the Tags tab, define filtering criteria for the OCI resources added to your account, and then select Add tag.
Consider the following when adding tags:- You can use glob expressions with the tag filter, for example:
tag value = prod* - Resources are discovered if they contain one or more tags specified with an include operation but not any of the exclude tags.
- The tag filter is case sensitive.
For more information, see LM Cloud Monitoring Overview and Using AWS Tags in LogicMonitor.
- You can use glob expressions with the tag filter, for example:
- On the Global Settings tab, you can configure the following behavior:
- To configure monitoring preferences for an individual service, do the following:
- Select Settings.
- Toggle the Inherit from Global Settings switch, and configure the settings as needed for the individual service.
- To configure monitoring preferences for all services to inherit, select Default Settings, and then do the following:
- Select Test Permissions to validate your OCID credentials.
- Select Finish.
The OCI resources you choose to monitor display in the LogicMonitor Resource Tree.
