
Job Monitor Widget
Last updated - 24 July, 2025
The Job Monitor widget enables you to see the status, start, and finished times of a recent batch jobs being monitored by Job Monitor. For more information on the different statuses, see What do the different alert severities mean?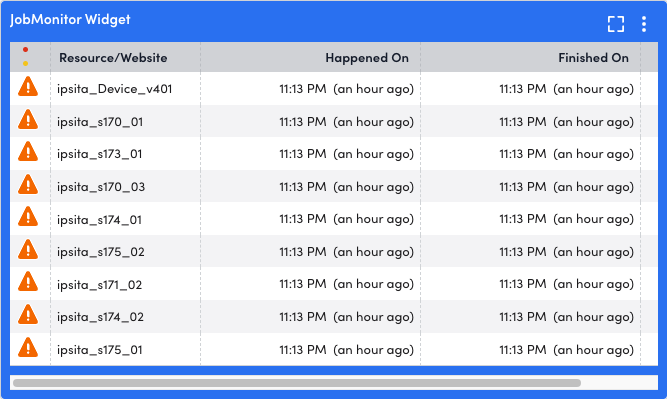
To configure a Job Monitor widget, fill out the Job Monitor widget title, description, dashboard and refresh fields, and set a default time range.
Configuring a Job Monitor Widget
- Create a Job Monitor widget. For more information, see Widget Creation.
- Configure Basic Information fields. For more information, see Configuring Standard Widget Settings.
- In the Default Time Range dropdown, select the scheduled time range over which the JobMonitor data will be displayed.
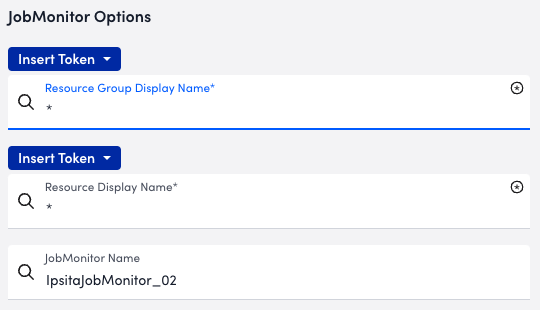
- In the Resource Group Display Name field, select a resource group or a glob expression * of multiple individual resources to display in the Job Monitor widget.
- In the Resource Display Name field, select an individual resource or a glob expression * of multiple individual resources to display in the Job Monitor widget.
- (Optional) In the JobMonitor Name field, enter a name to identify this item in the Job Monitor widget.
- Complete the standard widget configurations, and then Save the widget. For more information, see Configuring Standard Widget Settings.
