Disclaimer: This content applies to the legacy UI and is no longer maintained. It will be removed at a future time. For up-to-date content, see Widget Creation. At the time of removal, you will automatically be redirected to the up-to-date content.
Adding and Configuring Widgets
Last updated - 24 July, 2025
Adding Widgets
New content can be added to a dashboard in one of three ways:
- By clicking the Add Widget command available from the header of the dashboard that you would like to update with the new widget.
- By clicking the Clone command available from the header of an existing widget.
- By adding an instance graph. (For more information on adding instance graphs to dashboards, see Graphs Tab).

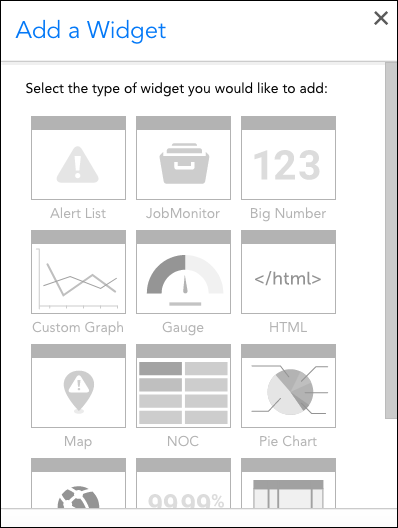
If you’re adding the widget from scratch (vs. cloning an existing widget), select the type of widget you would like to add. (For guidance on which widget type is best suited for your intended purpose, see Widget Overview)
Configuring Universal Widget Settings
Upon selecting a widget type or cloning an existing widget, you are presented with the various configuration settings for that widget.
While many of the available widget types look very different from one another, there is a considerable amount of shared functionality among them. This section provides instructions for configuring settings that are common across most or all widget types.
Note: Don’t see the setting you’re looking for? It’s likely specific to a particular widget type. For information on configuring settings that are specific to a particular widget type, see the dedicated support article for that widget type.
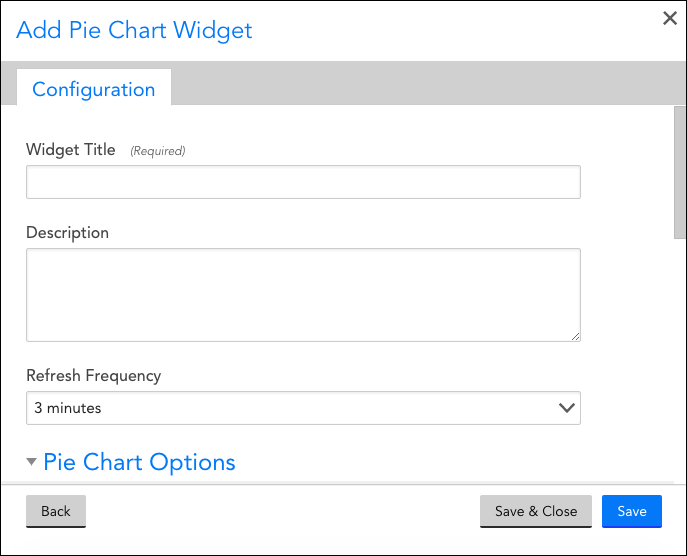
Widget Title
The title entered here displays at the top of the widget. There are a few naming convention restrictions to be aware of:
- Widget titles cannot include the operators and comparison functions available in LogicMonitor’s datapoint expression syntax, as discussed in Complex Datapoints.
- Widget titles cannot contain commas (,), semicolons (;), or asterisks (*).
Description
The text entered here does not display with the widget, but is helpful for making notes.
Dashboard
The Dashboard setting only displays after a widget has been saved. This field defaults to the current open dashboard, but can be changed to move an existing or cloned widget to another dashboard.
Refresh Frequency
Select the frequency in which data displayed by this widget will be updated.
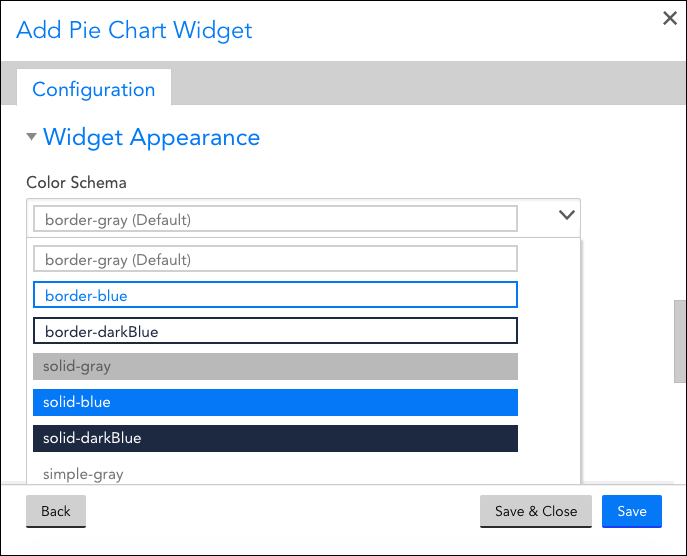
Color Schema
The schema options available from this setting’s drop-down preview the colors that will be applied to the widget’s border, text, and background. It is recommended that the “solid” schemas be used selectively to draw attention to critical data.
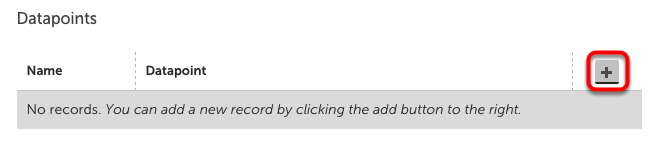
Configuring Datapoints
While not universal across all widget types, many widget types utilize datapoints. Widgets that display metric information, as opposed to widgets that display status, require datapoints to be configured.
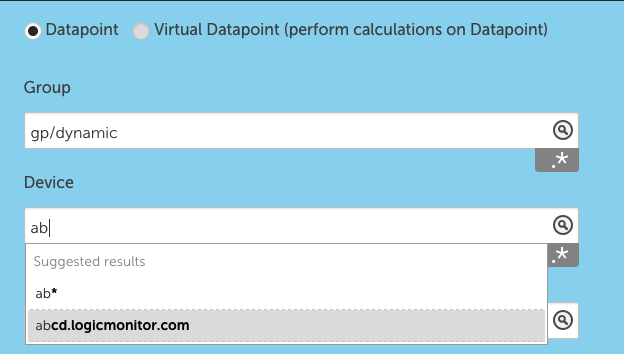
Groups and Devices
When adding a datapoint to a widget, you will be prompted to select Groups and Devices.
If you do not select any specific Groups or Devices, it will default to all. There are exceptions when a specific instance is required for the widget to display correctly.
Glob expressions can be used in the Group and Device fields. This works for include and exclude. To include only subgroups, enter GroupName/*. To exclude a group or device, use !DeviceorGroupName.
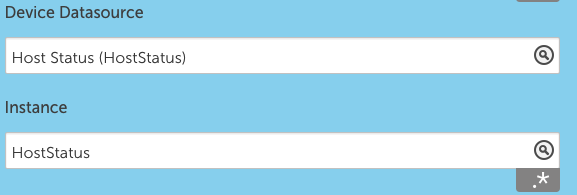
Datasources and Instances
Once your Groups and Devices have been configured, you will have the option to select Datasources and Instances. Datasources are available as ‘DisplayName (DataSource Name)’, such as CPU (WinCPU).
Only datasources that are enabled on the selected Group and Device are available. Similarly, only active instances of the datasource can be added.
Glob expressions are also available for Datasources and Instances. To include all matches, append *. To exclude, prepend !, such as !InstanceA.
Datapoint
While Groups, Devices, DataSources and Instances can all be specific, configured as a glob match, or set to all, a datapoint must be selected.
The configuration of Group, Device, Datasource and Instance determines which occurrences of a datapoint will be utilized in the widget, whether it is a datapoint specific to a singular instance, many instances on the same device, or a datapoint on many instances across devices.
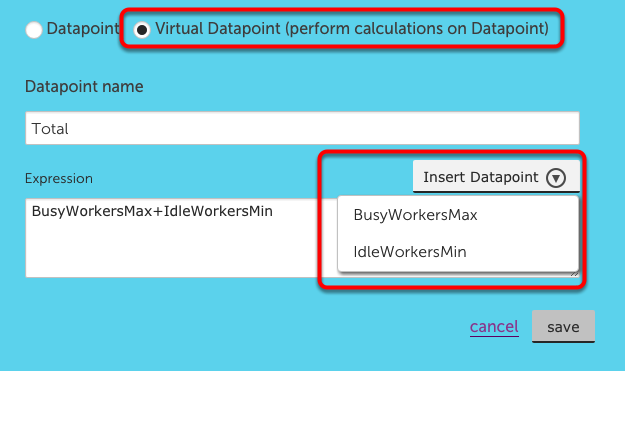
Configuring Virtual Datapoints
Virtual datapoints are calculations based on the datapoints that have already been added to the widget.
To add a virtual datapoint, select the toggle in the top of the Add Datapoint configuration. You will need to enter a name, to be utilized in the remainder of the widget configuration. From there you can apply any datapoint expression to the existing datapoints.
Note: If the set of datapoints referred to by an expression are wildcard datapoints, with glob expressions used, be aware that the virtual datapoint will only operate on datapoints that share the same host and instance. For example, given a datapoint InTraffic which is defined as the top 10 InOctets counter on all hosts, all interfaces for the SNMP 64 datasource, you can combine that with another datapoint OutTraffic which is defined as the top 10 OutOctets counter on all hosts, all interfaces for the SNMP 64 datasource. You could not have a virtual datapoint combine the InTraffic datapoint with a TopCPU datapoint, which is defined as the top 10 CPU load of all hosts – they would not have an instance in common and so could not be combined.
Insert Datapoint enables you to add your existing datapoints directly into the datapoint expression.