Datapoints for Widgets
Last updated - 30 March, 2026
Datapoints are used by many widget types, but not all widgets require them. Widgets that display metric information (as opposed to widgets that display status) must have one or more datapoints configured.
Datapoint Types
The data displayed in in a widget that leverages datapoints comes from a set of intersections between individual instances and a single datapoint. You can configure multiple instances individually or use a glob expression to include all instances. You can provide filters for groups and resources to find the exact instances you need.
You can choose the following types of datapoints:
| Datapoint Type | Description |
| Datapoint | This datapoint type is the raw datapoint value. If multiple instances are included, you can choose to only display: – The top ten values: Up to 10 items will be calculated among the total 100% of the pie. The sum of values of those 10 will act as a basis for 100%, and each slice will be shown with a percentage relative to that total. – An aggregate of the values as Max, Min, or Sum: This will be one value calculated as part of the 100% of the pie. – All values For more information, see Datapoints. |
| Virtual Datapoint | This type of datapoint is a calculation involving multiple datapoint values from a datasource. Virtual datapoints calculations are based on the datapoints that have already been added to a widget. |
| Resource Count | This datapoint returns the number of resources that matches any AppliesTo expression. For more information, see AppliesTo Scripting Overview. |
Datapoints
While Groups, Resources, DataSources, and Instances can all be specific, configured as a glob match, or set to all, a datapoint must be selected. The configuration of Group, Resources, DataSource, and Instance defines which datapoint occurrences are used in the widget. The configuration also defines if it is a datapoint specific to a singular instance, many instances, on the same device, or a datapoint on many instances across devices.
- Groups and Resources: When adding a datapoint to a widget, you’ll be prompted to select groups and resources. If you don’t select anything, all groups and resources are included. These are exceptions when a specific instance is required for the widget to display correctly. Glob expressions can be used in the group and resource fields. This works for include and exclude. To include only subgroups, enter GroupNamel*. To exclude a group or device, use !DeviceorGroupName. For more information, see Using Glob Expressions Throughout the LogicMonitor Portal.
- DataSources and Instances: DataSources are available as ‘DisplayName (DataSource Name)’, such as CPU (WinCPU). Only DataSources that are enabled on the selected Group and Resource are available. Similarly, only active instances of the datasource can be added. Glob expressions are also available for datasources and instances. To include all matches, append *. To exclude, prepend !, such as !InstanceA. For more information, see Using Glob Expressions Throughout the LogicMonitor Portal.
Requirements for Configuring Widget Datapoints
To leverage Dashboard tokens, you must create them prior to configuring the widget. For more information on creating dashboard tokens and using them in widget fields, see Dashboard Tokens and Tokens in Widgets.
To add virtual datapoints to a widget, you need the following:
- Datapoints must already be added to the widget
- Same host and instance for multiple virtual datapoints
Adding Widget Datapoints
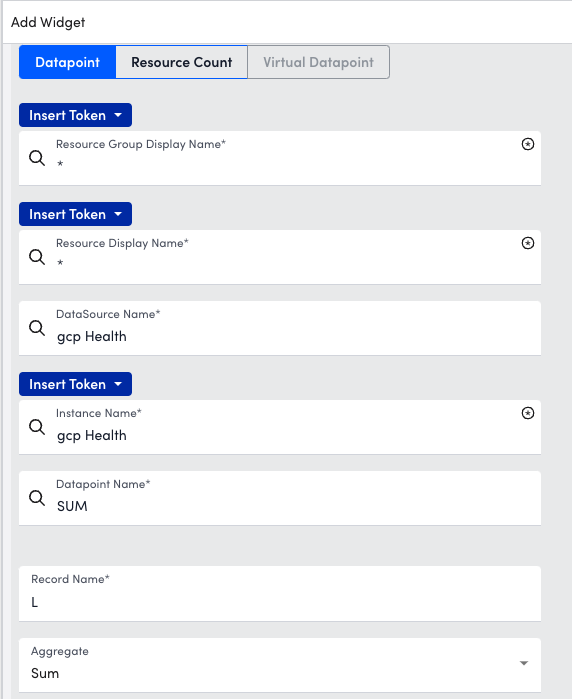
- In the widget you are adding datapoints to, select +Add Record.
- Select Datapoint.
- In the Resource Groups Display Name field, enter the name of a resource group and select it from the results list or enter a * glob expression to select all or multiple resource groups.Note: Entering a *glob expression includes all resources within that group, including resources in any subgroups.
- In the Resource Display Name field, enter the name of a resource and select it from the results list or enter a * glob expression to select all or multiple resources related to the selected resource group.
- In the DataSource Name field, enter the name of a datasource for this datapoint and select it from the results list.
- In the Instance Name field, enter the name of an instance for this datapoint and select it from the results list.
- In the Datapoint Name field, enter the name of a datapoint and select it from the results list.
- In the Record Name field, enter a unique name to identify this datapoint by.
- (Optional) In the Aggregate field, select an aggregated value of Sum, Average, Max, or Min (defaulted to Sum).
- Select Apply.
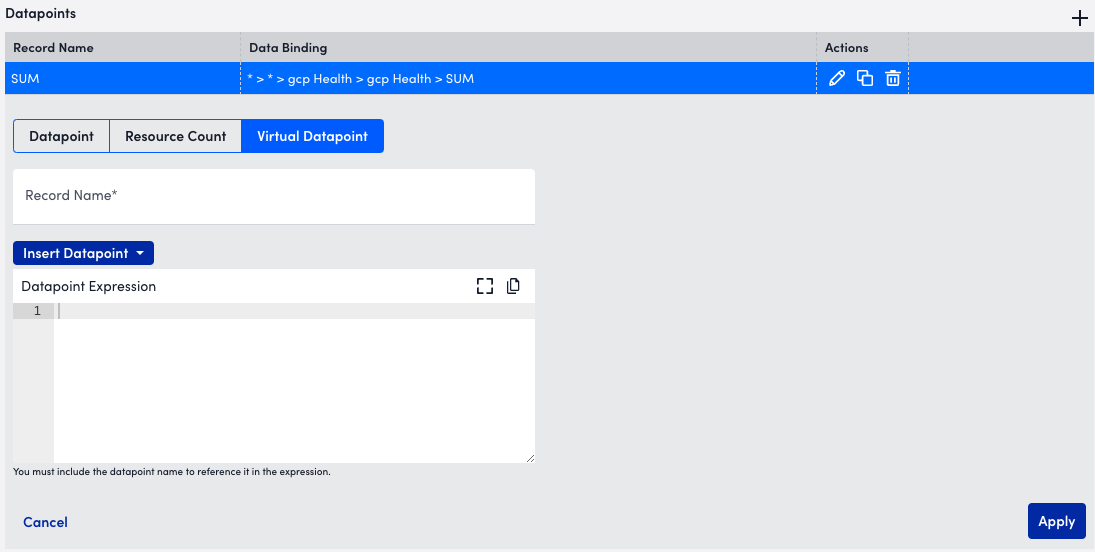
Adding Virtual Datapoints to Widgets
- In the widget you are adding virtual datapoints to, select +Add Record.
- Select Virtual Datapoint.
- In the Record Name field, enter a unique name for this virtual datapoint to be identified by.
- Select the Insert Datapoint dropdown, and then select a datapoint Record Name to add to the list.
Note: The Insert Datapoint dropdown list contains datapoints that you added already added to this widget. For more information, see Adding Widget Datapoints.
- Press Enter.
Repeat for all the datapoints you want to add. - After adding all the datapoints to the Datapoint Expression list, select Apply.
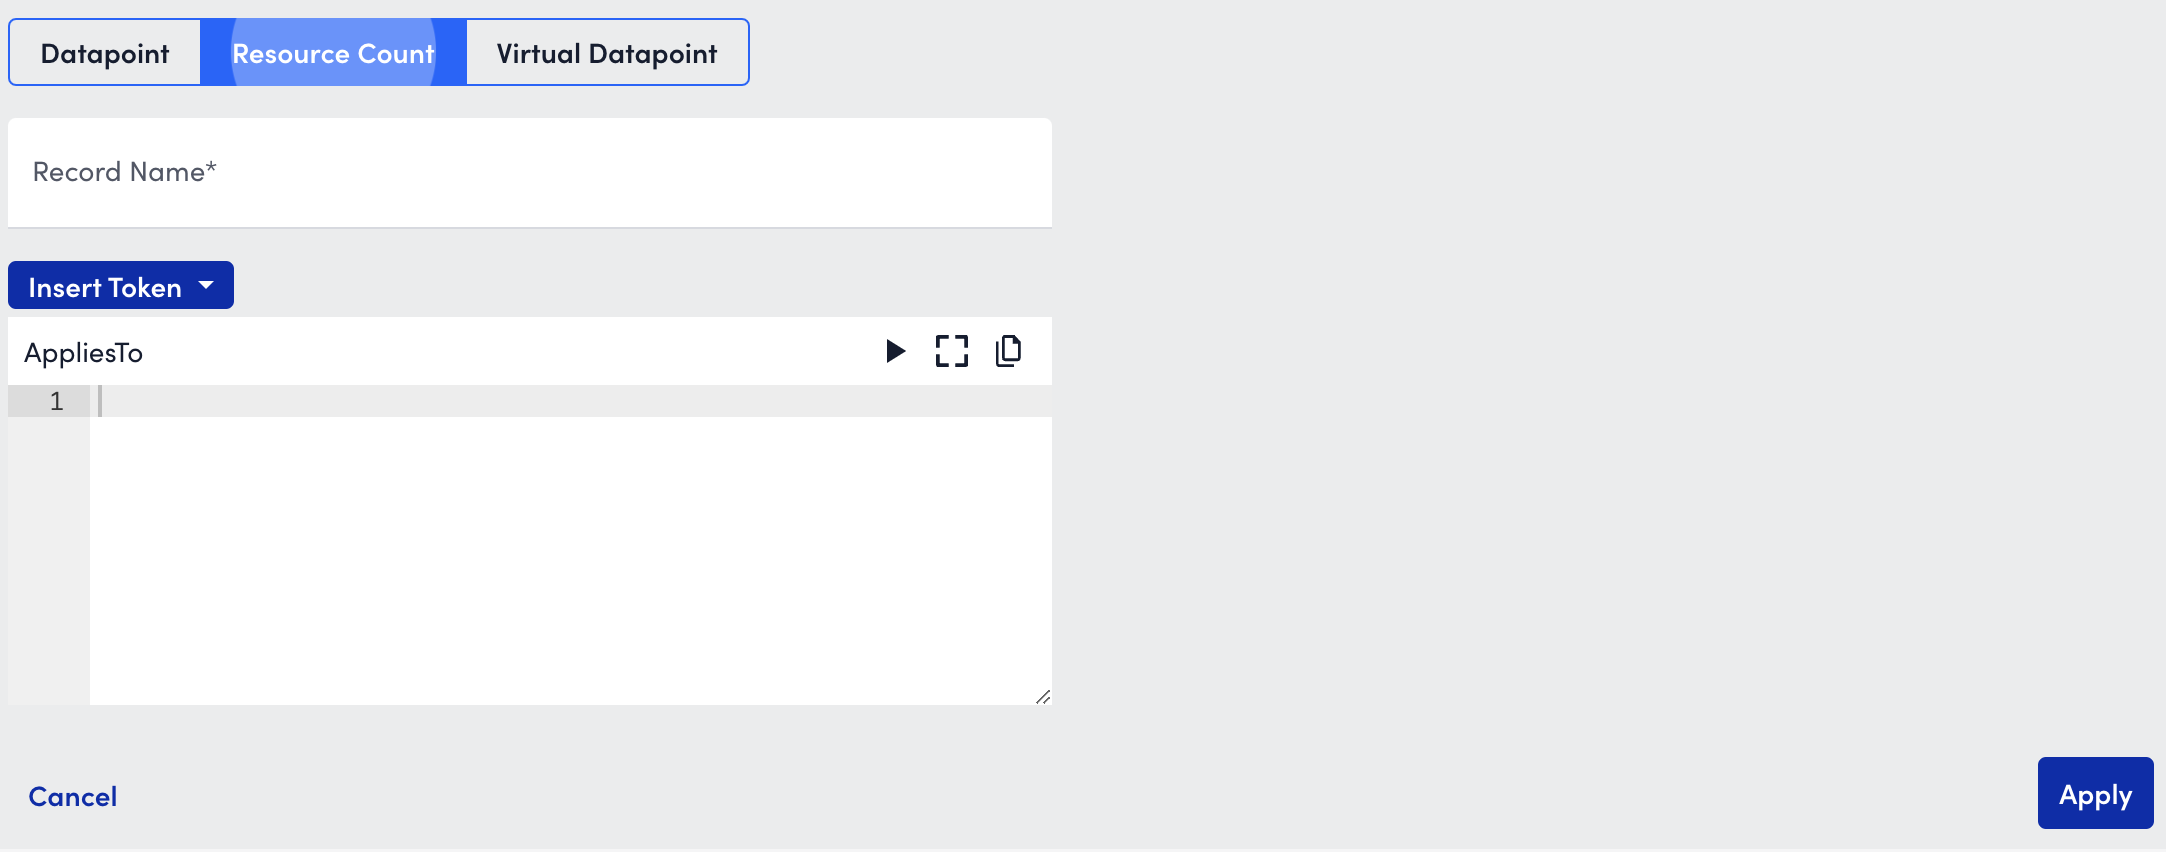
Adding a Resource Count
- In the widget you are adding a resource count to, select + Add Record.
- Select Resource Count.
- In the Record Name field, enter a unique name for this resource count to be identified by.
- Enter an AppliesTo expression to return any number of resources that matches the expression. For more information, see AppliesTo Scripting Overview.
- Select Apply.