3. Adding Collectors
Last updated on 19 May, 2021The LogicMonitor Collector monitors your infrastructure and collects the data defined by LogicModules for each resource in that location. See About the LogicMonitor Collector.
This article will guide you through basic steps for adding a Collector. For more details about each of the options, see the main topic Installing Collectors.
Installation Settings
Collectors are added from Settings:
- If you’re starting from the new account wizard, then you’ve just created your first user and are now being presented with the Add a Collector dialog.
- If you’ve already exited or completed the wizard, you can open the Add a Collector dialog by navigating to Settings | Collectors | Add | Collector, as shown next.
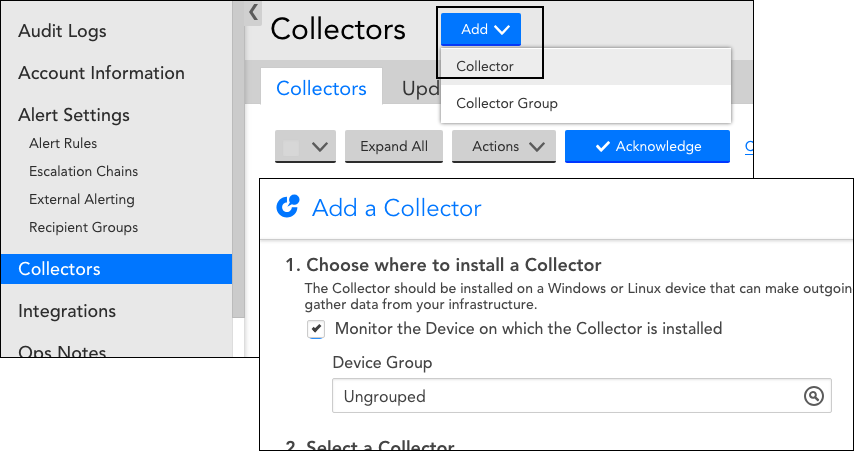
Follow the steps in the Add a Collector dialog to complete and verify the Collector installation.
Installation Instructions
See the main article for the complete instructions for Installing Collectors
1. Choose Where to Install a Collector
The Add a Collector instructions assume that you have already decided which device your Collector will be installed on. This may be a syslog server, DNS server, or other relatively unconstrained server that is part of the infrastructure environment you want to monitor. You do not need to install a Collector on every device, instead one Collector on a server should be used to monitor all the resources in that location.
The Collector should be installed on a Windows or Linux (physical or virtual) server that can make outgoing calls to discover and gather data from your infrastructure. If you want to collect data from Windows systems, the Collector must be installed on a Windows server.
You also have the option to monitor the device you installed the collector on to and select the Device Group the collector will be part of.
2. Select a Collector
In the Select a Collector area of the Add a Collector dialog box (shown next), select the download file you will install, its version, and size (which correlates to monitoring capacity). You also have the option of assigning the new Collector to a Collector Group.
3. Download and Install
This section provides options for you to download the installer file for the collector you selected in Step 2.
Under Download a Collector, you can choose between two types installer packages:
- “Bootstrap” downloads a smaller installation package (~500kB) for a faster install using the LogicMonitor CDN.
- “Full package” downloads the full installation package which is approximately 200MB.
You can choose to download the installer file directly to your server (if your server supports web browsing) or onto another server and use a file transfer option (such as scp) to copy it to the server where you will install the collector.
We also provide download commands that you can copy to your clipboard and then run on your server to download and install the collector file.
- For Linux, we provide download commands using cURL and Wget.
- For Windows, we provide download commands using PowerShell and a URL.
4. Verify Connection
After successfully installing the Collector on your Windows or Linux server, return to the “Add a Collector” dialog in LogicMonitor and verify that the Collector can communicate with LogicMonitor’s datacenters.
Troubleshooting Collectors
If you have any issues with your Collectors, check the Troubleshooting Collectors articles listed below:
- Troubleshooting Windows Collectors
- Troubleshooting Linux Collectors
- Using the Collector Debug Facility
- Restarting Collectors
Next Steps
After you’ve installed a Collector, you can start adding resources to be monitored.