
Instance Tab
Last updated - 24 November, 2025
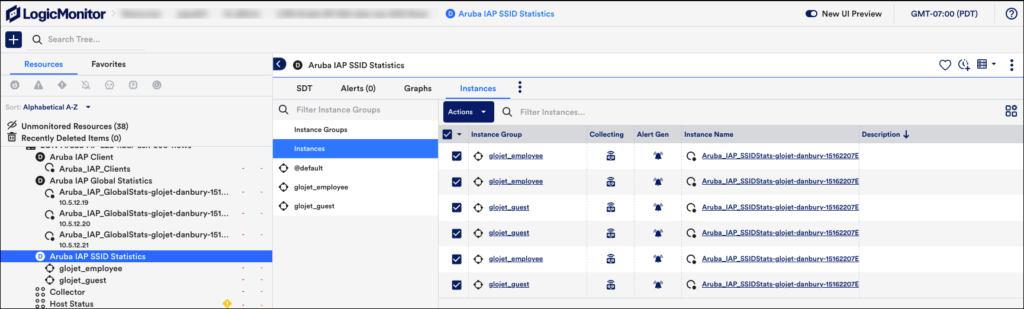
The Instances tab is available from the Resources page. It displays multi-instance DataSources from the Resources tree. Multi-instance DataSources are DataSources that monitor objects (e.g. disks, server volumes, interfaces, and so on.) that can potentially be present multiple times on a single device.
The Instances tab provides an overview table of all the instances found for a particular DataSource on a particular device. It’s a convenient way to quickly view or edit instance detail, as well as perform tasks in bulk such as disabling instances or disabling alerting on instances.
Adding Instances
- In LogicMonitor, navigate to Resource Tree and select the required resource.
- On the Resource Tree page, select Instance Group.
- Select Instances tab.
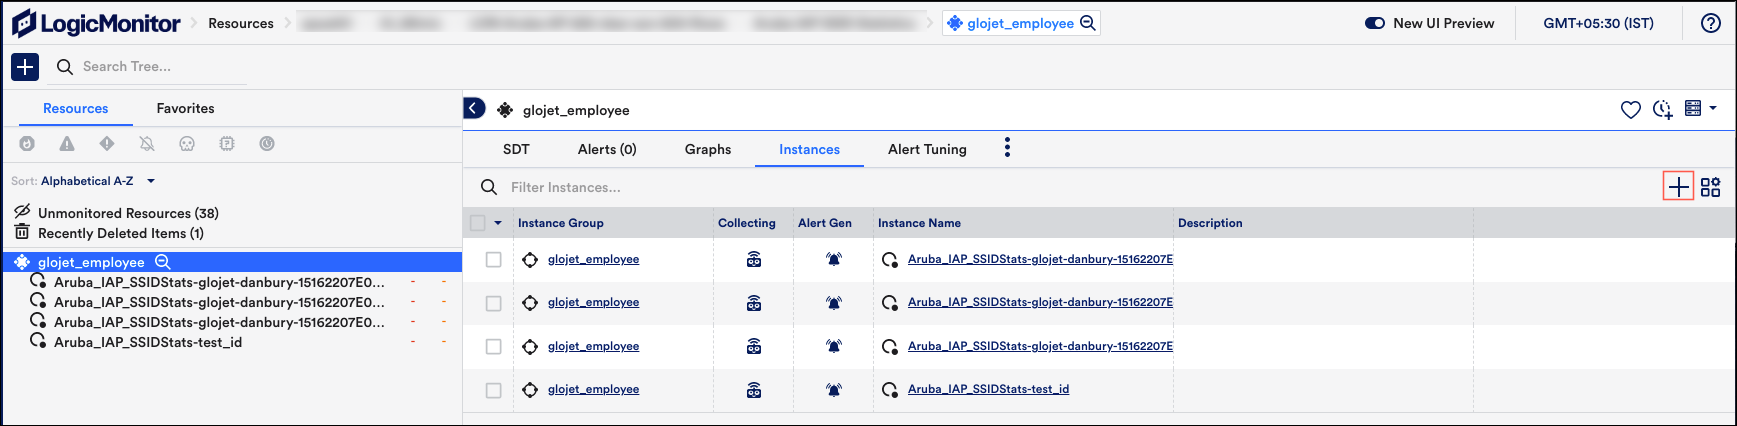
- On the Instance Group page, select Add Instance Group.
- On the Add new instance group dialog box, enter the required information.
- Select Save.
A new instance group is added.
Editing Instances
1. In LogicMonitor, navigate to Resource Tree and select the required resource.
2. On the Resource Tree page, select Instances to view the list of instances and the instance groups for the selected resource.
3. On the Instances tab, select the Resource icon ![]() , to edit the instance.
, to edit the instance.
Note: If you are unable to edit the instance and you see property details information, you may have to contact the administrator.
The Manage Instance panel is displayed.
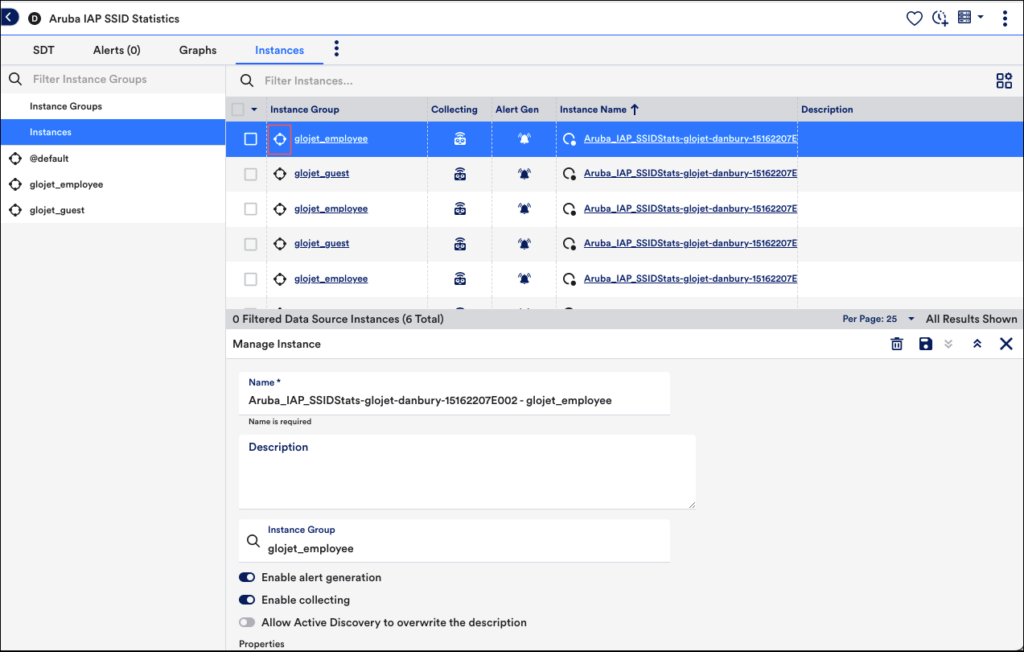
4. On the Manage Instance panel, make the required changes and select the Save icon on the top-right corner. You can also delete the instance if required.
Note: You must select at least one instance for the Actions drop-down list to be displayed.
If the instance was manually added, you have the ability to edit all instance details including instance name, value, and description. If the instance was added automatically by Active Discovery, only the description is available for editing. For more information on these instance details and the process of manually adding instances, see Adding Instances.
If Active Discovery is enabled for the DataSource, the Allow Active Discovery to overwrite the description option is available. When checked, this option allows the Active Discovery process to overwrite any description manually entered here. The lock icon that displays to the right of an instance description in the instance table depicts an open lock when this option is checked and a closed lock when it’s unchecked. For more information, see Active Discovery.
You can also manage property assignments for an instance from the Manage Instance dialog. See Resource and Instance Properties for more information on instance properties.
Bulk Actions
You can select one or more instances to take the following actions:
Note: You must select at least one instance for the Actions drop-down list to be displayed.
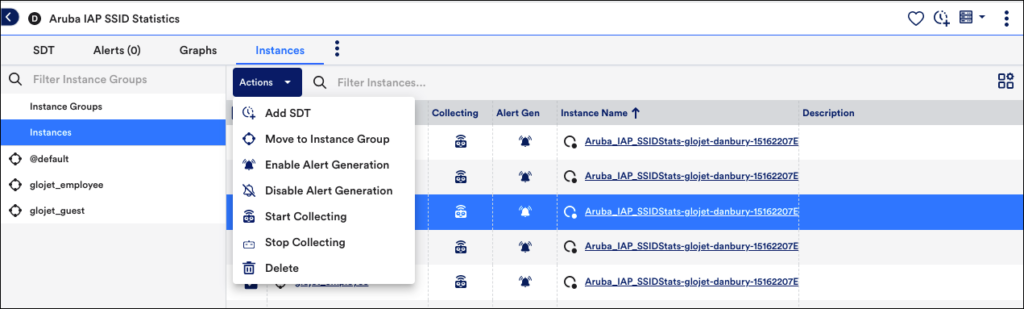
- Add SDT – Configure SDT (scheduled downtime) to suppress all routed alert notifications during periods when alerts are expected as a result of upgrades, maintenance, or other scheduled activities. For more information, see SDT Tab.
- Move to Instance Group – Move an instance or instances to the required instance group.
- Enable Alert Generation – Enable alert generation for the required instances.
- Disable Alert Generation – Disable alert generation for the required instances. For more information on the impacts of disabling alerting, see Disabling Alerting.
Start Collecting – Enable the instances to start collecting data. - Stop Collecting – Disabling an instance stops data collection for that instance. Upon disabling an instance, LogicMonitor will automatically create an instance group named “Unmonitored” and populate it with the unmonitored instance. For more information on the impacts of disabling instances, see Disabling Monitoring for a DataSource or Instance.
- Delete – Delete the required instances.
Note: When an instance is deleted, all data collected for it (i.e. monitoring history) is also deleted.
You can also perform all these actions for a single instance from the Manage Instance panel. For more information, see Editing Instances.
Managing Instance Groups
LogicMonitor supports instance groups, allowing you to flexibly show relationships between the instances that are monitored under a DataSource for a single device. From the Instances tab, you can manually create or edit instance groups (assuming they are not automatically created groups), as well as move instances among groups. For more information on managing instance groups (both manual and automatic), see Instance Groups.
Note: In addition to displaying for multi-instance DataSources, the Instances tab also displays when viewing instance groups from the Resources tree, allowing you to view and edit instance configurations for just those instances in the group, rather than all instances found on the device for that DataSource.
