
SNMP Active Discovery
Last updated - 21 May, 2026
Simple Network Management Protocol (SNMP) Active Discovery is a LogicModule feature that dynamically discovers and groups SNMP-monitored resources. It uses SNMP walks to query indexed table data from a specified base OID and automatically generates instances and their associated metrics. This discovery method supports multiple modes with flexible filtering to include only matching instances.
LogicMonitor uses pre-configured LogicModules to walk SNMP OIDs and create instances based on indexed results. Each instance can represent a resource element, such as network interface, processor, or storage component. The method scales to environments with changing topologies.
SNMP Active Discovery provides the following benefits:
- Eliminates manual instance creation
- Automatically adapts to resource changes
- Scales monitoring across large or dynamic infrastructures
Note: SNMP Active Discovery attempts SNMP versions in the following order: SNMPv3, SNMPv2c, and SNMPv1. If SNMPv3 is selected and no credentials are set, the default username is logicmonitor.
SNMP Discovery Types
You can configure SNMP Active Discovery to return instance names and values using one of the following types:
| Discovery Type | Behavior | Example Input (SNMP Walk) | Resultant Instance and Wildcard Values |
|---|---|---|---|
value | Uses the value returned at each leaf as the instance name | For example, walking the interface OID .1.3.6.1.2.1.31.1.1.1.1 on a resource returns interface names and their corresponding SNMP indices:IF-MIB::ifName.2 = STRING: eth0IF-MIB::ifName.3 = STRING: eth1 IF-MIB::ifName.4 = STRING: bond0 | eth0 = 2 eth1 = 3 bond0 = 4 |
wildcard | Uses the SNMP index as both the instance name and wildcard value | For example, walking the interface OID .1.3.6.1.2.1.31.1.1.1.1 on a resource returns interface names and their corresponding SNMP indices:IF-MIB::ifName.2 = STRING: eth0IF-MIB::ifName.3 = STRING: eth1 IF-MIB::ifName.4 = STRING: bond0 | 2 = 2 3 = 3 4 = 4 |
lookup | Uses values from the initial walk as inputs to a lookup OID to retrieve descriptive names | For example, walking OID .1.3.6.1.4.1.9.9.109.1.1.1.1.2 returns CPU indices:1 => 30132 => 3001The values returned from the initial SNMP walk (3013, 3001) are used as inputs to the lookup OID to retrieve descriptive names. Lookup OID (entPhysicalName): 3013 → CPU of Routing Processor 5 3001 → CPU of Switching Processor 5 | CPU of Routing Processor 5 = 1 CPU of Switching Processor 5 = 2 |
Requirements for Configuring SNMP Active Discovery
To configure SNMP Active Discovery, you need the following:
- SNMP is enabled on the resource and accessible from a LogicMonitor Collector
- The resource responds to SNMP GET and WALK operations
- SNMP credentials are configured on the resource
- The LogicModule supports SNMP Active Discovery
Configuring SNMP Active Discovery
- In LogicMonitor, navigate to
 More > Modules > My Module Toolbox.
 - Select
 Add > DataSource.
 - In the Info tab, provide the basic information.
For more information, see DataSource Configuration. - In the Summary section, provide the following information:
- Select “SNMP” from the Collection Method dropdown menu. This defines how data is collected for the DataSource.
- Select an interval from Collection Schedule based on how frequently the monitored data updates. Use shorter intervals (for example, 1 minute) for rapidly changing or critical metrics. Longer intervals reduce system load on both the monitored resource and the Collector.
- Toggle the Multi-Instance switch to enable monitoring of multiple instances of an object. For example, multiple disks or volumes on a server.
- (Optional) Toggle the ERI Discovery switch to runs once for each instance to assign external resource identifiers (ERIs).
- Toggle the Enable Active Discovery switch to enable LogicMonitor to automatically detect instances.
Note: This option is available only when Multi-Instance switch is enabled.
- Select Access Groups to assign access to the DataSource.
For more information, see Access Groups for Modules. - In the AppliesTo field, enter AppliesTo scripting to determine which resources are associated with this DataSource. For more information, see AppliesTo Scripting Overview.
- (Optional) In the ERI Discovery section, provide the following information:
- Select an option from the External Resource ID Discovery Schedule dropdown menu to set the ERI Discovery schedule.
- Select the script type either an “Embedded Groovy Script” or “Embedded PowerShell Script” from the Script Type dropdown menu.
- Add the script according to the selected script type, and then run it to initiate ERI Discovery.
After you run the script, LogicMonitor executes ERI Discovery using the selected schedule and script type.
- In the Active Discovery section, provide the following information:
- Select an option from the Discovery Schedule dropdown menu to set schedule the Active Discovery schedule.
- Select how instances are grouped after discovery using the Group Method dropdown menu.
- Select Manual to manually organize instances into groups after discovery, or leave them permanently ungrouped.
- Select Regular Expression to group instances based on pattern matching using regular expressions.
- Select Instance level property to automatically create instance groups based on unique values of the selected instance-level property (ILP).
For information, see Instance Groups.
- (Optional) Toggle the Disable Discovered Instances switch to place newly discovered instances in a disabled state by default. These instances move to the dynamic Unmonitored group and are not monitored until you enable them.
For more information, see Instance Groups. - (Optional) Toggle the Automatically Delete Instances switch to remove instances from monitoring when Active Discovery no longer detects them. You can delete the instance immediately or retain its history for 30 days.
Recommendation: Keep this option disabled if you want to continue receiving alerts for missing instances.
- Select “SNMP” from the Discovery Method dropdown menu. This defines the SNMP protocol to discover instances by querying SNMP-enabled resources using OIDs.
- Select an option from the SNMP Discovery Type dropdown menu. This determines how SNMP data is interpreted during discovery. Select
valueto match direct OID values,wildcardto discover instances using pattern-based matching, orlookupto map discovered values to descriptive names. - Enter SNMP OID to specify the base OID that LogicMonitor walks to discover instances. The system queries this OID and evaluates returned values against any configured filters.
- (Optional) Specify additional context for each discovered instance in the Description OID field.
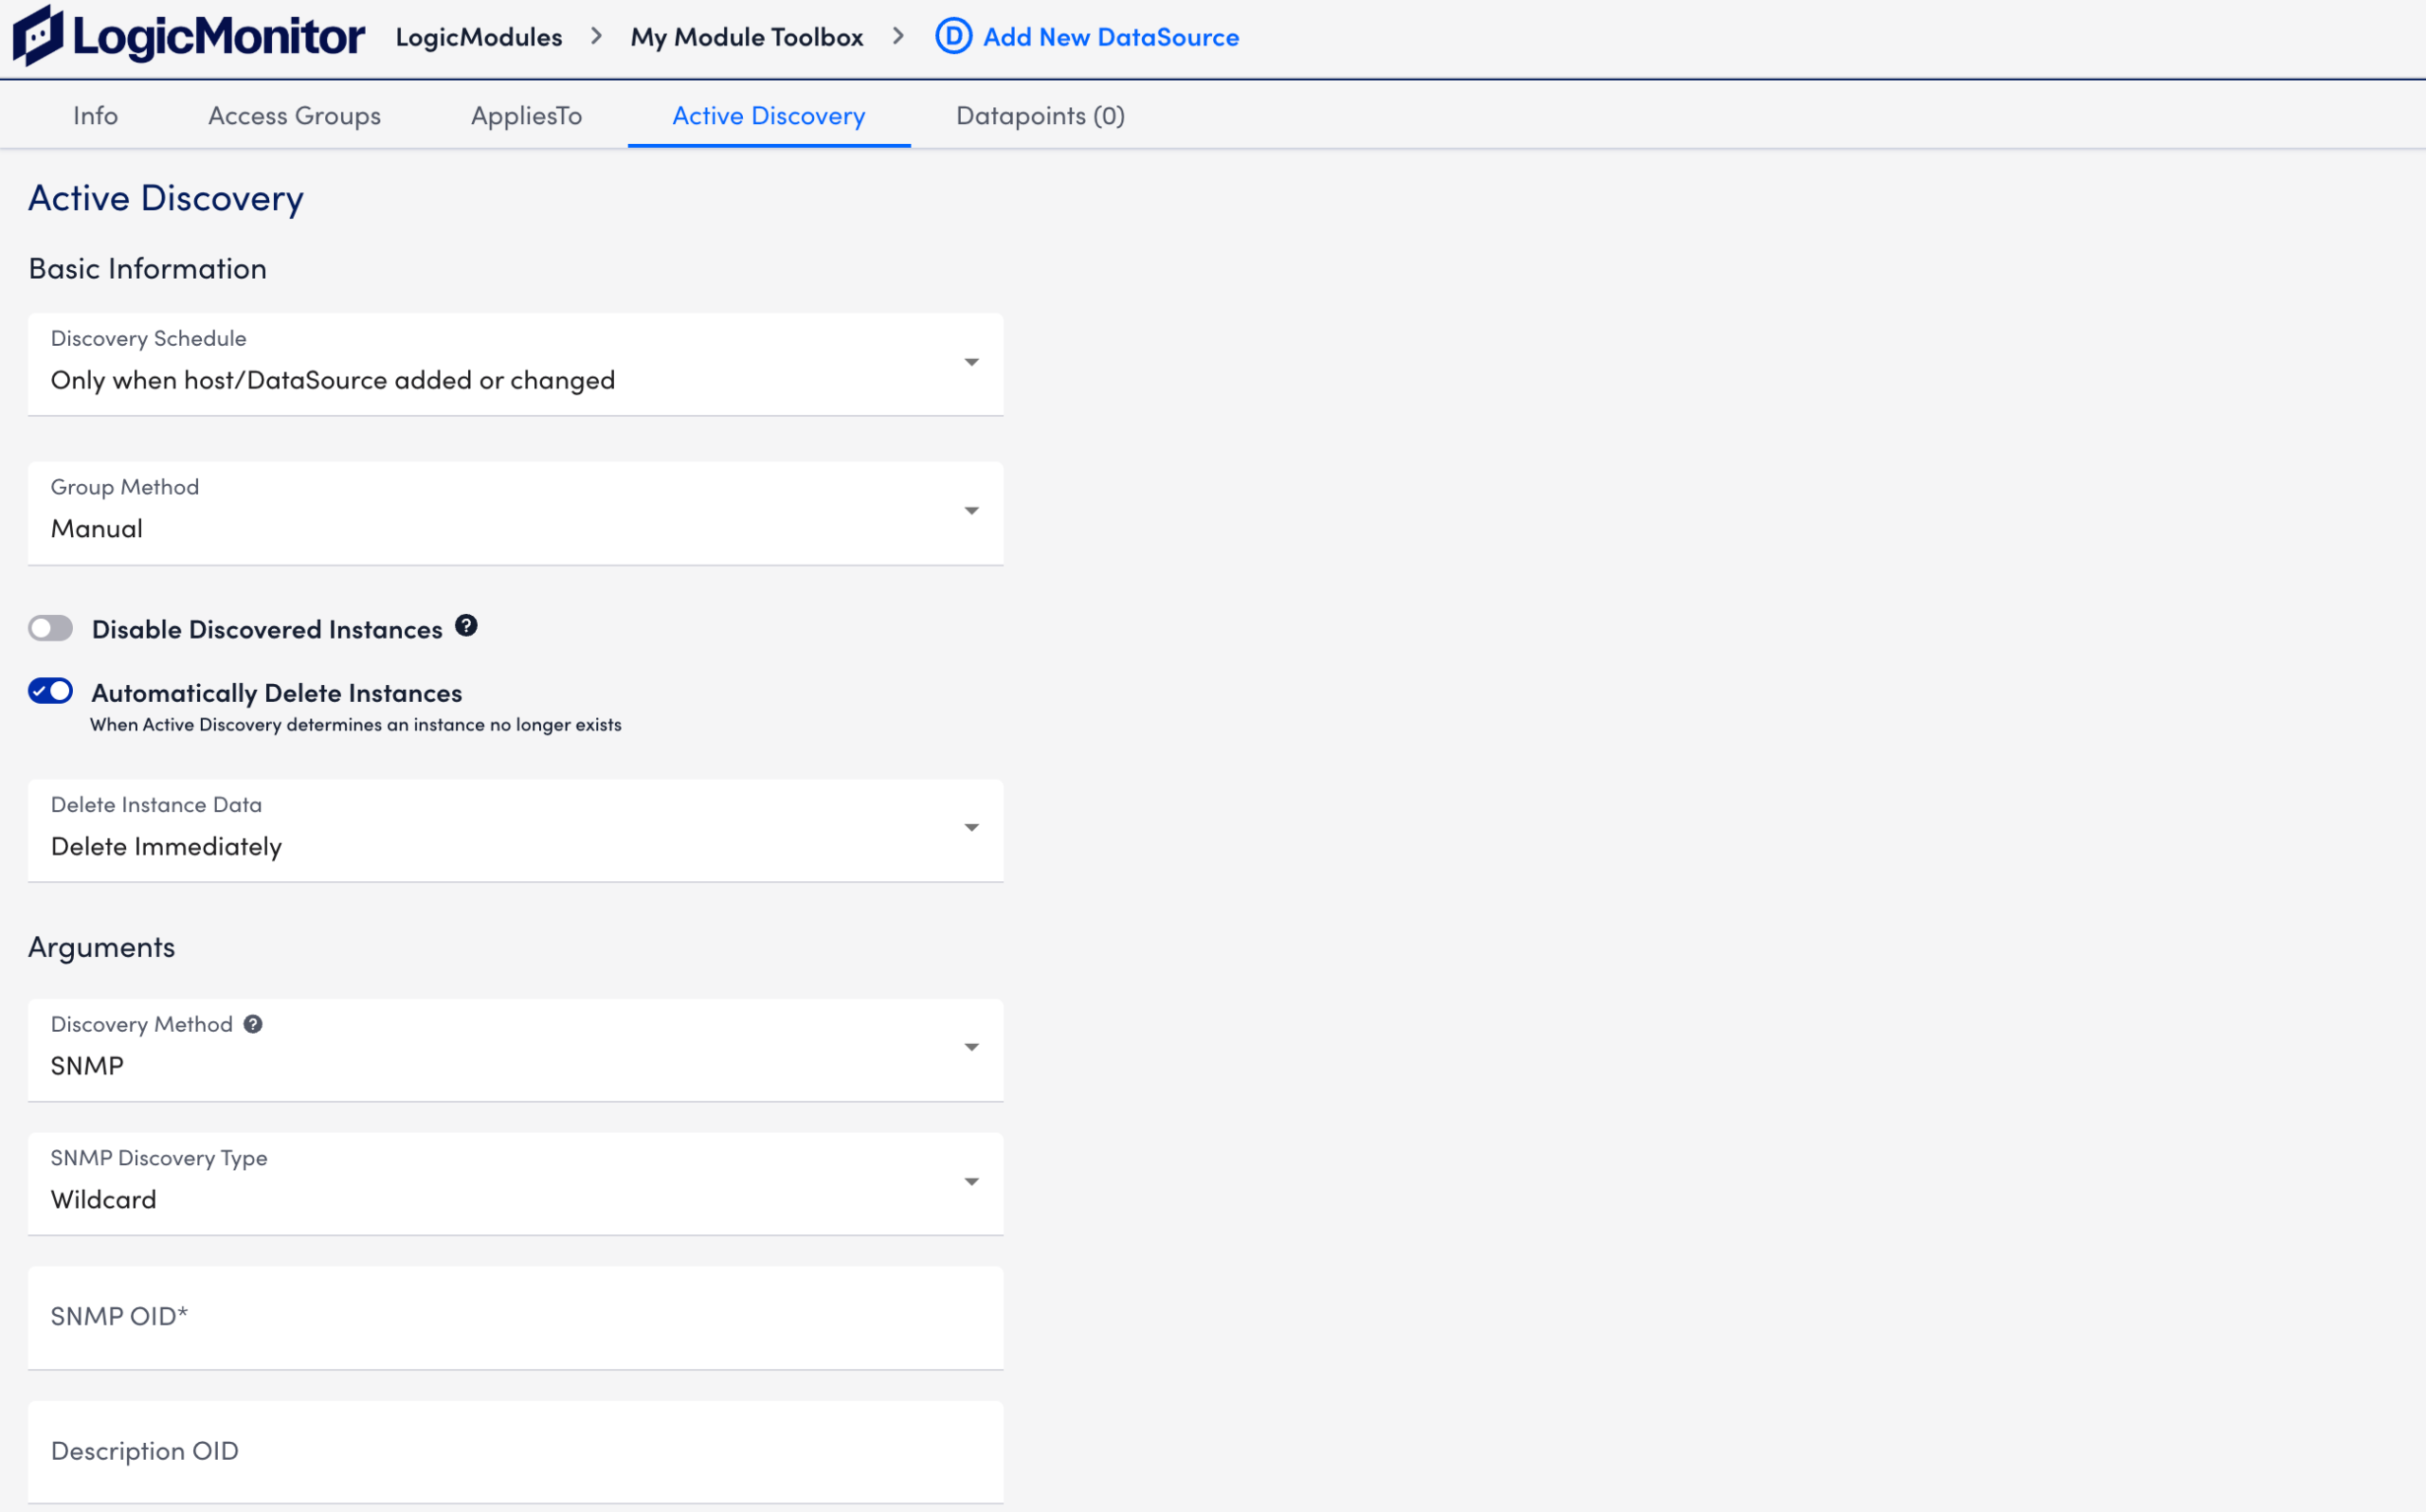
- (Optional) Specify a value in the Lookup OID field to define the OID used when lookup discovery type is selected. The system uses this OID to retrieve human-readable names or labels for discovered instances.
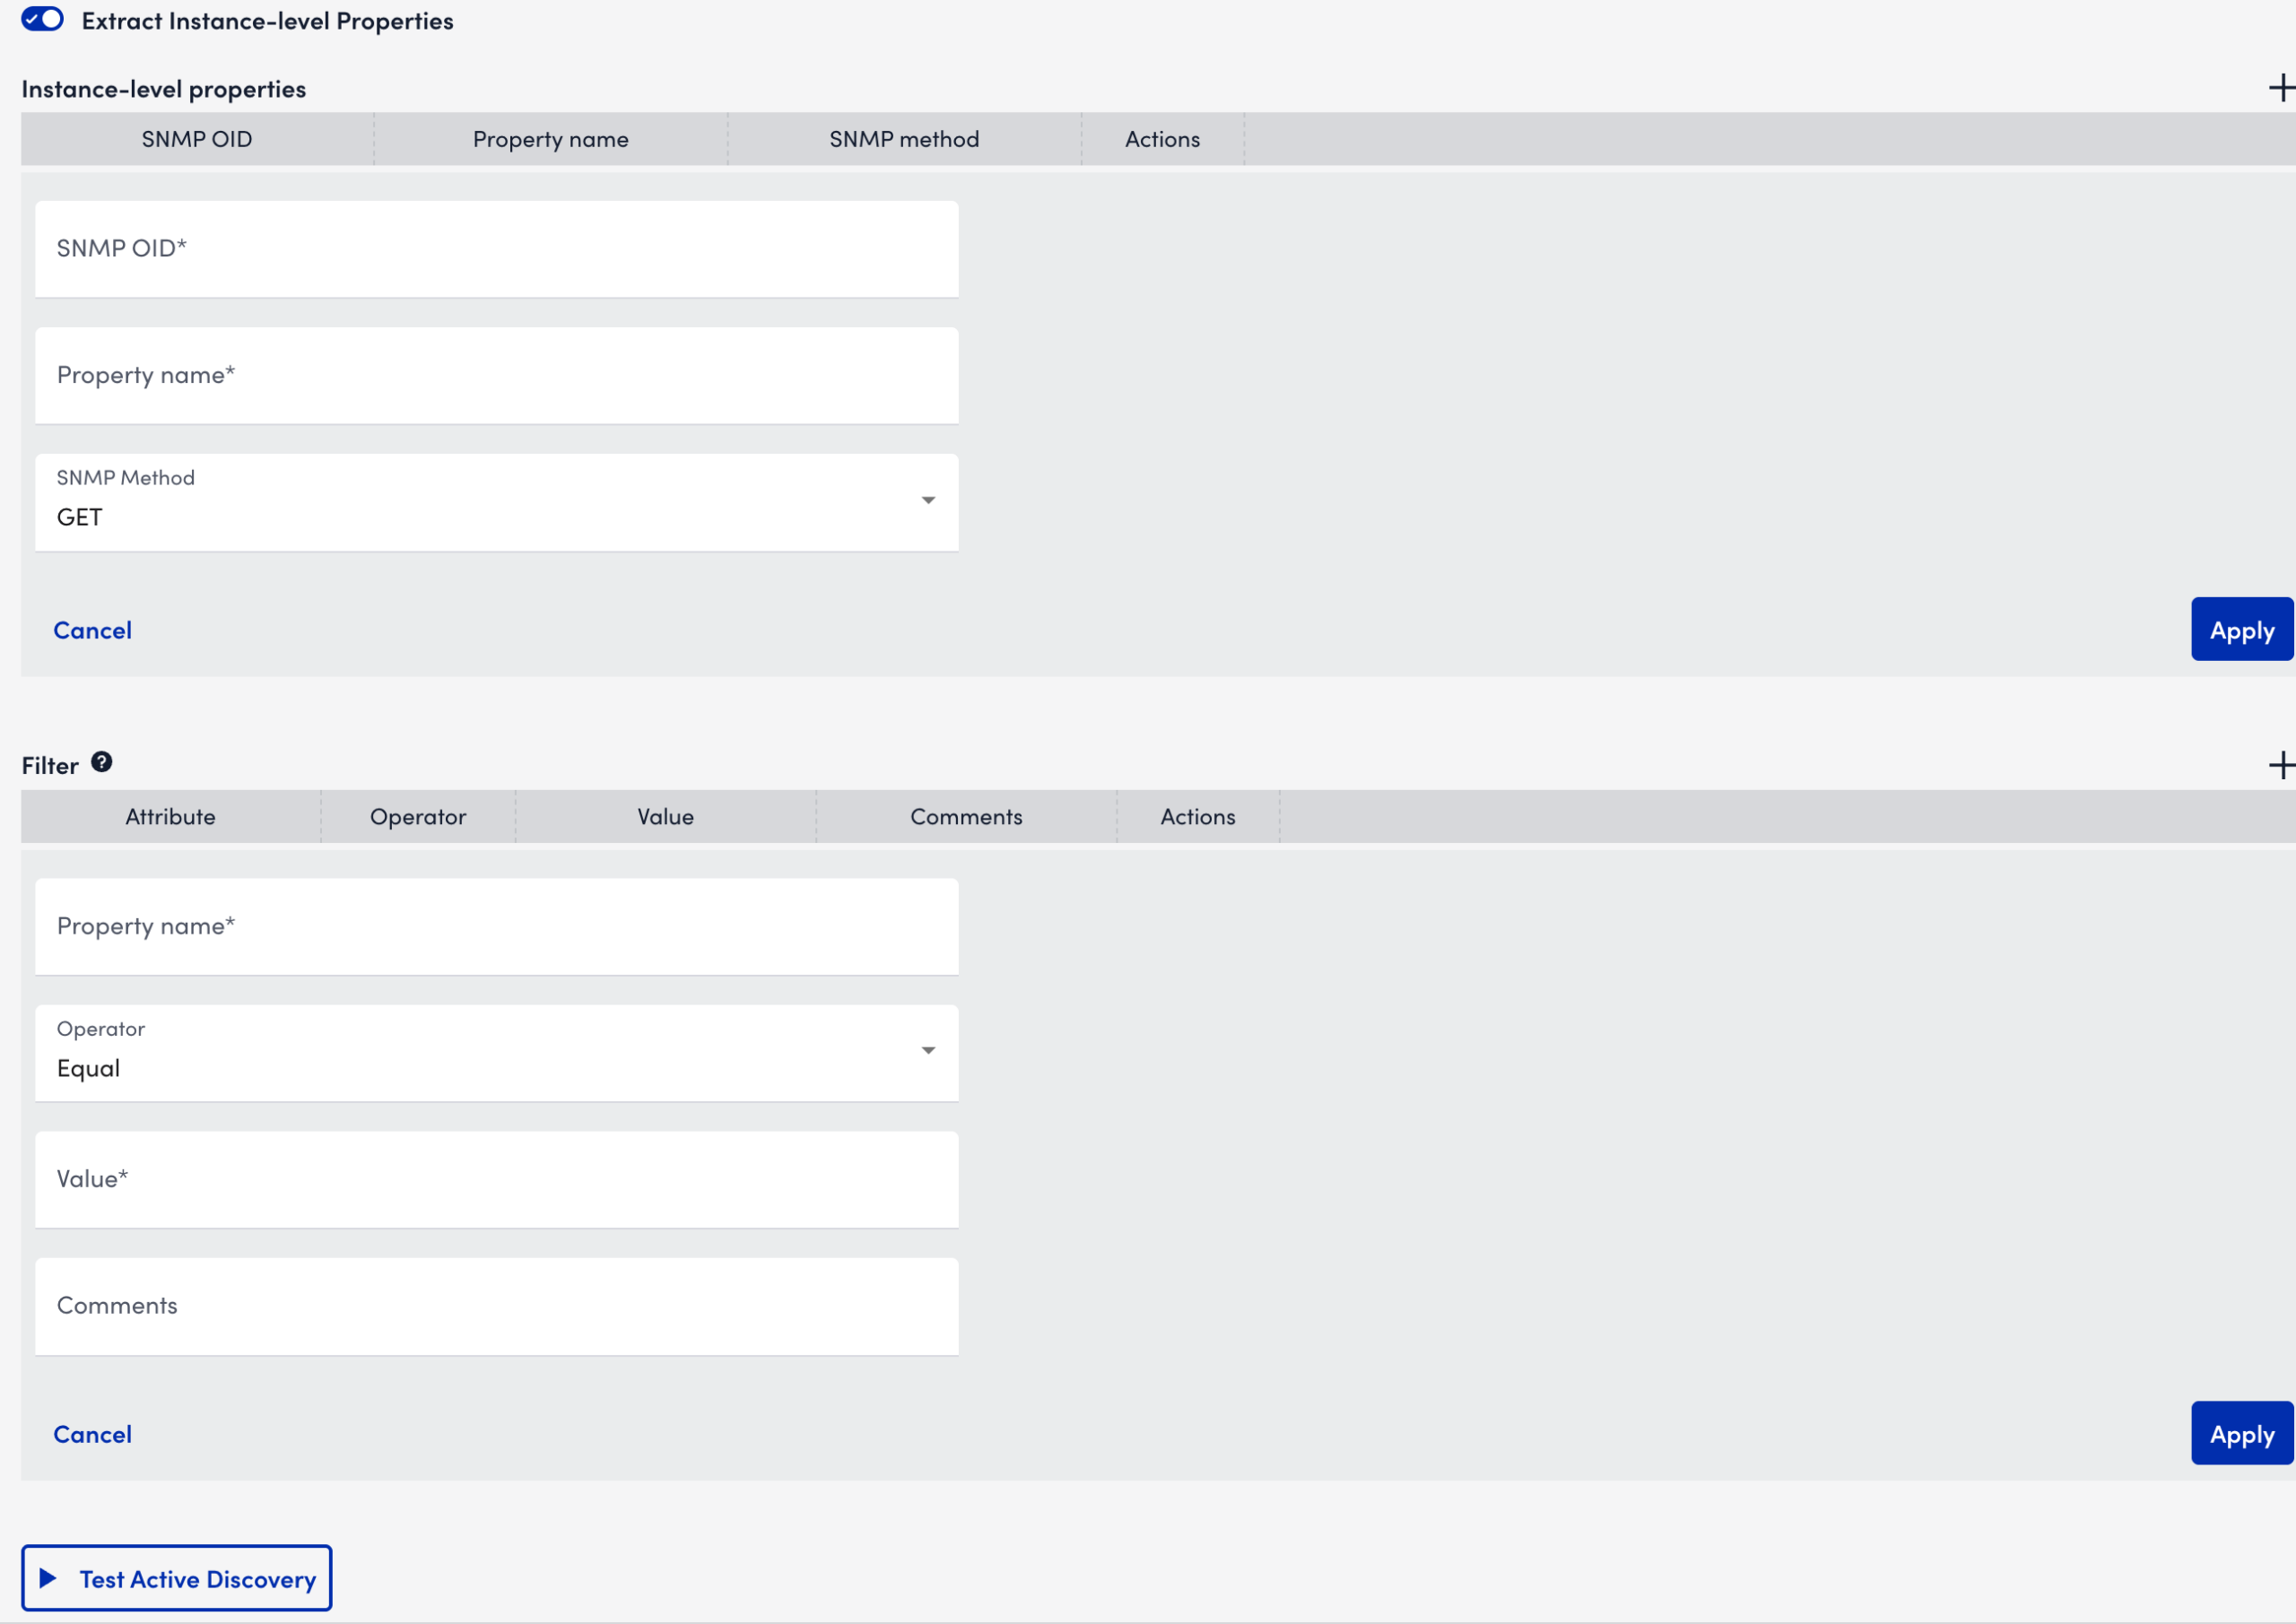
- Toggle the Extract instance-level properties from this class? switch to collect instance-level properties from the selected SNMP class. These properties can be used for alerting, grouping, or display.
When this option is enabled, do the following:- In the SNMP OID field, enter the OID used to retrieve instance-level property values in the . Use
##WILDVALUE##as a token where applicable to reference discovered instances. - In the Property Name field, enter a name for the property. The name must begin with
auto.to ensure the property is automatically assigned. - From the SNMP Method dropdown menu, select one of the following methods used to retrieve SNMP data:
GET— Fetches a single value.WALK— Fetches all key-value pairs (comma-delimited).WALK-KEY— Fetches keys only.WALK-VALUE— Fetches values only.
- Select Apply.
The instance-level properties are applied.
- In the SNMP OID field, enter the OID used to retrieve instance-level property values in the . Use
- To add a filter, do the following:
- In the Property name field, enter a property name.
- From the Operator dropdown menu, select a comparison operator.
- In the Value field, enter a value to match.
- In the Comments field, enter any relevant comments.
- Select Apply.
The filter is added and applied to the Active Discovery configuration.
- Select Test Active Discovery.
- In the Collection section, enter the required details based on your collection method.
For more information, see Data Collection Methods Overview. - In the Datapoints section, add relevant normal or complex datapoints based on your requirement.
For more information, see Datapoint Overview. - Select
 Save.
Save.
The SNMP Active Discovery configuration is saved, and LogicMonitor begins discovering instances based on the defined SNMP settings.
